
Working Out How Many Tomato Plants Fit in a Greenhouse
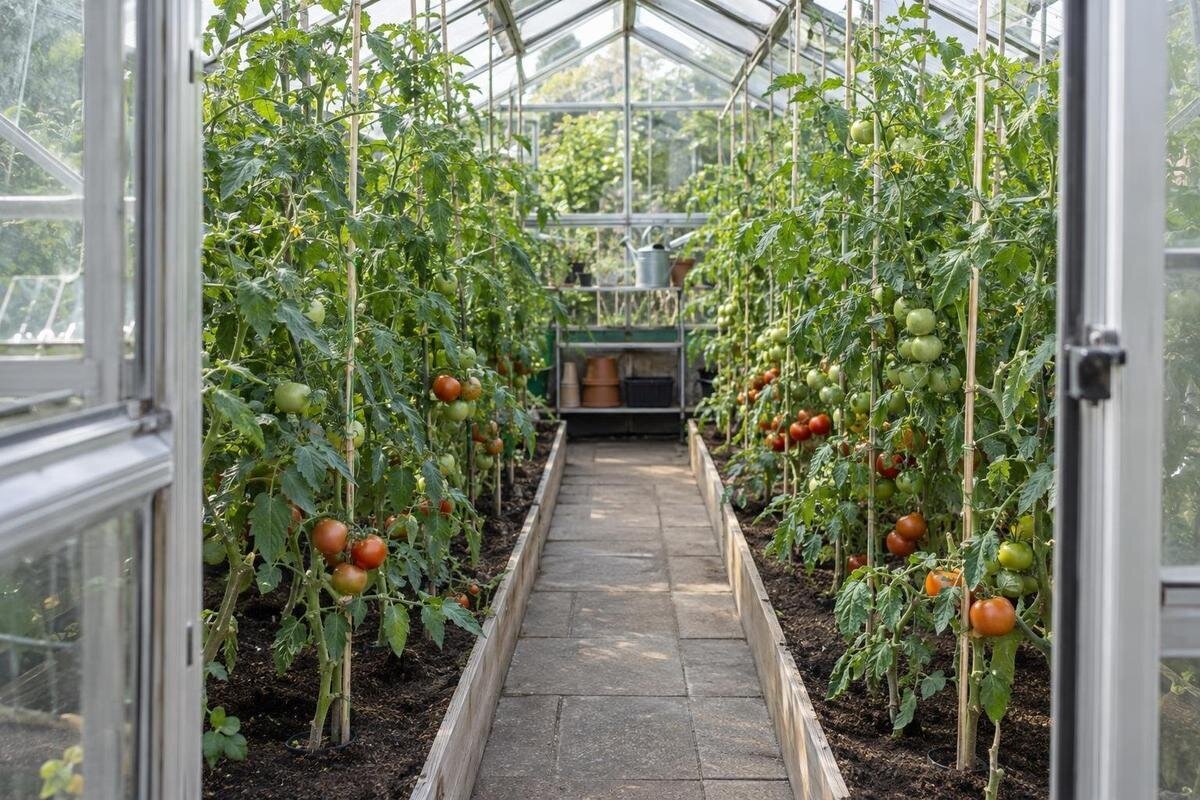
Tomato greenhouse planning
How many tomato plants fit in a greenhouse? The useful answer comes from a floor plan, not the greenhouse’s headline area. Internal dimensions, bed arrangement, the way each cultivar is trained and the space needed to water, tie and pick all change the count. A layout that holds many young plants can become difficult to manage once foliage fills out. The example below uses illustrative dimensions only; it is not a size offered by any greenhouse model.

01
Why greenhouse floor area is not a plant count
Greenhouse floor area is a useful starting measure, but it does not convert directly into a tomato count. Two interiors with the same area can have different widths and lengths: one may fit two side beds and a workable aisle, while another leaves narrow strips that are awkward to plant. Door openings, frame posts, wall edges and fixed fittings can further interrupt the floor. The useful question is how many continuous planting rows remain after those features are marked, not how many square metres appear in a headline.
Also decide what you mean by fit. A maximum count might include every spot where a pot can sit on planting day; a practical count leaves room for mature stems and leaves, watering, tying, inspection and picking. Young tomatoes are deceptively compact, so a layout that seems generous at planting can become crowded as foliage develops. Dividing total floor area by a single per-plant figure hides the space taken by paths and the differences between greenhouse shapes. Plan for plants at their expected mature size and for the work you will do among them.
Measure the usable interior
Measure the inside width and length where beds or pots will sit, rather than relying only on an external footprint. Note the narrowest clear width if a frame, base rail, door reveal or other projection reduces the space. Mark the door opening, the space the door occupies when open, and any internal posts, shelves, benches, water containers or permanently fitted equipment. If the floor is not a simple rectangle, divide it into measured sections instead of multiplying the widest length by the widest width. That avoids counting an unusable corner or strip as a full bed. Record the available length along each proposed bed, too: an obstruction at one end may shorten one row without affecting the opposite row. Keep those measurements on the sketch so you can calculate the two rows separately rather than assuming they match.
Product-page area ranges can help you compare footprints, but they do not establish the planting layout. The Aluminium Greenhouses listing, for example, spans 3.77 m² to 28.08 m². Treat that as the listed area range, not as usable planting area for any one selected size. For the exact option, use a dimensioned plan to check the internal width and length; if those measurements are not shown, ask for them before drawing your beds and rows.
02
Choose a training method before setting the count
Choose the tomato cultivar and training approach before fixing its spacing. Indeterminate, or cordon, tomatoes are commonly trained upwards, often with one main stem. Their floor footprint can be relatively narrow, but they need vertical room and access for tying and tending. Consider where the support line will sit so stems do not obstruct the aisle or press against the greenhouse frame. Use the cultivar’s growing instructions to decide how to train it; the word tomato alone does not tell you its eventual shape or height.
Determinate, or bush, tomatoes often branch into a wider canopy. They are not automatically more compact on the floor: a plant with several outward-growing branches can need more bed width than a carefully trained single stem. Some varieties have an intermediate habit, and growth can vary with conditions. Read the seed packet or supplier’s notes for mature height, spread and pruning guidance. Do not assume that the same training or pruning method suits every type; follow the instructions for the cultivar you are growing. If you plan to grow several varieties, label their proposed positions on the sketch and use the relevant spacing for each. A count based entirely on single-stem plants should not become the planting plan for a mixture of bush tomatoes and trained vines without checking the layout again.
Set spacing for mature plants
Set spacing from plant centre to plant centre along a row, using expected mature growth rather than the width of the pot at planting time. Follow the cultivar’s label or trusted growing guidance first. If you are sketching before choosing a variety, you could test an interval of 50 cm for single-stem planting positions and see how the mature foliage would fit. This is an arithmetic assumption for planning, not a universal spacing recommendation. Allow more room if you intend to keep several leaders on a plant or choose a variety with a broad habit. Keep the spacing between plants separate from the clearance at the ends of the row. A 50 cm interval describes the distance between two neighbouring plant centres; it does not mean the first plant must be 50 cm from the end. Mark the first and last centres explicitly so neither end clearance is lost in the calculation.
Spacing across the bed matters as well as spacing along it. One accessible row may be more useful than two rows squeezed into a bed, where inner plants become difficult to tie, inspect and pick. If you are considering two rows, mark their centre lines and check the distance between them and from each row to the bed edge; the full bed width is not planting width. The Bloomcabin Prestige Greenhouse listing covers options from 3.77 m² to 28.08 m², but that area range cannot tell you whether a particular internal width will accommodate one row or two.

03
Draw beds and aisles inside the measured space
Sketch the layout as a set of usable widths. For two side beds, the width needed is one bed, plus a clear aisle, plus the other bed; all three must fit inside the measured interior. A single bed along one side still needs a route beside it. A central bed needs access to both sides if you are to reach the plants there. Mark the bed centre lines as well as their edges, then check that you can reach the far side without stepping into the soil or pushing through neighbouring foliage. Treat a change in bed arrangement as a new layout, not simply an extra row. Adding a central bed, for example, also means accounting for the paths beside it. Compare the complete width of each arrangement before calculating how many planting positions it provides.
When comparing a wall greenhouse, apply the same test rather than assuming its area tells you how a bed will fit. The Wall Greenhouse listing ranges from 3.69 m² to 14.34 m². Those figures do not show the usable internal width or the position of a path in any one option. Check the selected size’s internal measurements against your sketch, and allow for plants that may extend beyond the bed edge. A plan that fits only before the foliage grows is not a practical planting layout.
Keep doors, paths and storage clear
Reserve space for the route you will actually use, not just a line on the drawing. Mark the door swing and the area needed to carry in a tray, watering can or picking basket. Add benches, shelves, tools, water containers and storage before counting plants, because each takes up space that cannot also be a tomato bed. Choose a clear path that suits the people who will work there and the items they need to carry; plants growing into it can reduce its usable width.
For a storage-equipped option, the Limited Edition Aluminium Greenhouses with Storage listing gives an area range of 5.52 m² to 28.08 m². Where the chosen configuration includes built-in storage, mark its footprint as occupied space using the measurements for that option. Do not count the full listed area as tomato-growing space. The same principle applies to a movable bench or seasonal equipment: decide where it will be in use, then leave that area out of the planting calculation.
04
Calculate planting positions row by row
Once the beds and paths are drawn, calculate each planting row separately. Subtract the end clearance at both ends of a row from its usable length, divide the remainder by the centre-to-centre plant spacing, round down to a whole number of intervals, then add one planting position. In formula form, that is: positions per row = floor((row length − 2 × end clearance) ÷ spacing) + 1. This version assumes equal clearance at both ends; if they differ, subtract each end clearance separately. Use the same units throughout, such as centimetres for every measurement. If the row is too short to hold even one position with the chosen clearances, do not force an extra plant into it. Round down for each row before adding the row totals. Leftover lengths in separate beds cannot be combined to make another planting position, so rounding only the overall total can overstate capacity. Count a row interrupted by a doorway or fixed fitting as separate planting stretches.
Here is an illustrative calculation, not a greenhouse product size. An interior 2.4 m wide by 3 m long could have two 0.75 m side beds and a 0.9 m centre aisle: 0.75 + 0.9 + 0.75 = 2.4 m. With one row in each bed, 25 cm clearance at each row end and 50 cm between plant centres, each 3 m row has 2.5 m between its first and last plant centres. That gives five gaps and six positions per row, or 12 altogether. To check the count, mark the centres at 25, 75, 125, 175, 225 and 275 cm along each row. The final position then leaves the intended 25 cm clearance at the far end. The aisle and spacing are assumptions for this example, not universal requirements. The Limited Edition Aluminium Greenhouses listing spans 3.77 m² to 28.08 m²; repeat the calculation using verified measurements for the exact size you are considering.
Check vertical room for trained vines
A floor plan alone can overstate capacity if plants are trained upwards. Note the usable height above each bed and where a support could sit, then compare it with the cultivar’s expected growth and your training method. The highest point in a greenhouse may not be above the planting row, so check the dimensions where the plants will actually grow. Also consider whether you can reach the plants for tying and picking. If the internal height or support details are unclear, verify them for the exact greenhouse before relying on a tall-vine layout.
The Pyramid Greenhouse listing gives an area range of 5.53 m² to 18.9 m². Area alone does not establish how much vertical room is available above a bed or where a support can be placed. Use the selected option’s verified internal dimensions and follow the greenhouse maker’s guidance before attaching any support to the structure. If you cannot confirm that information, plan for a growing method that does not depend on an unverified attachment.

05
Allow for containers and other crops
Decide whether the greenhouse is for tomatoes alone or for a mix of crops and tasks. Pots, grow bags, seedling trays, a potting bench and supplies all compete for floor space. Count the full footprint of each container and leave room to water it or move it, rather than placing it over the aisle on paper. If you want to grow herbs or other vegetables alongside tomatoes, draw their area separately and check that their mature spread will not obstruct a tomato row. For containers, make two checks: whether the pots fit on the floor and whether the plants fit at the intended centre-to-centre spacing. Small pots placed close together do not establish a suitable mature plant count. Also distinguish temporary seedling space from space that remains occupied while the tomatoes are growing; do not allocate the same area to two uses that need it at the same time.
For a mixed-use plan, the T-Model Orangery Greenhouse listing gives an area range of 16.52 m² to 30 m². That figure does not show how much space your chosen crops or work areas will occupy. Mark a separate zone for those uses first, then count tomato positions in the remaining beds. A larger floor area may give you more layout options, but the workable tomato count still depends on the internal shape, clear paths and space needed by every other use.
Test the layout before settling on a number
Treat your result as a practical target, not a challenge to fill every available spot. The theoretical total includes every planned planting position; the comfortable total may be lower if mature foliage narrows a path or makes fruit difficult to reach. Sketch the expected canopy using the variety’s guidance, then look for overlaps between plants and rows. A little spare room also makes it easier to inspect plants and do routine work without pushing stems aside. If the plan feels cramped at full size on paper, reduce the count before planting. Keep a short record beside the final sketch: the cultivar, training method, row lengths, spacing, end clearances and number of positions in each row. This makes the total understandable and lets you revise the affected row if a variety or part of the layout changes.
Test the sketch on the ground with string, boxes or pots marking the beds, door clearance and path. Walk from the entrance to each proposed planting position with a watering can or basket to see whether the route is genuinely clear. The Spacious Greenhouse listing gives an area range of 47 m² to 70 m², but a larger listed area still does not reveal the internal layout for a particular option. Tie your final count to verified measurements and the mature spacing for your chosen cultivars.
Frequently asked questions
Can I calculate tomato capacity from greenhouse square metres alone?
No. Floor area does not show how much space remains after beds, paths, the door and fixed fittings are accounted for. Two greenhouses with the same area can have different usable row lengths and widths. Sketch the interior layout, then count planting positions along each row.
What spacing should I use between greenhouse tomato plants?
Use the cultivar’s growing instructions or trusted growing guidance, and measure between plant centres rather than pot edges. If you are sketching before choosing a variety, 50 cm can serve as an illustrative spacing assumption for a single-stem row, but it is not a universal recommendation.
Can I grow two rows in one bed?
Only if the bed is wide enough for the row centres, mature foliage and access to both rows. Draw the row positions and check that you can reach the plants for tying, inspection and picking. Two rows squeezed together may be less useful than one accessible row.
Do cordon tomatoes let me fit more plants than bush tomatoes?
Not automatically. A trained cordon can keep its floor footprint relatively narrow, but needs vertical room and regular attention. Bush types can spread more widely across a bed. Check the mature habit and care guidance for the particular cultivar before setting its spacing.
Should I include pots, storage and other crops in the capacity plan?
Yes. Count the space occupied by containers, shelves, storage, seedling trays and other crops, as well as the room needed to reach and water them. A tomato count that uses floor space already assigned to these items will overstate how many plants the greenhouse can accommodate.
A dependable tomato count is the number left after you map the usable interior, choose a training method, reserve paths and calculate planting positions row by row. Use mature cultivar spacing, then test that you can reach each plant. Keep illustrative calculations separate from product sizing: only verified internal measurements for the exact greenhouse option can show whether a layout will fit. A manageable row is more useful than a higher count that leaves no room to tend the plants.
