
Greenhouse Leaks: Is Water Coming from the Roof, Ground or Condensation?
Greenhouse leak diagnosis
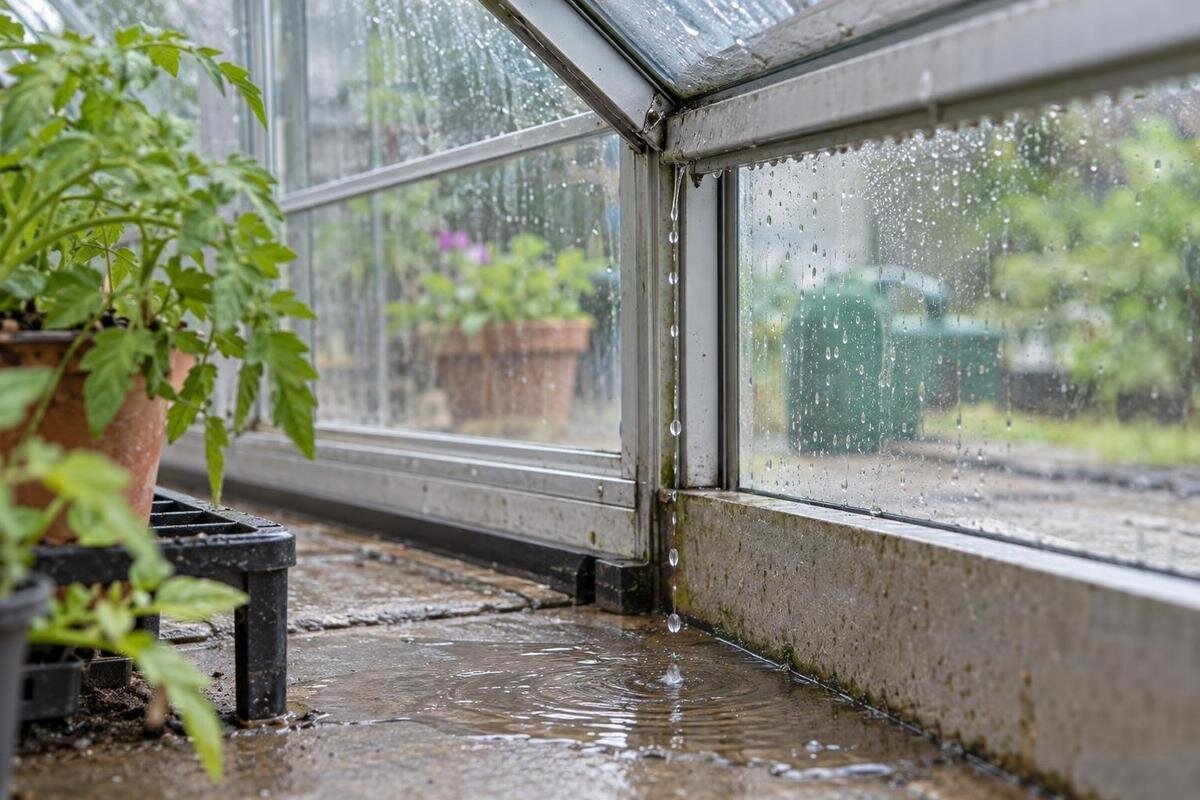
A puddle on a greenhouse floor can have several causes: rain may be entering through the roof or a junction, water may be running in at ground level, or moisture may be forming on the inside of the glazing and dripping down. These can look alike once water reaches the floor, and more than one source can be active at once. A useful diagnosis relies on timing and location, not the puddle alone. Dry and observe the area, compare conditions with rainfall and watering, then check one likely route at a time without climbing onto the structure or disturbing glazing.

Details to have ready for a repair enquiry 1
Map the wet area before drawing a conclusion
When you find water on the floor, record the earliest visible sign rather than treating the largest puddle as the source. Mark whether moisture is under a roof bay, beside a wall, near a doorway or along the perimeter; label several affected areas on a simple sketch. Photograph the floor and nearby surfaces before moving pots, mats or shelving. A narrow track or drip mark may show the route water has taken, while standing water can spread well beyond where it first landed. Note whether the floor itself is wet or only an item beneath a damp surface.
Let the area dry if conditions allow, then recheck it before the next rain or watering. A patch that remains damp may be holding water in soil, paving joints, floor covering or debris rather than receiving fresh water. Remove standing water without shifting surrounding items and note the first place that becomes wet again. Keep the layout consistent: moving trays can hide a route or create a different splash pattern. Photograph from the same position for comparison. If water is near electrical equipment or power points, keep clear and seek qualified help.
Record the weather, watering and timing of wet patches
A useful record includes when water first appears, not just when you discover a puddle. Note whether rain had started or stopped, how long passed before the floor became wet, whether the rain was wind-driven and which side of the greenhouse faced it. Add hose or irrigation use, watering cans, open vents or doors, and any overnight change in conditions. Repeat the same checks after more than one event where practical. One dry day does not rule out a leak that only shows up with wind or rain from a particular direction. A short note made during the event is more reliable than memory.
Write down the exact greenhouse name and any model or order reference on your paperwork, along with the location of the wet patch. An order description such as Oasis Pyramid Greenhouse gives a supplier a starting point for identifying the structure, but is not enough on its own to select a replacement panel or seal. Copy the wording rather than shortening it to a general description such as ‘pyramid greenhouse’. Keep the order reference with your event log so that photographs, observations and later replies all relate to the same structure. If you cannot find a detail, mark it as unknown rather than guessing from a similar product image. There is no need to climb onto the greenhouse to read a label.
Details to have ready for a repair enquiry 2
Clues that point to rain entering through the roof
Rain entry is more plausible when fresh water appears during or shortly after rainfall, especially if the same localised area gets wet in repeated events. Look for an inside trail on the roof, glazing bars, frame members or nearby wall, and note the highest visible wet point. Water may run along a frame or pane edge before dropping, so the drip can land away from its entry point. The puddle shows where water ended up, not necessarily where it first entered. Record whether the pattern changes with rain intensity or wind; one dry spell between showers is not decisive.
Check from the ground for a repeated connection with a roof vent, ridge, eaves or glazing junction, without opening or pressing components. A localised rain-related trail can help narrow the area, but it does not prove that a pane, seal or fitting is faulty. When describing a roof problem on a model such as the Aluminium Classic Greenhouse, identify the affected roof section as well as the product. Use a doorway or another fixed feature as a reference so that someone reading your notes can locate it. Distinguish the highest point where you actually saw moisture from the point where you suspect it entered. Use the manual for your exact greenhouse to name visible parts; leave an uncertain component unlabelled rather than borrowing terminology from a different model.
Inspect accessible roof and wall junctions from the ground
Look from a safe position on the ground for an obvious gap, displaced glazing, a damaged or missing seal, debris that diverts water, or a visible mark running from a junction. Compare the affected area with nearby sections and take clear photos from inside and outside where access is easy. A garden greenhouse is not a surface to walk on, and a ladder leaning against its frame or glazing can create serious risk. Do not remove glass, panels or roof fittings just to test an idea; a visual check is enough to decide whether a closer assessment is needed.
Where the greenhouse meets a building or another structure, record whether the wet mark starts along that junction or appears elsewhere first. For an Aluminium Lean-to Greenhouse, a useful photograph shows both the affected greenhouse section and its position against the adjoining wall. Pair that wider view with a closer image taken from an accessible position, and describe which surface becomes wet first. If you only notice the water after rain has stopped, say so; do not present the highest remaining mark as a confirmed entry point. The model name alone cannot establish how the wall connection was installed. Check the manufacturer’s instructions or ask a greenhouse installer before altering a seal, flashing or frame connection. Keep clear of cracked, loose or displaced glazing and leave its inspection or repair to a qualified person.

Details to have ready for a repair enquiry 3
Trace water around the greenhouse base
Water concentrated at the bottom edge points to a different route than a roof drip, but it does not prove that moisture is rising from below ground. Check whether the wetness is outside the greenhouse too, whether a puddle forms beside the base, and whether water runs towards it from a path, garden bed, downpipe or higher part of the site. Look for a narrow trail under a door or at one corner, as opposed to an evenly damp floor. Surface runoff, irrigation splash and wet soil close to the greenhouse can all create a similar indoor patch.
On a dry day, note which sections of the perimeter remain damp, then compare them after rainfall or watering. Record the outside and inside of the same edge separately: ‘wet beside the base’ is less useful than identifying where the first visible trail appears. If your paperwork identifies a Prestige Greenhouse with Metal Base, include that full description in the enquiry, together with photographs of the actual base and surrounding ground. The name does not confirm how your existing base is installed or identify a compatible part. Do not dig alongside the structure, lift the base, add a drainage channel or alter supports on the strength of one puddle. The response depends on the foundation and site, so repeated water from beneath the edge warrants an installer’s assessment rather than a repair aimed only at the visible wet patch.
When condensation is more likely than a roof leak
Condensation is moisture from humid air collecting on a cooler surface. It often appears as fine droplets or a film across a wider area of the inside glazing, then runs down and may drip onto benches or the floor. It is more likely when several surfaces are wet at once and the pattern follows a cool night or a change in conditions, rather than appearing as one fresh trail during rain. Check the undersides of several roof and wall sections, not just the spot above the puddle. Widespread droplets are a clue, not a guarantee.
Moist air can come from watering, wet growing media, plants and people working inside; limited air exchange can allow moisture to linger. Note whether droplets clear as the greenhouse warms or ventilation changes, and whether the same floor patch returns without rain. If droplets are present alongside a separate rain-linked trail, condensation and a leak may both be contributing. Do not assume every roof drip needs a new seal: first establish whether water is entering through a defect or forming on the inside surface. Keep observations consistent enough to compare.
Details to have ready for a repair enquiry 4
Rule out watering, spills and other indoor sources
Before blaming the structure, consider routine water use. Check watering cans, hoses, irrigation lines and timers, pot drainage, trays, hose connectors and damp materials stored on the floor. A line that leaks may leave moisture in dry weather, while watering splash can create an isolated patch. Note whether wetness follows a particular task and inspect around that area before moving equipment. If practical, pause or separate one non-essential water source for an observation period, while still meeting plant needs, rather than stopping every source at once.
Water can travel: a drip from a bench, pot or frame may land away from the item that released it, and a floor covering can spread or retain moisture. Compare the edges of a damp patch and look for a route from a nearby source. Include containers and stored supplies in your sketch, even if they are not normally used for watering. For a model listed as Limited Edition Aluminium Greenhouse with Built-In Storage, record the actual position of stored items rather than relying on the catalogue name to explain the wet area. Photograph the arrangement before moving anything, and note each change you make during the check. This keeps a later observation useful: you can distinguish a patch that returns under the same conditions from one noticed only after a tray, container or covering was moved.
Compare moisture patterns during natural rainfall
Once the area is dry, use the next natural rain event as your first comparison rather than saturating the greenhouse. Before rain, photograph or note the dry starting point. During and after it, check the same marked areas and record when each becomes damp. Keep the normal watering routine and ventilation as steady as practical; changing several things at once makes the result harder to read. If rainfall does not reproduce the problem, ask the manufacturer or an installer whether a water test is appropriate for your model.
Do not use a pressure washer, aim a strong jet at glazing or joints, climb onto the roof or remove panels to find a leak. Forceful spraying can make a joint appear to leak, and working at height around glazing can lead to injury or breakage. For a Limited Edition Aluminium Greenhouse, as for any other model, a deliberate water test should follow instructions for the exact version, not a method borrowed from a similar-looking structure. Before any recommended test, establish which area is being observed and what result would help distinguish the suspected routes. Record the outcome even if no water appears; an inconclusive result is not confirmation that a repair is unnecessary. Stop if glazing is cracked or loose, the frame seems unstable, or water reaches electrical equipment.

Details to have ready for a repair enquiry 5
What to include in a repair enquiry
Once repeated observations point to an entry area, gather evidence rather than dismantling it. Send a wide photo showing the whole greenhouse and a close view of the wet path, with outside context if visible. Note dates, rain direction if known, the delay before water appeared, whether watering had taken place and whether condensation covered other surfaces. Include the exact model or order reference, the glazing type if it is documented, and any spare-part number listed in the manual. Do not guess an identifier from appearance.
Ask whether the suspected area can be checked against the manufacturer’s instructions and whether an exact replacement component is available. Separate what you observed from the repair you think might be needed: ‘water first appeared at this junction during rain’ is more useful than an unsupported request for a new seal. If your order refers to the Spacious Greenhouse, include its model or order reference rather than sending the product-page title alone. A listing helps establish identity but is not a parts diagram. Ask the supplier to clarify which component is being discussed before ordering. If the source remains unclear, or the repair involves glass, framing, a roof joint or a persistent base problem, arrange an installer’s review. Keep the reply with your photographs so that later enquiries do not restart with an incomplete account.
When professional assessment or replacement is appropriate
A localised, clearly documented issue may be suitable for a model-matched parts enquiry, but recurring leaks, movement, cracked glazing or water at several unrelated points call for a broader assessment. A repair should address the route water takes, not merely cover the place where it drips. Avoid adding sealant, changing glazing supports or altering the base unless the manufacturer’s instructions or a qualified installer confirms the correct method; a temporary-looking fix can hide the source or complicate a later repair.
If repair is not supported, parts cannot be matched or the structure has broader damage, a replacement enquiry may be more appropriate than repeated guesswork. Keep the diagnosis separate from the choice of replacement: changing the greenhouse does not, by itself, establish what caused the original wet patch. If you compare an option such as the T-Model Orangery Greenhouse, explain whether your observations pointed to roof entry, water around the base, indoor moisture or an unresolved combination. Ask how the existing site requirements affect the options being discussed, rather than assuming a catalogue model will fit or solve the problem. Include any proposed work on the site in that conversation. The aim is to compare a defined repair with a defined replacement proposal, not to choose a new structure simply because the old one has a puddle.
Frequently asked questions
How can I tell a roof leak from condensation?
A roof leak is more likely to follow rain and leave a localised trail from a higher point. Condensation often forms as droplets across several inside surfaces after conditions change. Neither clue is conclusive, and both can occur together. Record what gets wet first and compare more than one event.
Does water at the greenhouse base mean groundwater is rising?
No. Water near the perimeter may be surface runoff, irrigation splash, an entry point at a door or base junction, or moisture retained in the ground or floor. A puddle alone cannot establish its source. Check outside after rain and note whether the same area stays damp.
Is a hose test a good way to find the leak?
Not as a first step. A pressure washer or strong jet can force water into joints and obscure how rain normally behaves. Compare observations during natural rainfall first. If a deliberate water test is recommended, follow the instructions for your exact model or ask an installer.
Can I replace the seal or pane where the drip falls?
Not based on the drip location alone: water can travel along a frame before falling, and appearance does not identify a compatible part. Check the exact model instructions and part identifier. Leave cracked or loose glazing and any work at height to a qualified person.
What should I include in a repair enquiry?
Provide the model or order reference, photos showing the water’s path inside and outside, when it appears, and the associated rain or watering conditions. Include the glazing type and spare-part identifier if documented. Do not guess a part from a photo; ask what further check is needed.
Treat the first puddle as the end of a water path, not a diagnosis. A dry baseline, dated notes and a careful comparison with rain, ground conditions and indoor moisture can narrow the possibilities without disturbing glazing. If the evidence remains mixed, document it rather than sealing the nearest joint. A model-matched parts enquiry or installer assessment is more likely to resolve the source than a repair chosen from the drip mark alone.
