
How Much Clear Space Is Needed Around a Greenhouse?
Greenhouse site planning
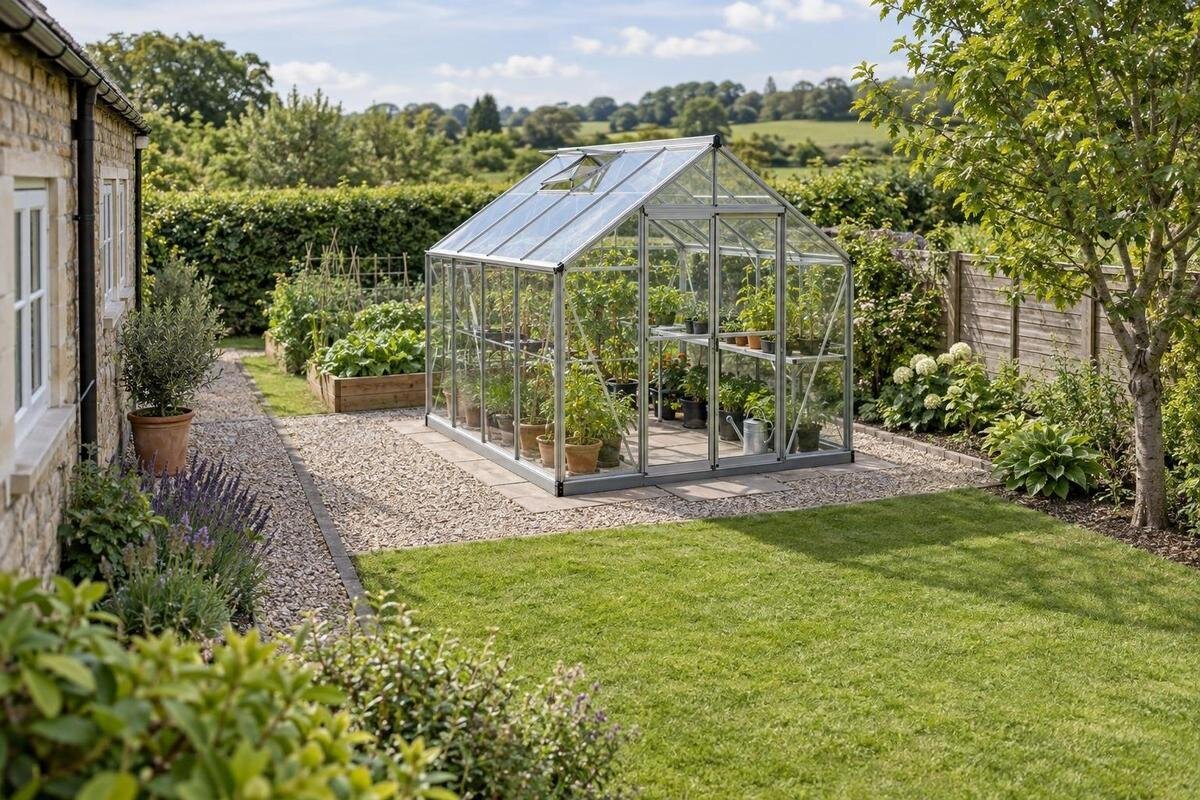
Clear space around a greenhouse is more than the strip left after its footprint is placed. You need room to deliver and assemble it, open the doors, reach exterior surfaces, clear any included gutters, and move garden tools past it. The space depends on the selected model, its openings, your maintenance routine, and the shape of the site, so a universal clearance figure is not a reliable plan. A scaled sketch that separates permanent access from temporary installation space shows where a layout works—and where it does not.
Before choosing a site 1
What clear space around a greenhouse includes
Clear space is the usable room outside the greenhouse’s actual exterior outline. It is not simply the leftover gap after fitting a box onto the lot, and it is not the interior aisle. On your plan, distinguish the permanent footprint, the operating envelope for doors and other openings, and the work area for people, tools, and garden traffic. These zones may overlap, but they do different jobs: a door needs an approach, an exterior surface needs to be reached, and assembly may need temporary staging. Some areas must stay open all the time; others only need to be clear during a particular job. The useful perimeter can vary from one face to another, so label each area by purpose instead of drawing an unexplained band.
Maintenance clearance is not automatically the same thing as a legally required setback or property restriction. Check applicable local requirements and property or association documents separately, rather than treating an empty work strip as proof of compliance. When comparing the large backyard greenhouse range, reserve space for the surrounding work areas as well as the structure itself. A larger footprint may leave less room for an existing garden route, even if it fits within the available plot. Keep boundaries, installation needs, and your own access zones as separate lines on the drawing. That distinction shows whether a location is practical without confusing a maintenance plan with a compliance check.
Measure the selected model’s outside footprint
Get a dimensioned plan for the exact model and size before measuring the yard. Record the exterior length and width, the ground-level footprint, and any part that projects farther out, such as an eave or gutter if shown. Do not substitute an interior growing dimension, a rounded product name, or square footage for the outside outline: equal floor areas can have different shapes. When comparing sizes in the aluminum Classic range, draw each candidate on the same site plan so you can see which paths or work areas would change. If the product page does not show the measurements you need, request the installation drawing rather than estimating from a photograph.
Draw that outline to a stated scale on graph paper or a digital site plan, then plot fixed features such as fence lines, house walls, paving, planting beds, gates, and drain outlets. Note what each measurement starts from—the base edge, the frame, or a projection—so distances are comparable from side to side. If the model has an irregular or attached portion, copy its actual outline rather than enlarging a plain rectangle. Write dimensions beside the drawing even when it is to scale, and mark uncertain details as items to confirm. Keep base or foundation instructions separate; a perimeter sketch is not a foundation design.
Before choosing a site 2
Draw the delivery and assembly route
Trace the route from the unloading point to the proposed site, not just the greenhouse’s eventual footprint. Mark the gate opening, narrow turns, steps, changes in slope, uneven surfaces, low branches, and anything that must be crossed or temporarily moved. Check the tightest point and the turns, because a clear straight entrance may lead to a narrower corner. Ask the supplier or installer what package dimensions, component lengths, and assembly access the chosen model requires. If you are considering the Garden View T-Greenhouse, use that information to check how its components would travel through the side passage and where they could be set down. The delivery route must work before the assembled outline becomes relevant.
Show temporary staging separately on the sketch: where components can be set down, where workers need to stand, and which route must remain open during assembly. This work area may be larger or differently shaped than the permanent maintenance strip, and it may no longer be needed once installation is complete. Confirm the assembly sequence in the model instructions; do not assume the structure can be assembled entirely within its final outline. If a bed, fence, vehicle, or shared walkway would block the planned route, decide whether it can genuinely be cleared for the full installation period. Agree on the route with the installer before fixing paving or a base.
Include doors and other moving parts
Mark the entry point and the way each door operates, using the selected model’s drawing. For a hinged door, sketch its swing; for a sliding door, show the track and the space needed to approach and pass through. The doorway itself is not automatically a usable walkway: someone may need room to stop, turn, or guide a cart without hitting a fence, raised bed, or stored object. When considering a lean-to greenhouse, include nearby building doors and windows on the sketch as well. Check whether their movement or approach areas would conflict with the greenhouse entrance, and confirm the wall relationship and any access needed at the attachment area in the installation guidance.
Include moving parts and projections only as shown for the selected model: roof vents, openable panels, eaves, gutters, or other features can extend beyond the base. Compare their operating or access envelope with branches, a house eave, an awning, or a fence top. A plan viewed only at ground level can miss an overhead obstruction, so note its location and height when it could interfere with opening or access. If a door arc crosses a garden path, redraw the orientation or route. Do not count the same patch of ground as an unobstructed passage while also using it for a door’s swing.
Before choosing a site 3
Allow room for cleaning and repairs
Estimate maintenance room from the task and tools, not from a generic ring around the greenhouse. For each exterior face, note how you plan to wash or inspect it, what reach or implement is needed, and where a person can stand on stable ground. If the selected model has gutters, mark the sections that need clearing and the approach for reaching them; if gutters are not shown, do not assume they are included. For the Pyramid-type greenhouse range, review the selected version’s side profile as well as its plan view: the height and position of each surface matter when choosing a cleaning method. Include the path for cleaning equipment or a hose so it does not create an obstacle at the entrance.
Plan occasional work separately from routine washing. Handling or replacing an exterior component may require more reach and clear ground space than wiping a surface, so ask what access the maker’s instructions or installer expects. Show where a removed component could be carried and set down without blocking the only exit or garden path. Avoid putting a permanent hedge, storage bin, or fixed screen in that work area. Where gutter outlets or downspouts are included, mark their location and where water is intended to go; keep hoses and equipment clear of the walking route. If discharge could affect a nearby path or neighboring property, flag it for site-specific assessment. Less frequent jobs are easy to overlook before the surrounding beds are planted.
Connect the greenhouse to usable garden paths
A perimeter strip is useful only if it connects to somewhere. Draw the paths that reach the garden gate, hose faucet, tool storage, compost area, planting beds, and the place where harvest or debris is carried. Mark the route around the greenhouse instead of assuming someone can cut across a bed or squeeze past a wall. If paving is already in place, show its actual width and where it narrows. If you intend to add a path, reserve it on the same plan as the greenhouse rather than leaving it to later. This exposes dead ends, awkward crossings, and routes that would interrupt routine garden work.
Test the route with the widest item you actually move, such as a wheelbarrow, mower, hose reel, or garden cart, including handles and the room needed to turn. Measure the tight point, then see whether the item can pass without striking the frame, gutter, bed edge, or fence. A path that works for walking may not work for a loaded cart; one that works in a straight line may still fail at a corner. Add your preferred size from the aluminum Limited Edition range to the plan, then check the approach to each corner rather than measuring only the straight sections. Decide whether a maintenance area must also serve as a path and, if so, how it stays usable during the work.
Before choosing a site 4
Account for walls, fences, trees, and ground changes
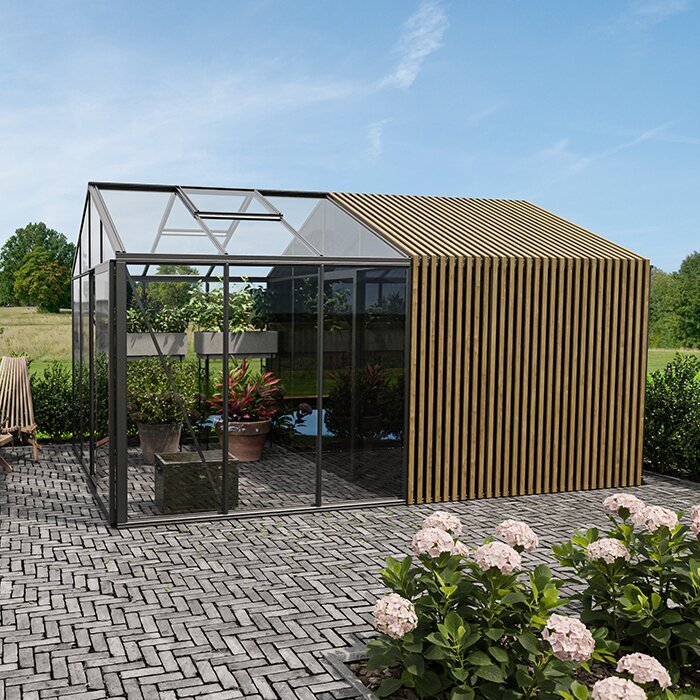
Show walls, fences, sheds, retaining edges, and property boundaries as distinct features on the drawing. Measure to the nearest obstruction from the greenhouse’s outermost relevant projection, and note whether you can reach the space between them for cleaning, inspection, and assembly. A gap that looks open on a plan may be unusable if a gate, downspout, or fixed object blocks its entrance. For a greenhouse with built-in storage, use the selected version’s drawing to locate the storage access and include the route for items you expect to move in and out. Keep that approach separate from any space reserved for cleaning equipment. Keep known shared access or property lines visible and check applicable documents or restrictions separately.
Nearby trees and established shrubs can change the usable envelope through branch growth, leaf drop, and seasonal cleanup. Photograph the site from several angles, note branches over the proposed position, and sketch their reach and the area needed for routine clearing; a single viewpoint can hide a low limb or narrow gap. Also mark changes in ground level, existing drainage paths, and the route a hose or tool must follow. A seasonal record can show whether an apparently empty area becomes obstructed later. Do not use the access drawing to choose a foundation or judge a slope; if surface conditions affect installation, ask a qualified installer or other relevant professional to assess the site.
Resolve access limits on a narrow site
A narrow site does not need a symmetrical clearance band, but every necessary task still needs a workable route. Rank what happens on each side: assembly and initial setup, daily entry, recurring cleaning, gutter work if applicable, and less frequent repairs. Some faces may need occasional access only; others may form part of the main garden route. Confirm the requirements for the exact model instead of assuming that a wall-facing side can be ignored. If the Prestige greenhouse range is on your shortlist, compare its selected size against the tightest parts of the site. Label each restricted area with the task it must accommodate so you can distinguish an inconvenient gap from one that prevents essential work.
If the available gap cannot accommodate a person, tool, door operation, or planned repair, do not solve the problem by drawing a thinner line and calling it clear. Try a different orientation, move the proposed position, adjust a path or bed, or compare another footprint after checking its exact dimensions and access needs. A lean-to arrangement may make one side less accessible, but that is a layout issue to resolve, not proof that rear access is unnecessary. If a required task depends on entering another owner’s land or moving a fixed boundary, pause and confirm permission and applicable restrictions before choosing the site. Keep any unanswered access question visible rather than treating it as solved.

Before choosing a site 5
Test the perimeter plan at full scale
Before ordering or preparing the ground, mark the plan at full scale with removable tape, string, or chalk. Trace the actual exterior outline, projections, door swing, planned working areas, and garden route with different colors or line styles. Walk the delivery route with a measuring tape, then wheel the cart or wheelbarrow you expect to use through the marked turns. Carry other tools along their intended route. Stand at each planned cleaning position to check the available ground space; this rehearsal does not establish that elevated access is safe. Include the hose route and any place where an open door could narrow the passage. A full-scale test often catches a pinch point that looks generous on a small drawing.
Repeat the test with the site as it is likely to be maintained, not just newly cleared. Note mature shrubs, seasonal leaf fall, stored garden items, and whether a path narrows when a door is open. Take photographs from the gate, each greenhouse corner, and nearby obstacles, but use measured dimensions for decisions rather than estimating scale from a photo. If you change the model size, door orientation, or planned route, update the sketch and test again. A full-scale mock-up is especially useful when a wall, fence, or bed leaves little room to adjust after installation.
Review the drawing before choosing a location
Keep one final page that combines the selected version’s exterior dimensions, installation information, door and projection envelopes, each side’s work allowance, and the connected route from the garden entrance. Mark what is permanent, temporary, movable, or still unknown. Put measurements beside the drawn scale, record where a hose or drain route passes, and identify any wall, fence, tree, or level change that could affect access. Add the delivery route and staging area as well as the permanent maintenance zones. A complete page makes candidate sizes easier to compare and gives an installer a specific plan to review instead of a vague request for a clearance number.
Get site-specific help when the drawing depends on an uncertain base or slope, a hard-to-reach repair area, a drainage route, a shared boundary, or an unusual delivery path. A qualified installer can confirm what the selected model and assembly method require; applicable local authorities or property documents can clarify restrictions that a maintenance sketch cannot answer. If the remaining space only works on paper, revise the location or model before committing. A practical perimeter is one you can use during installation and ordinary garden care, not merely an empty border on the day the greenhouse arrives.
Frequently asked questions
Is there a standard clearance distance around every greenhouse?
No single distance suits every model, site, and maintenance routine. Start with the selected model’s installation information, then allow for the tasks and equipment you actually need to use around it. Check applicable local requirements separately; a practical access zone does not establish that a location meets them.
Should I measure from the greenhouse frame or the roof edge?
Use the dimensioned drawing for the selected model and include whichever exterior projection affects access or the nearby obstruction. Depending on the design, that might be an eave, gutter, or other feature shown in the drawing. Mark door and opening movement separately, since those can extend beyond the fixed outline.
How much room should I leave for cleaning?
Base it on the selected model, the cleaning method, and the tools you plan to use. Think about where you can stand, reach each exterior face, and place equipment safely. If your method requires special access equipment, include its position in the plan and follow the maker’s guidance or seek qualified advice.
Can a greenhouse go close to a wall or fence?
Only if the exact model’s installation and maintenance needs can still be met and the site’s applicable restrictions allow the location. A wall or fence may make one side difficult to reach. Check the selected model’s instructions and plan how that side can be installed, inspected, and maintained before committing to the position.
Can a narrow gap count as clear space if I can squeeze through?
Not necessarily. A person may fit through a gap that does not allow a door to open, a tool to reach the surface, or a cart to turn. Mark the task and equipment the space must serve, then test the route at full scale. If an essential job cannot be done, revise the layout.
Good clearance planning begins with the exact outside shape and ends with a route for real tasks. When the sketch shows where people can install the structure, operate doors, clean exterior surfaces, and move garden equipment—and a full-scale test confirms the available space—you can judge the location on its actual demands rather than an arbitrary perimeter number. Keep access zones visible as the garden fills in; the paths around a greenhouse are part of its long-term usability.
