
Combining a Greenhouse and Pergola in One Garden Plan
Garden planning
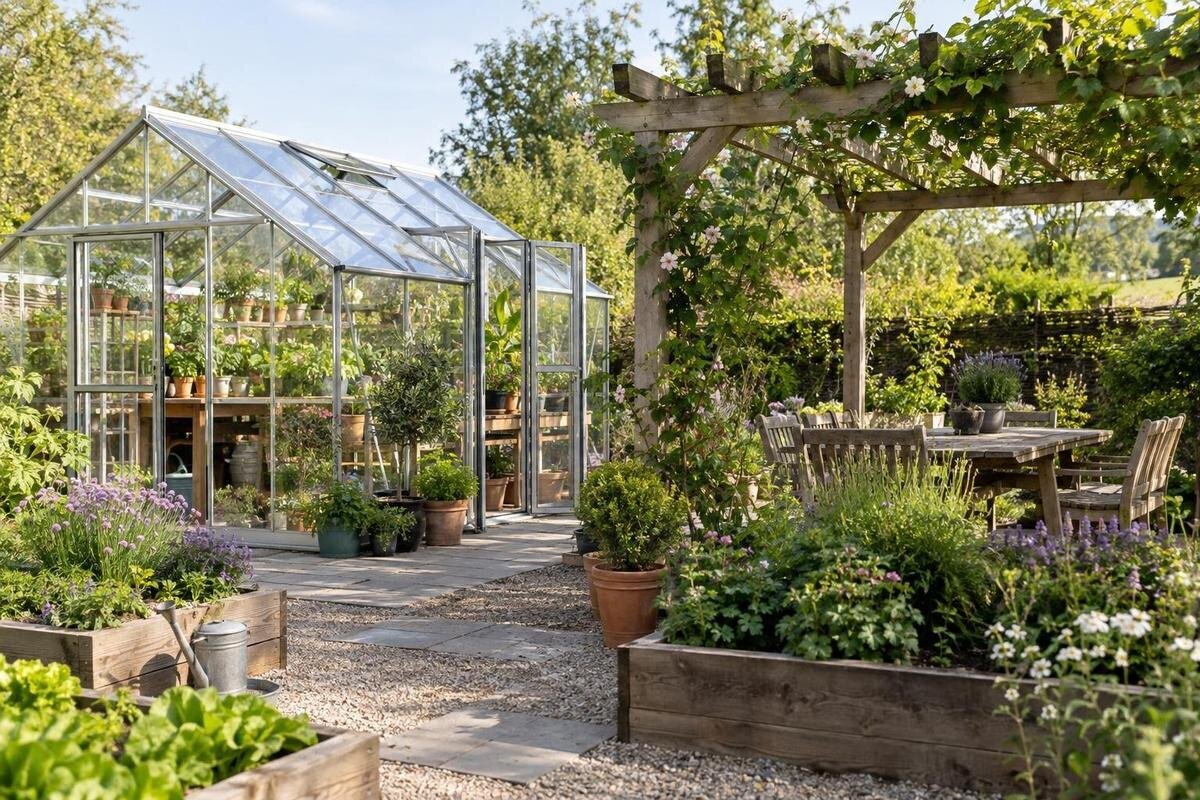
Combining a greenhouse and pergola can make a garden work for both growing and spending time outdoors, but their requirements are not interchangeable. The greenhouse needs a position suited to its intended plants; the pergola needs to create the kind of shade and gathering space you actually want. Place them as a pair on one site plan, and check how sunlight, moving shadows, paths, doors, water, and runoff interact before settling on either footprint. Measuring first can prevent a pleasant seating area from shading the growing space or a convenient route from becoming a narrow passage.

Give each structure a clear purpose
Write down what each space needs to do before deciding where either belongs. For the greenhouse, list the plants and tasks you expect to handle: starting seedlings, growing crops, sheltering containers, or potting and repotting. Note how often you will visit, which months matter most, and whether more than one person needs to work inside. That gives you a practical basis for selecting its size and location. For the pergola, specify its main use—outdoor meals, a lounge chair, conversation, or a shaded link between house and garden—rather than assuming it will serve every activity equally well.
A pergola does not provide a predictable amount of shade by name alone: its overhead design, slats, fabric, or climbing plants affect how much sun passes through and where the shade falls. Decide whether you want bright sun, filtered light, or deeper shade at particular hours. Then separate what belongs in each zone: growing supplies and muddy work in or beside the greenhouse; furniture and social activity under the pergola. If an activity needs both spaces, such as carrying pots outside, draw a connecting route. Distinct roles make later compromises visible instead of letting one structure gradually take over the other’s space.
Map the greenhouse, pergola, and working clearances
Make a measured plan of the whole garden, including the house, fences, gates, trees, established planting, paved areas, and fixed equipment. Mark features that cannot move and note any known service runs. Trace the greenhouse using the exterior dimensions for the specific model, not only its quoted floor area. Roof edges, doors, gutters, vents, and space to clean or maintain the structure may affect its position. If built-in storage is part of the choice, show how you will reach it and where you need to stand to use it. The Limited Edition greenhouse with built-in storage is listed with area options from 59.4 to 302 square feet; use the selected plan, not that range, to mark the footprint.
Draw the pergola at its full outside dimensions, then add the table, chairs, and room to move around them. Show chairs pulled out and people approaching a seat, rather than depicting only furniture neatly tucked beneath the structure. Account for a greenhouse door opening, an approach with a tray or cart, and routine cleaning or repair around both buildings. Cut paper outlines to match the plan scale, or mark the shapes on the ground with tape. Moving an outline is easy; discovering later that it blocks a gate or squeezes a passage is not. Keep some flexibility for details shown on the final drawings.
Track sunlight before choosing a greenhouse location
Observe light on the plot at different times of day and, if possible, in more than one season. Record shadows from the house, fences, mature trees, neighboring buildings, and existing canopies; a midday visit alone will not show morning or late-afternoon conditions. Deciduous trees can cast a different pattern when in leaf, and the sun’s angle changes through the year. Note which candidate greenhouse locations get light and when. Taking notes or photos from the same viewpoints, with the time and date recorded, makes comparisons more useful than relying on memory. A sun-path app or compass can help orient a sketch, but real obstructions still need to be checked at the site.
Compare your light observations with the needs of the plants you intend to grow, including the months when they will occupy the greenhouse. The sun available during a convenient gardening hour is not the whole picture: check the growing space throughout the day. When considering the Prestige greenhouse, overlay the selected model’s outline on your light map and compare alternative positions. Mark shaded portions of the footprint as well as the overall location, since a nearby obstruction may affect one end more than the other. Keep those observations with the planting plan so that changing the greenhouse size or position also prompts a review of the light available to the plants.
Check how pergola shade reaches the greenhouse
Treat pergola shade as a moving pattern, not a permanent strip on the plan. An open slatted top, a solid cover, fabric, and leafy growth cast different shadows; their effects also depend on orientation, height, spacing, nearby trees, and season. Mark the proposed pergola footprint on your sunlight observations and note where shade would fall during the hours you expect to use the seating. A larger growing space also needs room beyond its walls: the large orangery is listed with area options from 506 to 753 square feet. Compare the selected version with the pergola, its seating area, and the intervening space to see whether the garden can accommodate both without sacrificing the growing area’s light.
Choose the balance deliberately. Afternoon shade may be a priority for the seating area, while a greenhouse needs the light appropriate to its planting plan; a small or heavily shaded site may not provide both at every hour. Try shifting the pergola, changing the gap, or moving the seating zone before compromising growing conditions. Don’t assume a vine-covered roof will preserve light: foliage can add shade as it develops, and the effect changes through the season. After each adjustment, redraw both shadows and paths. If no arrangement meets your priorities, reconsider the footprint or intended use of one space rather than relying on a later fix.

Set a practical distance between the structures
Proximity can help when you carry seedlings, pots, harvested items, or tools between the two spaces, but a narrow gap can be awkward to pass through and maintain. On the plan, distinguish the route between entrances from the access needed to clean, inspect, and repair each structure. Include roof edges, doors, vents, and the area where a person needs to stand. There is no universal spacing that suits every pair: exact dimensions, access needs, and installation conditions depend on the selected products and site. Also check the view from the house and pergola seating so that service areas do not end up in an unwanted sightline.
A constrained edge of the garden deserves a separate fit check. If you are considering the Lean-To Greenhouse, obtain the chosen model’s drawings and installation requirements before planning it beside a wall. Have the supplier or a qualified designer assess the proposed relationship to the existing building; the model name alone does not establish compatibility. Show nearby windows, doors, downspouts, and access points on the garden plan, along with pergola posts and furniture. Check whether either structure would obstruct an existing feature or make its maintenance difficult. Treat any proposed connection between the greenhouse and pergola as a design question requiring review, rather than assuming that placing them close together makes a connection suitable.
Keep the route between the spaces clear
Draw a route from the house or gate to each structure, then show the path between them. Check it with the greenhouse door open, chairs in use, and a tray, watering can, or wheelbarrow in hand. Note turning points, steps, changes in surface, overhanging branches, and gate swings; a line on paper can appear open while the real route catches a cart or sends someone through the seating area. If people with mobility needs will use the garden, plan around the equipment and turning space they need from the outset. For formal access questions, consult a qualified designer familiar with the requirements that apply to the property.
Locate the greenhouse entrance where it can be approached without cutting through the main seating area, and arrange pergola furniture so the shared route remains clear. If a busy path must cross a working zone, decide where trays can be set down without narrowing the passage. The Classic aluminum greenhouse range is listed from 40.6 to 302.3 square feet; a floor-area figure does not show the door position or how someone approaches it. Trace the selected drawing, mark the entrance and door movement, then walk the proposed route at full scale with chairs or tape before finalizing surfaces. A usable route is part of the layout, not leftover space.
Plan water and power routes early
Mark the existing water source, hose route, and any planned outlets or irrigation before paving or planting around the structures. Include greenhouse watering and ordinary outdoor chores, but avoid a hose crossing the direct route, running under chair legs, or ending far from the task it is meant to serve. If you want a sink or another fixed water point at the pergola, record it as a separate requirement and discuss connections with a qualified plumber. Note where watering equipment can be stored without occupying the passage. A shared water plan is about convenient routing as much as it is about the point where a supply begins.
List electrical uses separately: perhaps lighting for evening seating, a pump, or equipment used in the greenhouse. Have a qualified electrician assess the existing provision, intended equipment, and proposed route; do not assume one outlet will suit both structures. Before ground work, identify existing services with the appropriate professional and coordinate proposed routes with drainage and maintenance access. If the Limited Edition greenhouse is on your shortlist, include the selected layout in that discussion and identify where equipment would be used. For a phased project, distinguish what is needed immediately from what may be added later. This lets the professionals assess the whole project before finished paths or planting make access more difficult.
Coordinate runoff, drainage, and surfaces
Plan the rain path from both structures instead of treating it as a later landscaping detail. Use the selected drawings to mark likely roof edges, gutters, and downspout locations, then decide where water will go or be collected. Avoid directing runoff across the path between greenhouse and pergola, toward an entrance, or onto adjoining property. Roof details vary, and front-view images may not show where water leaves the structure. If you intend to collect rainwater, reserve space for the container and its overflow route as well as access to use and maintain it. Where slope, soil, or existing drainage makes the outcome uncertain, ask a qualified site professional to assess it.
Choose paths and surfaces for the work they need to support: moving carts to the greenhouse, pulling chairs around the pergola, and keeping soil out of the sitting area. Consider how water drains from each surface and whether the route stays usable after rain. When planning around the T-Model Greenhouse Orangery, use its model-specific drawings to locate roof drainage relative to the pergola seating and shared path. Record existing puddles or wet patches after rainfall, and flag any proposed entrance near them for review. Coordinate both structures’ bases and surrounding surfaces using the site’s actual levels. For sloping or otherwise complex ground, have a qualified installer or designer assess the details instead of guessing at grades.
Test the layout against daily use
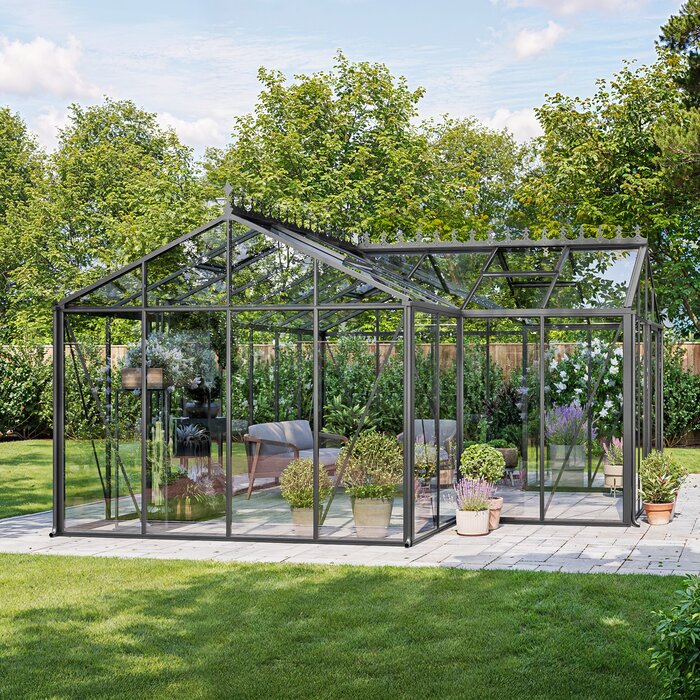
Check the layout against an ordinary day, not only the view from the house. Imagine carrying seedlings into the greenhouse, doing a task there, taking a pot or harvest outside, and then sitting under the pergola. Identify where you would pause, set something down, or wash a tool, and make sure those spots do not block doorways or shared paths. Keep furniture and meals distinct from routine growing work where possible; a route that cuts through the seating area can make both spaces feel busy even if they fit on paper. This exercise shows whether the structures work together in use, rather than simply sitting near one another.
Test simultaneous use as well as changes over time. Imagine one person watering or moving containers while others sit beneath the pergola: check whether hoses, temporary trays, or a cart would interrupt the seating area. If the Pyramid-type greenhouse is on your shortlist, use the selected drawing to place its entrance within that test rather than choosing its position solely for the view. Then consider seasonal crop changes, a different table arrangement, added shade fabric, or vines. Identify a place for temporarily staging plants and supplies outside the shared route. A flexible layout accommodates these ordinary changes without turning the greenhouse entrance or pergola edge into a permanent storage area.
Verify the combined plan before building
Before ordering, assemble one coordinated drawing with both exact footprints, surrounding clearances, sun notes, seasonal shadow patterns, doors, furniture, routes, service connections, and runoff. Use model-specific technical drawings for dimensions; product names and broad area ranges are not enough to resolve door movement, maintenance access, or the details of a proposed connection. Ask the supplier or a qualified designer to clarify missing information, and involve an electrician, plumber, or site professional where the plan needs utility or ground assessment. For shared-use, event, or other public-facing projects, confirm actual operating, access, and safety requirements with the responsible project team rather than assuming a residential plan addresses them.
Requirements can vary with the property and project, so consult the relevant local planning or building office and any applicable property association, insurer, or project owner before work begins. This is a prompt to verify what applies, not a claim that a particular permission is required. If construction is phased, reserve both full footprints, access clearances, utility corridors, and future shade zones now. Avoid putting paths or planting where a later structure is planned. If the combined layout creates an unavoidable conflict, revise the positions or intended uses on paper before committing; changing the plan there is simpler than trying to correct shade, access, or runoff after installation.
Frequently asked questions
Can a pergola shade a greenhouse?
Yes. The amount and direction of shade depend on the pergola’s position, overhead design, any fabric or plants, and the time of year. Map its changing shadow against the greenhouse location at different times; a single fixed gap does not guarantee the right light.
How much space should be left between the two structures?
There is no universal spacing. Use the selected structures’ drawings to allow for their full outlines, doors and any features that need access, then add the route and maintenance space you need. Have a qualified professional review any plan to connect or support one structure with the other.
Which structure should I place first?
Plan both together. Identify the greenhouse’s light needs for the plants you intend to grow and the shade you want at the pergola, then test possible locations for both footprints. Which requirement matters most depends on your site and intended use.
Can the greenhouse and pergola share water or electrical services?
Possibly, but it depends on the existing services, the equipment you plan to use, and the proposed routes. Note connection points on the site plan and ask a qualified plumber or electrician to assess the project. Keep hoses and service routes out of main walking paths.
What should I verify before building?
Check exact model drawings, access and maintenance space, seasonal shade, service routes, and runoff. Requirements can vary by property and project, so confirm what applies with the relevant local office and any applicable property association or project owner before committing.
A coherent plan does not require the greenhouse and pergola to touch or match as a set. Each needs to serve its purpose, with suitable light, clear routes, maintenance access, and planned drainage. Keep the greenhouse’s growing conditions and the pergola’s intended use visible on the same drawing, then check that drawing against exact product plans and observations of the site. Test it with doors open, furniture occupied, and seasonal shade accounted for. The result should be a garden where growing and relaxing fit comfortably alongside each other, without either activity obstructing the other.
