
Greenhouse Leaks: Finding Whether Water Comes From Above or Below
Greenhouse troubleshooting
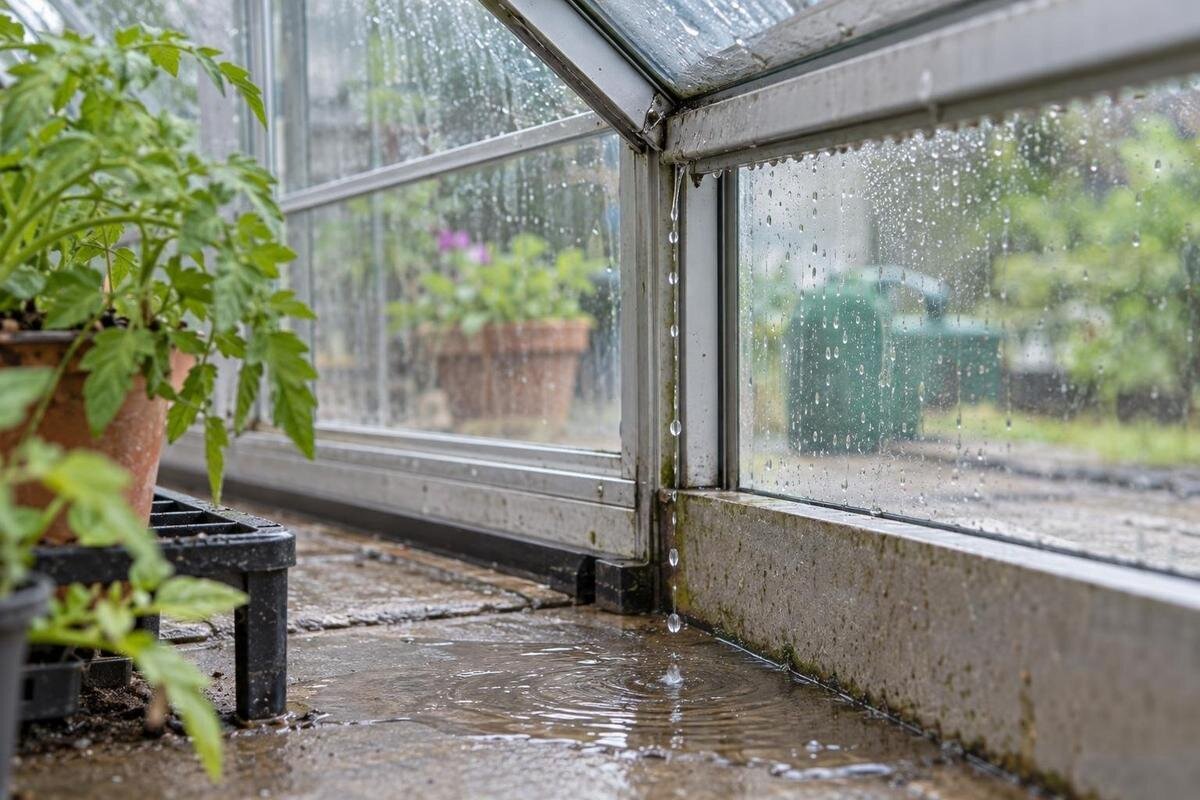
Water on a greenhouse floor can look like a roof leak even when it began at the base—or formed as condensation on the inside of the glazing. A reliable diagnosis comes from timing and the first place moisture appears, not from the largest puddle. Follow a controlled sequence to separate rain entry, ground moisture, and condensation before sealing a joint or requesting a replacement part.

Before requesting parts 1
A puddle does not identify the source
A puddle tells you where water collected, not where it began. Rain may pass a roof joint, follow a glazing bar or frame, and drip several feet away; surface water can move toward a low edge; condensation can collect on glazing, run down a frame, and reach the floor. Even a dry-looking panel does not rule out entry higher up. Before calling it a roof leak, note the first visible sign: a droplet on the inside surface, a trail along a frame, dampness at the perimeter, or standing water with no clear route. Rain splash from the floor can also mark lower panels, so check whether the marks are inside or outside.
Treat roof entry, water from the ground, and condensation as separate possibilities. A rain-linked drip that begins at a repeatable joint points toward the roof or wall connection, although wind can change where rain reaches. Dampness at a floor edge after rain or irrigation suggests outside water or wet ground. Broad droplets on cool inner glazing, including when it has not rained, are consistent with condensation. These clues are not proof, and two sources can occur at once. Record each as suspected rather than confirmed until the pattern recurs under similar conditions; the useful question is what gets wet first and under which conditions.
Record conditions before testing
Before testing anything, get the greenhouse as dry as practical and create a simple record. Note the date and time, recent rain and wind, irrigation or hand-watering, whether doors or vents were open, and when you first noticed moisture. Photograph the floor and nearby frames before moving pots or tools; make a rough plan and mark each drip, damp patch, track, and puddle. Keep the same reference points from one observation to the next. If you know when the floor was last dry, include that too; it helps narrow the delay between rainfall and the first visible drip. This prevents the final pool from becoming the only evidence.
Change one condition at a time. A dry-weather check after watering can reveal whether irrigation is involved; a rain-free observation can show whether interior droplets form anyway. If you dry a small accessible patch, use a towel and leave fittings, seals, and glazing in place, then note where moisture returns. Do not wet the whole greenhouse to see what happens: that can obscure the route and introduce more than one possible source. Record how long it takes for a spot to reappear. Keep a separate note for each trial; changing watering, door position, and test method together makes the comparison unreliable. A short timeline is easier for an installer or manufacturer to interpret than a general report that it leaks.
Before requesting parts 2
Trace rain-linked water from the roof
When moisture appears during or soon after rain, look for a repeatable point near the roof, not just the place where a drop lands. From inside, follow any trail upward along framing; water can run before falling. Check what is visible from ground level: glazing edges, roof vents, ridge and eaves, gutters where fitted, and joints where a roof meets a wall. Wind-driven rain may expose a different side than a calm shower, so note wind conditions. A brief shower may not reproduce a leak that appears after prolonged rain; record duration. Do not climb onto the greenhouse, lean on glazing, or reach over a roof to inspect it; use a ground-level view or ask a qualified installer.
For a greenhouse attached to a building, distinguish water arriving from the building above from water appearing at the greenhouse-to-wall connection. Photograph both areas from the ground and note which becomes wet first. An installer may need to inspect the connection and the building's runoff together; sealing the visible drip point could miss the actual entry. If you are considering an attached replacement, the Lean-To Greenhouse options range from 40 to 154 sq ft. Ask for the proposed connection details before choosing a size, since floor area alone does not explain how the greenhouse will meet your wall.
Test one suspected roof area at a time
Use ordinary weather as the first controlled check. Once the interior is dry, watch the suspected area during the next rain from a safe position and note exactly when it changes. If the weather passes without a drip, do not conclude that the roof is sound: rain angle, wind, and duration can affect what reaches a joint. Repeat the observation on another comparable occasion if safe, and compare it with the same marked points. Check the floor beneath the suspected area too, but do not infer an entry point from a matching vertical line alone. A persistent trail through a frame may end far from its entry, so follow it upward visually rather than opening the structure.
If natural rain leaves the question unresolved, consult the greenhouse manual or manufacturer before any water test. Use only an approved method that can be performed safely from the ground, with someone watching inside. Test one accessible area at a time, pause between areas, and stop when water first appears. Never use a pressure washer or remove panes or seals to create a test. Request instructions for the exact installed model and version: if your purchase record identifies an Oasis, the Pyramid Greenhouse Bloomcabin Oasis listing can help establish its catalogue identity. Provide the purchase date and product code as well, so the manufacturer can identify the applicable documentation.

Before requesting parts 3
Check the perimeter for water from the ground
When the first dampness is at the floor edge or comes through bare ground, inspect the greenhouse perimeter after rain and again when conditions are dry. Look for wet soil or a visible path leading from the yard, a low corner that stays damp, or water collecting beside the base. Compare how quickly the edge becomes wet and whether the change begins at one corner or along a longer section. Also note whether the wet area is directly below an upper frame: runoff from above can mimic water entering from underneath. Observe the surface without digging, lifting a base, or changing supports. If water is pooling against the greenhouse or appears to affect its footing, have a qualified installer assess it rather than altering the base yourself.
Compare rain, irrigation, and periods without either. Water may flow across the surface, enter at the perimeter, or seep through a damp floor or soil; the resulting puddle cannot establish whether groundwater is involved. Record whether the patch expands inward from an edge and whether the ground outside is wet before the interior changes. If replacement planning includes the Limited Edition greenhouse with built-in storage, its listed sizes range from 59.4 to 302 sq ft. Include the proposed storage area in the site review: a larger footprint could extend into a different part of the yard, so assess the whole intended location rather than only the current wet corner.
Separate irrigation and runoff from groundwater
Rule out water you control before attributing a wet floor to the ground. Check accessible irrigation tubing, hose connections, watering cans, and nearby taps for drips or spills; compare the same floor area after watering and on a dry day when the system has not run. Check whether a hose has been left running or a drip line passes above the wet patch, without moving fixed lines. If the dampness appears only after a particular watering event, record the location and timing. Do not pull installed lines or disturb the greenhouse base to find a leak. A small, repeatable association with irrigation is more useful than assuming that all moisture after rain has the same cause.
Then observe surface runoff outside. Rain from a roof edge, an overflowing gutter, a downspout, or a hard surface can send water toward the greenhouse. Note whether it flows across the ground, splashes from above, or collects beside the base, and photograph the route while it is visible. A drainage professional can assess persistent runoff before excavation or changes near the structure. This matters when considering a larger replacement such as the Bloomcabin Orangerie, listed from 506 to 753 sq ft: compare the proposed footprint with the observed flow paths. Moving or enlarging the greenhouse without addressing the water route may leave the underlying problem unresolved.
Before requesting parts 4
Recognize condensation on interior surfaces
Condensation commonly looks like a fine film or many small droplets across broad areas of interior glazing or framing, rather than one stable drip from a single seam. It may appear after cool nights, temperature changes, or watering even when there has been no rain. Droplets can run down frames and collect at the base, creating a floor puddle. Note whether the beads are on the interior or exterior surface and whether they recur during dry weather. Their extent may vary with watering and outdoor conditions. Wet leaves alone do not identify condensation, and a damp floor does not prove a roof defect; examine the glazing and the route water follows.
Dry a small, safely accessible area of interior glazing and check it later during a rain-free period. A broad return of droplets supports condensation as a possibility; a recurring track from a joint needs further investigation. Note whether droplets form after a cool night or fade during the day. Wet soil, plants, and watering contribute moisture, so follow the ventilation guidance for your greenhouse rather than sealing a joint simply because it is damp. If you are comparing the Bloomcabin Prestige Greenhouse as a replacement, ask for its ventilation and operating documentation. Its listed sizes, from 40.6 to 302 sq ft, do not establish how much condensation you would experience at your site.
Map the entry point and identify the greenhouse
Once the pattern points to a particular area, draw the route rather than naming a part prematurely. Mark the wettest point, the first point that became wet, and any frame or panel edge where water travels; they may be different. Take clear photos from safe positions, one wider view to show location and one close view of the visible mark. Note whether the sign is on the inside or outside face and whether it appears after rain, watering, or overnight cooling. Photograph residue or splash marks before cleaning, since removing them can erase part of the trail. Do not take glazing or trim apart just to obtain a better picture.
Find the purchase record or manufacturer documentation. Record the brand, exact model, purchase date, and any serial or product code visible without moving panels or reaching unsafely. Use the manual to identify components; similar-looking channels, seals, or clips are not automatically interchangeable. If your paperwork names a Classic greenhouse, the Aluminum Classic Greenhouse product page may help confirm the catalogue name, but the installed version still needs to be identified from your records. Send a photograph of any accessible label with the water-route photos. This gives the supplier both the greenhouse identity and the location that needs investigation.

Before requesting parts 5
Send useful details with a parts inquiry
Contact the manufacturer or seller with the model details, a short timeline, and photos of the suspected source. Ask for the exact spare-part identifier and the applicable manual or drawing, not a generic seal or panel that merely looks similar. Include a close-up of the joint and a wider image showing its position; another safe angle may reduce glare. Describe observations after rain, irrigation, and dry weather, including whether moisture starts at one point or across a broad surface. Also mention previous repairs or sealant applications, if known. These details support a parts inquiry without presuming that a component has failed. Have the required part confirmed before ordering or arranging glazing work.
Ask an installer to assess persistent water after a confirmed repair, a displaced frame, loose or broken glazing, or possible damage around the base. Keep people clear of damaged glazing. Request a clear account of the suspected cause, the proposed repair, and any site work needed separately. If replacement is recommended, the Aluminum Limited Edition Greenhouse lists sizes from 40.6 to 302 sq ft. Compare a complete replacement proposal with the repair proposal, including removal, installation, and any necessary base or drainage work. A new greenhouse and a correction to the surrounding site are different items; make sure the proposal identifies which problem each addresses.
Choose repair or replacement after diagnosis
Repair is easier to evaluate when the source is localized and an installer or manufacturer can specify the appropriate correction. Several unrelated leak points, unavailable model-specific parts, or visible movement may warrant a broader review before more components are bought. The size of the puddle is not a reliable measure of repair scope. After an approved repair, compare the same marked locations under conditions similar to those that produced the original problem. Record whether the first wet point disappears, moves, or remains unchanged. Continued wetness may indicate an incomplete repair or a second source, such as condensation alongside rain entry; it does not automatically mean the whole greenhouse needs replacement.
For a full replacement, obtain the overall dimensions and installation requirements before assuming that an existing base can be reused. Compare access, the relationship to nearby walls, and the proposed perimeter with your water-route map. The Garden View T-Greenhouse lists options from 178 to 323 sq ft, but floor area alone cannot establish whether its footprint fits an existing base. Have an installer review the base and the proposed layout together. Keep the leak diagnosis in the replacement brief: the goal is not simply to replace a wet structure, but to avoid carrying an unresolved runoff or support problem into the new installation.
Frequently asked questions
Can water from a roof leak appear at the base?
Yes. Water can run along a glazing bar, frame, or wall connection before it drips, so the wet point on the floor may be far below the entry. Trace any visible trail upward and compare the first wet location with the final puddle; do not assume the nearest pane is the source.
How can I tell condensation from a roof leak?
Condensation more often appears as many droplets or a film across interior glazing and may recur without rain, particularly after cool nights or watering. A leak more often follows a repeatable joint after precipitation. These are clues rather than a guarantee, so record both the weather and the surface where moisture first appears.
Should I use a hose to test the roof?
Use natural rainfall first. If that does not answer the question, follow a water-test method only when the manufacturer approves it and it can be done safely from the ground, one area at a time. Never climb on the greenhouse, use a pressure washer, or remove glazing to test a joint.
What should I include in a parts inquiry?
Send the exact model and any product or serial code you can read safely, plus the purchase record if available, clear photos, and a brief log of rain, watering, and when the first moisture appeared. Ask the manufacturer or seller for the correct spare-part identifier; a similar-looking seal is not enough to confirm a match.
When should I stop troubleshooting and call an installer?
Stop if checking would require climbing or removing glazing, or if a pane is loose or broken, the frame looks displaced, water persists after an identified repair, or moisture may be affecting the base. Keep people away from damaged glazing and ask a qualified installer to inspect the structure.
The clearest diagnosis comes from three comparisons: rain versus dry weather, watering versus no watering, and a broad interior moisture pattern versus a repeatable drip point. Record what gets wet first and where it leads before choosing a seal or part. If the evidence points to damaged glazing, movement at the base, or a test that requires unsafe access, leave the repair to a qualified installer. That keeps any replacement discussion grounded in the likely cause rather than the puddle.
