
Can a Greenhouse Fit Between a House and Fence?
Greenhouse location guide
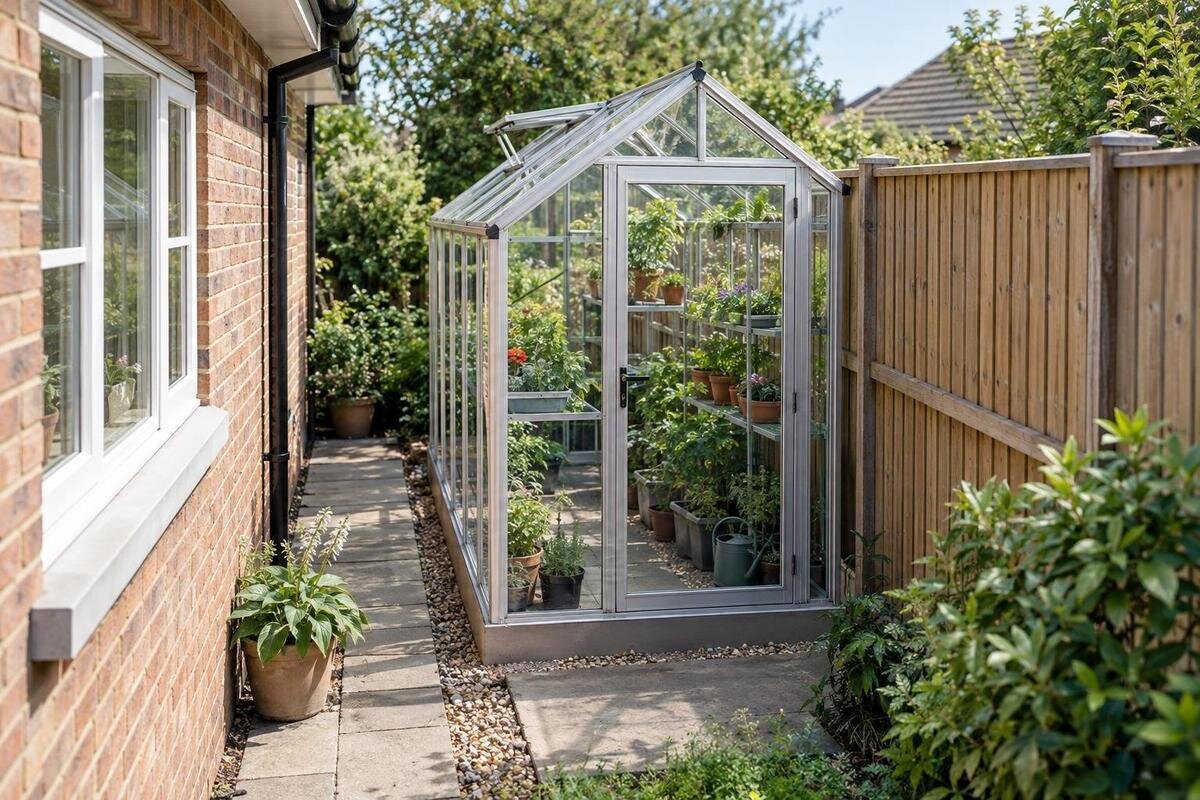
A greenhouse between a house and fence can work, but it is more than a footprint calculation. You need enough clear width for the outside dimensions, a growing layout that works inside, access to maintain both structures, and a plan for shade and roof water. A measured sketch is the quickest way to see whether all four can coexist.

Four separate tests determine whether the site works
Treat the answer as four checks rather than a simple yes or no. First, can the greenhouse's complete exterior shape sit inside the available corridor? Second, will the interior still hold the beds, benches, and path you need? Third, can you reach the greenhouse, house, and fence for routine use and repairs? Finally, do the light and water conditions suit the plants and the structure? A unit can pass the footprint test and fail the other three. If it only fits as a bare rectangle on paper, it is not a workable fit for everyday gardening.
There is no single clearance figure that resolves every property. Roof overhangs, gutters, fence construction, window locations, the selected greenhouse, and the jobs you must do around it all change the usable space. Also separate physical fit from permission to build or dig: confirm the property line and any recorded access or utility areas, and ask the appropriate local office or a qualified professional about requirements that may apply. A passage that looks unused is not automatically available for a permanent structure. Treat local review as site-specific rather than applying a universal setback rule.
Measure the corridor at several points
Measure along the entire proposed length, not just where you plan to put the door. On a top-down sketch, mark the house wall and fence, then record the gap at both ends and at several points between them. Note changes caused by house corners, bay windows, window wells, steps, fence posts, gates, hose bibs, meters, downspouts, and any fixed planting or paving you will keep. If the fence wanders or the wall is not straight, show the actual line rather than drawing a convenient rectangle. Measure from permanent surfaces, not from items you expect to move. Label each measurement's location so you can check it again when comparing drawings. Record distances in consistent units, including inches where needed; rounding a narrow passage to whole feet can hide an obstruction that changes which configurations are possible.
Mark the narrowest measurement instead of averaging away a pinch point, and record the clear length as well as the width. Measure at the proposed base line and note anything that projects farther into the passage above it, such as a roof eave or gutter. Also note whether a fence cap, rail, or post reduces usable clearance. Catalog floor area is not a corridor measurement: the Large backyard greenhouse listing states a range of 506 to 753 sq ft, but that figure alone does not tell you the selected unit's width or whether it fits.
Compare the sketch with the full outside dimensions
Use the dimensioned drawing for the exact greenhouse configuration, not a general category label or a floor-area number. Check the outside width and length at the base, then identify parts that may project beyond it: roof edges, eaves, gutters, trim, handles, door hardware, and a door while it is open. Ask what the published width measures—base, frame, or widest point—and whether it includes projections. Check any opening roof or side vents, too. Their open positions may need clearance that the closed outline does not show, especially beside a house eave or tall fence. Record the greenhouse height and the heights of nearby obstructions so the comparison covers more than the ground-level footprint. If the manufacturer offers several sizes, record the exact option alongside its dimensions so you do not compare your site with the wrong configuration.
The aluminum limited-edition greenhouse listing gives a size range from 40.6 to 302 sq ft. Treat that as an area range, not a width to subtract from the corridor; request dimensions tied to the exact option you are considering. Two configurations with the same floor area can have different proportions, and a roof edge can extend beyond the base. Add room in your sketch for assembly and positioning rather than relying on a perfect, edge-to-edge fit.
Calculate the width left for growing
The outside footprint is not the same as usable growing space. Inside, the frame and panels take up some room; benches, trays, beds, and stored tools take up more. Draw an interior cross-section and place the planned beds or benches before deciding that the remaining strip will make a workable aisle. Think about carrying a tray, reaching the back of a bed, turning around, or bringing in supplies. If you plan to work from one side only, test whether you can still reach the far edge for the crops you intend to grow. Mark the proposed aisle and bench edges with tape on an open floor, then try the tasks with the trays or containers you normally use. Allow for plants extending beyond their pots as they mature. A narrow layout that works for empty shelves may become awkward once foliage fills the space, so compare a one-sided bench arrangement with benches on both sides.
If storage is part of the design, separate it from the area you expect to plant. The greenhouse with built-in storage listing identifies a storage feature, but its title or total square footage does not tell you how much clear growing area remains in a chosen configuration. Use a layout drawing to mark where storage begins, how you enter it, and whether its door or contents intrude on the aisle. Reserve space for shelves or a potting station now rather than squeezing them in after the greenhouse is full.

Decide whether a lean-to arrangement is suitable
A lean-to design may look like an obvious answer in a side yard, but the name alone does not confirm that a particular greenhouse can attach to your house or use its wall for support. Check the manufacturer's intended installation method and the requirements for the chosen configuration. If attachment or changes to the house are involved, ask the manufacturer and a qualified installer what the wall and its finish can accommodate; do not treat siding or a fence as structural support. A freestanding greenhouse avoids relying on the house for support, but its footprint and access needs still have to fit.
The Lean-To Greenhouse listing is one catalog example to compare, not proof that your house wall is suitable or that its dimensions fit the passage. Its listed range is 40 to 154 sq ft; floor area does not specify the exterior depth, wall interface, or door position of the option you might choose. Compare the installation information with your site plan, and keep access to house windows, gutters, siding, and fixtures. If those functions are blocked, a different layout may make more sense even when the base fits.
Leave room for routine maintenance
Plan how you will do ordinary work on both sides of the gap. The house may need window cleaning, gutter clearing, siding repairs, or access to an exterior fixture; the fence may need a panel replaced or a latch adjusted. The greenhouse itself also needs access for cleaning and inspection of its exterior, doors, vents, and glazing. Make a short task list and mark where a person, cleaning tool, or service equipment must stand. If a task requires a ladder or long-handled tool, check that the working position is possible before placing the greenhouse.
Distinguish permanent access routes from areas that can be cleared temporarily for maintenance. For each task, note the approach and working position: cleaning a gutter from the ground is different from reaching it from a ladder. Consider whether a removable bench or planter would genuinely be easy to move, rather than assuming a planted bed can be cleared whenever repairs are needed. Seasonal storage, pots, and a wheelbarrow can gradually occupy the only passage, so give them a separate storage location. When comparing the Prestige Greenhouse, place its exact plan beside the maintenance areas marked on your sketch. Ask how exterior components can be serviced if either side faces a narrow gap; the catalog listing alone cannot answer that question.
Check shade through the growing season
A passage between a house and fence can receive very different light from the open yard. Both structures cast shadows, and the shaded area moves over the day and changes with the season. Make a simple shadow diagram: at several times of day, note where each edge of the proposed greenhouse would be shaded, and repeat observations at different points in the growing year. Photos from the same marked position can help show changes, but keep the proposed footprint in view; a sunny photo of the far end of the yard says little about the corridor.
Do not base the decision on one summer-noon observation. Lower winter sun can lengthen shadows, while a fence or nearby roof may shade the site at different hours; actual conditions depend on the site's orientation and obstructions. Compare the pattern with the plants you intend to grow and where you could place benches, rather than assuming extra interior area compensates for poor light. Also note whether locating the greenhouse would block daylight to house windows you use. If you cannot observe every season before choosing, record what you know and plan for the uncertainty instead of treating one day's conditions as year-round.
Trace roof runoff before choosing a location
Look above the greenhouse footprint as well as at the ground. Trace where rain from the house roof leaves the eaves, gutters, and downspouts; an overflowing gutter can send water into the very strip where the greenhouse stands. Also note drips from roof edges and places where surface water already collects after rain. The greenhouse roof creates its own runoff, so account for both buildings rather than only the house. Photos taken during or just after rain can reveal flow paths and wet patches that are easy to miss in dry weather.
On the sketch, draw roof edges and current discharge points, then identify where water from the greenhouse would go according to its selected design. Do not assume that a model's overall shape tells you its gutter or outlet locations. For example, the pyramid-type greenhouse listing names a product type, but you still need the chosen configuration's drainage details and a site-specific plan for handling runoff. If you need to alter downspouts, grading, or drainage, have the method reviewed by a qualified professional rather than redirecting water into another problem area.
Keep doors, windows, utilities, and the route clear
Test the passage as a route you will actually use. Where will the greenhouse entrance face, and can you open it without blocking a gate, steps, or a path through the yard? Sketch the open door as well as its closed position, then consider the space needed to carry plants, trays, or supplies inside. Check windows that open into the gap and keep access to hose connections, meters, service panels, and downspout cleanouts that need to remain reachable. Do not enclose or obstruct building vents or equipment outlets; ask the relevant qualified professional about required clearances wherever the proposed greenhouse is nearby. Consider repeated trips, not just whether someone can squeeze through once.
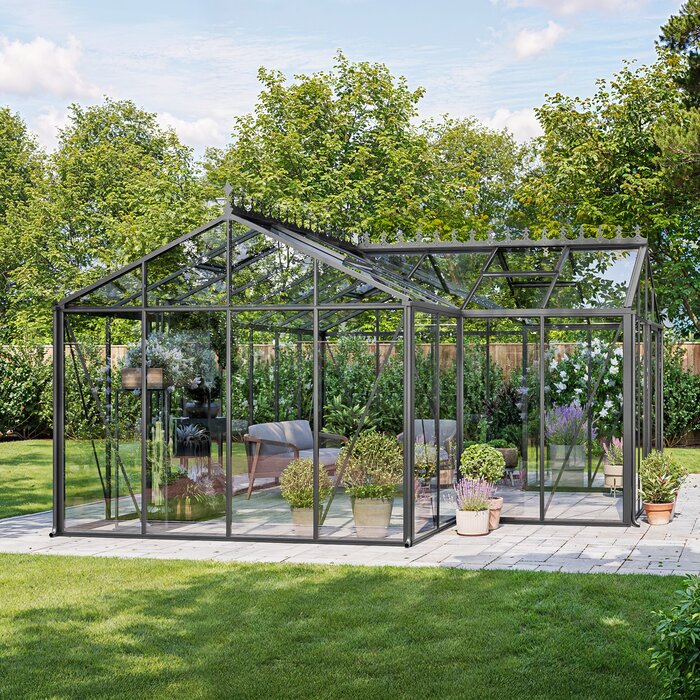
Use the exact plan for the option under consideration to locate its entrance and any projections, rather than assuming that all sizes in a product family share the same arrangement. For the T-Model Greenhouse Orangery, confirm the selected configuration's drawing before comparing its entrance with your side-yard route. Also check the delivery and assembly route separately from everyday access. If a fence gate is the only entrance, measure its opening and the turns along the way. Ask for the packaged component dimensions and whether assembly requires access outside the finished footprint. A greenhouse might fit once built yet be difficult to bring into the yard or assemble in place. Include a temporary staging area for components, and check whether using it would block the household's only usable route through the side yard.
Test the full layout before you order
Put the site measurements and chosen greenhouse dimensions on one scale drawing. Include the base, the widest roof projection, the open door, interior beds and aisle, and the space reserved for house, fence, utility, and gutter maintenance. Add fixed obstacles and show the path from the yard entrance to the greenhouse. A paper cutout at the same scale can be moved to test alternate positions; walk the site with the drawing and compare each corner with what is actually there. Record uneven paving, changes in ground level, and areas that stay soft or wet. Ask the installer what site preparation the selected configuration requires before treating the drawn position as final. An existing path is not automatically a suitable base, and changes to its level may affect nearby drainage or access. Do not scale a product photo to estimate dimensions—use a dimensioned plan.
Repeat the drawing with any smaller or differently shaped option you are considering, and cross out a layout that only works if a gate, window, drain, or service area becomes inaccessible. The Classic aluminum greenhouse listing gives a catalog area range from 40.6 to 302.3 sq ft; that number cannot replace the exact outside plan and the clearance you have drawn around it. Ask for dimensions tied to the configuration you intend to buy, and keep the sketch as a record of why it fits—not as a substitute for technical or local review where that is needed.
Frequently asked questions
How much space should I leave between a greenhouse and the fence?
There is no single gap that works for every greenhouse and fence. Compare the selected model's outside dimensions with your measurements, then allow practical access for cleaning, repairs, assembly, and fence maintenance. Use the greenhouse's installation information and your actual maintenance needs to decide whether the remaining space is workable.
Can I put a lean-to greenhouse directly against the house?
Do not assume that a house wall can support or attach to a particular greenhouse. Check whether the selected model is intended for that installation, and ask the manufacturer or a qualified installer about the wall and the proposed connection. Even a greenhouse that stands independently can block access to windows, siding, gutters, or fixtures.
Does a greenhouse's listed square footage tell me whether it will fit?
No. Floor area does not show the exact width, length, roof projections, or door clearance of a particular configuration. Get its dimensioned plan, compare the outside dimensions with the narrowest part of your passage, and then work out how much usable growing space remains inside.
How can I tell whether a side yard gets enough sunlight?
Observe the proposed footprint at different times of day and at different points in the growing season. Record shadows from both the house and fence, using photos or a simple diagram. Compare those observations with the light needs of the plants you intend to grow; a single sunny-day view is not a year-round assessment.
What if the greenhouse fits but blocks access or runoff?
Treat that as a practical fit problem, even if the base fits on paper. Revise the position, choose a different configuration, or consider another location rather than losing essential access to the house, fence, or drainage. A workable plan needs to account for the space around the greenhouse as well as its footprint.
A side-yard greenhouse is a practical choice only when the measured footprint, growing layout, maintenance routes, light, and runoff all work together. If the sketch shows an exact squeeze, treat it as a warning: change the position or configuration rather than sacrificing access or drainage. Keep the final drawing alongside the selected model's dimensioned plan and your seasonal shade notes. That turns a guess about whether the greenhouse will fit into a decision based on the actual property, not floor area alone.
