
Moving a Greenhouse to Another Part of the Garden
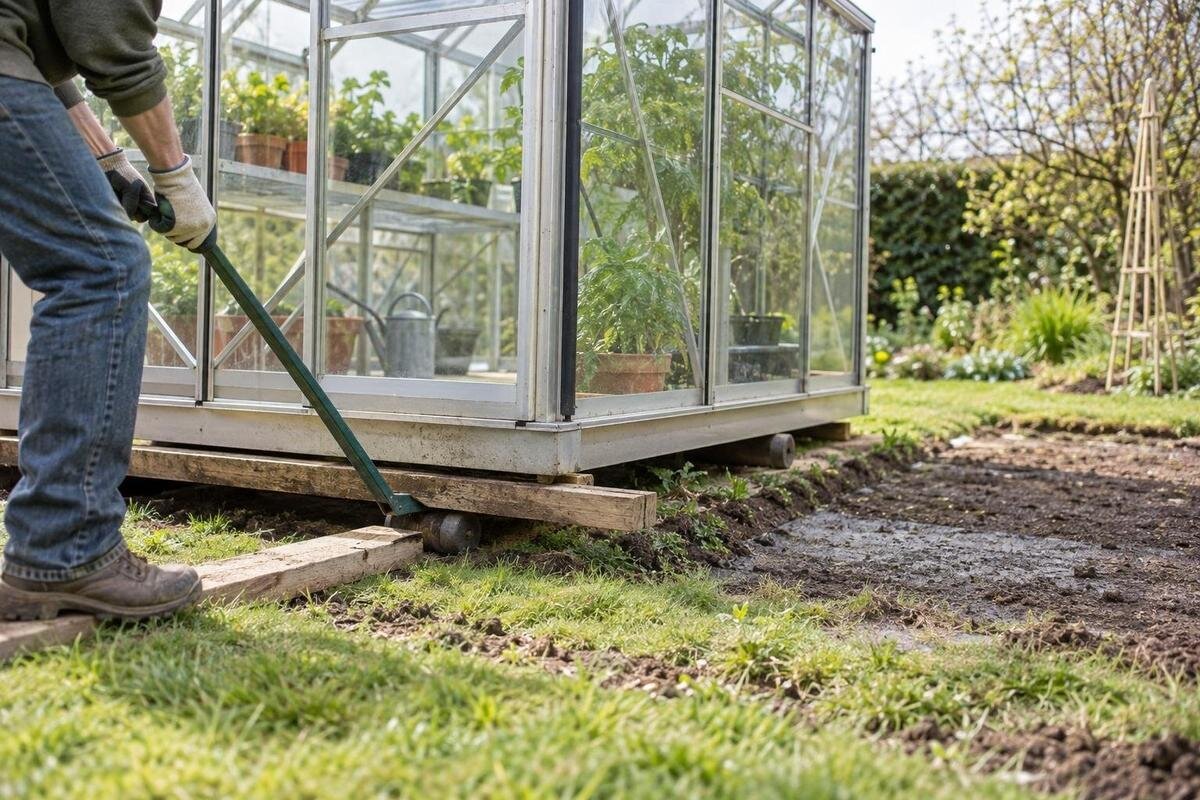
Greenhouse relocation
Moving a greenhouse across the garden involves more than choosing a new sunny spot. The frame, glazing, foundation, access route, and any fixed services all affect whether the move is practical. A sound plan starts with the exact model and its documentation, then covers site measurements, controlled dismantling, a model-appropriate base, and installer-led reassembly. If the structure or its parts are uncertain, compare relocation with replacement before taking it apart.

Decide whether the greenhouse is worth relocating
Treat the move as two decisions: whether the existing greenhouse can be dismantled and rebuilt, and whether its new position justifies that work. Before booking labor, inspect the frame, connections, fasteners, glazing, doors, and vents from safe positions. Note missing or visibly damaged parts, distortion, loose panels, or openings that no longer work as expected. Don’t straighten members, drill holes, or remove glazing to investigate a problem. Ask a qualified greenhouse installer to assess anything that could affect stability or safe dismantling. A move can involve labor, replacement parts, transport, a new foundation, and time without growing space, so compare those costs with the structure’s condition and expected use—not just the short distance between sites.
Don’t assume a complete greenhouse can be dragged, lifted, or carried as one unit. Unless the manufacturer’s instructions and a qualified installer specifically approve a method for that exact model, plan for controlled dismantling and reassembly; a short trip across the yard doesn’t remove the risk of frame distortion or damaged glazing. Replacement may be more practical if the existing footprint won’t fit, essential parts can’t be identified, or the structure isn’t suitable for another assembly. As an early size comparison, Classic greenhouse listings show a floor-area range from 40.6 to 302.3 sq ft. That range isn’t the exact outside dimensions of a selected configuration or proof that it will fit your site.
Identify the exact model and gather its documents
Locate the order confirmation or invoice, model name, serial or identification label if present, purchase date, assembly manual, technical drawings, and any record of the original base or accessories. Photograph the greenhouse from all sides before moving anything, then take closer views of joints, glazing layout, doors, vents, and labels. Keep digital copies somewhere accessible to you and your installer. A product family name alone isn’t a dependable parts identifier: similar-looking greenhouses can use different components, and a later catalog page can’t prove it matches your unit. Give the manufacturer or seller the strongest identifiers available instead of guessing from appearance. Record any known repairs or replaced components, since those details can help an installer assess the parts.
Check that the instructions cover the exact model and configuration, including glazing retention, fastener identification, and foundation requirements. Ask whether separate dismantling guidance is available and have the installer address any gaps before work begins. If the manual is missing, ask the manufacturer or seller to identify the right document from purchase records, labels, and photographs. A page such as the Lean-To model page can identify a current replacement option, but it cannot identify your older structure or establish parts compatibility. Assemble a reference folder with labeled photos, dimensions, existing part numbers, and unanswered questions, then share it before the installer visits.
Assess the new site before dismantling
Walk the proposed area at different times of day instead of judging it by one sunny afternoon. Nearby trees, fences, buildings, and future growth can change light and airflow; note where shade moves and whether the area stays wet after rain. Observe where runoff travels and whether the ground is uneven or crowded by roots, hardscape, or garden beds. The aim isn’t to follow a universal orientation rule but to establish whether the site suits your growing plans, remains accessible, and has a workable setting through the year. If the conditions are unclear, ask the installer or a relevant site professional to review them before a base is prepared.
Check access from the house and garden, the space needed to open doors, the route for carrying parts, and whether water or power connections must reach the new position. Have a qualified professional assess any fixed connections that need to be relocated. Before ground work, check whether local requirements or utility routes affect the proposed spot. If the current greenhouse would crowd the plot, compare keeping it with a different configuration, using the Limited Edition greenhouse options as one catalog reference. Sketch where the entrance, paths, beds, and nearby obstacles would sit for each choice. This helps separate the benefits of a new location from benefits that would require a different greenhouse.
Measure the greenhouse and the access route
Measure the greenhouse you have and the space it will occupy rather than relying on a remembered size or a generic model chart. Record the outside length and width, overall height, door opening and swing, vent locations, and any projections that affect the footprint. Compare these measurements with the technical drawing for the selected configuration; nominal floor area doesn’t tell you the clearance you need. At the new site, mark the proposed outline and door access, then allow room to approach, clean, open, and maintain the structure. Have an installer confirm critical dimensions. Don’t climb on the frame or lean across glazing to measure high points.
Measure the route as carefully as the destination: gate width, turns, steps, narrow paths, changes in grade, and temporary staging space can all affect how components are removed and transported. Note where a crew can reach the garden and whether plants, fences, or stored items need temporary relocation. Put measurements in a dated sketch and photograph the route so estimates use the same assumptions. For a replacement comparison, the T-Model Greenhouse Orangery listing gives a stated area range of 178 to 323 sq ft. Obtain the selected configuration’s outside dimensions for the site plan, and ask about component or package sizes for access planning. These are separate measurements; neither can be inferred from floor area.

Specify the new foundation for the exact model
Get the foundation details for the exact greenhouse model and configuration before starting ground work or buying materials. The manufacturer’s drawings and installation instructions should establish the required footprint and how the structure connects to the base. An installer or qualified foundation professional can assess the ground, drainage, level, and condition of any existing base against those requirements. Don’t assume the old foundation can be lifted, shifted, extended, or reused simply because the greenhouse is going back in the garden. Differences in layout or a base in poor condition can create reassembly problems, so have a qualified person verify it against the actual specifications rather than relying on a general rule.
Finish and inspect the new base before the greenhouse components arrive. Coordinate its dimensions, position, and access with the installer, and confirm that planned service routes won’t conflict with the foundation or assembly sequence. If you’ll replace the old unit, request the selected model’s own foundation drawing instead of using a similar-looking product page. The Pyramid-type greenhouse listing shows a range from 60 to 203 sq ft; that floor-area range doesn’t define base dimensions, anchoring details, or a suitable foundation design. Keep the relevant drawing on site so the installer can compare the prepared base with it before reassembly begins, and resolve any discrepancy first.
Plan utility connections, plants, and downtime
Make an inventory of irrigation, water lines, lights, controls, heaters, and drainage connected to or used in the greenhouse. Record which items are portable and which involve fixed connections; have an appropriately qualified professional disconnect and reconnect fixed services. Photograph routes and connection points only where they’re safely accessible, and include them in the installer’s plan. Think through the growing calendar as well: decide where plants will stay while the greenhouse is empty, how long the structure may be out of service, and whether you need temporary space for tools or supplies. Allow time for unexpected part identification or foundation work rather than scheduling the move as if dismantling and rebuilding happen in one uninterrupted day.
Use the new site plan to check whether the greenhouse will still serve the way you intend, including storage and working space. If that prompts you to consider a replacement with built-in storage, the greenhouse with built-in storage listing shows a floor-area range from 59.4 to 302 sq ft. Treat that as a broad catalog comparison, not confirmation of the exact footprint, internal layout, or foundation requirements of a selected configuration. Ask for its model-specific drawings before changing the base plan. Keeping growing needs and physical fit in the same discussion can help avoid moving the existing structure only to discover that the new arrangement doesn’t work for your routine.
Document parts during dismantling
Agree with the installer who will lead the dismantling, where components will be staged, and how the parts inventory will be maintained. Follow the exact manufacturer sequence and use the handling methods specified for the model. Glazing can be hazardous to remove or handle, so leave that work to a qualified installer or other suitably trained professional with appropriate equipment; don’t pry panels out or follow generic online instructions. Photograph each section in place and label the packaging or storage location using the manufacturer’s drawing or part references. Don’t put tape, marker, solvents, or adhesive on glazing unless the manufacturer says that method is suitable.
As parts come off, note missing, damaged, or previously replaced items and match components to the manual rather than relying on memory. Keep fasteners and fittings identified by their specified location; don’t substitute a part based on a rough visual match. Confirm exact spare-part identifiers with the manufacturer or installer, and record which items need replacement before rebuilding. If the findings make relocation doubtful, the Prestige greenhouse model page can serve as a reference for a separate replacement inquiry, not as a source of interchangeable components. Ask for a replacement proposal alongside the outstanding-parts list so you can compare two clearly defined options rather than committing to an incomplete rebuild.
Protect components during transport
Use the manufacturer’s handling and packaging guidance, coordinated with the installer or a carrier familiar with greenhouse components. Keep the parts inventory with the load so you can check what leaves the old site and what arrives at the new one. Glazing and frame components may need different protection, but don’t guess at stacking, support, or securing methods; have the person responsible for transport specify them for the actual parts. Label packages clearly and keep the records accessible rather than packing them with items that may be hard to reach. Plan where the components will be staged at the destination, protected from interference and out of the way of foundation and assembly work.
If you compare relocation with a new purchase, ask how delivery and handling would differ. The large backyard greenhouse listing identifies the Orangerie family, but a new greenhouse is a meaningful alternative only if its selected configuration suits your site and needs. Request package dimensions, handling requirements, and the delivery scope rather than assuming a new purchase eliminates access problems. For the existing greenhouse, confirm who is responsible for packing, loading, transport, unloading, and checking the inventory. Agree on how damage or missing parts will be recorded at each handoff. A written scope can prevent confusion between the dismantling crew, the carrier, and the people scheduled to rebuild the structure.

Reassemble to the manual and inspect the finished structure
Have a qualified installer rebuild the greenhouse in accordance with the exact model’s manual and the approved foundation details. Confirm that the correct parts are on site and that the prepared base matches the drawings before assembly proceeds. Don’t ask the installer to improvise holes, cuts, substitutions, or other structural changes to make components fit; pause and get manufacturer guidance if parts or dimensions don’t agree. Keep the labeled photos and inventory available during the work, since they can help resolve questions about a component’s original location. Any fixed service connections should be completed by the appropriate qualified professional, not folded into unreviewed assembly changes.
Before the installer signs off, review the finished work against the manufacturer’s instructions. Ask them to check that the frame and glazing have been assembled as specified, that doors and vents operate as intended, and that the base and any connected services have been handled within the agreed scope. If a component binds, doesn’t align, or can’t be identified, have the installer resolve it before treating the move as complete. Keep a record of any approved replacement parts and changes made during reassembly. These notes are useful if you later need to identify a component, ask the manufacturer a question, or arrange further service.
Compare the full costs and preserve the records
Ask for a written scope that separates dismantling, packing, transport, foundation work, reassembly, replacement parts, service disconnection or reconnection, and disposal. Confirm which tasks are included, what could change the estimate, and who is responsible if glazing or other components are damaged or missing. Ask whether relocating the structure affects any applicable warranty or service terms, and get the answer from the relevant manufacturer or seller rather than assuming. Comparing an itemized relocation quote with repair or replacement costs makes it easier to see where the main expense lies. Include the time without a usable greenhouse and any temporary arrangements for plants or supplies in that decision.
Keep the manual, technical drawings, original and updated part identifiers, site measurements, foundation records, photographs, and installer notes together after the work. Add any new purchase or service documents so the greenhouse’s history doesn’t depend on memory. If the move is delayed, the same file helps everyone return to the plan without repeating the identification process. A practical relocation ends with a structure that the installer has assembled to its model-specific instructions and a clear record of what was done. If the condition, parts, or site don’t support that outcome, choosing not to move the greenhouse can be the more sensible result.
Frequently asked questions
Can I move a greenhouse without taking it apart?
Do not assume that you can move it intact. A method that is safe for one model may not be safe for another, especially when the structure includes glazing. Follow the exact manufacturer instructions and get a qualified installer’s assessment. If neither clearly supports moving it assembled, plan for controlled dismantling and reassembly.
Can I reuse the greenhouse’s old foundation?
Only after an installer confirms that it meets the foundation requirements for the exact model and configuration, and that its dimensions and condition are suitable. A base that stays in the garden may still be in the wrong position or no longer fit the greenhouse. Don’t extend or alter it without manufacturer guidance and qualified review.
Does a listed square-foot range tell me whether a greenhouse will fit?
No. Floor area doesn’t give you the exact outside length and width, height, door clearance, or foundation outline for a particular configuration. Use the selected model’s technical drawing and compare it with measurements of the new site and access route.
What information should I provide when asking about replacement parts?
Provide the exact model or identification details, any order records, the part identifier from the manual or drawing, and clear photos showing the component and where it belongs. If you can’t identify a part, ask the manufacturer or installer to confirm it rather than ordering one based only on appearance.
What should I do if I can’t find the assembly manual?
Ask the manufacturer or seller to identify the correct instructions using your purchase records, any model or serial label, and photographs. Don’t use a manual for a similar-looking greenhouse as a substitute. Have a qualified installer review the documentation before dismantling begins.
A successful move starts with documentation and a fit check, not with lifting the first component. When the exact model’s instructions, parts inventory, new foundation, and installer plan all line up, you can assess a controlled dismantling and rebuild with fewer unknowns. If any of those pieces are missing, pause before work begins: problems discovered after dismantling can leave you with unidentified parts, an unsuitable base, or avoidable delays. Comparing the full relocation cost with the greenhouse’s condition and the demands of the new site gives you a clearer basis for deciding whether to move it at all.
