
Planning a Greenhouse as the Center of a Kitchen Garden
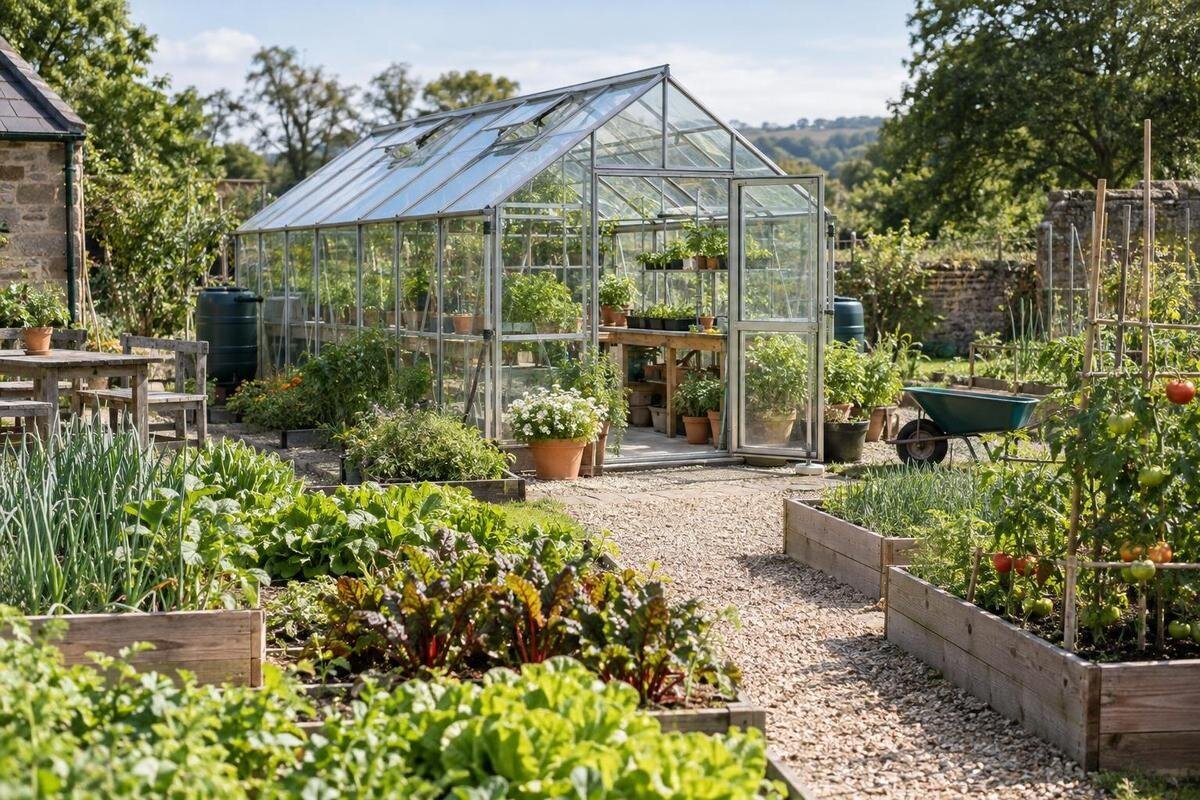
Kitchen garden planning
A kitchen-garden greenhouse can be the center of a growing space without dictating every bed and path. Its value depends on how well it connects to outdoor crops, water, compost, tools, and the route that carries produce toward the house. Draw those relationships before settling on a structure. That order helps reveal whether the greenhouse belongs near a particular work zone, how much outdoor ground should stay open, and where daily movement could become awkward. The goal is a connected garden plan, not a greenhouse surrounded by leftover space.

The greenhouse’s role in the kitchen garden
Start with a list of crops and jobs, not a model. Separate crops that need protected growing conditions from those that will occupy outdoor beds, and record when each task happens. Note whether greenhouse work means sowing and potting, holding plants for a short transition, or harvesting an indoor crop; then list outdoor jobs such as planting, weeding, picking, and adding compost. This inventory shows which trips will happen every week and which are occasional. A greenhouse need not sit at the geometric center of the property. Its practical position should make frequent tasks easier while leaving room for productive beds and clear movement outdoors.
Sketch the journey for each frequent job. Seed starting may involve supplies, a work surface, water, and a short carry to the next growing area; harvesting may call for a basket and a direct trip toward the kitchen or wash area. These routes can point to different ideal locations, so decide which work matters most and where one shared path can serve both. As an early size comparison, the Pyramid / Oasis greenhouse listing shows options from 60 to 203 sq ft. Use that range as a shortlist filter only: check the selected configuration, door position, internal arrangement, and external clearances against the actual plan.
Sun, shade, and drainage affect the whole growing area
Walk the proposed location at different times of day and record where buildings and mature trees shade the greenhouse and outdoor beds. A single sunny midday visit can hide morning or afternoon shade; deciduous trees can also change the picture between seasons. Compare the light reaching each planned bed with the crops you intend to grow, rather than assuming one exposure suits every vegetable. Note views from the house, access to the garden, and any areas where existing plants or structures limit future beds. This survey helps distinguish a convenient greenhouse location from the best place for the outdoor crops that need more light.
Add slope, puddling after rain, existing paths, gates, and room for continued access to the sketch. A convenient-looking low corner may stay wet or sit beyond the route used to bring in compost and remove harvests. Mark likely water-source locations too, without treating a sketch as a plumbing plan. If a lean-to format is under consideration, the Lean-To Greenhouse listing gives a range from 40 to 154 sq ft. Treat the model name and area as comparison points, then check the selected installation plan, supporting surface, and required clearances with the supplier or a qualified installer.
Map routes for people, harvests, tools, and soil
Draw the garden as a network of routes rather than a collection of separate features. Mark the main way in from the house or gate, then show branches to the greenhouse, each bed group, the compost area, and any planned water point. Include turns and places where a wheelbarrow needs to stop or unload; a line that fits on paper can still end at a crowded bed corner. Make the main route useful in both directions: supplies come in, while harvested produce goes out. Where possible, avoid making the greenhouse interior a shortcut between compost and outdoor beds.
Tools and supplies need a place that does not narrow those routes. If covered storage is part of the plan, the Limited Edition greenhouse with built-in storage listing identifies that feature and shows sizes from 59.4 to 302 sq ft. The listing does not establish what will fit or where storage sits in every configuration. Make an inventory of tools, trays, and bags, then confirm dimensions and access on the selected plan. If a separate shed or cabinet is needed, mark its footprint and the route to it too, rather than leaving storage to occupy a path later.
Arrange outdoor beds for access and rotation
Sketch vegetable beds before filling every open space around the greenhouse. Group crops according to their light, watering, and seasonal needs, and consider which beds may need to change position as you rotate crops. Keep the edges reachable from paths and consider how you will move between beds while carrying a basket or tool. A layout that looks compact on paper can be awkward if plants spread across a narrow route or if a bed end leaves no room to turn. Mark permanent plantings separately from annual beds so they do not quietly take over space needed for future crop changes.
Count working paths and turning areas as part of the layout, not as leftover ground. The Classic greenhouse size options range from 40.6 to 302.3 sq ft, so plot your preferred footprint at the same scale as the beds. Label annual beds and leave space on the drawing to record successive plantings. This helps you see whether a change of crop will also change access: tall supports, spreading plants, and temporary covers may occupy space beyond a bed’s soil surface. Keep those seasonal additions within designated growing areas rather than relying on a main path to accommodate them.

Water access for the greenhouse and outdoor beds
Map how water is used before deciding where a point should go. You may need to water inside the greenhouse, reach outdoor beds, fill a can, or rinse tools. Mark existing spigots and the routes a hose would take. A hose that repeatedly crosses the main path can become an obstacle during planting or harvest, even if the water source itself is convenient. If one source cannot serve every work area without awkward crossings, consider whether another point or a different route belongs in the plan.
For a new permanent connection or water-storage setup, ask a qualified professional to assess the source, capacity, route, and site requirements rather than estimating them from a garden sketch. When comparing the Prestige greenhouse options, listed from 40.6 to 302 sq ft, mark the intended watering area beside the selected footprint. Include somewhere to store a hose or watering can without blocking access. Keep greenhouse watering and outdoor bed watering distinct in your care notes: they may need attention at different times. A helper should be able to identify each area and reach it without moving equipment out of the way.
Compost location and handling space
Plan two journeys to the compost area: bringing in garden material and taking finished compost back to the beds. Place it where both trips are manageable without carrying a loaded wheelbarrow through the greenhouse. Check what access the chosen compost system needs for handling and upkeep, and allow room for any temporary staging that is part of your routine. The most hidden corner is not always the easiest to maintain; if it adds distance to every return trip, finished compost may be harder to use where it is needed.
Consider the surrounding beds, drainage, neighbors, and likely pest pressure when comparing locations. Keep the main path clear and leave enough working access for the system’s instructions. If you are considering the Limited Edition greenhouse range, with listed areas from 40.6 to 302 sq ft, reserve the compost handling area alongside—not within—the greenhouse footprint on your drawing. Show where a wheelbarrow will stand during loading and where material can wait while you work. Check whether those temporary uses obstruct a gate or bed entrance. A compost area needs usable space around it, not merely a corner large enough for a bin.
Keep the greenhouse entrance clear
Treat the space just outside the entrance as a work area. You may need to set down a tray, turn with a basket, or pause while someone else passes. Do not place a bed edge, water point, or compost route where it blocks that approach. Check the selected greenhouse drawing for entrance position and opening space rather than assuming all configurations work the same way. A clear arrival point makes it easier to carry plants and harvests without turning the doorway into a storage spot or a junction for every garden route.
Consider what happens when two tasks meet: one person carrying plants out while another brings produce in, for example. Sketch the approach with people and equipment moving both ways, and include a place to pause if the route is busy. For the Garden View T-Greenhouse, listed from 178 to 323 sq ft, confirm the entrance arrangement on the selected drawing and align the approach with your main garden path. Check where a tray can rest without obstructing the door. Also consider the approach after rain: its surface and drainage should be reviewed as part of the site plan, not left until the surrounding beds are planted.
Balance the greenhouse footprint with outdoor beds
Compare the greenhouse with the usable garden as a whole, not just the patch where the structure might stand. On a scaled drawing, include outdoor beds, main paths, compost access, water routes, and space needed around the greenhouse according to its installation information. Mark existing features and any future beds you want to preserve room for. This makes trade-offs visible: a larger enclosed area may leave less room for outdoor growing, while a smaller one may not support the tasks you planned. Floor area is not the same as planting area, since movement and work space also use some of it.
The Bloomcabin Orangerie size range runs from 506 to 753 sq ft. Compare that scale with the outdoor growing area you want to retain and the time available for upkeep. Make two versions of the garden drawing if you are weighing substantially different greenhouse sizes, keeping the same essential beds and service routes in both. The comparison will show what must move or disappear to accommodate each option. Then consider who will water and maintain the enclosed growing area throughout the season. Choose the size that serves the planned work without displacing outdoor crops you value or creating more growing space than you intend to manage.

Plan responsibilities for a shared kitchen garden
When several people use the garden, add responsibilities to the drawing. Record who looks after each bed, who waters the greenhouse, who handles compost, and where shared tools belong. A simple rota with a backup for absences can prevent important jobs from depending on one person. Also agree on how harvests and supplies move through common areas. A route that feels clear to the person who planned it may be less obvious to someone visiting for the first time, so make the main paths and work zones easy to identify.
Base access and turning space on the people and equipment that will actually use the site, not on an assumed typical user. Ask regular gardeners what they carry, where they need to pause, and which tasks are difficult to reach. If the garden is part of an organization or open to visitors, confirm applicable access and facility requirements with the responsible organization and relevant local professionals. Those requirements depend on the actual site and use; a generic garden sketch cannot establish them. Include access and care arrangements in the plan before the layout is treated as final.
Test the plan with real tasks and seasonal changes
Before committing to a layout, mark bed edges and path routes on the ground with temporary markers. Walk from the entrance to the greenhouse, from the greenhouse to each bed, and from the beds to compost with the kinds of loads you expect to carry. Try a wheelbarrow turn, a watering route, and a two-person pass at the busiest point. These simple tests can expose a blocked corner or unnecessary detour before it becomes a fixed feature. Note where supplies are set down and whether the next task can begin without moving them into a path.
Review the drawing across the growing season as well as on the day you make it. Shade from trees may change, beds may be replanted, and a route that works for sowing may become crowded during harvest. Before ordering a greenhouse, compare the selected configuration’s exact plan and installation requirements with the site layout, and ask a qualified installer about details that depend on the location. Keep a copy of the final garden sketch with bed use, water points, compost access, and paths marked; it gives future helpers a practical reference when the plan changes.
Frequently asked questions
How close should outdoor beds be to the greenhouse?
There is no single distance that works for every garden. Keep beds convenient for frequent trips, while allowing for sunlight, working space, and clear paths between them. Draw the route you will use with a tray or harvest basket, then check it against the actual greenhouse footprint and entrance.
Should the compost area be next to the greenhouse?
It should be easy to reach, but it does not have to be immediately beside the structure. Plan one route for bringing in garden material and another practical route for taking finished compost to beds. Keep the compost system accessible for its own upkeep and clear of the main greenhouse entrance.
Where should a garden water point go?
Place it near the areas that need water most often, including outdoor beds and any planned greenhouse watering area. Map how a hose would run so it does not routinely cross a busy path. For a new permanent connection or storage setup, have a qualified professional review the site and requirements.
How large should a greenhouse be for a kitchen garden?
Base the choice on the crops, tasks, and maintenance time you expect to manage, then fit the selected greenhouse plan into the full garden drawing. Listed area alone does not show working space, entrance locations, or how much ground should remain for outdoor beds and routes.
What changes when several people share the garden?
Plan for the people who will actually use and maintain it. Agree on bed use, watering and compost responsibilities, tool locations, and a backup plan for absences. Check paths and turning space with the equipment users bring, and confirm any site-specific access or facility requirements with the responsible organization.
When the greenhouse is planned with the beds, water, compost, and paths, it becomes a working hub rather than an isolated enclosure. The strongest layout is not the one with the most structures or the shortest straight line; it is the one that makes frequent jobs manageable and keeps outdoor growing space productive. Mark the actual greenhouse footprint, keep working routes visible on the drawing, and check the plan against the people and tasks that will use it. Then the greenhouse supports the kitchen garden through everyday work, not just on planting day.
