
Can You Reuse an Old Shed Base for a Greenhouse?
Greenhouse foundation guide
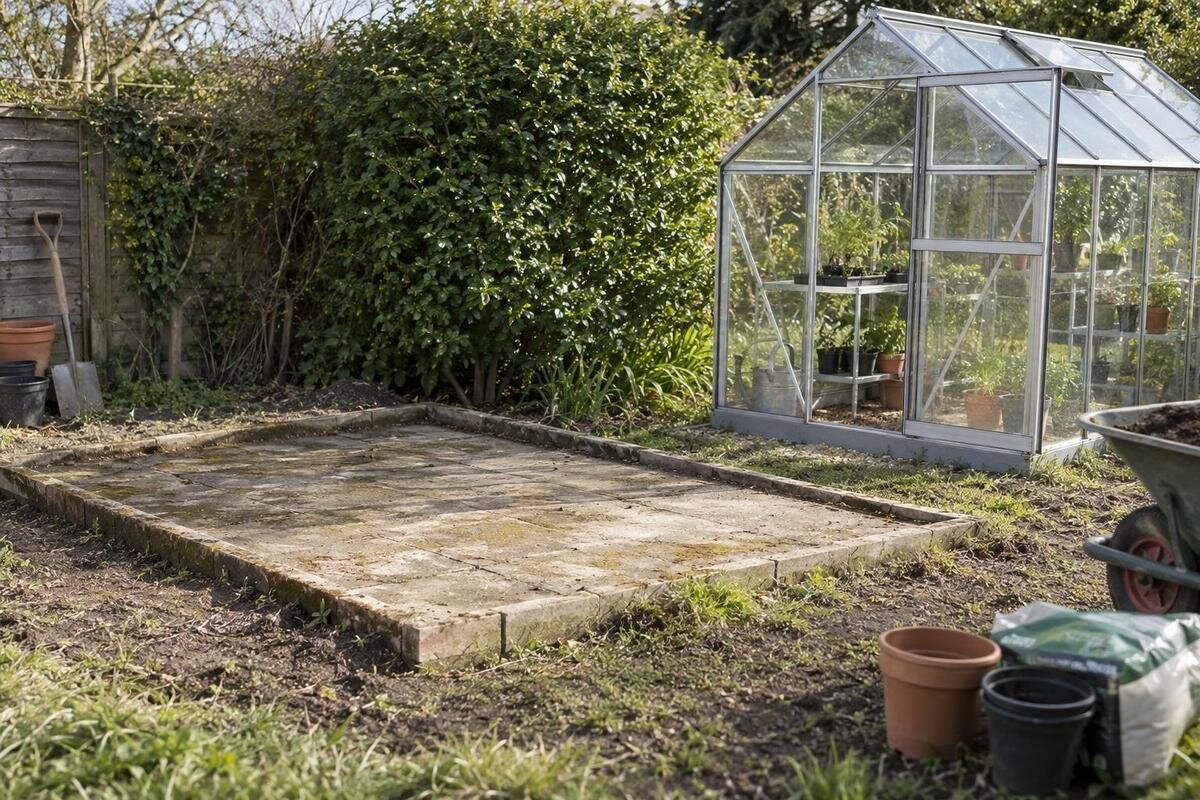
An old shed slab can sometimes serve as a greenhouse base, but its former use is not proof that it fits or can support a new installation. Check its dimensions, level, square corners, condition, drainage, and available anchoring against the drawing for the exact greenhouse model and configuration. Greenhouse frames and their attachment needs differ from sheds, so uncertain concrete, movement, or site conditions call for a qualified foundation review rather than a guess.

When an old shed slab can be reused
An old slab can sometimes serve as a greenhouse base, but two questions have to be answered separately: Is the concrete and ground beneath it in acceptable condition, and does its layout meet the selected greenhouse’s requirements? A pad may be too small, out of square, uneven, cracked, or poorly positioned even if it looks substantial. The reverse is also true: weathered concrete is not automatically unusable. Age and appearance are clues, not a verdict; history, movement, surface condition, and a workable attachment plan matter. A poor fit can make frame assembly and door alignment difficult. The shed may have hidden edge damage or low spots, so inspect the full slab rather than only the exposed center.
Do not treat a shed’s former use, floor area, or anchor pattern as confirmation for a greenhouse. The frame, support perimeter, and fastening arrangement may differ, and the old structure may not have addressed the same site conditions. Start with the manufacturer’s base drawing for the exact model, size, and configuration; a product photo or model name cannot replace it. If you are considering the Oasis pyramid greenhouse, request that drawing before deciding whether to retain the slab. Keep model compatibility and concrete condition as separate questions: a drawing can establish the required layout, while a qualified concrete or foundation professional can assess uncertain construction, cracks, or support.
Measure the usable footprint, not the old floor area
Get the manufacturer’s base or foundation drawing for the exact model, selected size, and configuration. Compare the slab with the dimensions and perimeter shown there—not the greenhouse’s roof outline, advertised growing area, or the shed’s former interior floor size. Those figures can describe different boundaries. Measure the usable slab length and width at several points; note any taper, clipped corner, notch, step, wall, or obstruction that reduces the space available for the frame. A large total area can still leave an unusable strip where the base must sit. Separate the frame footprint from the path you need to reach its doorway. If edges are buried, mark the visible boundary as uncertain rather than treating it as a confirmed dimension.
Make a simple sketch with those measurements, the intended greenhouse orientation, door side, and nearby edges or obstacles. Compare the required frame perimeter and any anchor positions with the concrete; check whether the full base can sit where the drawing expects it, rather than leaving one side over an edge. Do not scale an outline from a photograph or infer foundation dimensions from a published area range. For the limited-edition greenhouse with built-in storage, request the complete base layout for the chosen configuration so your comparison includes the storage portion as well as the growing space. Treat attached paving or a later concrete patch as a separate surface until its continuity and support have been reviewed.
Check level and flatness separately
Level and flatness are related, but they are not the same check. A slab can be evenly sloped, or generally level with a hollow, ridge, or raised corner; either condition can affect how the base frame sits. Check the intended frame perimeter and any specified interior support points with a straightedge and level, taking readings at corners and along each side rather than relying on one center reading. Note the direction and location of high and low spots. A surface that looks even across the center may still dip under one frame rail. Repeat readings at the same reference points so the notes show a pattern rather than an isolated result. Include the planned doorway, where changes in height can affect the threshold and transition to surrounding ground.
Compare observations with the level and flatness limits in the selected greenhouse’s instructions or base drawing. If no limit is stated, ask the manufacturer or installer what they require before ordering or building. Do not assume a small slope can be ignored or that shims, a topping layer, or leveling compound is an approved correction; those choices change finished height and how the base bears on the slab. When evaluating a Prestige greenhouse, submit your readings with the selected configuration and identify where each measurement was taken. That gives the reviewer a useful record of the surface rather than a general description such as “mostly level.”
Verify the greenhouse footprint is square
Square corners matter because the base frame has a defined shape. Mark the proposed greenhouse footprint from the drawing, not simply the slab’s outside corners, and check side lengths and corner-to-corner diagonals for a rectangular layout. If the diagonals do not agree, the marked outline is not square. Take diagonal measurements from the proposed frame corners rather than from chipped or rounded concrete edges. Also note whether the concrete edge itself is crooked or whether the slab is oversized and a correctly aligned frame could sit inside it. A visual impression from one corner is not enough to establish the layout.
An out-of-square marked footprint can put the frame out of alignment or move its anchor points toward an edge; forcing the frame into place is not a reliable correction. Equal diagonals alone do not prove every dimension is right, so compare the complete outline and side lengths with the model drawing. For a nonrectangular or stepped footprint, check every corner and segment rather than relying on the two-diagonal test. If you are considering the Bloomcabin Orangerie, obtain its selected-size drawing before marking the layout. Any proposed rotation or shift must preserve the required support and attachment positions. Keep the sketch and measurements together so a reviewer can identify whether a mismatch comes from the slab edge, orientation, or marked frame line.

Inspect cracks, patches, and signs of movement
Inspect all exposed concrete before cleaning or covering it. Record cracks, chipped or spalled areas, joints, previous patching, and any visible vertical offset; note whether a crack crosses the planned frame line or a proposed anchor point. Take dated photos from the same angle if you need to track a change. A fine surface line and a crack with displacement are not equivalent observations, but appearance alone cannot identify the cause or establish that the slab is sound. Check the corners and perimeter as well as the center, because an intact-looking middle can coexist with damaged edges. Pair a close-up with a wider photo that shows where each crack sits on the slab.
Give special attention to cracks that appear to be widening, reopen after repairs, accompany settlement, or have one side higher than the other. Do not treat filler or a fresh surface coating as proof that movement has stopped; the underlying cause may remain. A qualified concrete or foundation professional can assess whether the crack is superficial, active, or relevant to greenhouse support and anchoring. Share its location and history, not just one close-up photograph. If old shed bolts cracked the surrounding concrete or were cut off, include those spots in the same review. For a proposed Classic aluminum greenhouse, mark the selected frame outline on your inspection sketch so the reviewer can see which defects lie beneath it.
Trace rainwater around the slab
Water behavior deserves its own check, because a dry inspection can miss where rain gathers or runs. After ordinary rainfall, look for standing water on the slab and along its outside edges; note whether runoff heads toward the planned doorway, collects on one side, or carries soil away. Record downspouts, nearby paving, irrigation, and low points that send water toward the base. Persistent wet areas, erosion, or water entering from higher ground can affect both use and support at the slab edge. Photograph the flow path, not just a puddle. If the site is dry during your visit, ask what happens after storms and label that information as reported rather than observed.
Do not assume that the greenhouse frame, its floor treatment, or a bead of sealant should solve a drainage problem. First identify the water source and compare the planned base with the manufacturer’s assembly details; the base outline itself may not explain how surface water should leave the area. Ask the installer or a qualified site professional what needs correction and whether it could alter the slab or anchor locations. Consider how greenhouse irrigation water will be managed too; an old shed floor may not have been planned for frequent wetting. If your shortlist includes the aluminum lean-to greenhouse, include runoff from the adjoining building in the site review, along with water crossing the slab from surrounding ground.
Match the greenhouse anchors to the concrete
An old anchor pattern is not automatically reusable. Locate every bolt, hole, filled opening, or patched area and compare it with the attachment positions in the selected greenhouse drawing. Existing fasteners may not line up with the frame; even if they do, their condition and the surrounding concrete still need assessment. Count alone is not enough: the specified connection, its location, and the concrete at each point must all be suitable. Mark holes in relation to the proposed frame corners, not just the slab’s outside edge. If the drawing calls for an anchoring method that the slab cannot accept, the surface is not ready just because the greenhouse footprint fits. Disclose any point that cannot be reached or used.
Before drilling or changing anchors, confirm the permitted attachment method with the greenhouse maker or installer and ask a qualified contractor to review the slab at those positions. Edge distance, concrete condition, and concealed reinforcement or services can matter, so do not choose fasteners, embedment, spacing, or a substitute pattern by copying the shed. Whether a connection is adequate depends on the specified system and site; a generic bolt count or a neighbor’s installation does not answer that question. For the limited-edition aluminum greenhouse, obtain the attachment details for the exact size and configuration and compare them with your hole-location sketch. Establish who will confirm the connection and whether any existing holes can be used.
Check the slab’s edges and underlying support
Surface appearance cannot tell you everything about what is under the slab. Its thickness, reinforcement, joints, and the preparation beneath it may be unknown, and a concrete pad can be stable at the center while an edge or supporting soil has settled. Look for exposed slab edges, open joints, patches, a change in height across a crack, gaps, and erosion or depressions in adjacent ground. Gather old plans or contractor records if available, but treat them as background rather than proof of current condition. If edging, soil, or a later floor finish hides part of the perimeter, record that uncertainty rather than assuming the visible line is the slab edge.
Do not chip or drill into the slab solely to find out how it was built. A qualified foundation professional can decide whether the available records and visible evidence are enough or whether further inspection is needed. Ask them to assess the concrete, joints, slab edge, and support conditions in relation to the selected greenhouse drawing, not to assume that every shed pad has a standard construction. If you are considering the Garden View T-Greenhouse, provide its complete base drawing so the assessment covers every required support location. Note later changes to the shed area, including added paving or repairs, because they may conceal the original construction or make separate surfaces appear continuous.

Decide whether a repair can solve the mismatch
A mismatch is not always solved by patching. A chipped surface, an uneven plane, a poor outline, active movement, and drainage problems have different causes; a surface repair can hide a symptom without correcting the support. Grinding, topping, or extending concrete can change finished elevation, footprint, water path, and the place where anchors can be installed. Before commissioning any work, ask whether the proposed repaired surface will satisfy the greenhouse manufacturer’s requirements and keep the planned attachment positions usable. A repair that fixes one issue may create another, such as changing a threshold or covering an old hole.
Have the qualified professional describe the cause of the defect and the proposed remedy, then have the maker or installer confirm that the changed base remains compatible with the selected model. Do not move anchors, add a narrow strip, or fill a low area as a shortcut unless the full arrangement is reviewed. If a suitable repair cannot be confirmed, compare reusing the slab with building a new base. The goal is not to preserve concrete at any cost; it is a support and layout that can be verified before the greenhouse arrives. A simple record can mark each point as acceptable, correction needed, or still unknown. Review the surface again when repair work is complete.
Prepare a site record before installation
Assemble a short site record: a sketch with slab dimensions and diagonals, level observations, photographs of all corners and edges, close-ups of cracks and patches, anchor-hole locations, and water behavior after rain. Add any drawings, receipts, or construction details from the shed, and clearly label information you do not know. Include views of the surrounding ground, not only tight concrete close-ups. Send the exact greenhouse model, size, and configuration with its current base drawing. Keep each photo linked to a location on the sketch so a reviewer can place it.
Divide the questions between the people who can answer them: ask the greenhouse manufacturer or supplier to identify the required footprint and attachment details; have a qualified foundation professional assess the existing slab and soil; and ask the installer to confirm that the proposed setup can be assembled as specified. A product page cannot approve concrete, and a site visit cannot replace the model drawing. Ask for clear conditions or corrections rather than interpreting a casual visual opinion as approval. Pause if any dimension, support concern, drainage issue, or anchor arrangement remains unresolved. Reuse is reasonable only when the slab’s condition and greenhouse requirements have both been checked.
Frequently asked questions
Can I put a greenhouse directly on the shed slab?
Sometimes. Confirm the slab’s dimensions, geometry, condition, drainage, and attachment options against the current drawing for the exact greenhouse size and configuration. A shed may have stood securely on it, but the old footprint and anchoring do not establish that a different frame fits or can be attached. If support or movement is uncertain, get a qualified foundation assessment.
Does the slab have to be perfectly level?
No single tolerance applies to every model. The base must meet the level and flatness requirements in the manufacturer’s instructions or drawing. Record high and low spots, then ask the manufacturer or installer about any unstated tolerance. Avoid leveling or shimming until the correction is confirmed, because it can change the support surface, finished height, and anchor positions.
Can I reuse the shed’s anchor bolts?
Not automatically. Reuse them only if the model-specific instructions allow those positions and the fasteners, holes, concrete, and connection can all be confirmed as suitable. Old bolts may be misplaced, loose, damaged, or too close to an edge. Have the installer or a qualified contractor review them before using them or drilling elsewhere.
Can I patch a crack and use the slab?
Possibly, but a surface patch alone does not show why the crack formed or whether movement has stopped. Photograph its location, note any change or vertical offset, and have a qualified concrete or foundation professional assess cracks that reopen after repairs, widen, or accompany settlement. Then confirm that the proposed repair restores the support and attachment arrangement the greenhouse requires.
Do puddles automatically mean the slab is unusable?
Water at the slab is a reason to investigate, not a stand-alone verdict. Note where it remains, whether runoff reaches the planned frame or doorway, and whether soil is eroding near an edge. Compare those observations with the greenhouse assembly and site drainage plan. A qualified professional can identify whether the source needs correction before the slab is reused.
Reusing a shed slab can avoid rebuilding a base, but that only makes sense when the concrete, footprint, and connection have been verified for the greenhouse being installed. The decisive evidence is the selected model’s drawing alongside measurements and observations from the actual site—not the slab’s age, surface appearance, or history as a shed base. If the checks agree and any needed correction is confirmed by the relevant professionals, reuse may be reasonable. If a key fact remains unknown, treat the slab as unverified rather than forcing the greenhouse to fit.
