
Choosing and Managing Peat-Free Greenhouse Media
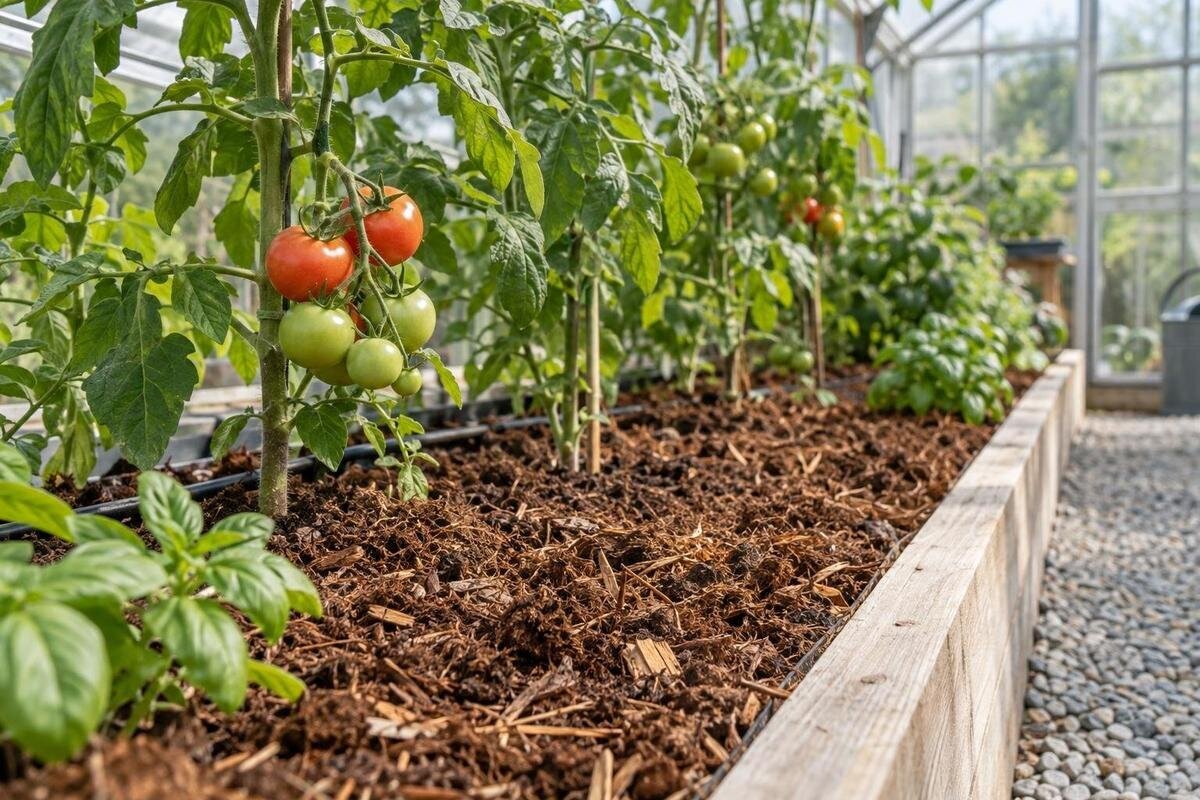
Greenhouse growing media
Peat-free greenhouse media are not a single recipe. Mixes can differ in how they hold water, leave air around roots and supply nutrients, so changing from peat-based media may call for a different watering and feeding routine. Start with the product’s intended use and ingredient details, then check moisture at root level and observe how the crop responds. This guide explains the main ingredients, how to compare mixes for beds and containers, and what to look for when buying and managing a new medium. The aim is not to find one blend for every crop, but to choose and use a product that suits your growing system.

What peat-free means on the label
Peat-free should mean that peat is absent from the mix; reduced peat describes a different product. The label may list several ingredients without stating their proportions, and formulations can change, so the product name alone cannot tell you how the medium will hold water or nutrients. Look for a clear intended use, ingredient details and, where provided, pH, electrical conductivity (EC) and information about any starter fertiliser. If a bag says all-purpose, read the full guidance: that description does not necessarily make it suitable for seed raising, long-season crops or permanent greenhouse beds. Treat the label as a starting point, then compare it with your crop and growing method.
Here, growing medium means the material around roots in a pot, growbag or bed; it need not be native soil. A bagged potting mix may be designed for use on its own, whereas compost or a soil improver may be intended for blending with existing ground. Confusing these uses can leave roots in a mix that holds too much water, dries too rapidly or supplies nutrients unpredictably. In an in-ground greenhouse bed, assess the existing soil separately and check that the purchased material is suitable for that use. A product made for pots is not automatically suitable as the entire bed, so check the directions before filling a large area.
How common ingredients affect a growing medium
Coir, made from coconut husk fibre, can contribute water retention and air space, but the balance depends on fibre grade, particle size and the proportion in the blend. Composted bark and other woody ingredients can create a coarser structure; their effect changes as particles break down. Compost can contribute organic matter and nutrients, yet its maturity, salt content and nutrient release vary with the material and production process. Some wood-rich mixes may temporarily reduce available nitrogen as microbes decompose the fibre. These are tendencies, not guarantees, so a component list is most useful when it gives proportions and the supplier explains the finished mix’s intended use.
Perlite and pumice are examples of mineral components used to alter air space and drainage. Their effect depends on particle size and amount, and they do not provide a complete root environment by themselves. Fine particles can fill gaps between coarse pieces, so proportions matter as much as the ingredient names. Two bags listing coir, compost and bark can behave differently if their grades or ratios differ. Avoid choosing a mix solely because it contains a familiar ingredient. Look at the finished texture, intended application and instructions; if you are uncertain how it will perform with your crop, try a small quantity before filling every container or bed.
Match the medium to the crop and growing system
Choose a medium with the crop’s growing period and root environment in mind. Seedlings generally need a fine, consistent medium, while a crop kept in a container for a long season needs a structure that can support its roots and provide a dependable supply of water and nutrients. Fruiting crops and leafy crops do not necessarily have the same requirements, and the right choice also depends on the product’s intended use. These are broad comparisons, not recipes: check crop-specific guidance and the mix label rather than assuming one formulation will suit every greenhouse plant.
Containers and growbags have a limited volume of medium, so moisture and nutrients can change quickly within them. A bed holds a larger shared volume, and an in-ground bed also interacts with the soil beneath it. Allow for those differences when planning how much to buy and how often to check moisture. If you are selecting a structure as well, compare your proposed growing layout with the available details for the T-Model Orangery Greenhouse. Draw in beds, containers and access routes rather than treating the whole floor as planting space. For a mixed setup, identify which crops will share a bed and which will have their own containers. This gives you a clearer basis for choosing media for each use, instead of ordering one blend simply because everything will be grown under the same cover.
Why air space and drainage matter
Roots need access to both water and air. A very fine or compacted medium can remain wet for too long, while an overly coarse blend may drain rapidly and leave roots short of water between checks. The aim is not simply to make water run through quickly; it is to have a root zone that holds useful moisture while allowing excess water to leave. Texture can change as a mix settles or as organic components break down, so inspect it after filling and during the growing season rather than relying only on how it looked in the bag.
A suitable mix cannot compensate for a blocked outlet or a container that has nowhere for excess water to go. Nor should a layer of coarse material at the bottom be treated as a substitute for a suitable medium and working drainage. Include drainage checks in your layout planning: you need to see whether water is leaving containers and be able to reach their outlets. When comparing the Pyramid Greenhouse with your proposed setup, use published measurements and layout details where available. Mark the positions of beds, pots and paths, including the gaps needed to inspect them. This keeps the drainage assessment practical: choosing a medium and arranging containers are related decisions, but a freely draining blend does not remove the need to check the containers themselves.

Adjust watering after changing the mix
Do not carry over a watering timetable unchanged when you switch to a peat-free medium. Ingredients and particle sizes affect how quickly water moves through a mix and how long it remains available to roots. The surface can look dry while the root zone is still moist, or look damp while a container’s centre remains dry. Check at more than one point and below the surface, especially in larger pots and beds. Consider the crop, plant size, recent weather and greenhouse conditions as well as the medium; the same mix can need different attention at different stages of growth.
If the product arrives very dry or compressed, follow the supplier’s instructions for preparing it and moisten it evenly before planting. Water across the whole surface, then check whether moisture has reached the root zone. If water runs down a channel or off a dry surface, smaller, even applications with time to soak in may work better than flooding it at once. Keep drainage openings clear and do not leave roots sitting in standing water. For a layout based on the Bloomcabin Prestige Greenhouse, consider how you will reach each growing position both to water and to check the result. Reaching the front of a bed is not the same as being able to assess moisture throughout it. Plan your checking points alongside your watering points, rather than assuming that every pot or part of a bed received water evenly.
Manage nutrients and pH with care
Check whether the medium contains starter fertiliser and how long the supplier expects it to support plants. Other products may contain little available nutrition and require a feeding plan suited to the crop. Compost can release nutrients at different rates, while some woody ingredients may temporarily affect available nitrogen as they decompose. Coir products can also differ in preparation and salt content. These variations make a universal feeding schedule unreliable. Follow the product guidance and crop-specific advice, and do not add extra fertiliser simply because the mix is peat-free.
For a persistent problem, consider checking the medium’s pH and EC, as well as the water used for irrigation; the source water can influence conditions around the roots. Do not diagnose a nutrient shortage from leaf colour alone, because moisture problems and other growing conditions can produce similar signs. Keep feeds labelled and dry, and store them according to their instructions. The Limited Edition Aluminium Greenhouses with Storage may be part of your greenhouse comparison, but assess the published storage details separately from your choice of growing medium. List what you need to store, including opened bags and labelled feeds, and compare those needs with the stated provision. Keep the original product instructions accessible so that a later feeding decision is based on the medium and fertiliser you actually used.
Measure the amount before filling beds or pots
Estimate the amount of medium from the space you intend to fill, not from the greenhouse’s total floor area. For a rectangular bed, multiply its length by its width and the depth you plan to fill; use the same units for all three measurements. If the dimensions are in metres, the result is cubic metres, and one cubic metre equals 1,000 litres. For pots, use their capacity or measure the actual fill volume. Compare your estimate with the volume stated on the bag, since product weight is not a reliable substitute for volume.
Avoid pressing a medium down hard just to make more fit: compaction can reduce the air space around roots. Follow the product’s filling guidance, water it as directed and allow for normal settling when deciding whether a small top-up will be needed. Keep a separate quantity for each bed or group of containers in your estimate, especially if they will use different mixes. Then total the quantities for each product before comparing bag sizes. When assessing the Classic aluminium greenhouse, use the available layout information to establish where those beds and containers will go. The structure’s overall area is not the quantity you need to fill. Recording the planned fill depth alongside each bed’s dimensions also makes it easier to revise the order if your growing layout changes.
Choose a supplier and product you can assess
A useful label tells you whether the product is peat-free or only reduced in peat, what it is intended for, and which ingredients it contains. Where the supplier provides them, compare component proportions, pH, EC and starter-fertiliser information. Ask whether a product is suitable for your intended crop and whether its stated volume is loose, compressed or measured in another way. Environmental claims also deserve a closer look: peat-free describes an ingredient choice, but does not by itself explain the origin or production of every component.
Consistency matters when you need enough medium for a whole bed or a run of containers. Check the batch details, retain the label and ask the supplier whether the formulation has changed if a later bag behaves differently. Before placing a larger order, establish which product and pack size the supplier will provide; do not assume that a familiar name means the ingredient blend is unchanged. Keep unopened bags in the conditions specified by the supplier. Order quantities should reflect your planting plan: the Spacious Greenhouse listing gives a floor-area range of 47 to 70 m², not a planting area or a volume of medium. Use your measured bed volumes and container capacities to discuss quantities with the supplier, keeping different formulations separate in the order.

Keep records when testing a new mix
Write down the product and batch, planting date, crop, container or bed, watering pattern and feeding routine. Note conditions that could affect the result, such as a change in weather or water source. A brief record helps distinguish a medium that drains differently from a routine that has changed at the same time. It is especially useful when a supplier updates a formulation or when you reuse a type of container in a new season. Without those notes, it is easy to attribute a difference to the mix when several factors have changed.
When you are unsure about a new formulation, test it on a small, comparable group of plants before changing the whole greenhouse. Use the same crop and type of container, begin with comparable routines, and avoid deliberately changing several factors at once. If moisture checks show that one mix needs a watering adjustment, record it rather than keeping an unsuitable routine simply to make the comparison look consistent. Note both crop performance and the attention each mix requires. If a future plan involves changing between containers and beds, compare the available details for the Limited Edition Aluminium Greenhouses with that proposed layout. Keep the results of your container trial separate from assumptions about a bed: the trial describes the conditions you tested, not every possible use of the medium.
Check the root zone when plants struggle
Wilting, slow growth or discoloured leaves do not point to a single cause. Check moisture below the surface, whether water drains away, and whether roots are crowded or sitting in persistently wet medium. Consider recent changes to watering, feeding, greenhouse conditions and the product itself. A mix that dries quickly may need different monitoring from one that stays wet, but extra water or fertiliser is not automatically the answer. Look at the whole growing setup before deciding that the ingredients are at fault.
Make one measured adjustment, then observe the crop before making another. Note what prompted the change and which plants were affected, so that you can judge whether the response matches the original problem. If a new batch seems inconsistent, compare its label and batch details with your notes and ask the supplier for product guidance. Access for inspection deserves attention when choosing a structure such as the Lean-to Greenhouse. Compare your proposed bed and container positions with the published layout information, where available, and identify how you will reach the plants you need to examine. Do not restrict checks to the easiest pots to reach. When a problem appears confined to one area, compare its moisture and drainage with an unaffected area before changing the routine throughout the greenhouse.
Frequently asked questions
Is every peat-free mix suitable for greenhouse vegetables?
No. Mixes differ in water retention, structure and nutrient content, and some are intended for seed raising or potting rather than long-season crops or beds. Check the label’s intended use and compare it with your crop and growing system.
Should I water more often after switching from peat?
Not automatically. A peat-free mix may dry or re-wet differently, but the rate also depends on the ingredients, container, crop and greenhouse conditions. Check moisture below the surface and adjust from what you observe rather than following a fixed schedule.
Do peat-free mixes always need extra fertiliser?
No. Some contain starter fertiliser; others rely on nutrients you add. Compost and woody ingredients also behave differently. Read the product guidance and consider the crop, growth stage and available test results before changing your feeding routine.
Can coir be used on its own?
That depends on the product and crop. Coir can contribute water retention and air space, but it does not necessarily supply the nutrients a crop needs. Check how the coir was prepared, what the supplier recommends and whether the intended use calls for a blended medium.
Can I use any peat-free potting mix to fill a greenhouse bed?
Not necessarily. A mix designed for containers may not be intended for use as the entire contents of a bed. Check the label, consider the existing soil if the bed is in-ground, and calculate the volume you need before buying.
A peat-free label tells you what a mix leaves out, not how it will behave in your greenhouse. Compare its intended use and ingredients, prepare it as directed, and manage watering and feeding by checking the root zone and the crop. Keep notes when you test a new blend so that any adjustment is based on what happened, rather than on the label alone.
