
Automatic Greenhouse Vent Opener Closed? Checks
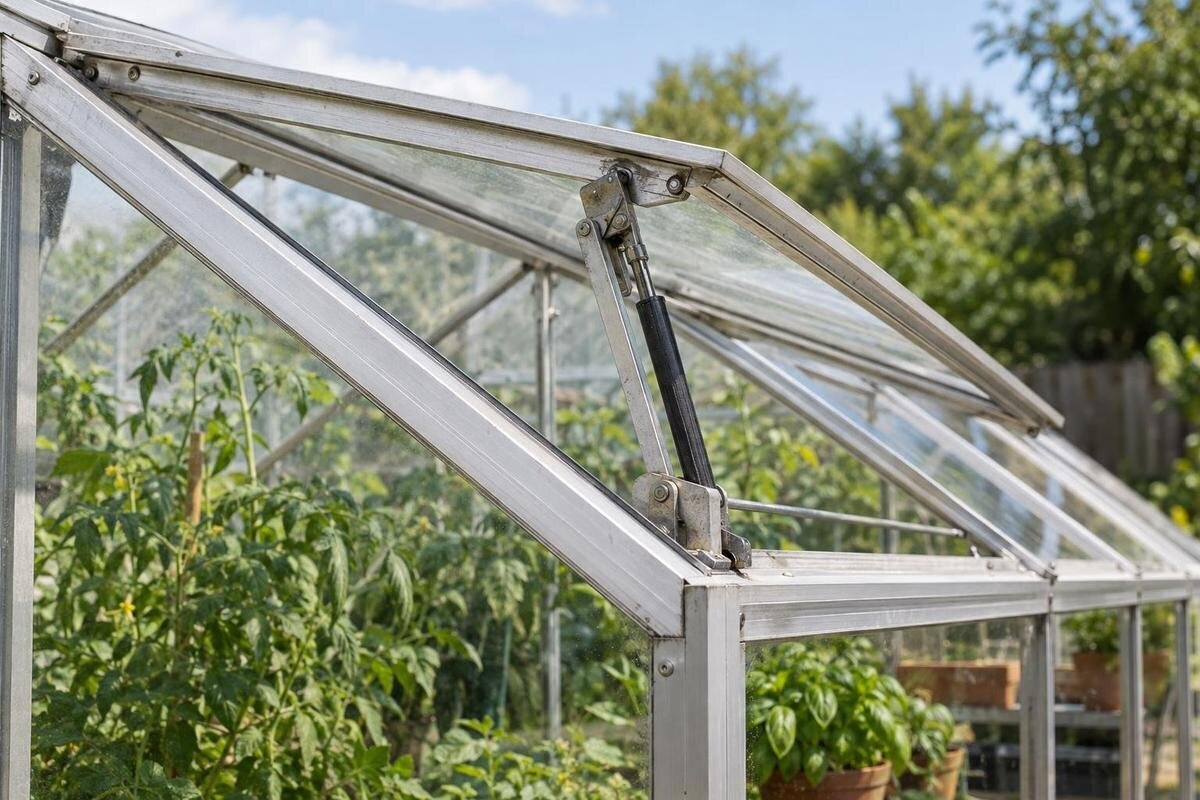
Greenhouse ventilation troubleshooting
An automatic greenhouse vent opener that stays closed is not necessarily broken: it may not have reached its model-specific trigger temperature, or the vent may be set up, loaded or obstructed in a way the mechanism cannot handle. Use the exact opener manual and work through safe observations before changing anything.

Identify the opener, vent and greenhouse
Before adjusting anything, establish what is actually fitted. Read the label or paperwork on the opener and note its maker, model, control type and any stated adjustment. A passive temperature-responsive actuator is not diagnosed in the same way as a motorised opener with a controller, and models can have different trigger settings and fitting arrangements. A model number may appear on the unit, receipt or instruction sheet; a product name alone is not enough. Photograph the label and brackets from a safe position. If the opener has a display, note its status or error message exactly, but do not remove a cover or probe wiring. Record whether parts have been replaced before, since a mismatch can resemble a temperature fault.
Identify the moving panel, often called the vent sash, and note which way it opens. A photograph of the whole vent and a closer view of the brackets can help a supplier distinguish versions; do not move the panel to get a better angle. Record the greenhouse make, model or range as well. The Aluminium Classic Greenhouse product name identifies a greenhouse range, but it does not tell you which opener is installed or whether a replacement actuator fits. Keep the two sets of model details together, then find the opener’s own manual. If you cannot match the label to an instruction sheet, ask the opener maker or greenhouse supplier for the exact document rather than following guidance for a similar-looking unit.
Check the temperature at the actuator
On a temperature-responsive opener, a closed vent does not automatically mean it is jammed: the actuator may be below its specified opening temperature. The trigger point, any stated temperature range and the way it closes again depend on the exact model. A weather-app reading, a thermometer at the centre of the greenhouse or the outdoor temperature is not a reliable substitute for conditions at the actuator. Sun may warm the mechanism differently from the surrounding air; shade, ventilation or a cool spell may leave it cooler. Compare the manual’s trigger information with conditions at the vent rather than borrowing a setting from another opener.
Make a short log during periods when you expect movement: date, time, temperature beside the opener, temperature around plant height, humidity if you are tracking the wider greenhouse, whether the vent moved, and the weather or shade conditions. Use °C consistently. Keep a thermometer out of direct sunlight and away from glazing and the actuator; note its position so readings can be compared fairly. Air readings are clues, not a measurement of the cylinder itself. Humidity will not trigger a temperature-only opener, although a controller may have a separate humidity input; its manual will say. If readings vary, repeat them at comparable times rather than relying on a single hot afternoon. Never heat the actuator with an improvised source.
Follow the exact mounting and adjustment instructions
Compare the installed brackets and actuator position with the diagram for the exact model, including the manual revision if one is stated. From a safe position, check whether the specified mounting points and orientation appear to match, and whether a shipping restraint remains where the instructions say it should have been removed. Do not move a bracket to make it resemble a different diagram. A replacement vent, repaired sash or changed hinge can make an older fitting arrangement look wrong; note those changes and ask the maker before altering anything. A visual check should not involve lifting the vent or taking weight off the opener.
Adjustment is equally model-specific. Some units have a setting intended for the user; others are fixed or require a prescribed setup. If the exact manual describes a user adjustment, follow only its stated direction, amount and method, and record the original position first. Do not turn a threaded rod, nut or end cap by guesswork, or extend or shorten the opener to make it reach. When checking a replacement, a structure name such as Lean-to Greenhouse is not a parts chart: confirm the exact vent, bracket arrangement and opener model with the relevant makers before ordering.
Inspect the vent’s travel for obstructions
Without releasing or forcing anything, look along the vent’s full opening path. Visible snags can include a latch left engaged, plant ties or clips, a hose, labels, leaves, loose debris, shade material or a support that has shifted into the moving panel. Use the normal latch-release procedure in the greenhouse manual if you need to check whether a latch is still engaged. Look for signs that the panel catches on the frame or another vent, and inspect hinges and stays visually for dirt, corrosion, bending or misalignment. A stiff hinge may resist an otherwise sound opener. Do not put fingers between the moving panel and frame or lean on glazing.
Some obstructions are intermittent: a cable or stem may move with the wind, or a vent may catch only at one point in its travel. Note where it rubs and photograph the area without pushing the panel through the catch. Clear only loose material that is easy to reach without moving, lifting or supporting a loaded vent, and only as the manual allows. If a fastener is loose, a bracket is bent, or the sash needs to be lifted or detached for inspection, stop and ask the installer or a competent repairer. Forcing an opener to overcome resistance can damage the mechanism or the vent.

Check vent load and movement
An opener has to move the vent it was designed for. A vent can become heavier or harder to move if glazing, a frame part, insect mesh, a screen, a latch or another fitting has been added or changed. Dirt or deterioration at the hinges can also add drag. Review the opener manual for the exact vent type and any stated limits, then compare them with the greenhouse and vent documentation. Do not estimate the load from the vent’s appearance or the greenhouse floor area. A listing such as Limited Edition Aluminium Greenhouse identifies a product family, but it does not establish a vent’s weight or the opener’s capacity.
Look back over changes since the opener last worked: glazing replaced, a vent repaired, mesh or shading attached, a latch changed, or brackets moved. Make a dated list of what changed and when; do not remove fittings simply to see whether the opener moves, as an addition may also serve another purpose. Do not add counterweights, springs, extension pieces or extra arms unless the manufacturer specifies them for that exact setup. They can alter the force and travel in ways that are hard to judge by eye. If load or compatibility is uncertain, send the opener and greenhouse model numbers, vent details and photographs to the manufacturer or installer.
Account for shade and sensor position
With a temperature-responsive unit, the actuator may not have reached its trigger point even when a thermometer elsewhere reads higher. Check whether the actuator is shaded while nearby glazing or the crop area is sunny, and note whether a curtain, external screen, overhang, plant growth or temporary cover has changed since the opener last worked. If there is a separate controller sensor, its reading may differ from the temperature beside the actuator. Do not assume a shade feature is the fault or remove a screen solely to force a test; first establish which part of the system is responding to temperature.
Repeat observations at comparable times, noting where the sun falls and whether the actuator is shaded or exposed. If a separate sensor is used, check its position against its own manual; it may have been moved during cleaning or maintenance. When considering shading for a greenhouse such as the T-Model Orangery Greenhouse, check the proposed fixing positions alongside the vent and sensor locations. Establish whether the accessory could obstruct the vent’s travel or change the actuator’s exposure before choosing a fitting arrangement. Keep these observations with your temperature log so you can compare conditions before and after any change.
Compare the affected vent with other openings
Compare the problem vent with other openings, but treat the comparison as evidence rather than a diagnosis. If several temperature-responsive vents remain shut together, check the shared conditions, time of day and whether their manuals specify similar trigger settings. If only one remains closed while comparable vents move, look more closely for an obstruction, an incorrect mounting position or adjustment, or excess load on that vent. The comparison is useful only when the mechanisms are alike and have similar exposure. A powered unit and a passive opener may follow different controls, so record which vents moved instead of assuming they should all respond together.
If the greenhouse has a controller, find out from its manual whether it operates the vent, reports sensor data or manages another device. Note any displayed mode, schedule or error code without inferring its meaning from an icon alone. For a greenhouse such as the Pyramid Greenhouse, establish the actual vent layout and connected controls rather than relying on the range name. Ask the supplier for the relevant product documentation if you need to distinguish original equipment from parts added later. This distinction helps you identify which instructions apply to each opening.
Check condition and maintenance requirements
Inspect the opener and its connections visually for a bent arm, cracked bracket, corrosion, a loose joint, a distorted cylinder, visible leakage or damaged wiring on a powered unit. Photograph any change and note when it appeared. Do not open a sealed cylinder, dismantle a motor, disconnect a spring or actuator, or test electrical connections yourself. A mechanism that appears stuck may still move when its temperature changes. If the manual specifies routine cleaning or lubrication, use only its stated method and product; otherwise, do not apply oil or solvent to the actuator or hinges.
A powered device may also fail to respond because a controller is off, a schedule or setpoint differs from expectation, or a sensor is disconnected; check these only if the manual describes those features. Use visible buttons or a normal display menu only as instructed, and leave covers, wiring and internal components alone. If you need a replacement for a Limited Edition greenhouse with built-in storage, identify the fitted actuator and brackets separately from the greenhouse range. Save the opener’s model label and any error message for the supplier so the enquiry concerns the installed equipment, not just the structure.

Know when to stop and ask for help
Stop the checks if you cannot reach the mechanism from a stable, safe position, if wind is moving the panel, or if glazing is cracked or loose. Do not climb onto a greenhouse, use the vent as a handhold or hold the panel up while removing the opener. Never disconnect a loaded component just to see whether the vent moves. If a manual test requires releasing a latch or supporting the panel, follow the maker’s procedure or leave it to an installer who can secure the assembly correctly. Keep clear of a vent that is moving unpredictably.
Contact the opener manufacturer, greenhouse supplier or original installer when the manual is missing, the model cannot be identified, the stated trigger conditions appear to have been reached without movement, the vent binds, the actuator is damaged, or a powered controller reports a fault. Send the temperature log, label and vent photographs, greenhouse range, and a note of later changes. A model name such as Prestige Greenhouse can help identify the host structure, but you will still need the opener’s separate model details. Ask what inspection or adjustment is safe for that exact combination before ordering parts; refer electrical faults to an appropriately qualified person.
Keep a record and verify replacement compatibility
Keep useful evidence with the manual: opener make and model, greenhouse and vent model, documented settings, temperature and humidity log, service notes and dated photographs. Add a note whenever shade, mesh, glazing, hinges or a sensor location changes. A before-and-after image taken from a similar angle, with the date and time recorded, can make a change easier to identify. This record helps distinguish a new fault from changing conditions or an earlier adjustment, and gives a supplier enough context to check the correct part.
Before replacing an opener, vent or greenhouse, verify the exact combination in the relevant documentation: the specified vent type and load requirements, mounting details, opening-temperature behaviour and any compatible controller. If you are considering a Spacious Greenhouse, establish which ventilation equipment is included and which must be selected separately. Greenhouse size alone does not establish opener suitability. Compare the proposed equipment with the requirements for the actual vents rather than carrying over assumptions from your existing setup. For a replacement actuator, retain the original part details until compatibility with the vent and brackets is confirmed.
Frequently asked questions
Is it normal for an automatic greenhouse vent opener to stay closed on a cool morning?
It can be. A temperature-responsive opener may remain closed until its actuator reaches the opening temperature specified for that model. Check the manual and compare readings near the opener over time; outdoor temperature alone does not establish whether the trigger point has been reached.
My thermometer is above the stated opening temperature. Why is the vent still closed?
The thermometer may be measuring a different spot from the actuator or controller sensor. Repeat the readings at comparable times, check the sensor location and shade, then inspect the adjustment, mounting and vent movement as the manual allows. A reading on its own does not prove the opener has failed.
Can I push the vent open or heat the actuator to test it?
Do not force the vent or apply improvised heat. Either could damage the opener or panel, and forcing a loaded vent can be unsafe. Use a manual release only if the instructions for your exact model describe one and explain how to use it safely.
Can I turn an adjustment screw to make the opener start sooner?
Only if the exact opener manual identifies a user adjustment and gives the procedure. Some models are fixed or require a specific setup. Do not turn a screw, nut or rod by guesswork; record the original setting and follow the stated instructions.
When should I stop troubleshooting and ask for help?
Ask the manufacturer, greenhouse supplier or installer if the vent binds, the opener is visibly damaged, the stated trigger conditions appear to be met without movement, or the correct manual is unavailable. Get help before removing a loaded part or investigating a fault inside a powered unit.
Treat a closed vent as a symptom, not a diagnosis. A dated temperature log and exact equipment details help separate normal temperature behaviour from an incorrect setting, an incompatible opener, friction, an obstruction or a component fault. Follow the manual for any adjustment; when a safe visual check cannot explain the problem, give the manufacturer or installer your records so they can advise on the next inspection.
