
Coordinating a Greenhouse with New-Build Landscaping
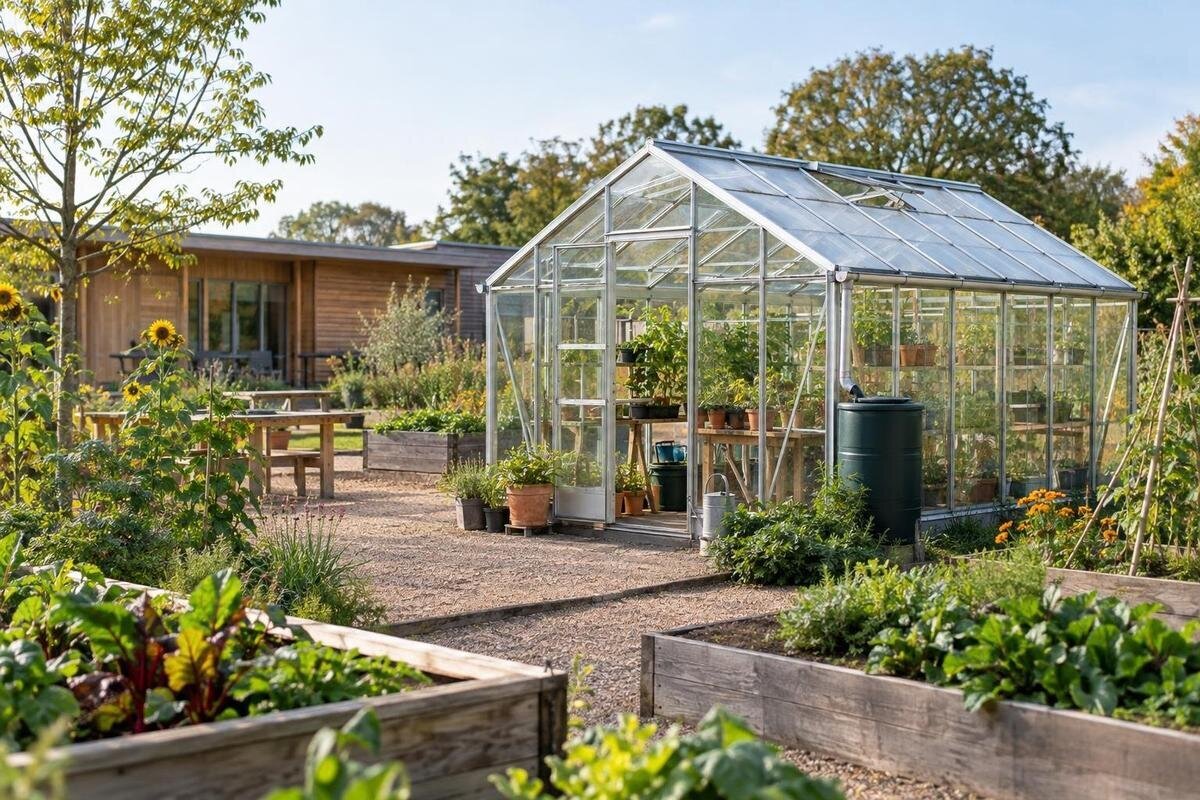
GREENHOUSE PROJECT PLANNING
On a new-build site, the greenhouse needs a place in the landscape plan before levels, routes and finishes are locked in. Its footprint can affect grading, surface-water management, utility runs, installation access, paths and planting. Coordinating it early does not require buying a model immediately. It does require a shared, measured plan, a clear account of what the greenhouse will be used for, and named responsibility for each connection between the structure and the rest of the project.

Set the greenhouse brief before the landscape plan is fixed
In a new build, a greenhouse affects more than the patch of ground beneath it. Its position can shape garden levels, drainage, paths, service routes, screening and the view from the house. If it is considered only after the landscape plan is detailed, the team may have to revisit paving edges, planting beds or work already completed. It can also affect construction access and what must stay clear while later trades are on site. Bring it into the design conversation early, even if purchase and installation will happen later. The purpose is to reserve a realistic zone and make the interfaces visible, not to choose a model before the site and brief are understood.
Write down what the structure is for—growing, potting, storage or another intended use—who will use it, and how people and materials should reach it. Note a preferred area, a likely door side if known, and whether water or electricity is actually required. Add priorities such as privacy, important views and planting to retain; they can rule out an otherwise convenient position. These are planning assumptions, not final specifications. The homeowner or developer should identify who can make decisions, while the landscape designer and relevant building or service professionals test the brief against the site. Keep unanswered questions on the shared drawing or issue list and assign someone to resolve each one. This stops different contractors from filling gaps in different ways.
Show the selected footprint on a shared site plan
Show the greenhouse as a specific proposed footprint, not simply a label on a plan. Include its outer limits, door opening, any storage section, the approach path and the space needed to work around it. Distinguish the external footprint from the internal growing area, and show any working space separately. Ask the supplier for the current drawing of the selected configuration, then place that outline beside planned paths, beds, walls, fences and other structures. The Limited Edition Aluminium Greenhouse with Built-in Storage is listed in options from 5.52 m² to 28.08 m²; a range that broad makes the exact option important. Use its confirmed outline, rather than a product-family name or illustrative image, when locating paving and preparing the site.
Choose a provisional position with the whole garden in view. Walk the site at different times and note where the house and established trees cast shade, how the greenhouse relates to principal views and boundaries, and whether planting or maintenance access would be squeezed. Consider likely sightlines from the rooms as well as the garden, and note any areas that should remain open. Ask the landscape designer to account for the mature size of proposed trees and shrubs and any known service corridors. A house plan or early concept drawing may not show every on-site level or buried route, so verify uncertain information with the responsible project team before treating the position as fixed.
Agree levels, surface water and the base interface
Agree the greenhouse levels with the wider grading plan. The groundworks and landscape teams need to work from the same reference information for the proposed base, adjacent paths, surrounding ground and entrance threshold. Include the transition to finished surfaces, so a path is not set before the entry level is understood. Ask the party responsible for setting out to confirm the location and levels against the current coordinated drawings before work begins. If a chosen product includes a base, that does not settle what preparation the site itself needs. If considering the Bloomcabin Prestige Greenhouse with Metal Base, request the current product information for that configuration and have the appropriate project professional confirm the site and base details.
Show where roof water and runoff from nearby hard surfaces are intended to go, and identify who designs and completes that drainage work. Agree the direction and destination, not only the point where water leaves the roof. The answer may depend on the site grading and drainage plan, so do not leave it to be improvised after paving is laid. If rainwater collection is planned, mark the tank position and how overflow is to be dealt with; if it is not planned, the route for water still needs consideration. Ask the landscape or civil professional to review surface-water movement around the greenhouse and its approaches, including any risk of water collecting at a path or being directed towards a building.
Reserve routes for any services the greenhouse needs
Not every greenhouse needs a permanent service connection. Decide from the intended use whether an outdoor tap, irrigation feed, electrical supply for lighting or equipment, or another service is required; separate essentials from future possibilities. Think through how often each connection will be used and whether it needs to remain accessible. Mark desired connection points and who will use them, then ask the relevant trade to confirm a feasible route before the ground is closed. If no service is planned, record that too, so a later contractor does not add an uncoordinated trench. The Bloomcabin Orangerie is listed from 47 to 70 m²; its area alone does not indicate what services a particular project needs, so select the footprint and service brief separately.
Show intended routes from the source to the greenhouse and note where each service should end, without treating a sketch as an installation design. Keep proposed routes visible to the landscape designer so they do not clash with the base, paving, tree planting or another contractor’s work. Qualified trades should verify supply, connection, protection and applicable requirements for water or electrical services. Agree who installs them, who checks their position before they are covered, and who records the final route. Where a route runs beneath a planned surface, document its location before it disappears from view. That record is useful if later landscaping, repairs or changes require work in the same area.

Confirm the installation route before hard landscaping
Trace the construction route from the site entrance to the greenhouse position, checking the narrowest gate, turning points, steps, changes in level, overhead obstructions and any surface that may not be ready for traffic. A route that looks clear on paper can still be blocked at one tight turn or gate, so check it on site. Ask the supplier or installer what access, unloading and assembly arrangements apply to the exact configuration, including the largest item that needs to pass along the route. For an Aluminium Classic Greenhouse, use current information for the chosen version; the family name alone cannot tell you whether a particular site route is workable. Measure against the actual site rather than relying on a drawing that predates fences, walls or utility work.
Also agree where materials can be unloaded or temporarily placed and whether the installation team needs a clear route for a particular period. The installer should explain its requirements; the site manager or nominated contractor can then coordinate them with other trades. Decide who will clear the route, protect completed surfaces and reinstate any area affected by access. Make sure the programme does not reserve the same unloading space for another delivery. If the only practical approach crosses future paving or planting, resolve the order or protection plan before those finishes are committed. Do not assume a vehicle, lifting method or staging arrangement: confirm the actual installation plan with the responsible supplier or installer.
Plan paths, doors and planting for everyday access
Construction access and everyday access are different. Set the door orientation and the approach path together, using the selected greenhouse drawing to locate the opening. Consider carrying pots, trays and tools, opening the door, and reaching the sides that need routine attention. The regular route from the house may differ from the direct construction route, so show both where that helps the team plan. If you are considering a Lean-to Greenhouse, show the intended wall line as well as the greenhouse footprint, then check its relationship with doors, windows, downpipes and maintenance access. Ask the supplier and the relevant building professional to confirm the chosen wall and interface; the product name does not establish that a particular wall is suitable.
Coordinate the finished path level, surface and threshold with the landscape designer and installer, especially where a route meets the greenhouse entrance. Draw the path to suit the way people will actually use it, without leaving planting or furniture to block the opening. Mark proposed beds at mature size, not only as small new plants, and retain access for pruning, cleaning and other upkeep. If the greenhouse affects an important view from a kitchen or living area, include that sightline in the landscape review. If step-free access or use by visitors is important, have the design team check the whole route and threshold against the intended users and applicable requirements before levels and paving details are finalised.
Assign each contractor a clear part of the work
Make each interface somebody’s explicit task. A simple responsibility schedule can name who approves the position, who issues the latest drawing, who sets out the location, who specifies and prepares the base, who arranges service routes, who installs the greenhouse, and who finishes paths and planting. Include client approvals and any professional review as separate actions where they are not the same responsibility. Some projects combine several tasks in one contract; others split them among different firms. Either way, state which contractor supplies information to the next one and who checks it before work is covered or made difficult to change. A named coordination lead can track decisions, but that role should not be mistaken for technical approval by a qualified professional.
When requesting information about Limited Edition Aluminium Greenhouses, identify the exact option you are considering and ask what configuration drawings, base information, access requirements or service details are available. Set a point in the programme when supplier information is needed, rather than asking after the base is already set. Put agreed information into the project documents and note who must review it. Contract scopes should make clear which work is included, which party provides materials or connections, and who handles changes at the greenhouse-to-landscape boundary. Record exclusions and unresolved items as well as agreed work; a missing task can otherwise be left between contractors because each expects the other to do it.
Sequence groundworks, installation and garden finishes
Set a construction sequence around confirmed dependencies rather than assuming one order suits every site. The team may need to confirm the model and position first, settle levels and service routes before groundworks, prepare the base and check that it is ready for installation, install the greenhouse while access remains open, and complete nearby paving and planting afterwards. A change in one dependency, such as late service work, can affect access or require rework elsewhere. The precise order must be agreed by the builder, landscape contractor and greenhouse installer for the actual project. The T-Model Orangery Greenhouse is listed from 16.52 to 30 m²; identify the selected configuration on the programme and plan, rather than referring to the full product range, when coordinating its site footprint.
Build review points into the programme before a change becomes expensive or hidden. Before a service route is covered, have the responsible trade confirm its position and provide information for the site record. Before the landscape team commits to a path edge or planting bed, confirm that the greenhouse footprint and access route still match the supplier’s current drawing. Agree who decides whether a delay or site change affects installation readiness, and who communicates that decision to other contractors. A short site meeting at each review point can help resolve mismatches while the relevant people are present. Where access must stay open, mark it in the programme rather than relying on a verbal reminder after finishing work has begun.

Check site constraints and keep drawing revisions together
Check the site’s own constraints before ordering or setting out. Ask the project architect, developer or appropriate local professional whether approval conditions, estate controls, boundaries, servitudes, utility corridors or existing drainage arrangements affect the proposed location. Requirements depend on the property and its project documents; do not infer permission or restriction from another greenhouse or site. If a change to a drawing already approved or included in the contract may be needed, have the responsible person confirm how it should be handled before contractors proceed. Include shared or private access routes and any relevant close-out requirements in that review. This is particularly important when the greenhouse position or service route affects work already included in the new-build contract.
Use one dated, revision-controlled plan as the reference for the landscape contractor, builder, trades and greenhouse supplier. When a site change is agreed, update the relevant drawing and tell every party whose work is affected; do not leave an old print in circulation. Keep the selected model information with that plan, together with confirmed levels, service locations, drainage decisions and any changes made during installation. Distinguish proposals awaiting a decision from changes agreed for construction, so contractors can see which details they should work to. Retain the revision history to explain why a position, route or level changed, while clearly identifying the current drawing. Keep the final records somewhere the owner and future maintenance contractors can find, rather than only in a project email chain.
Walk the site before final planting
Before final planting and close-out, walk the site with the landscape lead and the people responsible for the greenhouse installation and groundworks. Compare the installed greenhouse, or the prepared site if installation is still pending, with the current plan: footprint, door side, levels, path connection, surface-water route, service points and remaining installation or maintenance access. For a Pyramid Greenhouse, use the drawing for the selected configuration to review its relationship with paths and views; a catalogue image cannot show how it fits into the site. Record conflicts on site, assign a person to resolve each, and update the plan before the landscape team treats the area as complete. This gives the team a chance to address a mismatch before edging or planting makes access harder.
Close the project with a practical handover of what was installed and who maintains each part. Use the contractor’s final records to show the owner the service points and any agreed changes to paths, levels or drainage. Make clear who looks after planting near the greenhouse, keeps the access route usable and arranges future repairs or adjustments. If several people will use or maintain the garden, give them the same current plan and explain which areas must remain accessible. Keep a separate list of outstanding work, with a named person responsible for each item, rather than presenting unresolved details as complete. The handover should leave the owner able to distinguish routine garden upkeep from unfinished project work and know whom to approach about either.
Frequently asked questions
What should be decided first?
Reserve a provisional area on the landscape plan and agree what the greenhouse is for. Then identify the access, levels and any services that could affect its position. You can compare specific models once these site constraints are visible.
Does the greenhouse need to be installed before paving?
There is no single order for every site. If installation access would cross a future path, agree whether the greenhouse should go in first or whether a suitable protection plan can be arranged. Confirm the sequence with the installer and landscape contractor.
Who should confirm the base and drainage?
Ask the greenhouse supplier for information about the selected configuration and any available base details. The appropriate project professional should confirm site-specific levels and drainage, and the contractors should agree in writing who designs and carries out each part.
Should I install water and electricity even if I might not need them yet?
Decide based on the intended use rather than assuming every greenhouse needs connections. If services are wanted, ask the relevant qualified trades to check routes and connection requirements before ground is closed. Record on the plan if none are intended.
Can I choose a greenhouse after the landscaping contract is signed?
Possibly, but check the selected footprint, base interface, access, services and contract scope against what has already been agreed or built. A space reserved on a plan does not guarantee that every model will fit without changes.
The landscape is ready for a greenhouse when its selected footprint, levels, service decisions and installation route agree with the work around it, and every contractor knows where responsibility changes hands. Coordinating those details while the site is still open gives the team a chance to resolve conflicts before paving and planting make them harder to address. The final plan and handover records then connect the design decisions to the garden that was actually built.
