
Choosing Drip Irrigation for Pots and Greenhouse Beds
Greenhouse irrigation guide
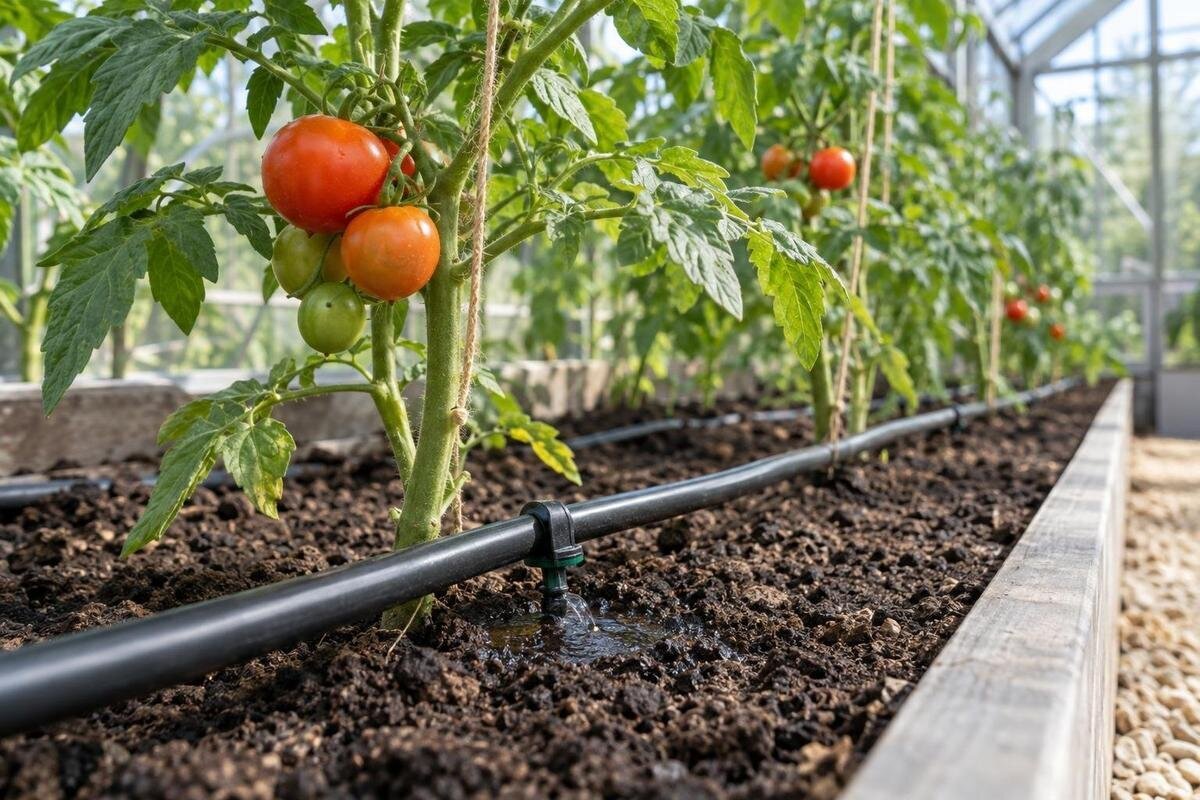
Drip irrigation can make greenhouse watering easier to manage, but a kit is only a good match when its emitters, filter, pipe layout and water supply work together. Pots and beds often need different outlet positions and may not suit the same watering schedule. Instead of choosing by greenhouse area or a timer label, map the plants, decide which groups can share a line, and verify pressure and flow at the proposed connection. This guide focuses on those design choices, plus how to test and maintain a system without assuming every plant needs the same arrangement.

Map the growing space before buying a kit
Draw a roughly scaled plan of the greenhouse floor, marking the water source, doors, paths, benches, beds, shelves and fixed obstructions. Show the actual growing area rather than treating the whole floor as plantable: a clear aisle or storage corner matters when routing pipe. If the greenhouse itself is still under consideration, the Classic aluminium greenhouse range is listed from 3.77 m² to 28.08 m². That gives a footprint reference, but it does not show your usable bed area or specify an irrigation kit. Use the plan for the selected option before deciding where the pipe will run.
Mark each bed row and pot group, then note which plants will stay in place and which may move. Add the water take-off point and mark places where valves and filters must remain accessible. A movable bench may call for a route that can be repositioned; permanent rows can use a fixed lateral. This exercise also reveals paths that should not be crossed by loose tubing. You do not need to finalise every fitting at this stage. A clear picture of distances, turns and planting groups is enough to compare a kit’s diagram with the greenhouse you will actually use.
Match drippers to container size and root zones
Treat each pot as a bounded root zone. Position an outlet to wet the growing medium around the roots, rather than simply placing it at the rim. One emitter may suit a compact pot, while a wider or fuller container may need a different position or more than one outlet to spread water evenly. Pot diameter alone does not determine the arrangement: crop, root spread, potting mix and drainage also matter. Follow the emitter supplier’s guidance, then check a few representative pots after a run. Surface moisture is not enough evidence; look below the surface to see whether the active root area is being reached.
Grouping similar containers makes the system easier to manage. Seedlings, herbs and established plants on one bench may not need identical output, so keep exceptions on a separately controlled branch rather than watering the whole row for longer. A wall-side pot arrangement also affects where a supply tube can be reached. The Lean-to greenhouse range is listed from 3.69 m² to 14.34 m², but the chosen plan and actual bench position—not the range name—determine the pipe route. Leave enough flexibility for pots you move, without stretching small tubes or letting them form loops across a walkway.
Choose between dripline and individual emitters for beds
A continuous dripline with built-in outlets can suit a straight, regularly planted row. Individual drippers connected to a supply tube allow more flexibility where crop positions, spacing or bed shapes vary. In either case, check that outlet positions match the root zones and that emitter spacing suits the planting arrangement and soil. Do not assume one line will wet the full width of a bed: the pattern depends on soil texture, water output, run time and outlet spacing. Use the maker’s guidance, then observe how moisture spreads at the depth where the plants’ roots are active.
Draw the bed edges and crop rows, and place each line beside the plants rather than through a route used for walking or tools. Where crops have different spacing or watering needs, consider separate laterals that can be controlled independently. The Limited Edition Aluminium Greenhouses range is listed from 3.77 m² to 28.08 m², but a greenhouse area does not tell you the number or length of bed rows. Check the plan for the selected option and measure the actual growing layout before settling on an emitter interval. The same approach applies to raised beds and to greenhouses with both beds and floor-level containers.
Understand emitter ratings and pressure compensation
Emitter labels describe how an outlet is intended to work. A fixed-flow dripper has a stated nominal discharge under the maker’s specified operating conditions. An adjustable dripper lets you change its output, but the setting is not necessarily calibrated to an exact discharge unless the maker says so. A pressure-compensating emitter is designed to deliver more consistent output within a stated pressure range. It cannot create pressure or compensate for an overloaded line. Check the documented operating range, discharge, outlet spacing and connection type, and confirm that the emitters are intended for the tubing and fittings you plan to use.
Choose a type that suits the actual layout, rather than mixing parts because they happen to connect. A short row of similar pots may be straightforward to manage with matching emitters; longer runs, changes in level or varied plant groups call for closer checks against the system design. Different outlet types or outputs on one branch can make delivery harder to compare and may exceed the branch’s capacity. The T-Model Orangery Greenhouse range lists areas from 16.52 m² to 30 m². On the plan for your chosen size, list the outlet type and quantity for each branch so an irrigation supplier can assess the proposed combination.

Check pressure and flow at the water connection
Pressure and flow answer different questions: pressure is the available push, while flow is the volume delivered over time. A supply may have adequate pressure when all outlets are closed, yet operating pressure can fall when water is flowing or restrictions are present. Have the available flow and operating pressure checked at the proposed connection; if a zone is already assembled, check it while that zone runs. For a tank, pump, borehole or shared supply, test the actual source and connection instead of assuming that a kit designed for another supply will perform in the same way.
Compare the results with the kit’s stated requirements, including those for its filter, regulator and emitters. Use the maker’s system diagram or sizing tool, or ask an irrigation supplier to confirm that the planned arrangement is supported. If the whole planting area cannot be run at once, separate zones may help, but each zone still needs sufficient supply and compatible controls. The Pyramid greenhouse range is listed from 5.53 m² to 18.9 m². Mark the proposed water connection on the plan for your selected option, and keep the measured pressure and flow with your layout notes for use when comparing kits.
Choose filtration for the water source and emitters
A filter helps keep particles out of small emitter passages, but the right choice depends on both the water source and the emitter’s filtration requirement. Rainwater may carry leaf fragments or sediment, while other sources can bring different debris. Inspect the water you plan to use rather than assuming it is particle-free. Choose a screen or disc filter to the mesh or micron rating specified by the irrigation maker; do not assume those rating systems are interchangeable unless the maker explains how they compare. A filter is normally upstream of the emitters, but follow the system diagram for the order of the filter, regulator, valves and other parts.
Choose a filter housing that you can open and clean without dismantling the layout, and leave room to reach it. A blocked filter can reduce delivery across a line, whereas a blocked individual emitter may affect one plant; check the cause before changing a timer. If you are considering a greenhouse with built-in storage, the Limited Edition Aluminium Greenhouses with Storage range is listed from 5.52 m² to 28.08 m². Check the selected plan before locating the filter and controls. Make sure stored tools and supplies will not obstruct access when the filter needs cleaning.
Separate crops with different watering needs
Use separate zones when plant groups need meaningfully different control. A small pot and a deep bed can respond differently, and young plants may not need the same watering as established ones. If these groups share one valve and timer setting, one may receive too much while another gets too little. Separate branches controlled by manual valves or a suitable timer allow you to adjust one group without changing delivery to all the others. There is no need for a separate zone for every species: group plants with similar needs, then split off exceptions where the container, growing medium or position changes their watering response.
Keep the number of zones manageable. Too many small branches can make controls harder to label and maintain; one oversized zone may combine plants that need different run times. If you use a controller, check that it supports the valves and operating conditions in the system. A timer cannot correct low pressure, a clogged filter or poorly placed emitters. The Bloomcabin Prestige Greenhouse range is listed from 3.77 m² to 28.08 m². Mark each zone and its valve on the plan for your chosen size, using the same bed or pot-group names on the plan and at the controls.
Route pipes so controls remain accessible
Keep the main supply line visible and reachable, then branch to beds and container rows without blocking doorways, walkways, vents or access to benches. Leave space around filters, valves and line ends so they can be inspected. Use connectors and clips intended for the tubing, and avoid sharp bends, kinks or stretched small-bore tubes that could restrict flow or pull free of their fittings. For pots that move, plan branches that can be repositioned without pulling on the connections. Check the tubing maker’s guidance for the conditions where the line will sit inside the greenhouse.
End-of-line flushing can help clear accumulated debris if the system is designed for it; add a flush point or removable end only as shown in the maker’s plan. Mark pipe routes on a copy of the greenhouse sketch and label valves by bed or pot group, so a blockage or leak is easier to trace. The Spacious Greenhouse range is listed from 47 to 70 m². Use the selected floor plan to trace the route from the water connection to each line end, including turns and branches. Check those routes against the run-length and pressure guidance for the system you select.

Test each zone before regular watering
Before fastening the pipe permanently or relying on a timer, run each zone and inspect it from the inlet to the farthest outlet. Check joints for leaks, look for pinched tubing and compare delivery along the line with the maker’s performance guidance. Confirm that each branch end is working as intended. Weak delivery at distant outlets may point to low operating pressure, excessive line length, a restriction or too many outlets; it does not automatically mean that an emitter is faulty. If performance changes, inspect the filter and regulator as well as the line, and correct the cause before extending the watering programme.
Check representative pots and more than one part of each bed, not just the first emitter near the tap. After a run, examine moisture in the root zone and compare plants near the start and end of a line. If the pattern is uneven, adjust outlet positions, emitter type, branch layout or zones before changing the whole schedule. Stay nearby during initial checks so you can spot a leak behind a bench or a tube that has pulled loose. Once the arrangement works as intended, record the valve positions and timer settings as a useful baseline.
Maintain emitters and adjust for new planting
Make filter cleaning and line flushing part of routine upkeep, with frequency guided by the water source, visible debris and the manufacturer’s instructions. Look for blocked outlets, disconnected small tubes, cracked fittings and leaks. Clean or replace components only in the way the maker permits. If the system has a pressure gauge or another monitoring method, note its normal operating reading and investigate a change rather than assuming the plants need longer watering. Avoid improvised solvents, needles or chemicals to clear a dripper unless its instructions explicitly allow them; damage can change how much water it delivers.
Review the layout when pots are repotted, crop rows change, benches move or seedlings become established plants. A system that suited last season’s arrangement may now be watering empty space while new roots sit outside the wetting zone. Reposition branches or separate unlike crops where needed instead of running every emitter for longer. Drip irrigation depends on the fit between the planting layout, emitter choice, filter and water supply. Keeping those parts accessible and checking the root-zone wetting pattern makes the system easier to adjust as the greenhouse changes.
Frequently asked questions
Can one drip system water both pots and beds?
Yes, if the components and water supply can support the combined layout. Pots and beds do not have to share one control line: use separate branches or zones where outlet positions, spacing or watering needs differ. Check the system maker’s guidance before combining different emitters.
Do I need a pressure regulator?
That depends on the supply and the emitters’ operating requirements. Use a regulator if the system design calls for one, and check that it suits the expected pressure and flow. A regulator can control pressure within its rating, but it cannot increase an inadequate water supply.
How many drippers should I put in each pot?
There is no universal number. Pot size, crop, growing medium, root spread and emitter output all affect how water spreads. Follow the emitter maker’s guidance, then check moisture in the root zone of representative pots. Change the outlet position or arrangement if parts of the medium stay dry or water runs through without wetting the roots.
What filter rating should I choose?
Use the filtration rating specified for your emitters, taking the water source into account. Check whether the maker gives a mesh or micron rating, and do not assume different rating systems are interchangeable. Choose a filter you can access and clean according to its instructions.
Why do emitters at the end of a line deliver less?
Possible causes include insufficient operating pressure or flow, a restriction, a kink, a blocked filter or a line carrying more outlets than the system can support. Inspect the whole line and compare its performance with the maker’s guidance before extending the watering duration.
A dependable drip system is not the one with the most outlets; it is the one whose emitters, filtration, zones and water supply match the planting map. Decide how pots and bed rows will be served, confirm pressure and available flow against the manufacturer’s requirements, and leave access for cleaning and inspection. Testing the wetting pattern in the root zone before settling on a routine makes it easier to spot problems and adapt the layout when crops or containers change.
