
How to Establish No-Dig Beds in a Greenhouse
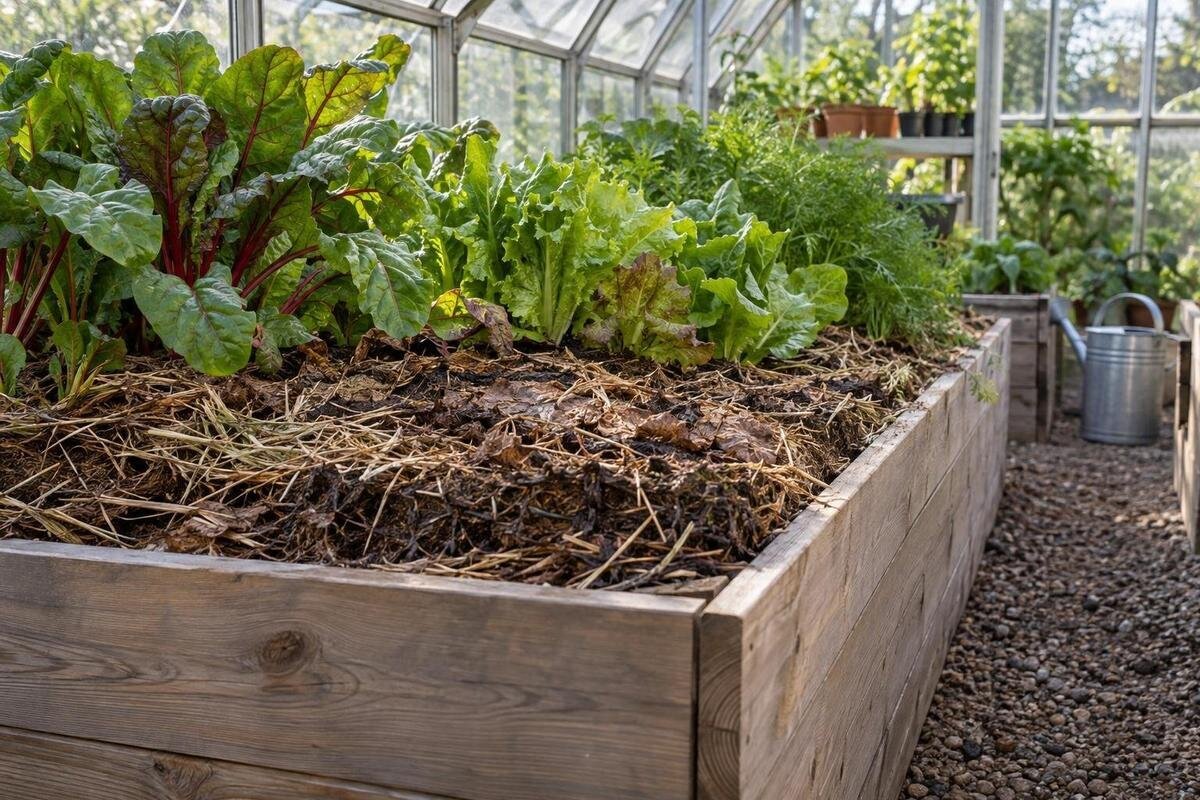
Greenhouse growing guide
A no-dig bed is managed by keeping the soil largely in place and adding suitable organic matter at the surface, rather than turning it routinely. In a greenhouse, the roof changes one important part of the routine: rainfall cannot replenish the beds, so moisture and any amendments need deliberate management. Establishing permanent beds starts with a floor plan and an honest assessment of the soil already there. Mark growing areas and paths, check drainage, clear persistent weeds and make measured additions. No-dig can reduce repeated disturbance, but it will not fix poor drainage, contamination or severe compaction by itself.

01
What no-dig means under a greenhouse roof
No-dig describes a way of managing soil, not a special kind of bed or a particular bought-in mix. In a permanent bed, leave the soil profile largely in place instead of turning it routinely with a spade or rotavator. Add suitable organic matter at the surface and plant through small openings, allowing roots to use the soil already there. Keep feet and repeated cultivation off the growing area: traffic can compact soil and make the surface harder to manage. The method does not prescribe a fixed stack of materials. What belongs on the surface depends on the soil, the crop and the material.
No-dig does not mean that no tool ever enters the bed. You still remove weeds and crop remains, open holes for transplants, harvest roots and deal with a specific physical problem when one is identified. If compaction, buried debris or poor drainage prevents roots from growing, refusing to address it will not make a low-disturbance system work. The difference is avoiding routine turning of the whole bed every season. In a covered greenhouse, rainfall cannot replenish soil moisture, so watering and surface additions need deliberate management. That is an important difference from an outdoor bed.
Plan the beds and paths before preparing the soil
Draw the layout before preparing the ground. Measure the usable inside footprint, then mark the door swing, vents, water access, benches, shelves and fixed fittings. Use string, chalk or temporary containers to outline beds and paths, then walk the proposed route as if carrying trays or a harvest basket. Each bed should be reachable from a path without standing on it, and doors and vents must remain accessible. Bed width depends on whether you can reach it from one or both sides, your reach and the crops you plan to grow; avoid copying a measurement from a different layout.
Separate growing area from circulation space in your notes. Paths, access and work areas take up floor space, so a greenhouse’s total area is not the same as its bed area. The Aluminium Greenhouses range is listed from 3.77 to 28.08 m²; use the chosen model’s actual layout to check what remains after paths are marked. Include room to turn at the end of a bed and to carry plants through the entrance. A measured plan also gives you a sound basis for calculating surface additions later, since those quantities belong to the beds, not the whole greenhouse.
02
Choose between an in-ground and a framed bed
An in-ground bed uses the soil already under the greenhouse and is a straightforward option when that soil is suitable, clean and free-draining. A framed or raised bed defines a separate rooting zone and helps distinguish the growing area from the path, but it needs an appropriate growing medium and a clear plan for drainage. A shallow compost topping does not turn unsuitable ground into a complete raised bed. If roots will depend mainly on material held above the original soil, choose the bed depth and medium for the crops you intend to grow. In either case, keep the bed edge distinct so material does not spread into the path.
Check how the greenhouse base meets the growing surface before choosing between those options. The Bloomcabin Prestige Greenhouse is identified as a model with a metal base and is listed in floor areas from 3.77 to 28.08 m². Those catalogue facts alone do not establish how a particular configuration meets the ground or whether it suits an in-ground or contained bed. Review the details for the exact model and its base arrangement before setting bed edges or ordering materials. Make the same check for any greenhouse if your plan depends on planting into existing soil.
Keep storage and work areas out of the growing space
Not every part of a greenhouse should become a bed. Allow for potting, keeping tools and watering equipment, moving trays and storing materials you use; otherwise those tasks tend to take over the nearest path. Keep access clear to water points, openings and fixed work surfaces. Store bagged amendments in a covered, orderly place and handle them separately from finished beds so they are not spread by habit. A permanent growing layout works best when ordinary jobs have their own space, rather than requiring you to step over a bed or lean across crops each time you need equipment.
If you are considering a model with built-in storage, plot that area before measuring the space for beds. The Limited Edition Aluminium Greenhouses with Storage are listed from 5.52 to 28.08 m² and include built-in storage. Check the selected configuration to establish how much of that area is available for cultivation, allowing for access to both storage and beds. Include these routes in your initial layout rather than trying to fit them around planted beds later.

03
Assess drainage and soil before making additions
Assess the soil before adding material, so you know what you are building on. Take samples from the intended beds and follow the testing laboratory’s sampling instructions; ask for guidance relevant to the crops you plan to grow. A test can help establish whether pH or nutrient adjustments are warranted, but it does not describe drainage or soil structure. If one corner has a different history or appearance, keep it separate rather than blending it into a single sample without guidance. The Lean-to Greenhouse is listed from 3.69 to 14.34 m²; use your marked bed area, not the model’s total floor area, to decide where to sample.
Observe how water moves as well as what the test shows. After watering a small section, note whether it soaks in, runs off or remains pooled; compare the centre with the edges and look for areas that dry much faster. A greenhouse roof excludes rain, but it cannot prevent water entering from the surrounding site or correct a poorly draining bed. Serious compaction, buried debris, suspected contamination or repeated waterlogging calls for targeted investigation before planting. A soil-testing laboratory or local horticultural adviser can help identify the cause. A one-off repair is compatible with no-dig management.
Clear weeds and make the first surface addition
Clear only the ground you have chosen for beds. Remove old ties, labels and dead crop material; pull young annual weeds before they set seed and remove perennial roots as thoroughly as practical. Covering vigorous weeds with a fresh layer can hide them without resolving the problem. If a previous crop showed unexplained disease, do not automatically fold its roots or leaves into the bed; identify the issue and follow crop-specific advice on handling the material. Loosen soil only where you need to remove roots or fix a diagnosed obstruction. Turning every bed simply to make it look tidy works against the low-disturbance approach.
Once the surface is ready, spread a known, mature organic material suited to the intended crops. Ask the supplier about its source, maturity and intended use if those details are unclear; do not rely on a material simply because it looks dark or crumbly. There is no universal top-up depth for every soil and crop, so use test results and appropriate horticultural guidance. To estimate volume, multiply bed area in square metres by proposed layer depth in metres: a 5 m² bed receiving a hypothetical 0.02 m layer needs 0.1 m³, or 100 litres. That is a calculation example, not a recommended layer. The Limited Edition Aluminium Greenhouses are listed from 3.77 to 28.08 m²; calculate from measured bed area, not the whole floor.
04
Water beds that receive no rain
Because a greenhouse roof blocks rainfall, treat watering as part of bed establishment rather than an occasional extra. Check moisture in the root zone, not only at the surface: a dark top layer can sit above dry soil, while a damp surface does not show whether the rest of the bed is saturated. Check more than one spot and water evenly, then observe how the soil responds. Frequency depends on the crop, growth stage, soil, temperature and ventilation, so a fixed daily routine is not reliable across all beds. Avoid keeping soil continually saturated, and investigate drainage if it stays wet.
Plan access to the water point and decide whether different beds need separate checks or watering zones. Crops at different growth stages, or in different soils, may not use water at the same rate. When planning a layout for the T-Model Orangery Greenhouse, listed from 16.52 to 30 m², mark how you will reach each bed with watering equipment. Check that the hose route leaves room to inspect plants without stepping into the beds. Watch for uneven drying at the edges and adjust watering to the moisture you find in each bed.
Plant through the surface and keep records
Plant according to each crop’s requirements. For transplants, open a small hole through the surface addition into the rooting soil or growing medium beneath, settle the roots and leave the stem base uncovered. For direct sowing, create a fine, even surface with good contact between seed and soil; coarse mulch or woody pieces are not a seedbed. Use crop-specific guidance for seed depth and spacing, and water gently enough to avoid washing seed into a corner. Keep the surface layer clear of young stems so it does not remain pressed against them, and label rows if you are growing several crops close together.
Place tall crops, supports and trellises on the plan before planting, so they do not shade or obstruct another bed or the path. Keep a simple record of crop family and position from one planting to the next; permanent beds can still support rotation. If you are planning beds in a Pyramid Greenhouse, listed from 5.53 to 18.9 m², draw the rows within the actual bed boundaries and mark the crop spacing. Check access alongside the proposed rows, including space occupied by supports. Remove supports and clear the path when crops finish.

05
Maintain beds with measured surface top-ups
At harvest, remove spent plants and supports, but do not automatically dig out every root. Where crop health permits, cut a plant at soil level and leave healthy roots in place; remove affected material when disease or crop guidance calls for it. Clear weeds promptly rather than leaving them on the growing surface. Check whether the surface has settled, become bare or remains covered. Add suitable, mature material only where the bed and crop history indicate a need, rather than repeating the same application on a calendar. Keep paths clear so you can tend the beds without stepping on the soil.
Review beds individually, especially if their crops or watering differ. Record what material was added, how much and how the crops responded; repeated additions without a reason can leave the growing layer too rich or otherwise unsuitable. In a larger layout, such as one planned for the Spacious Greenhouse, listed from 47 to 70 m², identify each bed separately in your notes. This lets you compare its crop history, watering and surface additions with those of neighbouring beds. Notes from each season make it easier to spot a pattern and avoid repeating a treatment that did not help.
Investigate problems before disturbing the bed
When a crop performs poorly, look for a pattern before disturbing the bed or adding more compost. Compare affected plants with healthy ones: are they in one bed, beside an edge, near a water point or all from the same crop? Check root-zone moisture and review recent additions and watering. Leaf symptoms can have several causes, so do not treat them as a soil diagnosis by themselves. A soil test can clarify some pH or nutrient questions; persistent disease, suspected contamination or a result you cannot interpret needs more specific advice. Record observations and take representative samples before making a broad correction.
No-dig is a management choice, not a promise to leave every condition unchanged. If an inspection or test identifies a local problem, make the smallest effective correction and return to surface-based care when appropriate. Avoid digging the whole bed each year as routine maintenance, but do not let the label prevent a necessary one-off repair. Persistent poor growth should be investigated rather than hidden beneath fresh material. When you know what changed—water, soil, crop or amendment—you can adjust the next action without resetting the entire bed.
Frequently asked questions
Does no-dig mean I must never loosen the soil?
No. The aim is to avoid routine turning of the whole bed, not to forbid every tool. Remove weeds, open planting holes and make a targeted repair if inspection shows a problem that prevents roots growing. Return to surface-based care once the cause has been addressed.
Can I start with the soil already in my greenhouse?
Often, provided it is suitable for the crops, drains adequately and has no known contamination or persistent disease problem. Inspect it and arrange a soil test before adding material. Severe compaction, buried debris or waterlogging may need attention first.
How do I work out how much surface material to buy?
Measure the bed area, then multiply it in square metres by the layer depth you plan to apply in metres. For example, 5 m² multiplied by a hypothetical 0.02 m layer equals 0.1 m³, or 100 litres. This is a volume calculation, not a recommended layer depth; use crop-specific guidance and the material’s suitability to decide how much to apply.
How often should I add organic matter?
There is no single calendar that suits every bed. Consider the soil test, the existing surface, the crops grown and how plants have responded to previous additions. Add suitable material when there is a reason to do so, rather than repeating the same amount automatically each season.
Does a greenhouse bed need the same watering as an outdoor bed?
Not necessarily. A roof prevents rainfall from replenishing the bed, so check moisture in the root zone and adjust for the crop, soil, growth stage and conditions inside the greenhouse. Water evenly and check how the soil responds instead of relying on a fixed schedule.
A dependable no-dig greenhouse bed starts with a known growing area, suitable soil or a properly planned contained bed, and an appropriate surface layer. Keep paths permanent, record what goes into each bed and respond to what the soil and crops show. That steady approach limits routine disturbance while still allowing targeted repairs when the evidence calls for them.
