
Fixed Beds or Removable Benches in a Greenhouse?
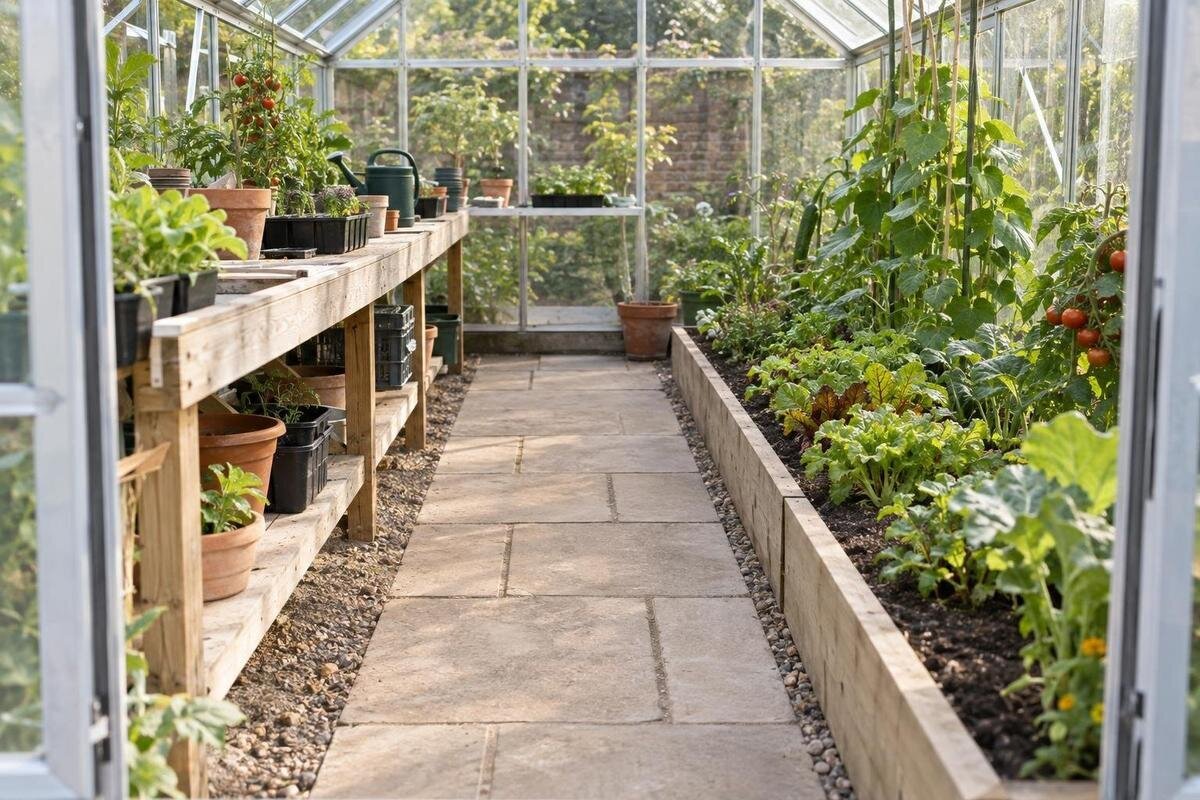
Greenhouse layout guide
Choosing removable greenhouse benches or permanent beds is less about which one produces more than about how often you need the floor to change jobs. Benches provide raised surfaces for pots and trays; beds reserve fixed strips for planting in place. The two measured floor plans below use the same illustrative 3.0 m by 2.4 m internal rectangle, so you can compare working routes and summer clearance on equal terms. These are planning examples, not sizes of available products.

How benches and beds change the working layout
Removable greenhouse benches and permanent beds solve different layout problems, even when they use the same rectangle. A bench raises pots and seed trays and, if it is designed to be removed, can expose the floor beneath it. A fixed bed reserves a strip for growing in place; it cannot be shifted aside when a change of crop calls for more open floor. Neither arrangement automatically provides more planting capacity. Compare the planting surface, the route you can work along, the entry zone and the jobs you repeat through the year. A layout that suits propagation may not suit a crop plan that later needs floor-level planting.
Write down the two periods that matter most: the time you want benches fully stocked, and the time you would clear them for summer crops. Add the objects you move, such as trays, pots, watering cans and harvest containers, and decide where a removed bench will go. Then use the chosen greenhouse’s verified internal dimensions, not its outside size or a category’s smallest and largest area figures. The Classic Aluminium Greenhouse options are listed from 3.77 to 28.08 m², but that span is not one floor plan; use the drawing for the selected size. The examples below are illustrative only.
Illustrative plan A: two removable side benches
Plan A uses an illustrative internal rectangle 3.0 m long by 2.4 m wide, giving 7.2 m². Assume access at one short end and keep a 0.6 m-deep strip clear across the full 2.4 m width; it covers 1.44 m². Beyond it, place a 2.4 m-long bench against each long side, each 0.55 m deep. The width adds up as 0.55 + 1.30 + 0.55 = 2.40 m, leaving a 1.30 m central aisle. Each bench top measures 1.32 m², or 2.64 m² together; the aisle covers 3.12 m². These dimensions are illustrative, not greenhouse or bench sizes on sale.
The arrangement gives trays a raised surface on either side while preserving one continuous route from the entry strip to the far end. Its 0.6 m entry zone is an assumption, not a door-clearance rule or allowance for a door swing; draw the actual opening and fixed frame positions separately. Check what happens if a full tray, watering can or other bulky item must pass at the aisle ends. When considering the Lean-to Greenhouse range, adapt the strips and aisle to the selected model’s internal plan rather than copying this rectangle. The bench length also starts beyond the assumed entry zone, so moving it towards the doorway would change the clear working space.
Illustrative plan B: two permanent side beds
Plan B keeps the same illustrative 3.0 m by 2.4 m internal rectangle, 0.6 m clear entry strip and 1.30 m centre aisle. Replace each 0.55 m-deep bench with a permanent bed measuring 0.55 m by 2.4 m. Each bed has a 1.32 m² footprint, so both occupy 2.64 m² in total; the central aisle and entry strip remain 3.12 m² and 1.44 m² respectively. For this comparison, the bed footprint includes its outside edges. The actual soil surface will be slightly narrower if edging takes up part of that 0.55 m.
These beds fix the growing zone along the sides, rather than creating raised surfaces that can be removed. Crops rooted in the beds remain in those locations while pots, trays and tools travel along the central path. That can suit a routine built around consistent in-ground rows, but it does not free the strip for a potting station or a crop that needs a different floor arrangement. If you are considering the Limited Edition Aluminium Greenhouse options, compare the selected model’s internal drawing with the beds’ outer dimensions and the space needed for access. The range name alone cannot confirm that the illustrative 2.4 m internal width is available.
Reading the area totals correctly
In either plan, the assumed 7.2 m² is divided on paper into 2.64 m² allocated to benches or beds and 4.56 m² for the aisle and entry strip. That is roughly 37% assigned to growing zones and 63% kept clear for movement. These are layout allocations: a raised bench does not remove the floor beneath it, although access and what the bench holds determine whether that space is useful. A permanent bed, by contrast, occupies the ground strip itself. Record the growing surface and accessible floor area separately rather than adding them together as equivalent space, and remember that edging, pots and mature plants can reduce practical clearance.
Remove one Plan A bench and the bench-designated footprint falls by 1.32 m²; remove both and 2.64 m² is exposed at floor level. The total greenhouse area stays 7.2 m². Pots, grow bags or crops may use the newly clear strip, so do not also count it as extra aisle. Plan B retains both beds and the same route. If your wish list needs distinct propagation or storage areas as well, the T-Model Orangery Greenhouse range lists options from 16.52 to 30 m²; those published areas still do not tell you the selected model’s usable width or route.

Clearing space for summer crops
Use the removable layout when seasonal change is a real requirement, not simply because empty floor looks useful on paper. In the tray-growing period, both side benches can hold containers and leave the 1.30 m route open. For a summer plan that needs one clear side strip, remove only that bench and retain the other for trays or smaller pots. If both strips need to be clear, remove both; then mark where floor-level containers, bed rows or taller crop bases will sit without narrowing the route. A clear bench footprint gives you more options, but does not establish how many plants fit or how much headroom remains.
Before relying on this change, check that the particular bench can be taken out, whether it needs tools or help to move, and where it will be stored away from the growing route. Seasonal clearing is less useful if the parts block access elsewhere or take up space needed for pots. Different greenhouse footprints also change the layout: do not assume the two straight side strips in this example will fit a model from the Pyramid Greenhouse range. Redraw the bench positions and aisle using the selected model’s internal drawing, then compare the space available before and after removal.
The centre aisle and entry need to work in practice
The 1.30 m centre aisle is an illustrative choice, not a recommended standard for every greenhouse. Test the real route with the objects you carry: a full seed tray, watering can, harvest tub or any tool you commonly use. Think about whether you can turn at the far end and pass a plant without stepping into a bed. Door opening, threshold, frame members and the position of a work surface can all reduce the clear width shown on paper. A 0.6 m entry strip is likewise an assumption; keep the actual doorway and any opening movement on the drawing.
Measure routes at the inside faces, then allow for crops at their planned mature spread rather than tracing only the bare bed edge. Where a greenhouse model includes storage, show that area on the same plan and count its effect on access instead of assuming it sits outside the growing floor. The Limited Edition greenhouse with built-in storage name identifies a storage configuration but does not show how much route or bed space remains. Compare the exact drawing and mark the storage zone before deciding whether the example’s aisle still works.
Daily watering and seasonal reset
Benches and beds also differ in how you handle containers and soil. On a bench, trays and pots can be arranged at a raised working surface, but the floor below is not automatically convenient for storing items or tending plants. If you use containers, include the places where you set them down while watering or replanting. With fixed beds, the growing area stays in the same soil strips; consider whether your planned tasks can be done from the centre aisle without reaching across plants or walking over the bed. These practical arrangements matter as much as the top-down square metres.
List the reset jobs you expect: moving trays, clearing spent plants, carrying in compost, cleaning or storing containers, and handling a bench if it comes out. A removable surface offers useful flexibility only if it is also suitable for everyday use. Confirm with the supplier that the bench’s design and fixings suit the containers you intend to place on it rather than judging by appearance. The Prestige Greenhouse with Metal Base title identifies a base feature, but does not specify a bench arrangement or usable bench area. Check which fittings are included and how your chosen benches would fit within the selected model.
When fixed beds are the better fit
Permanent beds are a strong fit when the same growing strips remain useful through your crop plan and you do not expect to turn them into open floor each summer. They keep in-ground planting in a defined place and avoid planning a bench-removal and storage routine. This arrangement is easier to map if the central aisle and two beds stay unchanged across your working periods: plant layout, watering route and tool space all have a stable reference. The trade-off is that the bed footprint is committed; a future need for more container staging or temporary floor-level crops must be worked around it.
If your plan combines permanent beds with a separate potting or propagation zone, decide how much space each job needs rather than treating a larger published area as a complete answer. The Spacious Greenhouse range is listed from 47 to 70 m², but even a large area figure does not replace the selected greenhouse’s internal dimensions and a drawn route. An extra work zone helps only if it stays accessible beside mature crops. Map beds, aisle, entry and storage before deciding that a bigger model will solve a layout problem.

Test both plans at full scale
Turn each plan into a full-scale mock-up before treating the arithmetic as usable space. Measure the chosen model’s internal clear length and width, then mark bed or bench edges with removable tape on a flat floor if possible. Mark the entry strip, central aisle, any door movement, fixed supports and places where a watering can or tray will be put down. This exposes conflicts that a neat rectangle hides: an entrance can open into a bench end, and a pot may project beyond its nominal bench edge. Use the dimensions of your actual fittings, not the illustration’s convenient numbers.
Walk the mock-up carrying the things used in ordinary work and simulate the most crowded period, not an empty-greenhouse tour. Stand where you would sow, transplant or harvest; check whether a full container can pass if that matters to your routine. Allow for the planned mature spread of chosen crops and keep the route clear at those widths. If the layout works only before leaves fill out or with every tool removed, adjust it. Repeat the exercise after removing one bench, since the summer version may have different pinch points.
A mixed layout can keep one strip flexible
The measured rectangle does not force an all-benches or all-beds choice. In a mixed version, retain one permanent 0.55 m by 2.4 m bed and use a removable bench of the same projected size on the other side. Each is assigned 1.32 m²; the 1.30 m aisle and 0.6 m clear end strip stay unchanged. During a summer crop change, remove the bench and reclaim its 1.32 m² floor footprint while the permanent bed continues in use. That gives you one stable growing strip and one adaptable one, rather than pretending the whole floor is free.
This arrangement is worth considering if you want a dependable in-ground area but still need occasional clearance for containers or a different crop layout. It only works if the remaining bed, bench and route each have a clear purpose, and if the removed bench has a suitable storage place. Draw the mixed plan in both its usual and summer versions. If the bench rarely needs to move, two permanent beds may be simpler; if both strips regularly need to change, two removable benches offer more flexibility.
Frequently asked questions
Do removable benches increase the greenhouse’s growing area?
No. They provide a raised planting surface over a floor footprint; removing them changes how that footprint is used but does not add square metres. In the illustrative plans, 2.64 m² is assigned to bench tops or bed surfaces, with 4.56 m² set aside for the entry strip and aisle.
Is a 1.3 m greenhouse aisle wide enough?
It is the width used in these examples, not a universal recommendation. Test the actual route with the trays, watering can and tools you use. Allow for the door, turning space and mature plants, which can make an aisle narrower in practice.
Can I remove greenhouse benches for summer crops?
Only if the particular bench is designed to come out. Confirm how it is fixed, whether dismantling is required and where you will store it without blocking another route. Then check that pots or crops in the cleared strip will not narrow the aisle.
Are permanent greenhouse beds lower-maintenance?
Not automatically. Fixed beds avoid a bench-removal routine, but keep the growing strips in the same place and determine how you reach plants. Benches make containers easier to rearrange, while trays and pots still need tending. Compare the regular tasks, not only the initial setup.
Can I use these plans to choose a greenhouse size?
Use them as layout examples only. The 3.0 m by 2.4 m rectangle is illustrative, not a listed product size. Check the selected greenhouse’s verified internal dimensions, doorway and fixed obstructions, then adjust the bed, bench and route measurements to suit.
Use the layout that fits the season when your greenhouse is most constrained. A bench is valuable only if removing it gives you useful floor clearance, and a fixed bed is valuable only if its position suits the crops you intend to grow there. Measure the exact internal footprint, include the walking route and entry, then decide whether you want two flexible strips, two permanent ones or a combination. The floor plan—not the headline area—will show whether the choice works.
