
Greenhouse in a Frost Pocket: Assessing Low Ground
Greenhouse site planning
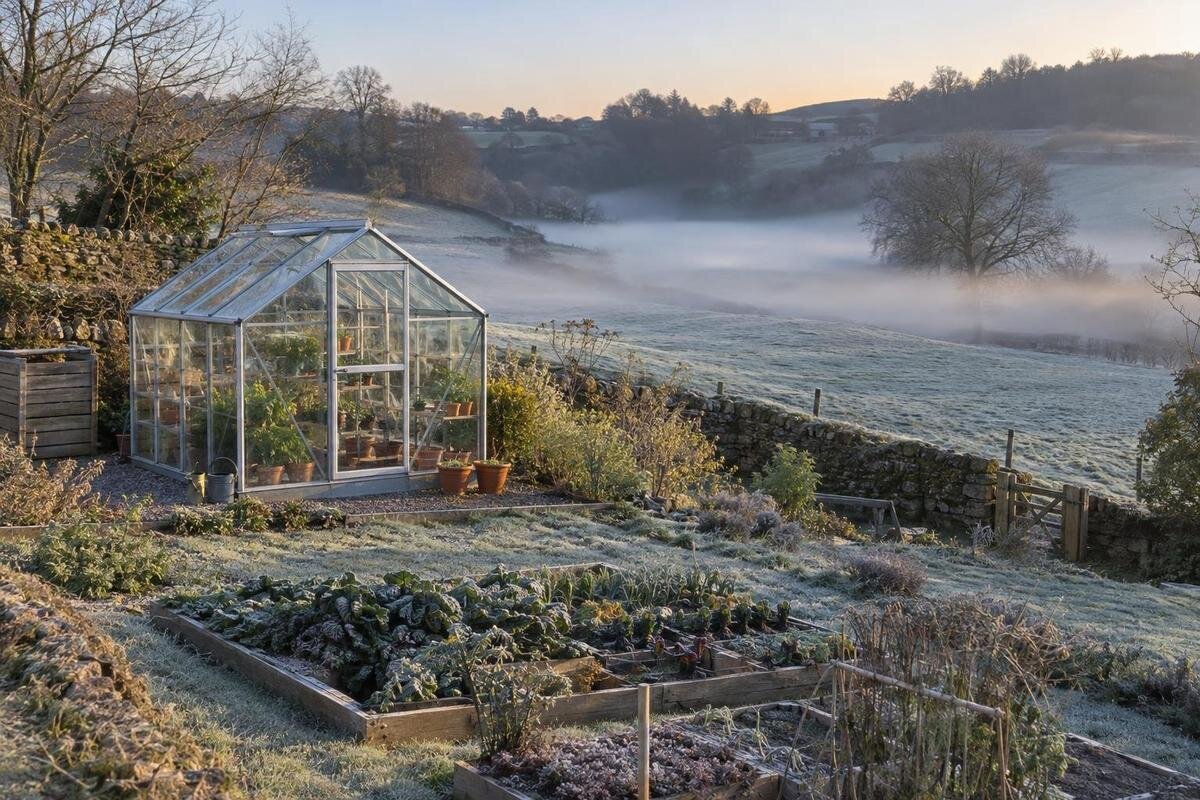
Low ground can collect cold air, but the lowest point in a garden is not automatically the worst place for a greenhouse. The useful test is how candidate positions behave on cold nights: record minimum temperatures at comparable points, note likely cold-air routes and repeat the observations. A site sketch, photographs taken at dawn and a consistent log can help you compare positions before choosing a site or planning heating.

Why low ground can record colder minimums
A frost pocket is a local cold spot, often formed when cooled air drains downhill and collects where it has no easy route out. On clear nights, the ground loses heat and chills the air close to it; this denser air can move towards hollows and lower ground. A bank, solid fence, dense hedge or raised garden edge may interrupt that flow, leaving colder air on one side. Terrain is only part of the picture: wind, cloud, ground cover, buildings and vegetation also affect night-time readings. A low point is a reason to test the site, not proof that it is unsuitable. A nearby weather station describes wider conditions, not small differences within your garden.
An unheated greenhouse does not erase the outdoor pattern. Its indoor minimum depends on the structure, glazing, ventilation, the ground beneath it and heat gained or lost overnight; an outside thermometer cannot promise a particular temperature inside. Think first about the crops and planting dates you want to support. Hardy crops and frost-sensitive seedlings may call for different risk tolerances, so a position that suits one plan may not suit another. Keep frost exposure separate from drainage and soil condition: a dry, cold hollow and a wet patch are different site issues, even if they occur together.
Map slopes, hollows and barriers
Begin with a simple scaled plan. Mark visible high and low points, gentle slopes, hollows, changes in level, drains or channels, and features such as walls, fences, hedges, banks and outbuildings that could interrupt or redirect air. Use arrows to show which way the ground falls, and add a known length or measured distance so the drawing can be read later. Note any apparent route by which air might leave the garden. A formal survey is not needed for this comparison, but the sketch should show level differences that are easy to miss when the site is described only as flat or slightly sloping.
Take photographs from repeatable viewpoints, showing the candidate area and nearby obstructions. A wall, raised bed or hedge can change local airflow, but the effect depends on its position and openings: shelter in one direction may also block a route for cold air to drain. If a wall-mounted greenhouse is under consideration, draw the wall and ground in front of it as one microclimate. The Lean-to Greenhouse is one product to compare, not evidence that a wall will keep a low site warmer. Mark gaps or openings in barriers, and note features such as hedges that may change seasonally.
Plot the intended footprint before testing positions
Before placing sensors, draw an outline for each possible greenhouse position. A thermometer on an open lawn tells you little about a footprint that would extend into a hollow or sit behind a barrier. Mark the corners, the likely door side and any end that falls lower; the aim is to see which parts of the proposed space the readings represent. Use exact external dimensions for the chosen variant, not only the model name or floor area. If the dimensions are not available, obtain them before treating the drawing as a reliable site comparison. When considering two sizes, draw both at the same scale.
Product families can cover several sizes: the Aluminium Greenhouses listing gives an area range, not one universal footprint. Area alone does not tell you the length and width or how the long side will sit against the slope. Sketch each shortlisted variant at a usable scale and mark sensor points within and just outside the outline. That shows whether a colder patch affects the whole candidate, only one end, or the ground immediately beyond it. Keep the selected model and size written beside the drawing so a later comparison is not accidentally made against a different outline.
Place sensors so readings can be compared
Use minimum/maximum thermometers or time-stamped data loggers intended for outdoor temperature readings, and follow each device's instructions. Before spreading sensors across the garden, place them together and compare the results; a consistent offset between units could otherwise be mistaken for a colder position. Put them in ventilated radiation shields, out of direct sun and rain, and away from warm paving, reflective surfaces, greenhouse glass, walls and equipment. The aim is to compare air at the locations, not the temperature of a surface next to a sensor. Place a reference sensor in an open spot outside the suspected hollow and label every device.
At comparison points, use the same height above the ground, shielding and support. Set the main sensor near the level of the foliage you most want to protect; if crops or seedlings will sit close to the ground, log that lower layer separately. Do not compare one thermometer on soil with another higher up. When assessing a position for one of the Limited Edition Aluminium Greenhouses, label readings from different heights separately so they remain distinguishable in your records. If a sensor must be moved, record when and where, then repeat the comparison rather than treating unlike setups as equivalent.

Log cold nights consistently
A useful log needs actual cold events rather than a run of ordinary mild nights. Start before the period when the garden usually records its lowest temperatures and continue through several cold nights, including clear, calm conditions when frost is more likely. Repeat on separate nights instead of basing a lasting decision on one unusual minimum. If the weather shifts, keep the sensors in place and record the change: breezy or cloudy conditions may show whether a cold spot is limited to particular nights. There is no fixed number of nights that suits every garden; extend the run when results are inconsistent.
With a minimum/maximum instrument, reset it at the same time each day and write down the overnight low, date and reset time so readings are not merged. A logger offers a time-stamped curve and shows when the low occurred, but its clock, battery and recording interval need checking. Record nights with no visible frost as well as frosty ones; the absence of ice on a leaf is not a temperature reading. If you have only one sensor, test candidate points on comparable nights and repeat the sequence, noting that changing weather makes this less reliable than simultaneous readings.
Record frost and weather beside each minimum
Write down cloud cover, wind direction and a simple description of its strength, recent rain and whether visible frost appeared at each measurement point. Look before direct sunshine reaches the ground, because frost can melt quickly, and take photographs from the same viewpoints each time. Record where frost appears and where it does not, but remember that grass, paving, roofs and leaves cool differently; visible frost cannot replace an air-temperature reading at crop height. Note water pooling, damp soil or runoff separately as drainage evidence. This helps prevent a wet low spot from being treated as proof of a frost pocket.
Match each note to a labelled point on the site sketch, not just to the garden as a whole. For a proposed T-Model Orangery Greenhouse, keep observations from the lower and higher ends of the site separate, with readings taken on the same nights. Give photographs the same date and location labels as the temperature records so you can trace each observation back to its measurement point. This makes it easier to see whether visible frost coincides with a repeated temperature difference, rather than comparing a photograph from one morning with a minimum recorded on another.
Read the pattern across the proposed site
Compare each suspected cold point with the open reference point for the same night, then look for the same relationship across multiple nights. A difference repeated on clear, calm nights may identify a cold pocket that forms under those conditions; if the order reverses when wind direction changes, airflow and barriers may help explain it. Do not hide a consistent difference by averaging all weather together. Conversely, a small difference that changes from night to night may be within the instruments' accuracy. Check the accuracy stated for each thermometer and compare the units side by side; avoid drawing a firm conclusion from readings the equipment cannot reliably distinguish.
Plot minimum temperatures on the sketch and label the weather conditions beside them. Mark the likely cold-air route separately from measured values so an interpretation is not mistaken for a measurement. If the Pyramid Greenhouse is on your shortlist, compare its proposed position with this temperature map rather than assigning it a single reading from elsewhere in the garden. Where values differ across the proposed area, retain the individual readings instead of combining them into one site minimum. Keep the open reference point on the map: without it, a cold night affecting the whole garden can be confused with a pocket specific to the greenhouse position.
Choose a position from repeat readings
Use the repeated pattern to choose the least exposed candidate, not to find a position guaranteed to remain frost-free. A slightly higher spot may be warmer in some conditions, but only your measurements show whether it helps in this garden; a sheltered hollow can still hold cold air. Where the log supports it, avoid placing the main growing area in the lowest enclosed part or directly behind a barrier that repeatedly coincides with lower readings. If there is no warmer alternative, recognise that before choosing crops and deciding whether heating is part of the plan. Do not let a single frosty morning outweigh the repeated log.
Compare the whole model outline with the measured zones. For Limited Edition Aluminium Greenhouses with Storage, include the storage section in the drawn footprint rather than plotting only the growing area, and verify the full dimensions of the chosen variant. The same principle applies to any greenhouse with an attached section: assess the complete layout against the site pattern. If one end would sit in a colder pocket, consider a different position or variant, or plan for crops that tolerate that exposure. A mean reading across both ends will not describe conditions at either end accurately.

Treat heating as a separate, measured decision
Decide on heating after setting out the intended crops, their growing requirements and the cold-night pattern. Outside readings indicate how challenging the site may be, but they are not the minimum inside a greenhouse. Glazing, ventilation, the ground below and heat lost or gained overnight all affect internal conditions; different points within a structure can also vary. Once the greenhouse is installed, log temperatures indoors at crop level and outside through cold spells. That evidence, combined with a clear crop temperature target, gives a sounder basis for deciding whether supplemental heating is needed than assuming any greenhouse will prevent frost.
Heating provision must be matched to the exact model, area and target; the garden's single lowest outdoor reading does not by itself specify a heater. The Spacious Greenhouse listing covers 47 to 70 m², so each selected size needs its own assessment rather than assumptions borrowed from a smaller structure. Check heating-equipment instructions and have electrical or fuel installation assessed by a qualified professional where applicable. Heating may support a defined crop requirement, but it does not change cold-air movement outdoors or correct waterlogged ground.
Check the base and site requirements before buying
Before committing, bring together the site sketch, photographs, weather notes and minimum readings. Ask whether the warmer candidate stayed warmer across repeat cold events, whether a wall or bank coincided with pooled cold air, and whether drainage or seasonal shade creates a separate issue. If differences between sites are too small to distinguish, continue logging or compare another suitable spell rather than forcing a confident choice. The aim is a documented, local comparison that makes remaining uncertainty visible and keeps a cold low point from being treated as proven safe.
Then confirm the exact model variant, complete dimensions and site-preparation requirements with the supplier or a qualified installer. The Bloomcabin Prestige Greenhouse listing identifies a metal base, but that description alone does not establish that a slope, soft patch or drainage condition is acceptable, or that the greenhouse will stay frost-free. Check how the base relates to the prepared ground and seek qualified advice for structural or installation questions. If the only practical position remains a measured cold pocket, decide whether your crop plan, monitoring and heating provision can cope with the risk before purchase.
Frequently asked questions
How long should I log temperatures?
Record several separate cold nights, including clear, calm conditions, and repeat the comparison if the readings vary. If your log covers only mild weather, it cannot rule out a frost pocket. Continue through another cold spell if the colder position changes from night to night.
Where should I place a thermometer?
Use a ventilated radiation shield and place it near the height of the plants you want to protect. Keep comparison sensors at the same height above the ground and away from walls, glass and surfaces that could affect the reading. Follow the instrument's instructions.
Does frost on the grass prove that a spot is a frost pocket?
No. Frost on grass is a useful observation, but different surfaces cool at different rates. Compare it with air-temperature readings taken at consistent heights, and check whether the same area is repeatedly colder on suitable nights.
Will an unheated greenhouse keep plants frost-free?
Not necessarily. Indoor temperatures depend on the greenhouse, its ventilation, the ground and overnight heat loss. Outside readings help assess the site, but they do not tell you the exact minimum inside. Once the greenhouse is in place, log temperatures near the crops.
Do I need heating because my garden is low-lying?
A low position alone does not answer that. Consider what you intend to grow, the repeated outdoor readings and, once the greenhouse is installed, its indoor minimums. If heating is needed, match the equipment to the exact structure and intended temperature target, with qualified help for installation where applicable.
The practical sequence is to map the ground, compare repeated minimum temperatures and then assess the greenhouse position against that pattern. Use observations of cold-air movement to explain the readings, not to replace them. If the evidence leaves you unsure, keep logging through another cold spell rather than relying on one frosty morning. Once the greenhouse is in place, check its indoor temperatures separately and base any heating decision on the crops you intend to grow.
