
Planning a Garden with a Greenhouse and Pergola
Garden planning
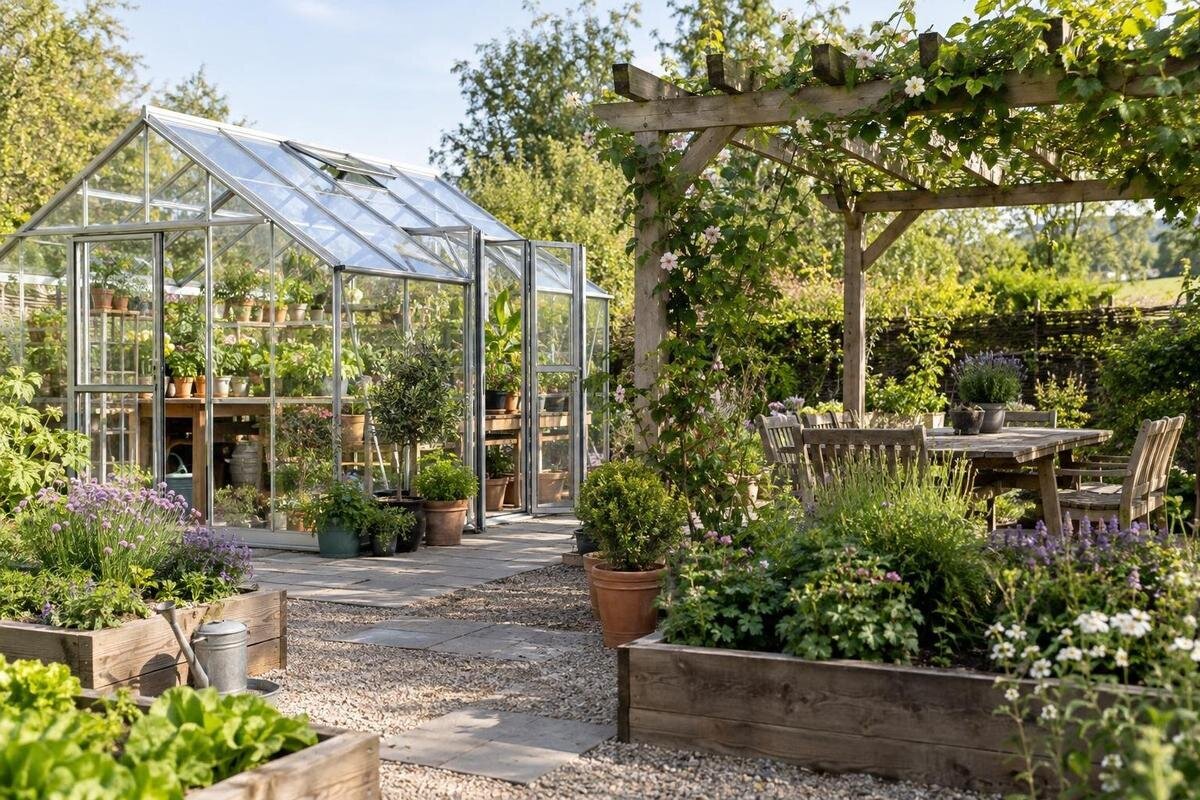
Putting a greenhouse and a pergola in one garden plan works best when each has a clear job. The greenhouse is the growing space; the pergola provides a shaded outdoor place to sit, eat or gather. Their positions affect one another: a pergola can shade greenhouse glazing, either structure can interrupt a route, and water or power may need to serve one or both. Start with the way the garden is used, then map sunlight, movement and service points before fixing the footprints. This keeps the two structures complementary rather than competing for the same patch of ground.

Give the greenhouse and pergola different jobs
Before drawing a layout, decide what each structure is expected to do. The greenhouse may be chiefly for growing, seed raising and potting; the pergola may be for sitting, eating or spending time outdoors in shade. Give each a primary purpose rather than treating both as interchangeable shelters. That distinction sets priorities: plants need a position and working access suited to their growing requirements, while the pergola should relate to the people using it and the parts of the garden they want to enjoy. If several activities are proposed, rank them. A layout built around frequent daily tasks will usually be more practical than one that gives most space to an occasional use.
Turn those roles into a list of what belongs inside each structure and what stays outside. Decide whether hand tools, pots, trays and growing supplies will live in the greenhouse, and whether furniture or serving items need a home near the pergola. Built-in storage can affect that division: the Limited Edition Aluminium Greenhouses with Storage listing covers models from 5.52 m² to 28.08 m². Treat this as a range of areas, not a measure of usable planting or bench space; check the exact option and layout before relying on it. Mark any outdoor work area and the route between it and the greenhouse, too. This inventory helps prevent storage boxes or chairs from occupying a route meant for moving plants.
Map sunlight and shade at different times
Draw the garden at a consistent scale and note existing sources of shade: the house, boundary walls, established trees and neighbouring structures. Observe the site at several times of day, not only at midday, and record where direct sun and shade fall on the proposed greenhouse and pergola areas. Repeat the check in different seasons where possible, since the sun’s path and shadow lengths change over the year. If trees may grow or new planting is planned, mark their likely future canopy as a separate layer. A sketch from memory is useful for a first draft, but it is not enough to settle the final position.
Next, sketch the shadows cast by the proposed structures and compare them with the times the spaces will be used. Note which parts of the greenhouse and nearby growing areas may be shaded, and whether the pergola’s shade would fall where people want to sit. The amount and pattern of shade depend on the pergola’s position and roof treatment, so do not assume it will create a fixed patch throughout the day. If its design is still undecided, show more than one possible footprint or shade pattern. The aim is not to eliminate shade; it is to understand where it will fall before deciding which areas need sunlight and which would benefit from protection.
Protect the greenhouse’s access to light
Do not position the greenhouse solely because it is convenient to the pergola or close to an existing wall. Compare the sun and shade map with the plants and tasks the greenhouse is meant to support; their light requirements can differ. A small gap between structures does not guarantee good light, because the direction and height of a shadow source matter. Check the greenhouse position against nearby trees and buildings as well as the pergola. Also consider future planting: a spot that is open now may be shaded later as trees or screening plants grow. Use observations from the site rather than a universal compass direction or rule of thumb.
If a greenhouse beside a wall is one of the options, the Lean-to Greenhouse listing gives a range from 3.69 m² to 14.34 m². That area range does not establish whether a particular wall or position will work. Check the selected option’s dimensions, light conditions, openings and access against the actual site; ask the supplier for exact information if it is not available in the product details. Consider whether the pergola would shade the same area. A wall-side position may be worth comparing, but it is not automatically the best choice for growing or circulation.
Draw the walking routes before fixing positions
Map the routes from the house and garden entrance to both structures. Think about ordinary journeys: carrying seed trays or tools to the greenhouse, moving a harvest, taking food to the pergola or bringing furniture in and out. Show doors and the space they need when open, using dimensions for the specific structures rather than a generic symbol. Keep the main route clear of furniture and avoid making it cross the greenhouse entrance or the area where people sit. A strip beside a building may look unused on paper, but it is not spare space if it is needed to reach a door or carry equipment.
When comparing a model such as the Prestige Greenhouse, place its entrance on the plan as well as its outline. Confirm the entrance details for the option you are considering, then trace the approach from the house and pergola. Test the route with the items likely to travel along it, such as a loaded tray or a wheelbarrow, and check whether someone can pass without moving chairs. In a shared household, agree which paths must stay clear and which areas are for sitting. A direct route between the house, greenhouse and pergola is useful only if it does not turn a working area or seating area into a shortcut.

Allow for more than the structures’ footprints
A scaled plan should show the house, garden boundaries, existing paths, planting, seating and other structures, as well as the proposed greenhouse and pergola. Draw the dimensions of the specific options under consideration, including any projections shown in their product information. Add door openings, places where chairs will be pulled out and space needed to reach the structures for routine care. Showing only a greenhouse rectangle and a pergola rectangle can make a tight layout look workable when the entrances and everyday use have not been allowed for. If you are comparing positions, keep the same scale so the effect on the garden is easy to see.
For a project considering a larger enclosed structure, the Spacious Greenhouse listing covers sizes from 47 m² to 70 m². Plot the dimensions of the selected option, then look at how much garden remains for the pergola, planting and the clear spaces marked around both structures. Compare that arrangement with the smaller options on your shortlist rather than considering the enclosed area alone. If boundaries, shared access, existing services or other property constraints affect the proposed position, check the project-specific requirements with an appropriate local authority or qualified professional before committing to a layout.
Plan water, drainage and power together
Mark existing water points and note which tasks need water at each structure. The greenhouse may need convenient access for growing tasks, while the pergola may not need its own connection at all. Decide whether one tap can serve the intended uses without a hose crossing a busy path, or whether separate points need to be considered. Include the route for carrying water or moving equipment in the plan, not as an afterthought once paths and planting are fixed. If you are unsure what connections the site can support, confirm the options before settling the layout.
Consider how water from the greenhouse and any covered part of the pergola will drain, based on the selected designs. A pergola does not necessarily provide a dry route, so do not assume the space between the structures will stay dry in rain. Mark where runoff could affect entrances, paths or seating, and seek qualified advice if the plan involves changes to drainage or ground levels. If lighting or other electrical use is being considered, show the intended locations and have the connection assessed and installed by an appropriately qualified professional. Planning services at the same time as the structures can help avoid routes being blocked later.
Surfaces for paths, working areas and seating
Think about what the ground needs to do between the greenhouse and pergola, as well as beneath each structure. A greenhouse route may be used with pots, tools or harvested plants, while the pergola area may need room for chairs and people moving around them. Note where soil, water or garden debris is likely to be carried, and choose surfaces and transitions that suit the intended tasks and maintenance. If people will use the garden with equipment or wheeled items, check the route with them while planning rather than assuming a line on paper is convenient.
The Aluminium Greenhouses listing covers sizes from 3.77 m² to 28.08 m². Once the selected option is drawn to scale, mark where the adjoining path meets the greenhouse entrance and where you expect to put down pots or trays. Compare this working area with the surface needed around the pergola furniture, including chairs when pulled out. The two areas need not serve the same purpose, even if you want a consistent appearance. Review the transitions between them, especially where a gardening route meets the seating area, so the surface choices support both uses without blurring the space each needs.
Check views, privacy and the relationship between the structures
Consider the view from the house, the pergola seats and the main garden paths. Decide whether you want the greenhouse to be visible from those places or set further to one side, and whether the pergola should connect directly to the house or sit within the garden. The right balance depends on how the spaces will be used. Boundary planting and screens can change both privacy and shade, so mark their current extent and allow for likely growth. Avoid improving one view by placing the pergola where its shadow creates a growing problem, or hiding a greenhouse in a position that makes its entrance difficult to reach.
To compare visual scale, use the footprint and available dimensions of any greenhouse you are considering. The T-Model Orangery Greenhouse listing covers sizes from 16.52 m² to 30 m²; that area range does not tell you the structure’s height or roofline. Check those dimensions for the selected option or ask the supplier for them, then compare it with the pergola and house from more than one viewpoint. A simple plan shows their positions, while an elevation helps you compare their outlines. Include any proposed screens or boundary planting in the comparison so that privacy, views and shade are considered together rather than as separate finishing touches.

Leave room for maintenance and future changes
Allow space to reach the greenhouse and pergola for the care their designs and materials require. The greenhouse may need access for cleaning, moving pots or tending plants; the pergola may need its own routine care. Do not assume that a narrow gap between the structures will be enough. The space required depends on the actual products, their position and the work involved, so check the relevant product information or ask the supplier what access to allow. A route that is easy to use now may also need to remain clear as plants grow or garden equipment changes.
If Limited Edition Aluminium Greenhouses are on your shortlist, confirm the relevant maintenance guidance and mark where access will be needed on the plan. Distinguish space used occasionally for care from the route you use every day; both need to remain available for their intended tasks. Consider what happens when seasonal furniture is put away, spare pots accumulate or tools are left near the greenhouse. Give those items a storage place rather than assuming they can occupy the gap beside the pergola. This helps preserve the access you have allowed without treating every open patch as space for more planting or furniture.
Test alternative layouts before choosing a model
Compare at least two layouts on plans drawn to the same scale. Show the greenhouse, pergola, doors, paths, furniture, planting, service points and expected shade on each one. Follow a normal day through the plan: entering the greenhouse, carrying items out, reaching the pergola and moving around its seating. If you can, mark the proposed outlines on the ground temporarily to get a better sense of their relationship to existing garden features. A change that improves one detail may create another problem, such as a useful seating position that shades growing space or a convenient greenhouse site that blocks the main route.
If the Pyramid Greenhouse is on your shortlist, its listing covers sizes from 5.53 m² to 18.9 m². Draw the selected option in each alternative layout and compare how it relates to the pergola, rather than judging it by area alone. Note what improves and what becomes less convenient when either structure moves. Use those trade-offs to choose between the plans: useful shade should not come at the expense of the growing space, and a shorter route should not obstruct seating. Resolve any remaining site constraints with suitable professional advice. The final drawing should show why the chosen arrangement works for both uses.
Frequently asked questions
How close can a greenhouse and pergola be to each other?
There is no single spacing that suits every garden. Base the gap on the pergola’s shade, the greenhouse’s light needs, door access and the space required for upkeep. Draw both exact footprints and keep any necessary access clear rather than also counting it as room for planting or furniture.
Which direction should the pergola face?
Use observations from your own garden rather than a universal compass rule. Check where the pergola’s shade falls at the times you expect to use it, and consider how that shadow changes through the seasons and with the pergola’s roof design.
Should I choose the greenhouse or pergola first?
Decide what each structure is for before choosing either. Then check the greenhouse’s light and access needs, compare specific greenhouse footprints, and test the pergola position against them. Keep both on the plan while you compare alternatives so one choice does not create a problem for the other.
Can the two structures share water or electricity?
They may be able to share a service, but first list what each space actually needs and map possible routes. Avoid running hoses or cables across busy paths. Have any electrical work and other connections assessed and installed by appropriately qualified professionals.
Will a pergola always shade the greenhouse?
Not necessarily. The effect depends on the structures’ positions, dimensions, roof treatment, surrounding shade and time of year. Map the expected shadow rather than assuming the pergola will leave the greenhouse unaffected—or provide shade at a particular time.
When exact footprints, moving shadows, routes and services have been tested together, the plan can give the greenhouse the light and access it needs while placing the pergola where its shade and connection to the garden are useful. Keep the two purposes visible in the drawing. If a change solves one problem but creates another, revise the layout before settling on a model. The aim is a garden that works as a whole, rather than two structures planned in isolation.
