
Checking a Greenhouse Base for Level and Square
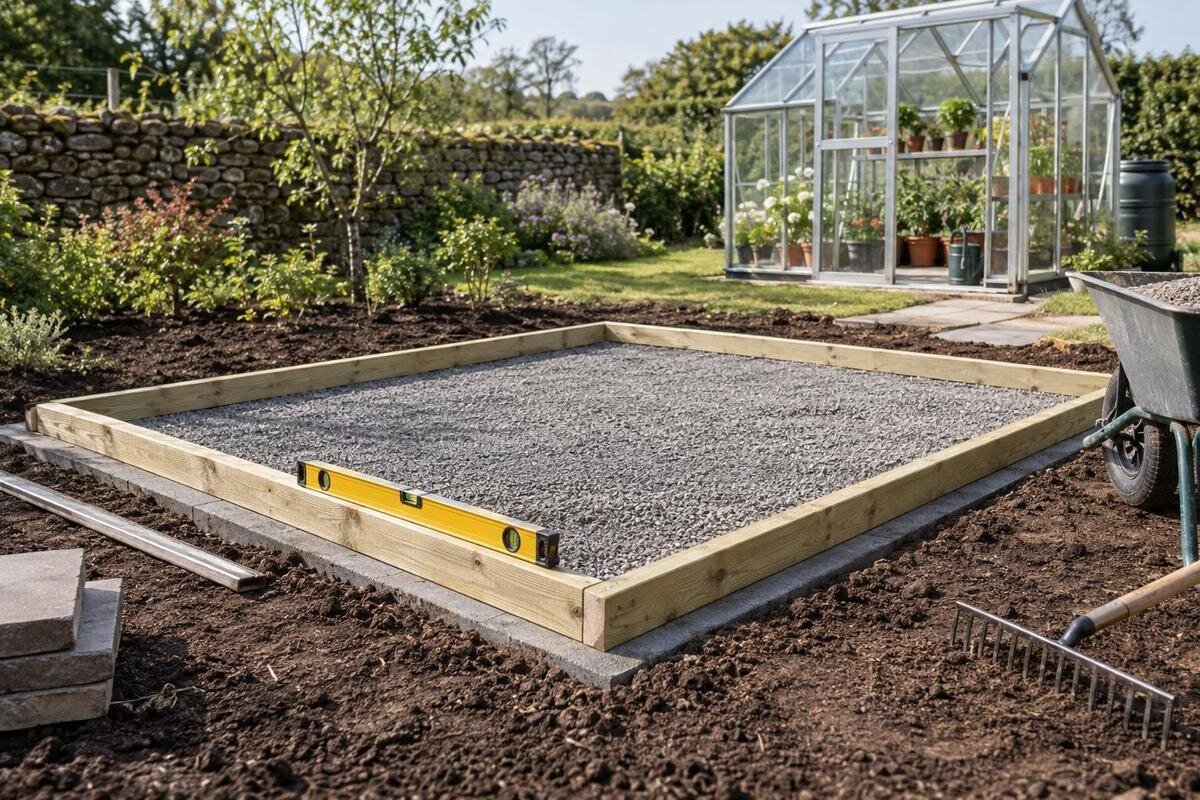
GREENHOUSE BASE INSPECTION
Before a greenhouse frame is assembled, its base needs two independent checks: it must meet the model’s level requirements and match the intended footprint. A spirit level cannot tell you whether the corners form the right shape. For a rectangular layout, comparing its diagonals is a useful squareness check—but only when you measure between the correct points and also verify the sides. This guide explains how to use the drawing, record an inspection and handle a mismatch before installation proceeds.

Level and square are separate checks
Level and square answer different questions. A level check asks whether the specified bearing surface meets the manufacturer’s level requirement; a square check asks whether the plan’s corners and sides match the intended geometry. Here, “square” means laid out at right angles, not that the greenhouse has four equal sides. A spirit level shows slope along its contact line, not the angle of a corner. A rectangular outline can be square but slope in one direction, or sit level along an edge while its corners are skewed. Flatness is separate: matching corner heights do not rule out a high or low point between them.
That distinction affects how well the structure meets its base. A skewed footprint may leave frame members out of alignment; uneven or twisted support may stop rails or joints sitting as intended. Depending on the design, pulling components into place can make doors or windows harder to operate or put strain on connections. These outcomes are not automatic for every deviation, but they are a reason not to rely on force or assumed adjustment. When considering the Spacious Greenhouse, allow for both footprint and level checks in the preparation work. Record the results separately so the installer can distinguish a layout problem from an uneven supporting surface.
Use the drawing for the exact model
Obtain the current base or foundation drawing for the exact greenhouse, model, option and base arrangement. A product photograph, overall floor area or another model’s outline cannot establish where the supporting edges should fall. For example, the page for the Limited Edition Aluminium Greenhouses with Storage identifies a product family, but the installer still needs the drawing for the precise selection being built. Confirm that the drawing applies to the base system being prepared and to the version ordered. Check its model reference against the order confirmation; do not transfer an outline or dimension from a similar-looking option.
Read the dimension references before marking anything out. Identify which lines denote the outside structure, supporting footprint, centreline or wall reference, and from which corners the dimensions are measured; follow the labels rather than assuming these lines coincide. Note any returns, offsets or separate segments shown. Catalogue floor area is not a setting-out plan, and no generic greenhouse foundation dimension can replace the model drawing. Record the drawing title or revision used. Do not scale measurements from a page or reconstruct an omitted position from a photograph. If the reference points or revision are unclear, ask the installer or manufacturer to confirm them before the base is finalised.
How to compare the diagonals
For a plan drawn as a rectangle, use the four corners identified on that drawing. Mark them A, B, C and D in sequence, then measure the two diagonals between opposite corners: A to C and B to D. Use the same kind of reference point at each end, as the drawing or installer specifies; comparing an outside edge on one diagonal with an inside corner on the other makes the result meaningless. With a model such as the Bloomcabin Prestige Greenhouse, take the measurement points from its matching documentation, not from a photograph or a guessed frame edge. Keep the marks visible until the readings are recorded.
A true rectangle has equal diagonals, so comparing the readings is a useful check when the side lengths and corner locations also match the plan. Record both numbers, units and points used; do not simply write “square”. If the readings differ, the base may be skewed, but a misplaced mark, a moved stake or inconsistent measurement points can also explain the result. Check that the same method was used for both diagonals, then remeasure before diagnosing the base. Keep the unrounded readings for the installer to review. Diagonal comparison is not a universal pass-or-fail rule: any acceptable difference must be confirmed for the exact model and base.
Check level across the full support layout
Check the specified bearing edges and support points in more than one direction. A spirit level laid along one short section shows the slope along that contact line; it cannot establish that the entire perimeter is level or that intermediate supports sit at the same height. Follow the installer’s agreed method, including any datum and instrument they use, and note where each reading is taken. Check both directions where relevant and include the support points called for in the drawing. One reading at a convenient corner is not a report on the whole base. If another instrument is used, ask how its readings relate to the same reference.
Describe locations so another person can repeat the check: name the front and rear edges and note the direction of each reading rather than keeping an unexplained number. If the reading changes from one end to another, record where and how; do not improvise a correction with packers or added material. When choosing from the Aluminium Greenhouses range, confirm the exact model and configuration before agreeing which support points will be checked. Any permitted height variation must come from that model’s installation information, rather than a generic allowance applied to the whole range.

Verify the sides and footprint shape
Diagonal measurements do not replace checking the sides. Compare each marked side and any offsets with the drawing; equal diagonals do not prove that every edge has the correct length or that the footprint sits in the right position. Confirm that the corner locations and the relationship between sides match the plan. This matters especially if the layout includes a return, angled section or more than one rectangle: one A-to-C and B-to-D comparison cannot describe the whole outline. Side and diagonal measurements answer related but different questions. Ask the installer which points define each segment and how each will be recorded.
If you are considering a Lean-to Greenhouse, use its own installation drawing to establish the reference lines; do not assume an existing wall, paving edge or nearby structure is square or is the correct datum. The same rule applies to any footprint that is not one simple rectangle: use all of the drawing’s reference points, not an imagined corner. Check that the orientation on site matches the drawing, too. Do not derive an offset from a convenient garden edge unless the drawing identifies that edge as a reference. If a section or dimension origin is unclear, have the installer or manufacturer resolve it before the base is finalised.
Look for twist and uneven support
A base can have the intended outline and matching diagonal readings while still being uneven between its corners. A high point, low point or unsupported section can leave a rail rocking, a gap beneath part of the frame or support at different heights. Level readings at selected corners do not automatically show whether every bearing point lies in the required plane. These observations are clues to record, not diagnoses: the cause may be the prepared surface, a shifted component or an incorrect reference point. The installer needs to assess the actual support line against the model’s requirements; a corner-to-corner measurement cannot answer that question.
Keep site photographs with the measurements, but treat them as supporting evidence rather than proof of level or squareness. If you choose one of the Limited Edition Aluminium Greenhouses, distinguish the product photographs used during selection from the site photographs used to record its prepared base. For the site record, photograph the marked points and any visible gap or high spot, and write down exactly where each image was taken. Even a smooth-looking surface may have a twist that is difficult to see from one viewpoint. Relate visible irregularities to the drawing and on-site readings rather than judging an allowable deviation from a photograph.
Illustrative inspection for installer review
Ask the installer to approve the drawing, measuring method and acceptance criteria before work starts. The following is an illustrative inspection example, not a report from an actual site. Imagine the installer preparing a selected T-Model Orangery Greenhouse. They identify the exact model and drawing revision, label each drawing-defined corner or reference point, check the side dimensions and both diagonals where the plan is rectangular, then take level readings at the specified bearing points. The record includes units, date, measuring locations and site photographs showing the marks and endpoints. If the drawing defines a more complex outline, the installer follows those points rather than forcing a four-corner test onto it.
Suppose the two diagonal readings do not agree. The installer confirms that both measurements start and finish at the correct marked points, repeats them using the same reference and checks the side dimensions and level notes. If the difference remains, the results are compared with the manufacturer’s requirements; uncertainty goes to the manufacturer or a qualified groundwork professional for review. The log can state “held for review” until the decision is clear, rather than applying an invented generic tolerance. It should also note who approved the method and what decision was made. If a correction is agreed, record what changed and repeat the relevant checks before assembly.
Interpreting mismatched readings
Treat a mismatch as a prompt to investigate, not as a diagnosis. It may indicate a skewed set-out, a wrong reference point, a measurement error or movement in the base; the readings alone do not identify which. Do not average the diagonal numbers, shift a corner by eye or pull the greenhouse frame into line to make them agree. If your chosen product is the Pyramid Greenhouse, keep its own base drawing with the inspection notes so the installer reviews the right footprint and requirements, rather than applying a generic rectangular template. The drawing and on-site check—not the product name—determine the method.
Ask the installer to explain which reading does not meet the stated requirement, what was rechecked and what action is proposed. Depending on the actual base, the next step might be a corrected set-out, a further site review or confirmation from the manufacturer; there is no single fix for every mismatch. Do not cut, pack, grind or otherwise alter the base on the strength of a generic web measurement. If assembly has already begun, pause before forcing more components into place and have the responsible installer assess the base and partial frame together. Keep work on hold while acceptance remains unclear.

Keep a clear handover record
A clear handover record lets the installer, groundwork contractor and greenhouse supplier discuss the same points. Keep the drawing used for set-out, its model and option identification, and its revision; add a labelled sketch showing A–D or every point used for a non-rectangular layout. Record both diagonals, side measurements and level readings with their direction, location, units and date. Site photographs should show where the tape or level was placed; a wide view alone may not reveal the reference point. Note any condition that prevented a reading rather than filling the gap with an estimate. Use the same corner labels on the sketch, notes and photographs.
Include who took the measurements, who reviewed them and which model requirement informed the decision to accept, correct or hold the base. If a correction is agreed, retain the original readings and add the recheck; replacing the first record hides what changed. When groundwork and frame assembly are handled by different people, share the drawing and notes before the assembly visit, not only after a fit problem appears. That gives everyone a consistent record of the site condition and makes questions easier to resolve without treating a photograph or verbal recollection as sign-off.
Resolve questions before frame assembly
Agree when the base will be inspected before frame assembly begins. The frame can conceal the original set-out marks, making a discrepancy harder to investigate once work is under way. Keep the marks visible and the measurement record available until the responsible installer has reviewed the base against the exact model documentation. Where groundwork and assembly are separate jobs, make this review part of the handover rather than leaving it until components are being fitted. An unexplained reading needs a decision before the structure is asked to fit.
The handover should make the outcome clear: accepted for assembly, awaiting correction or held for further review. Ask the responsible installer to explain any outstanding item and identify who will resolve it. Keep assembly on hold until that review is complete. The aim is not to chase identical numbers at all costs; it is to compare the actual base with the requirements for the greenhouse being installed. A documented decision gives the assembly team a clear basis for proceeding without relying on the frame to correct its base.
Frequently asked questions
How do I check whether a greenhouse base is square?
Use the base drawing for the exact model and identify its designated corners. On a rectangular footprint, measure between one pair of opposite corners and compare that diagonal with the other pair, using the same reference points and units. Check the side lengths and corner positions as well. If the outline has returns or offsets, use all the relevant points on the drawing and have the installer confirm the method.
Can a greenhouse base be level but out of square?
Yes. A level check concerns height and slope; a square check concerns the footprint’s corner angles and position. A base can sit horizontally while its corners form a skewed shape. The reverse is also possible: the plan may have right-angle corners but slope in one direction. Check and record each separately.
Do equal diagonals prove that the base is ready?
No. Equal diagonals are a useful check for a rectangular layout, but they do not establish that every side has the correct length, that the footprint is in the right position, or that the support points are level and even. The drawing and the full set of site checks still matter, and the installer should assess the results against the requirements for the selected model.
What difference between the diagonals is acceptable?
There is no generic figure that applies to every greenhouse and base arrangement. Ask the manufacturer or responsible installer what criterion applies to the exact model. Record both readings and their reference points without rounding them into an assumed pass. If the applicable criterion is unclear, treat the result as unresolved and request a review.
Should I start assembling if the diagonal readings differ?
Pause before frame assembly. Check that the drawing and measurement points are correct, then ask the installer to remeasure and assess the base against the model requirements. Do not pull the frame into line or alter the base to make the readings agree without qualified guidance. Keep a note of the discrepancy and the decision before work continues.
Level, squareness and flatness are related, but none replaces the others. Use the drawing for the exact model, measure from its reference points and record the results across the specified support layout. Where the plan is rectangular, compare both diagonals alongside the side and level checks. If readings conflict, let the installer review them against the applicable requirements before assembly. A documented inspection gives the greenhouse a better chance of fitting as designed without relying on guesswork or force.
