
A Greenhouse Beside a Garage: What to Check First
GREENHOUSE SITE PLANNING
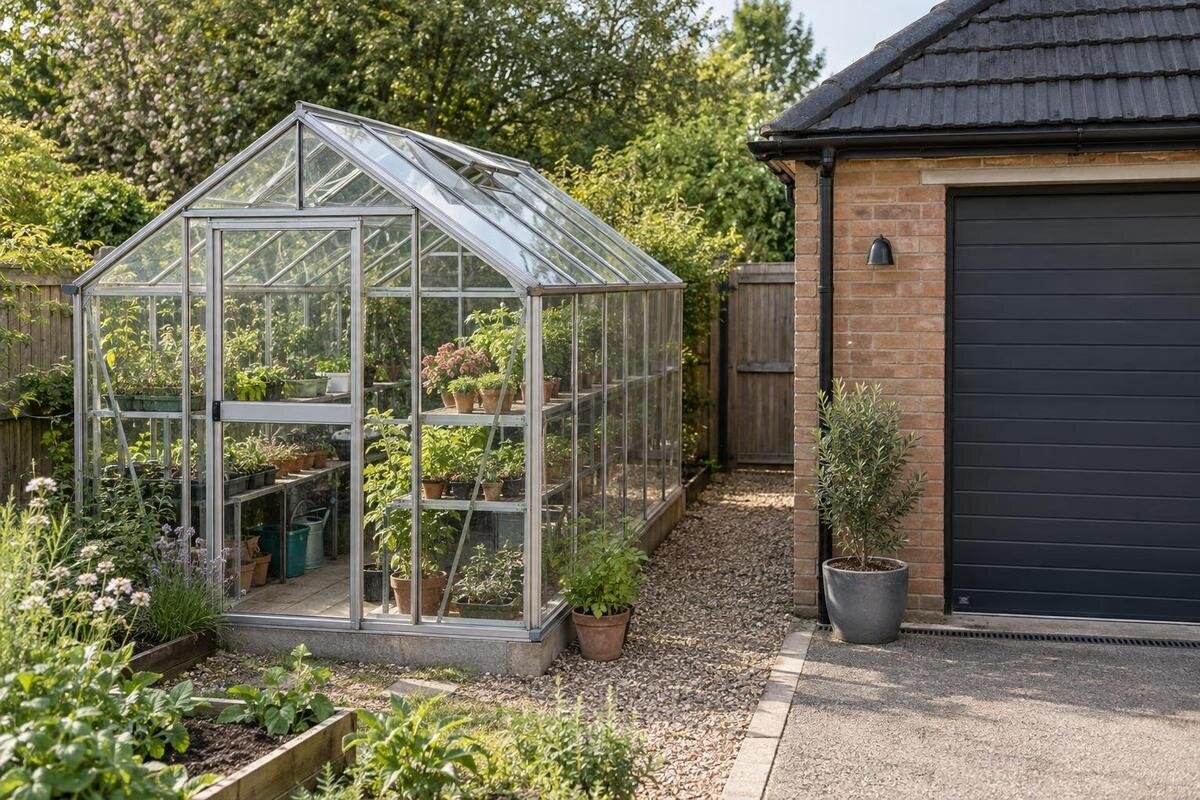
Putting a greenhouse beside a garage can make good use of a side yard, but the garage affects more than the available ground. Its roof can send water towards the site, its walls and eaves can cast shade or restrict access, and a door or maintenance route can become awkward once a greenhouse is in place. Compare a separate freestanding layout with a lean-to only if the wall has been assessed for that purpose. A scaled plan, seasonal observations and site photographs help expose these issues before you choose a model.

Draw the garage and greenhouse on one plan
The first useful drawing includes the garage, not just the patch of ground you hope to fill. Measure the garage’s outside walls, eaves and gutter line, downpipes, doors, windows and vents beside the proposed greenhouse. Add boundaries, paths, paving edges, taps, drain covers and other fixed features. Record the full external footprint for the exact greenhouse model, including its base and any roof projection; the advertised growing area alone does not show where the structure will sit. A rough sketch can help, but a scale drawing makes narrow gaps and awkward corners easier to see. Use the same units throughout so measurements can be compared accurately.
On that plan, mark where people walk, vehicles turn or park, and where you need to stand to service the garage. This helps you compare two workable layouts instead of an outline that fits only when everything else is ignored. As a catalogue reference, the Aluminium Classic Greenhouse range is listed with area options from 3.77 m² to 28.08 m²; those figures indicate scale, but are not the selected model’s external footprint or clearance drawing. Confirm its outside measurements before deciding whether the garage-side strip is wide enough, and show the dimensions on the plan rather than relying on memory.
Compare freestanding and lean-to layouts
A freestanding greenhouse and a lean-to solve different space problems. A freestanding structure sits separately rather than relying on the garage wall, but it still needs its own position, a suitable support arrangement and room for doors, cleaning and access to both buildings. A gap between the structures may be useful for servicing a gutter or wall; the width needed depends on the actual model and the work to be done. Compare the site footprint with the instructions for the specific greenhouse, not a universal spacing rule. This option can be assessed independently, but it does not remove the garage-side issues of shade, runoff or access.
A lean-to uses a wall line and can change how much garden depth the layout needs, but it makes the garage wall and roof junction part of the greenhouse decision. The Lean-to Greenhouse listing gives area options from 3.69 m² to 14.34 m². That identifies a product format and size range, not proof that the model can be attached to your garage or that the wall is suitable. Check the model’s installation information, wall construction, eaves, windows and services, and confirm any required assessment or permission before choosing an attachment. Compare both arrangements on the same plan so the apparent space saving does not hide a blocked route or maintenance problem.
Have the garage wall assessed before an attachment
Do not treat a solid-looking garage wall as proof that it can accept a greenhouse attachment. Its construction, condition, finishes, windows, service runs and eaves all matter; cladding, openings or waterproof layers may make fixing and sealing more complicated. Identify who is responsible for the building and look for any alteration records you have. Ask a suitably qualified building professional to assess whether the wall and proposed connection are appropriate, including the relevant structural questions. A product photograph or generic sketch cannot establish that for your property. If an approval or permission is needed for this site, confirm it before ordering materials or scheduling work.
Look at the roof meeting point as well as the wall. Check whether a greenhouse would sit beneath the garage eaves, interfere with a gutter, cover a vent or window, or make the wall harder to inspect and repair. The junction must be weatherproofed and its water path understood; do not improvise a connection based on the shape of a model. Consider how the greenhouse and garage will be maintained once both are in place. If an assessment cannot establish a sound, serviceable arrangement, compare the freestanding option or another position instead.
Track shade through the seasons
Garage walls and roof overhangs can cast a longer or differently placed shadow than a quick midday visit suggests. Note sunlight and shade in the morning, around midday and later in the afternoon, then repeat the observations in different seasons if possible. Mark shaded areas on a seasonal diagram with dates and times rather than relying on one photograph. That helps show whether a greenhouse would lose light briefly or for a substantial part of the day. Think about the crops you intend to grow, since their light needs matter more than a broad label such as sunny or shaded. Record whether the garage shades the whole area or only one part.
Compare possible positions along the garage side, not only the closest corner. Eaves, the height and shape of nearby buildings, and boundaries can shade a proposed footprint unevenly. The Pyramid Greenhouse area range is listed from 5.53 m² to 18.9 m², but an area figure does not show how its exact footprint would sit in your shadow diagram. Place a specific model using its current drawing, then compare the light available at that spot with your growing plan. If shade is significant, consider another position or a different footprint rather than assuming the greenhouse will receive full sun.

Trace roof runoff and drainage
Follow rainwater from the garage roof before choosing a position. Mark every gutter and downpipe, note where each outlet discharges, and look for overflow marks, puddling or water crossing the proposed footprint after rain. The greenhouse adds its own roof and runoff, so assess the two drainage patterns together. Keep the greenhouse entrance and route to the garage clear of any discharge, and avoid a position where water from the garage roof falls directly onto the greenhouse or collects at its base. A dry-day view alone will not reveal the route; photographs taken during rainfall can show where water actually moves.
Check the roof edge as well as the ground. An eave can project beyond a wall, while a gutter may need cleaning or repair; a close fit can obstruct that work or make overflow harder to manage. Note where runoff leaves the roof, crosses paving or meets an existing drain. If the plan involves changing a downpipe, adding drainage or directing water elsewhere, have that arrangement reviewed by a qualified professional and confirm any requirements that apply to the property. Do not solve one problem by sending water into a walkway, towards the greenhouse base or against another structure. Keep access to existing drainage points visible on the plan.
Allow for garage access and ventilation
Test garage access with every door and route in use. A garage door may lift, roll or swing into a space that looks empty when closed; a side door needs a clear approach, and a vehicle needs room to turn, park and unload. Mark the door’s full opening position and the vehicle’s practical approach on the plan, then check that the greenhouse entrance, open window or path does not occupy that area. Leave a route for carrying items between the garage and growing area without squeezing past a corner or moving stored objects each time. Check access both when the car is parked and when the garage is being used for work.
Air movement matters alongside physical access. Note where vehicle exhaust, a workshop extractor or another outlet releases air, and where greenhouse vents or open doors would face. Avoid a layout that places greenhouse openings directly in the path of garage exhaust or blocks an existing vent. When comparing the Limited Edition Aluminium Greenhouses range, listed from 3.77 m² to 28.08 m², look beyond the area options to the doorway and vent positions shown on the selected model’s drawing. Mark these alongside the garage outlets so you can assess their relationship. Seek professional advice if the discharge paths are unclear.
Space for maintenance and moving equipment
Leave a practical way to maintain both structures. Garage gutters, downpipes, fascia, roof edges, wall finishes, windows, vents and service points may all need attention; the greenhouse may need cleaning and repairs in line with its maker’s guidance. A narrow gap can look adequate on a plan yet be unusable for the person who has to reach the gutter or inspect the wall. There is no single clearance that suits every garage and model. Check the greenhouse installation and maintenance instructions, and ask whoever maintains the garage what access they need before fixing a position.
Map the route from the nearest gate, driveway or work area to the greenhouse entrance. Consider moving pots, soil, watering equipment and harvests, and note whether items stored in the garage could obstruct that path. The Limited Edition Aluminium Greenhouses with Storage range is listed from 5.52 m² to 28.08 m². Compare its layout with the storage you need and the space available beside the garage, using the product drawing to locate openings. Distinguish space used for storage from the route needed to reach it, so routine tasks do not depend on moving other items out of the way every time.
Assess the ground and locate services
Check the ground where the greenhouse would stand rather than assuming the paved area in front of the garage is an extension of the building’s base. Look for changes in level, cracked paving, soft patches, the direction water runs across the surface and places that stay wet; record them for the supplier or installer. The chosen greenhouse’s support and base requirements must come from its instructions and a site assessment. A nearby slab, retaining edge or garage foundation cannot be assumed to suit the greenhouse or an attachment. If the ground needs alteration, or you cannot tell how the proposed base should meet it, get appropriate professional advice before ordering or building.
Locate services before excavation or fixing. Check available property plans for water pipes, cables, drainage and irrigation, and have uncertain routes identified by a competent professional. Mark accessible taps, drain covers and service points so the greenhouse does not block them. The Prestige metal-base version is listed with area options from 3.77 m² to 28.08 m²; the product name does not establish that it suits a particular paved, sloping or serviced site. Use the selected model’s instructions and site assessment rather than treating a base label as a substitute for suitable ground preparation. Keep the garage’s own access to services available as well.

Fit the greenhouse layout to its intended use
Decide what the greenhouse needs to hold: seed trays, benches, beds, a clear working aisle, water containers or room to turn with a tray. Sketch these items at the sizes you expect to use, and include the doorway and any window that opens into the aisle. This tests the usable interior layout, while the outside footprint shows whether the building fits beside the garage. Keep the two questions separate: a greenhouse can fit on the site yet leave too little interior room, or provide adequate growing space while blocking garage access. Prioritise your main uses before comparing models.
If you need a larger growing area, compare that requirement with the space available beside the garage. The Spacious Greenhouse range is listed from 47 m² to 70 m², so include those area options when assessing how much of the site your growing plans would occupy. Use the exact model dimensions to place your preferred option on the plan, then compare the interior arrangement with the outdoor routes you need to retain. If benches, beds or working space compete with garage access, reconsider the growing layout, reduce the greenhouse footprint or choose another position rather than counting only the planted area.
Test the proposed position before ordering
Before choosing either layout, mark the proposed outside footprint on the ground with a removable method and compare it with the scaled drawing. Check the greenhouse door in its open position, the garage doors, vehicle route, access gap, downpipes and places where you need to stand for maintenance. Take photographs from the driveway, garden and garage entrance; include the eaves and gutter in the frame. A marked-up plan and photographs from several angles can reveal conflicts missed when viewing the spot from one position. Revisit the outline after rain or at another time of day if runoff or shade is uncertain.
Then compare the marked area with the current, model-specific drawing and installation guidance, including external dimensions, base, door and vent positions. The T-Model Orangery Greenhouse listing gives area options from 16.52 m² to 30 m²; those numbers alone do not show how a chosen model clears an eave or leaves access beside the garage. Ask the supplier or installer to confirm model dimensions and layout, and involve a suitably qualified professional for any wall attachment, drainage change or uncertain ground condition. Confirm any approval or permission that applies to the property before work begins.
Frequently asked questions
Can a greenhouse stand directly beside a garage?
Possibly; proximity alone does not decide whether the position works. Follow the greenhouse instructions and allow for garage access, gutter and wall maintenance, door openings and roof runoff. If you are considering an attachment, have the wall and proposed connection assessed first.
Will a garage wall keep a greenhouse warm?
Not reliably by itself. A garage wall can change shade and air movement, and its effect depends on the site and season. Observe the proposed position at different times of day and year, then plan ventilation in line with the selected greenhouse’s guidance.
How can I check whether garage roof water will reach the greenhouse?
Mark the gutters and downpipes, then observe where water goes during rain. Photograph overflow, splashing and puddles, and check the greenhouse’s own runoff as well. Have any proposed drainage changes reviewed by a qualified professional.
What should I measure before choosing a position?
Measure the garage walls, eaves, gutters, downpipes and openings, along with the usable access route and the chosen greenhouse’s full external footprint. Include door openings and maintenance access; the advertised floor area alone is not enough to establish fit.
Is a lean-to greenhouse automatically suitable for a garage wall?
No. A product listing does not establish that a particular wall is suitable for an attachment. Check the model instructions, wall construction, eaves, windows, vents and services, and confirm any relevant approvals with a qualified professional.
Choose a position that works for the garage and the greenhouse together, rather than simply filling the space between a wall and a boundary. The layout should leave doors usable, allow routine maintenance, account for roof runoff and provide the light and access needed for your growing plans. A separate structure may be simpler to assess, while a lean-to adds a building connection that needs its own assessment. Once the plan, shade observations and runoff checks indicate a workable position, confirm the selected model’s dimensions and site requirements before proceeding.
