
How to Keep a Greenhouse Diary That Improves Next Season’s Plan
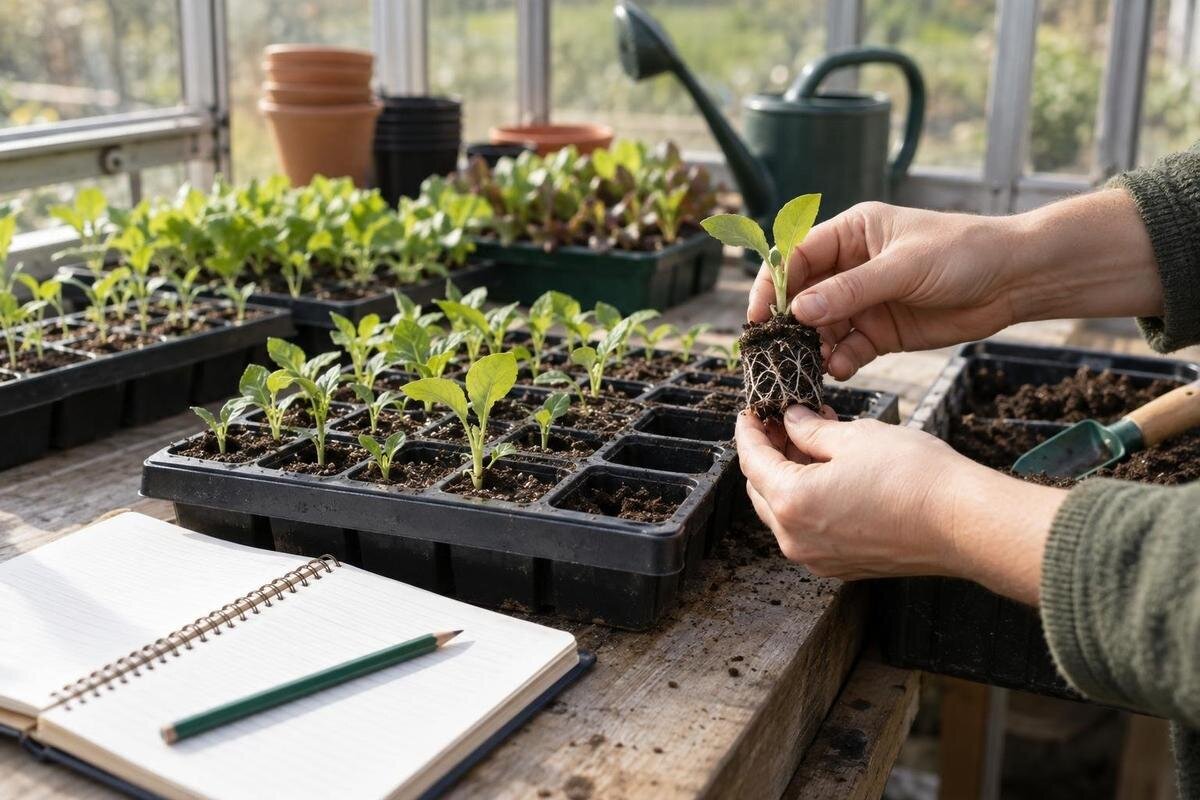
Greenhouse growing diary
Memory tends to keep the most recent harvest and forget the smaller details that shaped it: which seed batch was sown, where it sat, how many seedlings reached the next stage, and how much work the season required. A greenhouse diary gathers those details in a form you can compare later. It does not need to be a daily journal or a record of every reading. A small set of consistent entries—sowing, conditions, progress, harvest, labour and space use—can show which parts of your routine to repeat and which deserve a trial next season. The examples below are illustrative, not crop-specific advice.

What the diary should help you decide
The diary should help with decisions you will face again: which sowing batches gave enough usable plants, which crops justified the space, and which tasks repeatedly collided. Pick two or three questions before you begin; otherwise, the notebook can fill with observations that never affect the plan. Keep decisions concrete: repeat a reliable batch, adjust its timing or quantity, reserve room for young plants, or change the order of work. These are planning hypotheses, not proof that one factor caused an outcome. If you are new to recording, choose one unresolved question for the first season and add fields only when they help answer it.
Write down your starting constraints too: the growing space available, fixed commitments and tasks you can realistically keep up with. Note which crops you want to prioritise and what would count as a useful result, whether that is enough plants for a bed or a manageable harvest. These notes give the end-of-season review a reference point beyond the largest yield. If you are also comparing greenhouse sizes, the Aluminium Greenhouses range includes listed areas from 3.77 m² to 28.08 m². Catalogue floor area is not the same as usable growing space, so assess it alongside a measured layout showing benches, beds, paths and storage.
Map the greenhouse before sowing
Make a simple map of the greenhouse before the first sowing. Mark growing areas, benches or shelves, paths, door access, storage and any area used for tools or potting. Use measured dimensions with units, and label temporary surfaces separately from fixed ones. Divide the usable area into named zones—A, B and C, for example—so each sowing entry can identify a location without relying on vague labels such as ‘near the door’. A hand-drawn sketch is enough if its labels stay consistent. Add the map date and update it when a bench, bed or storage area moves. If the sketch is approximate rather than to scale, say so.
Record how the layout changes during the busy part of the season: which zone is occupied by propagation trays, when it becomes available, and whether space is blocked by work or storage. That exposes peak demand, which a single total floor-area figure misses. If comparing structures is part of your longer-term plan, the Lean-to Greenhouse range has listed areas from 3.69 m² to 14.34 m². Keep your layout questions beside any model you are considering: where would trays go, which areas need clear access, and where would potting take place? In your current diary, date temporary changes too, so you can see when a growing surface was unavailable even though the structure itself had not changed.
Keep a separate record for each sowing
Give every sowing a batch ID, even if you only sow a few trays. Use one record for a crop and variety sown on one occasion; give a repeat sowing a new ID rather than combining it with the first. A compact template is: batch ID; crop and variety; seed source and lot if available; sowing date; number sown; container or tray format; growing medium; method or treatment; greenhouse zone; intended destination; and next planned check. Add the details you expect to compare next year, not a long list of fields that will be left blank. If something is unknown, write ‘not recorded’ rather than guessing later. Note changes in seed lot or method against the relevant batch.
Illustrative example only—not sowing advice or an expected result: 15 September 2025; batch S04; Crop A, Variety 1; 20 seeds in a 24-cell tray; medium Mix 1; Zone B; first check planned for 22 September. At the check, add the date and observed number emerged rather than altering the sowing entry. This keeps the original facts intact while giving later observations a clear place. Keep future purchasing notes separate from these observations. For instance, if you are considering the Bloomcabin Prestige Greenhouse, listed from 3.77 m² to 28.08 m², record the capacity question you want the diary to answer: how many batches need space at the same time?
Log conditions as observations, with dates and units
Write conditions as dated observations, and say where and when you noted them. If you use instruments, enter the reading, unit, time and position; a reading beside a door may not describe a bench elsewhere. If you do not measure a value, use a consistent description such as ‘cloudy at midday’ or ‘surface dry to touch’ instead of estimating a number. Keep measured values, visual observations and your interpretation in separate fields. This makes comparisons clearer and avoids presenting an impression as a measurement. If an instrument gives a minimum or maximum reading, note the period it covers so the figure has context.
Record changes that could help explain a difference: shading or ventilation settings as you observed them, watering events, an unusually sunny or overcast spell, a cold night if known, or a change in routine. You do not need to fill a daily weather diary; note conditions at chosen checkpoints or when something changes enough to matter to your record. ‘Screen drawn from 12:00 to 14:00; bench B’ describes an event without deciding its effect, while ‘too hot’ does not. A date and site-specific note will make next year’s comparison more useful than a broad seasonal label.

Follow each batch from emergence to transplanting
Follow each batch through the milestones that matter to your plan: first emergence, thinning or pricking out if applicable, potting on, transplanting and final status. At each count, name the denominator. ‘13 emerged from 20 sown’ can be compared; ‘13 seedlings’ cannot show how the result relates to the original sowing. Record the date, number still usable, number moved and destination zone or bed. If plants are lost, note when and what you actually saw; use ‘cause unknown’ when you cannot tell. Keep ‘emerged’, ‘ready to move’ and ‘transplanted’ as separate stages if you need to distinguish them.
Compare batches at the same stage, rather than lining up dates alone: one may have been checked sooner or moved at a different point. Record how long each batch occupied a tray or bench if space is often tight, and note whether it was ready before its destination was free. Separate waiting time from the time needed to reach that stage; they suggest different planning problems. If the records lead you to compare the Limited Edition Aluminium Greenhouses range, listed from 3.77 m² to 28.08 m², take along the tray counts and occupied dates. These show whether you need to investigate more growing space or reconsider the timing of overlapping batches.
Measure harvests consistently
Record harvests against the crop, batch, location and date, using one consistent unit. Depending on what you grow and can measure reliably, this might be a count, a mass or a number of containers; write the unit every time and do not combine different measures in one total. If there are several pickings, enter each harvest separately and add them later. Where useful, separate produce you can use from damaged or discarded produce, and note the reason only when you observed it. Include the number of plants harvested or the planted area if you intend to compare yield per plant or per area; without that denominator, totals can mislead.
Use the same boundaries each year: what counts as a harvest, whether a total includes early pickings, and whether discarded produce is excluded. Compare like crops, varieties, plant counts and growing areas; a heavier total may simply come from more plants. If you review yield per square metre, use the measured area actually planted, not the entire greenhouse footprint. This distinction also matters when comparing structures: the T-Model Orangery Greenhouse has listed areas from 16.52 m² to 30 m², but those figures are not planted-area measurements or yield forecasts. Keep the area used for each crop beside its harvest total so next season’s comparison uses the same basis.
Track labour, inputs and space pressure
Add a task log to show what the plan demanded from you. Note the date, task, batch or zone, time spent and whether the time is measured or estimated. Useful entries might include sowing, watering, potting, transplanting, cleaning, tying in or harvesting—record work that relates to the decisions you want to make. Separate a one-off job, such as setting up an area, from a task that recurs. If more than one person helps, agree whether you are recording total person-time or elapsed time; otherwise, the figures will not be comparable. A rough, consistently recorded total can reveal pressure without becoming a detailed timesheet.
Log space in practical terms too: how many trays or plants occupied a zone, the dates it was in use, and whether you had to move anything to complete another task. Add inputs only if they help answer a question, and record quantities in units you can repeat. Storage deserves its own entry if tools or supplies regularly occupy a growing or working area. When considering the Limited Edition Aluminium Greenhouses with Storage, listed from 5.52 m² to 28.08 m², use those notes to identify what you need to store and where you need access to it. In the diary, distinguish storage from growing surfaces so you can see how each was used during busy periods.
Make the record easy to maintain
Choose a format you will actually update: a notebook, spreadsheet or digital log can all work. The essential feature is a stable batch ID that appears on the tray or plant label, record and any photograph. Keep dates in one format, measurements in consistent units and zone names the same throughout the season. A spreadsheet can make sorting and totals easier; a paper notebook may be quicker beside a bench. You can combine them, but decide which is the main record and when notes will be copied across. A photograph can show placement or visible development, but include its date and batch label; an image without them is difficult to compare later.
Build the entry around events rather than a blank page for every day: sow, check, move, harvest or complete a task. A reminder attached to a routine you already follow can help, and a brief review can catch missing counts or unclear labels. Mark a missed observation as missing, not zero; zero means you checked and found none. Keep planned dates distinct from actual dates, and add a note when you correct an entry. If the system feels heavy, remove fields that do not support a decision, but retain the identifiers, dates and units that make comparisons possible.

Review patterns across comparable batches
At season’s end, sort entries by crop and variety, then compare batches with similar sowing methods, locations and destinations. Look for repeated patterns rather than a single striking result: plants waiting for space, harvests consistently below your expectation, or the same task taking longer than planned. Check notes on conditions and interruptions before attributing an outcome to one change. If two batches differed in variety, date, tray and watering, the diary cannot isolate which difference mattered. State the finding at the level the evidence supports, such as ‘Batch A was ready before the bed was available in three records’, rather than claiming a cause.
Give each possible change a status: repeat because it worked more than once, adjust because a constraint recurred, or test because the evidence is uncertain. Keep a small trial distinct from your main plan so one experiment does not determine the whole season. If limited room is a repeated issue and you are considering the Pyramid Greenhouse, listed from 5.53 m² to 18.9 m², identify the specific constraint first. Was a bench full, a route blocked or a destination unavailable? Record that question with the proposed change. It gives you something concrete to assess rather than assuming a different structure will resolve every space problem.
Turn the findings into next season’s plan
Turn the review into a calendar with a small number of clear actions. For each planned batch, write the crop and variety, target sowing window, quantity, intended zone, destination and event that will trigger the next check. Work back from when plants or produce are needed, using reliable crop-specific guidance for your location rather than copying a date that only suited last year’s conditions. Keep planned and actual dates side by side next season; the difference is useful evidence, not a failure. Leave room to revise the plan if weather, available space or other commitments change.
Plan for peak overlap, not just the number of sowings across the full year. Mark when trays, established plants, harvest work and storage or potting activity may occupy the same area, then compare that demand with the map and labour available. If your review raises a question about a larger footprint, the Spacious Greenhouse range is listed from 47 m² to 70 m². Before treating expansion as part of the plan, identify which recorded demand it would address and which tasks would still need scheduling. Carry those questions into your comparison, and leave uncommitted space in the calendar rather than planning to fill every growing surface at once.
Frequently asked questions
What is the minimum information to record for each sowing?
Give each batch an ID and record the crop and variety, sowing date, number sown, location and a dated outcome. Add the container or tray details if you expect to compare them. For harvests, write the date and unit; for tasks, record the work and time. The ID, date and count make it possible to connect later results to the original sowing.
How often should I record greenhouse conditions?
Choose a routine you can keep up, and take readings at consistent times and places when you want to compare them. Add an entry when a relevant condition or routine changes. Daily readings are useful only if they help answer a question you are tracking; there is no need to fill in measurements you did not take.
How can I compare emergence between seed batches?
Record the number sown, the number emerged and the date of the count. You can calculate an observed emergence rate by dividing the number emerged by the number sown and multiplying by 100. Compare batches only when the count was taken at a similar stage, and note differences in variety, method or location.
What should I do if I missed an entry?
Mark the information as missing, and add a brief note if you know why it was not recorded. Do not reconstruct a reading or count from memory and present it as measured. Keep missing information distinct from zero: zero means you checked and counted none, while missing means no reliable count is available.
Should I reuse last season’s sowing dates in next year’s plan?
Treat them as a reference, not automatic instructions. Compare what happened around those dates, including conditions, batch results and any delays, then check suitable crop guidance for your location. Put target and actual dates side by side next season; the difference will help you refine the plan without assuming every year will match.
The most useful greenhouse diary is not the longest one; it is the one that lets you understand what happened to each batch and why the next plan changed. Keep identifiers, dates, conditions, outcomes, labour and space notes consistent, then review recurring patterns rather than relying on a vivid memory of one harvest. Carry forward the changes your records support, and keep uncertain ideas as trials. That gives next season’s plan a clear basis while leaving room to respond to different conditions.
