
Planning Greenhouse Grow Bags: Space, Drainage and Support
Greenhouse growing guide
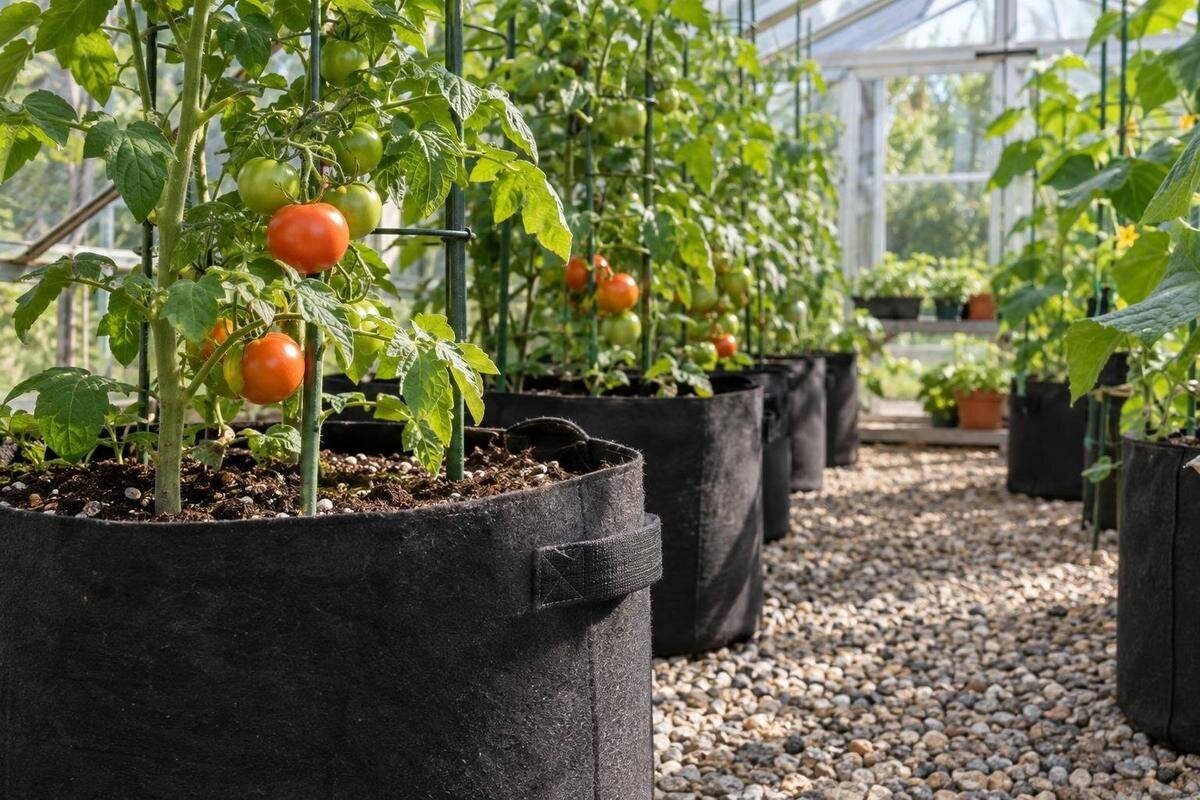
Grow bags can make a greenhouse planting plan easier to rearrange, but they do not remove the need to calculate root space, paths or runoff. Compare the usable litres in each bag with the volume a permanent bed would provide, then map both options against the clear floor area. The worked example below shows how the numbers compare and what to confirm before you buy.

How grow bags differ from permanent beds
Grow bags give each crop or planting group a separate, defined amount of growing medium. That can suit a greenhouse where you may want to rearrange crops, trial a medium or keep one root zone apart from another. The boundary also limits the available root space: unless roots can pass through the bag and reach suitable ground beneath, plan on the medium inside as the root volume. A stated bag capacity does not tell you how many plants to put in it; use crop-specific spacing and volume guidance as well.
A permanent bed provides a continuous growing strip rather than individual containers. If it is open to the ground, the usable root zone may extend below the material you add; if it sits on a sealed surface or has a root-blocking base, count the contained volume. A broad bed can require much more medium than a small group of bags, so measure rather than compare the labels bag and bed. Bags offer more flexibility before they are filled and planted; a bed keeps a fixed footprint. The choice depends on root room, access and how you want to manage the space.
Measure the usable greenhouse floor area
Measure the clear interior of the exact greenhouse size, rather than using the plot boundary or a headline floor-area figure as if every square metre were plantable. Draw the walls to scale and mark the doorway, fixed equipment, any storage you intend to use, and the routes needed for watering, pruning and harvesting. Put the path on the sketch before the bags: otherwise a row can occupy the only practical route to the back. If a dimensioned plan is available, use the drawing for the selected size to identify narrow points and obstructions.
A scale drawing makes it easier to compare a planned layout with different greenhouse footprints. The Aluminium Classic Greenhouse listing gives area options from 3.77 m² to 28.08 m², which can help narrow a shortlist. Check the drawing for the chosen size and use clear internal dimensions for the final count. Keep your proposed path and growing strips on the same scale when comparing sizes, so you can see what actually changes between options. Leave room for the tools and containers you carry, rather than assuming every visible gap can hold another bag. Mark any space that must remain clear at the entrance separately from the main path; it should not quietly become another planting position when you count the bags.
Calculate root volume in litres
Floor area in square metres and growing-medium volume in litres answer different questions. The Lean-to Greenhouse listing states size options from 3.69 m² to 14.34 m²; that helps compare overall greenhouse footprints, not the number of litres available to roots. For a bag, use the supplier’s stated usable capacity where possible. If only dimensions are supplied, estimate internal filled volume from length × width × fill depth. A tapered or irregular bag makes this only an estimate, so external measurements are not a reliable substitute for usable capacity.
Keep the units consistent: 1 m³ equals 1,000 L, and 1 L equals 1,000 cm³. For a first total, multiply usable capacity per bag by the number of bags; compare that with a bed’s length × width × filled depth. If crop guidance gives a volume or planting-density recommendation, use it to set the plant count instead of filling every spare space. Confirm that the bag and growing medium are stated as suitable for your intended use, and follow the fill instructions. Outside dimensions alone do not tell you how much medium to add.
Worked layout: ten bags compared with two beds
Imagine a clear interior measuring 3.0 m wide by 4.0 m long. For this arithmetic example, reserve a 0.6 m central path and split the remaining width into two 1.2 m growing strips. Assume ten 40 L bags, each with a 0.4 m × 0.6 m footprint. Put one row of five bags in each strip, with the 0.6 m dimension running along the row. The five bags take 3.0 m of length, four 0.1 m gaps take 0.4 m, and 0.3 m remains at each end. Ten bags hold 400 L in total and cover 2.4 m² by footprint. Each row occupies only 0.4 m of its strip’s width; the unoccupied width is not included in the bag footprint. Position the rows within the strips according to access and mature crop spacing. These bag dimensions and path measurements are examples, not crop recommendations.
Now compare the same two strips as continuous beds with a hypothetical fill depth of 0.25 m. Each bed would contain 1.2 m × 4.0 m × 0.25 m, or 1.2 m³; together they would hold 2.4 m³, equal to 2,400 L. That is six times the bags’ nominal volume, although an open bed may give roots access to ground below. This is a comparison of two ways to use the same greenhouse, not equal planting footprints: the beds occupy both strips fully, while the bags leave space around them. It does not establish that either arrangement holds six times as many plants. The bags need a stable surface, while a permanent bed stays in a fixed position but still depends on suitable construction. The 1.2 m bed width is for the calculation, not a reach standard. The Limited Edition Aluminium Greenhouses listing states area options from 3.77 m² to 28.08 m²; use the chosen size’s drawing to replace these hypothetical dimensions with your own measurements.

Allow for crop spacing and working access
Bag capacity is only one part of the planting plan. The number of plants that can share a bag depends on the crop and the spacing guidance for its mature size. Check the seed packet, plant supplier or a suitable crop-growing guide rather than using the bag’s volume as a plant-count formula. Include the space occupied by leaves and stems as plants grow, not just the area of the bags on planting day. If you are growing more than one crop, draw each group separately so its spacing and access do not disappear into an overall bag count.
Keep enough room to reach the plants for routine work and to move watering equipment or containers along the planned route. A layout that works while plants are small may become cramped as they fill out, so check the mature arrangement on paper. Mark which side of each row you will work from and whether the plants behind it remain reachable. Space between bags is not necessarily a usable passage once foliage occupies it. If you are comparing larger floor areas, the T-Model Orangery Greenhouse listing states options from 16.52 m² to 30 m². Compare possible row arrangements on the selected drawing, keeping crop spacing separate from working clearance. This makes the comparison more useful than simply increasing the bag count to match the extra floor area.
Plan where grow-bag drainage will go
Check the bag’s instructions for drainage and make sure any intended openings are not covered by the greenhouse floor, a tray or another bag. Do not assume that a bag which appears porous will drain in the way your growing medium and crop require. Permanent beds also need consideration: their drainage depends on the bed construction and what lies beneath it. Before filling, confirm that the chosen setup allows water to leave the root zone as intended, rather than collecting around the base of the bag or bed.
Water leaving a bag needs somewhere suitable to go. On a hard surface, observe where it runs and whether it collects where you need to walk or work. Mark those areas on the layout rather than treating drainage as something to address after planting. Distinguish the space occupied by the bag from the route taken by water leaving it: a clear path on paper may still be where runoff collects. The Pyramid Greenhouse listing states area options from 5.53 m² to 18.9 m². When comparing those sizes, carry the drainage markings across to each proposed layout alongside the bags and path. The actual floor and site conditions remain part of that exercise. Keep a note of any uncertainty so the trial before planting can address it, rather than merely checking whether water comes out of the bag.
Support and stability for tall crops
Separate the job of holding a plant upright from the job of holding its bag in place. A stake pushed into loose growing medium can wobble, and a narrow bag or tall plant can be easier to disturb than a fixed bed. Consider the base and position of each bag as well as the support needed by the crop. Keep support points accessible for tying plants as they grow, and make sure they do not narrow the route you have reserved for watering and harvesting.
Do not assume that a greenhouse frame can carry an added trellis or other plant support. Use the manufacturer’s guidance for any attachment, or choose a support arrangement intended to stand independently; ask a suitably qualified professional if you cannot confirm a safe method. Show the support positions on the plan rather than adding them after allocating all the floor space to bags. If your layout also includes storage, mark the space needed to use it as well as its fixed footprint. The Limited Edition Aluminium Greenhouses with Storage listing states options from 5.52 m² to 28.08 m²; its area range is not a support-capacity rating. Check the relevant product guidance for attachments, and use the selected drawing to keep storage access, plant supports and growing rows distinct.
Watering access and moisture checks
A bag contains less medium than a broad bed in many layouts, so it can hold less total water when the medium and other conditions are comparable. That does not set a universal watering interval: crop, growing medium and conditions all affect how often to check. Use crop-specific guidance and observe the medium rather than watering every bag on a fixed schedule simply because they are the same size. Different crops or bag sizes may need different attention, even when they are next to each other.
Place bags where you can inspect and water them without stepping across other planting areas. On your plan, mark the water source and the route to the furthest row; leave access for a watering can or hose if you use one. Trace a complete watering round, including the return route, rather than checking only whether you can reach the first bag. The Bloomcabin Prestige Greenhouse listing states area options from 3.77 m² to 28.08 m², which helps compare overall size choices. Use the selected drawing to assess that watering route alongside your proposed rows. Where crops or bag sizes need different attention, identify those groups on the plan so you can inspect them individually rather than treating the entire greenhouse as one watering zone.

Choose bags, beds or a combination
Grow bags can suit a plan that needs separate root zones, smaller measured quantities of medium or the option to change positions between plantings. Permanent beds suit a fixed planting area where you want to work with a continuous volume. A hybrid layout can reserve one strip for a bed and use bags elsewhere, but it still needs a clear path, a drainage plan and enough room for the mature crops. Compare the actual usable volume and access each arrangement provides; do not choose on flexibility alone if the bag count leaves too little root room.
For a larger greenhouse plan, the Spacious Greenhouse listing states options from 47 m² to 70 m². Draw the selected plan, add up the required litres of medium and reserve the working space before settling on a system. Compare a bag-only layout, a bed-only layout and a combination using the same drawing and the same crop-spacing guidance. Keep separate totals for bag capacity and contained bed volume, noting any possible root access below open beds without assigning it an unmeasured volume. A larger area can allow more layout choices, but it also needs to be organised around the crops and the time you can give them. Judge each option by how you would plant, water and work in it, not simply by which one holds the most medium.
Set out the plan before filling bags
Before buying or filling bags, confirm the usable capacity, intended use and fill instructions with the supplier. Check the crop’s recommended spacing and root volume, then mark bag footprints, bed edges, paths, drainage points and support positions on the greenhouse plan. Set out empty bags in their proposed locations if practical, and check that you can reach each row and still use the working route. This is the point to adjust bag numbers or spacing; it is harder to rethink the layout once the growing medium and plants are in place.
Test the arrangement with a representative bag and the planned watering method before planting the full greenhouse. Check where the water exits, whether the floor remains workable, and whether the support arrangement stays clear of paths. Use this trial to resolve the drainage questions marked on your plan, following the bag and growing-medium instructions. If you are choosing beds, calculate their filled volume from measured length, width and depth, then account separately for any root access below them. Keep a simple record of the crop, bag capacity or bed volume, and planting density. Note which layout you actually used if it differs from the original sketch. Those notes let you compare the next planting with a known arrangement rather than guessing how many bags or plants were there.
Frequently asked questions
What size grow bag should I choose?
There is no single size that suits every greenhouse crop. Start with crop-specific guidance on root space and planting density, then compare that with the bag’s usable capacity. Check the bag supplier’s fill instructions too: outside measurements may not match the volume of growing medium it is intended to hold.
How many grow bags will fit in my greenhouse?
Measure the clear interior, reserve paths and working space, then draw bags at their actual footprint on a plan. Check the arrangement against mature plant spacing, not just the bag count. Dividing the greenhouse’s floor area by one bag’s footprint will overstate what you can usefully fit.
Are grow bags better than permanent beds?
Neither is better in every layout. Bags provide separate growing volumes and can be easier to rearrange before they are filled. A permanent bed provides a fixed, continuous growing area. Compare usable root volume, access, drainage and how much flexibility you need.
Do grow bags need drainage openings?
Follow the bag supplier’s instructions for its intended use and drainage. Make sure any openings are not blocked by the floor or a tray, and plan where the water will go. If the instructions are unclear, confirm them with the supplier before filling or altering the bag.
Can I put a trellis or stake in a grow bag?
Do not assume the growing medium alone will keep a plant support stable. A stake can shift in loose medium, especially as a plant grows. Use a suitable support arrangement, and attach it to a greenhouse component only if the manufacturer confirms that the component is appropriate for that purpose.
Choose grow bags when separate, adjustable root zones solve a practical layout need; choose permanent beds when a continuous, measured volume suits the crops and access better. In the example, ten 40 L bags provide 400 L, compared with 2,400 L in two measured beds, before any possible root access below an open bed. Use your crop guidance, bag capacity and selected greenhouse plan to make the comparison for your own space.
