
Making a Greenhouse the Hub of a Kitchen Garden
Kitchen garden planning
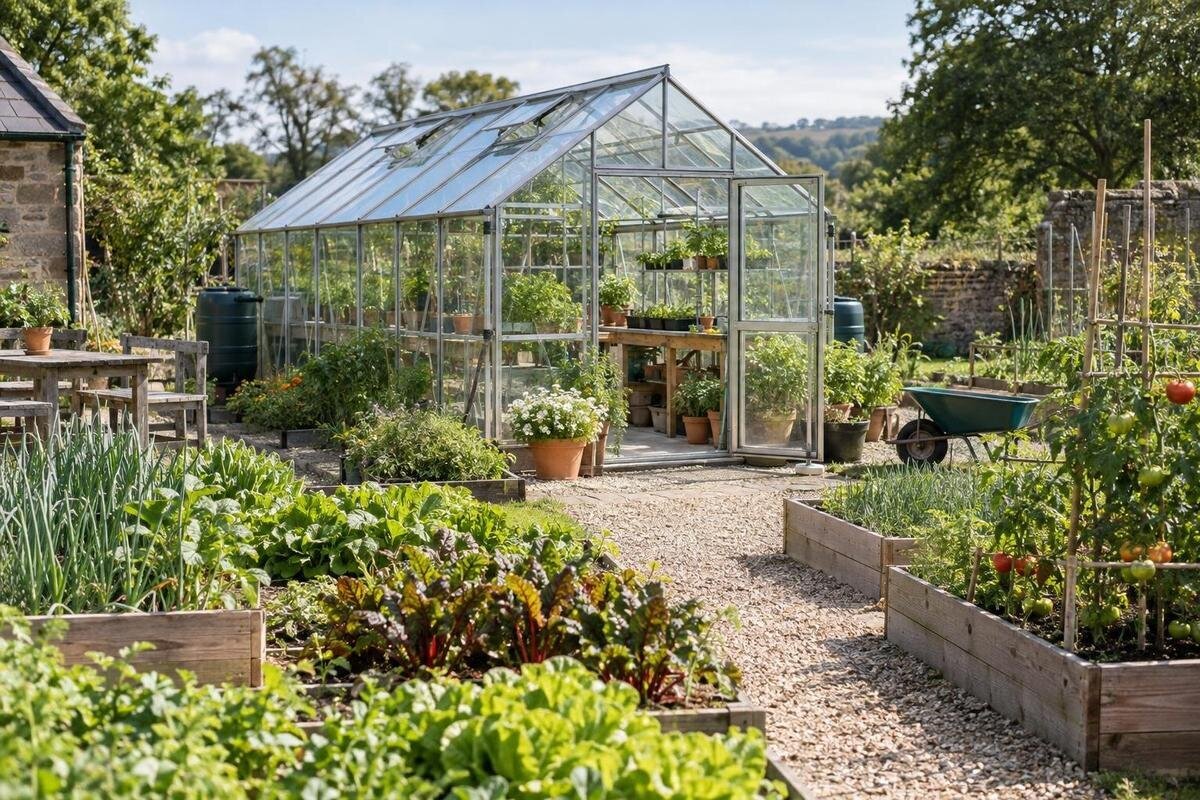
An efficient kitchen garden is organised around the jobs that happen every day, not around a greenhouse set in the middle of the plot. Treat the greenhouse as a working hub: connect it to outdoor beds, a practical water point, compost and the routes that carry seedlings, tools and harvests between them.

What makes a greenhouse a garden hub?
A greenhouse can be the kitchen garden’s hub without standing at the plot’s exact centre. Here, “hub” means a practical link between recurring jobs: raising plants under cover, moving them to outdoor beds, bringing produce towards the kitchen and taking suitable plant material to compost. It does not mean that every task belongs inside; outdoor beds remain the main growing area for crops suited to them. The best position is the one that makes those journeys straightforward while preserving useful growing space. A geometrically central spot may be a poor choice if it blocks a route, leaves a tap awkwardly placed or separates beds from the work they need.
Before drawing a footprint, list what the greenhouse will support and who will use it. Include sowing, potting, hardening off plants before planting them outdoors, watering, harvesting and handling garden material. Note which tasks happen often, which are seasonal and what must be carried for each one. A short written list also reveals whether the structure is mainly for propagation, extending the season or keeping plants under cover until outdoor beds are ready; these roles affect how often you move between it and the beds. In a shared garden, record whether people will work at the same time and where trays, baskets or tools can be set down without blocking somebody else. This turns the idea of a hub into a plan based on everyday movement rather than appearance.
Survey the plot before choosing a position
Begin with a simple site sketch rather than a preferred product shape. Mark boundaries, the house and gate, existing trees and structures, slopes, paths and water services. Observe the plot at different times of day and, if you can, at different points in the year: the shade cast by a tree or wall changes, and a corner that looks dry may collect water after rain. Note wind exposure and places where foot traffic already affects the garden. If roots or buried services may affect a proposed position, identify them before planning ground work and ask the appropriate professional to assess any uncertainties. These observations help you compare possible positions without assuming that one orientation suits every plot.
Then add a temporary greenhouse outline and the approach to its entrance, leaving the outdoor beds and paths visible around it. The Oasis Pyramid Greenhouse has a listed size range of 5.53 m² to 18.9 m², which provides a starting point for comparing scale. Confirm the exact outside dimensions and entrance position of the option you are considering before marking it on the plan. Check that the access route, beds and service points still fit around it. Measure from fixed boundaries and check the result on the ground, because a small shift can change a path or bed. A sketch that shows only the enclosure can hide the space needed to use it.
Arrange outdoor beds around access and care
Place outdoor beds according to what they need and how often people reach them. Group beds with similar routines where that reduces repeated trips, and keep the most frequently visited areas on a clear path from the greenhouse. The right arrangement depends on the plot’s light, soil and existing obstacles; there is no universal grid that suits every garden. Leave a usable path along the sides from which you intend to work, and make sure a bed can be reached without stepping on cultivated soil. Where different crops need different care, label the beds on the plan rather than relying on memory. This also makes it easier to see whether a bed is isolated behind the structure.
Draw beds and routes to scale, including the turning space at their ends. When comparing options such as the Limited Edition Aluminium Greenhouse with Built-in Storage, listed from 5.52 m² to 28.08 m², consider how much of the plot should remain available for outdoor growing. Mark the beds you want to retain before deciding how much space to allocate to the greenhouse. Give each bed an identifiable working side and show how you will reach it while neighbouring beds are in use. If bed positions may change over time, avoid a layout in which moving one bed cuts off access to another. Keep maintenance access around the greenhouse visible on the drawing rather than treating every remaining strip as planting space.
Plan clear routes for people and tools
Build the route map before settling the bed pattern. Mark the main line from the house or gate to the greenhouse, then the shorter connections to each bed, water point and compost area. A clear route is more useful than several shortcuts that cut across cultivated soil. Set its width by the people and equipment that will use it: a person carrying a tray, two people passing and a wheelbarrow turning all need different space. Use temporary markers to test those movements rather than relying on a line on paper. In a shared garden, include the busiest expected use, not just a quiet solo visit. Consider how the route will feel after rain, when mud can make carrying a harvest or pushing a barrow harder.
Check the greenhouse approach and entrance separately from the general path width. If you are considering the Prestige Greenhouse with Metal Base, listed from 3.77 m² to 28.08 m², use the chosen option’s entrance details to plan where the main path meets it. Allow for opening the door and setting down a tray without obstructing someone coming through. A broad path can still have an awkward junction if a bed corner or parked wheelbarrow narrows the approach. Keep this junction free of hose crossings and temporary storage, and test the turn as well as the straight approach. If people have different mobility needs, confirm the applicable access requirements with the project’s access professional rather than guessing from a sketch.

Place water points where the beds need them
Map the water source and the places where water will actually be used before deciding where a new point might go. Show the greenhouse separately from each outdoor bed; a point close to the structure can still leave a distant bed awkward to reach. Think about the hose or line’s route as well as its reach, especially where it might cross the main entrance, harvest path or a turning area. If you use more than one source, record which areas each serves. Test a hose’s practical reach on site rather than assuming that a measured distance will work around corners. Keep access to the point clear so someone can use it without moving compost or a wheelbarrow first.
Water planning should follow the garden’s footprint, not appear as a final note on the drawing. The Spacious Greenhouse is listed from 47 m² to 70 m²; when comparing an option of this scale, include the outdoor beds in the same watering plan rather than considering the enclosure alone. Trace the route from the supply to the greenhouse and then to the farthest bed. Note where someone would stand to use the water point and where the hose would be kept afterwards. If water storage is part of the project, also mark the access needed to use and maintain it. For fixed plumbing or changes to a supply, ask a qualified professional to assess what the site needs.
Give compost a direct, separate route
Treat compost as a destination with work space, not simply a bin placed in whatever corner remains. Organic material travels out from beds towards the compost area, while finished material travels back; plan for both directions. Choose an approach that can be used with the containers or barrow you expect to carry, and leave room for the tasks required by your composting method. A direct route need not run through the greenhouse entrance or the busiest harvesting point. Keeping the compost work area distinct also makes the route easier for other gardeners to understand. Consider who handles the material and whether they can reach the area without shifting equipment stored for other jobs.
Place the compost area on the same plan as the greenhouse, beds and paths before fixing any of them. Alongside a greenhouse option such as the Aluminium Classic Greenhouse, listed from 3.77 m² to 28.08 m², mark the space needed to handle compost rather than showing only the container itself. Include somewhere to stand, put down tools and load or unload the container you will use for transport. Trace the return journey to the beds with finished compost, checking that the unloading point does not block the route. If you are unsure which materials to compost or where a system can sit, follow suitable gardening guidance for the method and site.
Keep harvest and compost journeys manageable
Plan a clear way to take harvested produce from each outdoor bed to the place it will be sorted, washed or carried indoors, if those steps are part of your routine. A basket route should not run through a compost work area or force people to cross a busy entrance. Where produce and compost must use the same path, allow room to pass and keep loading or unloading areas out of the way. Think through a harvest from several beds: decide where full baskets can wait while picking continues and how they will be collected. Include somewhere to set a basket briefly without blocking the next person or narrowing a turning point.
Include the journey beyond the growing beds when comparing greenhouse positions. The Lean-to Greenhouse has a listed size range of 3.69 m² to 14.34 m²; mark the selected option on the plot and follow the harvest route from each bed past it towards the kitchen or sorting area. Include gates and shared paths rather than stopping the route at the edge of the kitchen garden. Check where a person carrying a full basket would need to turn, open a gate or put the basket down. If a wheelbarrow will be used to collect several baskets, show its collection point separately so it does not occupy the greenhouse approach.
Allow for seasonal changes in the beds
Make the plan work across the growing year, not just on the day you draw it. Bed contents change, crops are replaced, and some beds may be rested or replanted. Seasonal tasks can also require temporary trays, supports, netting or harvest containers; mark where these can stand without blocking the entrance, the tap or access to a bed. Avoid filling an apparently spare route with permanent storage if it is needed at another point in the year. A flexible route allows you to change what grows outside without moving the greenhouse every time the planting plan changes.
Potential expansion needs similar care. The Limited Edition Aluminium Greenhouse listing covers sizes from 3.77 m² to 28.08 m², but that range does not mean an installed configuration can be enlarged later. Plan around the size selected for the current project, and consider additional outdoor beds separately. Show where those beds might go and how their watering and compost journeys would connect to existing routes. Note which temporary storage areas would have to move if the beds were added. This gives future planting a defined place without filling the present garden with unused paths. Keep any connection needed for later access free of permanent obstacles.

Choose a greenhouse scale that leaves room outside
Choose the greenhouse scale only after giving the outdoor garden its share of the site. In addition to the enclosure, allow for outdoor beds, an approach to the entrance, usable routes, access to water, compost handling and the journey for harvested produce. These are separate demands on the plot, even if some paths serve more than one. If several people will work there, estimate the number likely to be present at busy times and include passing space. A design that feels generous for one person potting may become awkward when somebody is watering while another carries a harvest past. Do not treat the whole property area as available if existing trees, paving or other uses already occupy it.
The T-Model Orangery Greenhouse is listed from 16.52 m² to 30 m². Compare the space left around your preferred option with the outdoor work identified earlier in the plan. If fitting the greenhouse means losing a useful bed, moving compost farther away or narrowing the main route, make that trade-off explicit before choosing the size. For a community or shared project, ask users to review a typical busy day: one person watering, another moving plants and someone else collecting produce. Record where their activities overlap and whether any can share space at different times. The greenhouse is a useful hub only if the outdoor work remains easy to reach.
Test the whole plan before fixing it
Test the plan at full scale with temporary markers before installing beds or committing to work. Walk from the house or gate to the greenhouse, then carry a tray, basket and tool to every bed. Take the compost route in both directions, and check where a hose would lie without pulling it across a main path. Practise passing, turning and setting items down at the points where those actions will happen. If a route seems tight, adjust the plan while the markers are easy to move. A short walk-through can reveal a dead end or awkward crossing that looks harmless on a neat drawing. Repeat the test with the garden’s normal users, not only the person who drew it.
Before finalising the arrangement, agree who looks after the shared parts of the hub. Decide who checks watering, manages compost, returns tools and keeps paths clear, and how changes to beds will be recorded. Keep one simple plan showing the greenhouse, all outdoor beds, water points, compost area and main routes; update it when any of these move. Mark seasonal routes and temporary stopping places as well as fixed features. This avoids a layout that works only for the original gardener’s habits. The greenhouse can remain the organising reference while the outdoor planting changes, as long as the routes and services change with it.
Frequently asked questions
Does a greenhouse need to be in the centre of a kitchen garden?
No. It can serve as the hub from one side of the plot if the routes between it, the outdoor beds, water and compost are straightforward. Choose its position for access and site conditions, not symmetry.
Should outdoor vegetable beds be beside the greenhouse?
Keep frequently used beds on convenient routes, but place each bed where the available conditions suit the crops you intend to grow. The greenhouse need not be surrounded by beds; include paths, turning space and access to water in the plan.
How many water points should a kitchen garden have?
There is no universal number. Map the source, the beds and the practical hose or line routes, then check whether one point can serve them without crossing main paths. Ask a qualified plumber about changes to a supply.
Where should compost go in relation to the greenhouse?
Choose a spot with a workable route both from beds to compost and back to the beds. Keep containers and handling space out of the busiest greenhouse approach and harvest route.
What dimensions should I check before choosing a greenhouse?
Confirm the specific option’s outside footprint and entrance position, then mark it alongside paths, beds, water and compost. Published area ranges are useful for comparison, not a replacement for exact dimensions.
The strongest kitchen-garden plan treats the greenhouse as a junction between outdoor beds and the jobs that keep them productive. Give each route a purpose, make water and compost accessible without obstructing daily movement, and size the enclosure only after the rest of the garden is mapped. When the plan works for carrying, watering and harvesting—not merely in a top-down sketch—the greenhouse earns its place as the garden’s hub.
