
Raising Greenhouse Seedlings for Outdoor Raised Beds
Propagation and growing schedules
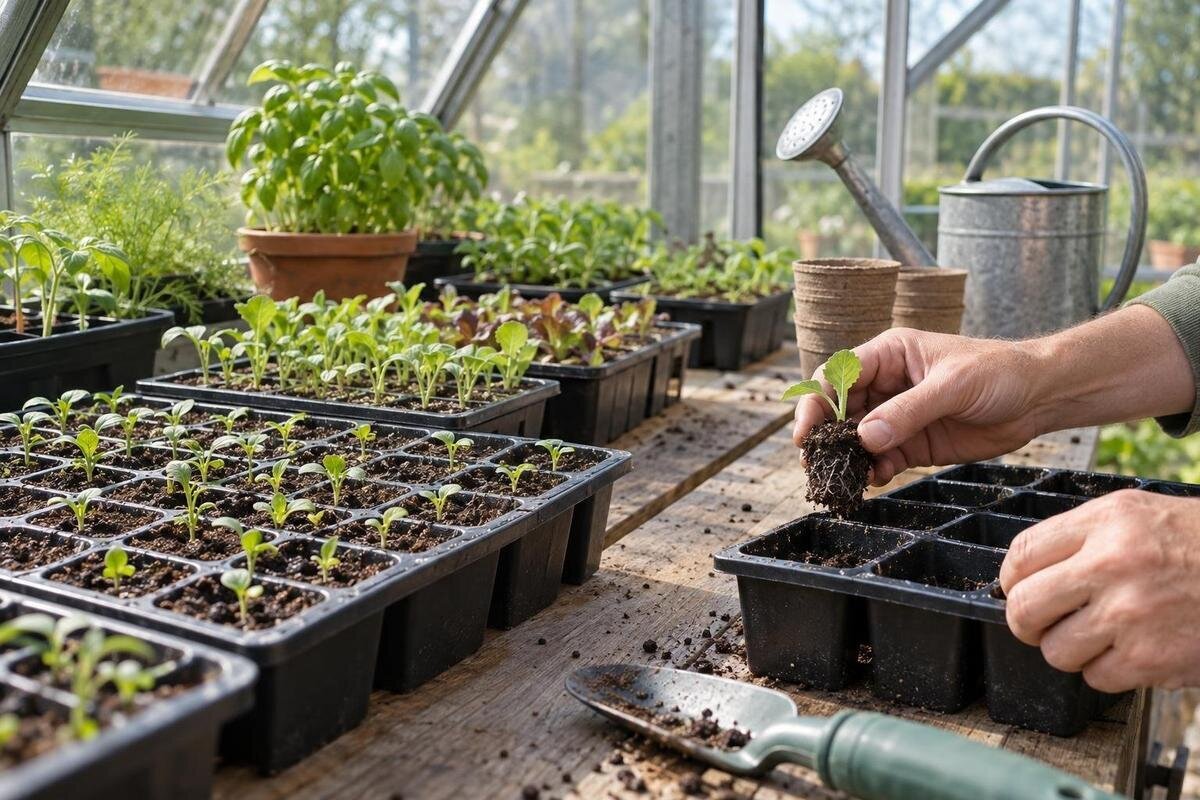
Use the greenhouse as a nursery with a clear planting plan: each tray should have a named crop, a destination in an outdoor raised bed and a likely planting window. The aim is not simply to raise as many seedlings as possible. It is to have healthy, transplant-ready plants when outdoor conditions are suitable and the bed is prepared, while leaving enough room to care for them before they move. Work backwards from outdoor conditions, then coordinate sowing, nursery capacity, hardening off and planting in batches. A protected start can help organise that sequence, but it cannot make a bed ready or remove the need to acclimatise plants.

01
Give every tray a raised-bed destination
The greenhouse has a defined job in this plan: it raises young plants until they are ready to move to an outdoor raised bed. That is different from keeping a crop under cover for its full growing cycle. For every tray, record the crop, variety, intended bed and approximate planting window. Add whether it is a single planting or one round in a succession, so its destination is clear before sowing. Keep the label with the tray if you move or split it; otherwise a group can lose its place in the plan. A written list also shows when two batches may compete for the same nursery space.
Work from the planned bed layout. Use crop-specific spacing information from the seed packet or reliable local growing guidance to work out the number of planting positions, allowing for supports, paths and access. Decide whether to raise a small reserve for failed germination or handling losses; avoid sowing more than you can water, label, space and plant. If the bed will be filled in stages, assign seedlings to each stage instead of treating the whole bed as one deadline. This keeps the nursery plan tied to the bed, rather than letting available greenhouse space dictate what gets grown.
Check the bed conditions and route from the greenhouse
Raised beds vary in depth, fill, sun exposure and wind shelter, so check the bed itself instead of relying on a general calendar. Confirm that the growing medium is ready for the crop and that watering access is available before seedlings arrive. The bed’s contents and exposure affect how quickly it warms and dries; a seedling ready in a tray may still face unsuitable outdoor conditions. Look at sunlight and wind across the bed, then use crop instructions and reliable local planting guidance. Check the forecast around the intended move rather than treating one calendar date as the only test.
Map the route between nursery, water point and bed as well as the bed itself. A tray may be awkward to carry through a narrow doorway or along an exposed path, and newly moved plants need timely attention. A nearby sheltered place can also make it easier to set out seedlings during hardening off. If considering a layout alongside a wall, the Lean-to Greenhouse is listed in area options from 3.69 m² to 14.34 m². Compare the chosen footprint with access and shade at your site, and verify placement requirements; the area range alone does not establish suitability for a particular wall. A trial trip with an empty or lightly loaded tray can reveal obstacles before planting day.
02
Choose crops that suit transplanting
Give greenhouse bench space to crops for which a transplant is useful. Tomatoes, peppers and many brassicas are commonly raised in trays before planting into prepared beds, although timing and suitable seedling stage differ by crop and variety. Root vegetables such as carrots are often sown directly in their final position because moving a taprooted seedling can disturb its shape. These are general patterns rather than absolute rules; read the packet and local guidance, especially where a variety recommends a different method. For herbs and flowers, check whether the instructions favour sowing in trays, pots or the bed itself.
Convert each crop’s allocation in the bed plan into a seedling count. Work from intended spacing and mature size, then decide how many seedlings are needed in each batch; trays of small seedlings can easily contain more plants than the bed will accommodate. If your plan spans several beds, the T-Model Orangery Greenhouse is listed in area options from 16.52 m² to 30 m². Compare the selected footprint with the actual tray, path and work-surface plan: listed area does not say how many seedlings or benches a configuration will hold. A larger area is useful only when it matches planned nursery work.
Time sowing around planting windows
Start with the likely planting window, then read the crop-specific sowing instructions and work back to a suitable sowing time. Allow for germination and for seedlings to reach a stage when they can be moved; both vary with the crop, variety and conditions. A greenhouse can alter the pace of growth, but its temperature and light are not constant. A tray started too early may outgrow its cells while the raised bed is still unavailable. Record sowing date, emergence and intended planting date for every batch so you can compare the plan with what actually happened.
Where one bed or several beds will be planted in rounds, make separate sowings that match each planting window instead of filling every tray at once. This spreads watering, checking and transplanting work, and reduces the chance that all seedlings are waiting for the same suitable day. The Limited Edition Aluminium Greenhouse range is listed from 3.77 m² to 28.08 m²; compare the exact option with the busiest overlap of trays, not the total number sown over the season. Use packet guidance when adjusting the sowing schedule between batches, and do not copy last year’s dates automatically if outdoor conditions differed.

03
Calculate tray capacity from usable bench space
Measure the space seedlings can actually occupy. Sketch the interior of the structure being considered, mark access doors and fixed obstructions, then add the bench or shelf surfaces you intend to use. Floor area is not the same as usable bench area: paths, turning room and access to plants all matter. Measure each tray’s outside dimensions, not just its cell count, since equal numbers of cells do not guarantee equal footprints. Leave a working gap so you can lift one tray, inspect leaves and water the next without shifting everything around it.
Count the maximum number of trays likely to be in the greenhouse at one time, including overlap between newly germinating seeds, growing seedlings and plants waiting to go outside. The Bloomcabin Oasis Pyramid Greenhouse is listed in area options from 5.53 m² to 18.9 m²; use that as a footprint reference, not a promise of tray capacity. Draw the layout for the chosen option, allow room for watering equipment and keep a clear route to the exit. If peak occupancy looks cramped on paper, stagger sowing or reduce the batch before buying more trays.
Organise work surfaces and storage
Organise the nursery around the tasks you repeat. Keep labels with their trays, group seedlings by bed or planting date, and maintain a simple map of their positions. Set aside a stable surface for sowing or potting, and keep the main route clear when carrying trays. Put frequently used items, such as labels, a pencil, a water container and hand tools, where they can be reached without stepping over plants. Return trays to their marked places after moving them for watering or inspection, so the group order remains clear.
Storage also affects how much floor or bench space remains for growing. The Limited Edition Aluminium Greenhouse with Built-in Storage is listed from 5.52 m² to 28.08 m². Check the chosen configuration’s storage arrangement and the area left for trays, rather than assuming the listed greenhouse area is all propagation space. Keep seed packets and notes dry and readable, and sort them by sowing date or crop. If no built-in storage is planned, include a defined place for equipment in your sketch so it does not end up on the potting surface.
04
Monitor light, temperature, ventilation and water
Monitor conditions where the seedlings sit, not just at the greenhouse entrance. Light, heat and air movement can differ across the structure, and an enclosed greenhouse can warm rapidly in direct sun. Check trays during the day and look for signs such as stretched growth, pale new leaves, wilting or persistently wet compost. These call for a closer look at light, temperature, watering and airflow rather than an automatic change to every tray. Follow crop-specific guidance, because a condition tolerated by one group may not suit another.
Water according to the growing medium and the plants’ needs, aiming to keep it evenly moist without leaving trays standing in water. Small cells can dry sooner than larger pots, so check them directly rather than following a fixed routine. Keep enough space between trays for inspection and air movement, and remove fallen plant material. The Bloomcabin Prestige Greenhouse is listed in area options from 3.77 m² to 28.08 m²; area alone says nothing about ventilation or growing conditions, so check the details for the selected configuration. Respond to actual readings and crop guidance rather than assuming a larger greenhouse will hold steadier conditions.
Manage seedlings if the bed is delayed
If the raised bed is delayed by weather, unfinished soil preparation or a change in the plan, assess how long each batch can remain in its current containers without becoming overcrowded or outgrowing them. Keep seedlings watered, labelled and spaced; plants in a crowded tray compete for light and are harder to inspect individually. Where roots have filled the cells or the growing medium dries unusually quickly, check whether a larger container is appropriate for that crop. Potting on can buy time, but it takes more bench area and creates another handling stage.
Set a clear holding limit and update the planting date, rather than continuing to sow for a bed that is not ready. If several beds are involved, move only the group whose destination is available and keep the rest under observation. The Spacious Greenhouse is listed from 47 m² to 70 m², a much larger area range to compare only if the planned nursery genuinely needs that scale. Those figures do not specify bench capacity or solve an outdoor timing problem; map how the space would be used before treating extra area as useful. For a prolonged delay, check crop-specific guidance on holding, potting on or restarting a batch.

05
Harden off before planting outdoors
Hardening off is the gradual process of acclimatising greenhouse seedlings to outdoor conditions. Seedlings accustomed to sheltered light and limited wind can be stressed by a sudden change in exposure. Begin in a sheltered outdoor position and increase exposure in stages, following crop guidance and the forecast; there is no duration that fits every species, starting condition or weather pattern. Keep watch on the plants and pause or provide protection if conditions become harsh. The objective is to help seedlings adjust to conditions in the outdoor bed before planting, not to test how much exposure they can tolerate.
Place trays where they can be checked and watered easily, and keep varieties labelled while they are outside. Move them without tugging at stems, and handle seedlings by their root ball where practical. The Aluminium Classic Greenhouse is listed from 3.77 m² to 28.08 m²; use the selected footprint alongside a real staging plan, not as evidence that hardening space is included. Confirm how trays could be carried to the sheltered area and whether the route is practical at busy planting time. Make sure the staging place does not block access to the bed, greenhouse or water point.
Plant out in manageable batches and keep records
Prepare the bed before carrying seedlings out: mark planting positions, make sure the growing medium is workable and decide which group goes where. Plant in manageable batches that match the bed plan and conditions, keeping labels with each row or group until you can identify them confidently. Follow the crop’s planting instructions for depth and spacing, and water the plants in as appropriate to the growing medium. A calm, organised sequence limits the time trays sit in sun or wind while you decide where they belong. Check the bed after planting rather than assuming the surface tells you how the root zone is doing.
Note the date, bed, variety and any unusual weather or delay. Observe which batches established well and which needed more space or a different sowing date; do not assume the greenhouse was the only factor, since bed exposure, watering and crop choice also matter. Compare the final number of plants with your original count, and record any losses before deciding whether to sow extra next time. This gives the next planting plan a reference for sowing dates, peak nursery space and the sequence that worked best. Clear away empty trays and spare plants so the greenhouse is ready for the next planned batch.
Frequently asked questions
When should greenhouse seedlings go into an outdoor raised bed?
Use the crop’s planting guidance, the condition of the bed and the forecast rather than relying on a universal date. Wait until the bed is ready and expected conditions suit the crop. If the weather changes, adjust the planting round instead of forcing every tray outdoors.
How long should I harden off greenhouse seedlings?
There is no single duration for every crop and set of conditions. Increase outdoor exposure gradually, taking account of how sheltered the seedlings have been and what the forecast allows. Follow crop-specific guidance and pause or provide protection if conditions become unsuitable.
Can seedlings stay in the greenhouse while I prepare the bed?
A brief delay can be managed if you keep seedlings labelled, watered and spaced, but greenhouse space is limited and plants keep growing. If they outgrow their cells or the delay becomes prolonged, check crop-specific guidance on potting on, holding or starting another batch.
Should every vegetable be raised in trays first?
No. Some crops are commonly transplanted, while others, including many root vegetables, are often sown where they will grow. Check the seed packet and local growing guidance for the crop and variety, then reserve greenhouse space for plants with a clear reason to be raised as seedlings.
How many seeds should I sow for each raised bed?
Work from the number of planting positions in your bed plan and the crop’s recommended spacing. You may want a small reserve for failed germination or handling losses, but avoid raising more seedlings than you can fit, care for and plant.
Treat the move outdoors as part of propagation, not an afterthought. A realistic bed plan tells you what to sow; a measured nursery layout shows whether the trays can be raised without crowding; and gradual hardening off helps seedlings adjust to outdoor conditions. Keep dates and counts alongside notes on how the plants established in their beds. Those details help you plan successive batches of seedlings for outdoor raised beds, instead of letting the greenhouse become a holding area for plants that have nowhere to go.
