
Growing Ranunculus in a South African Greenhouse
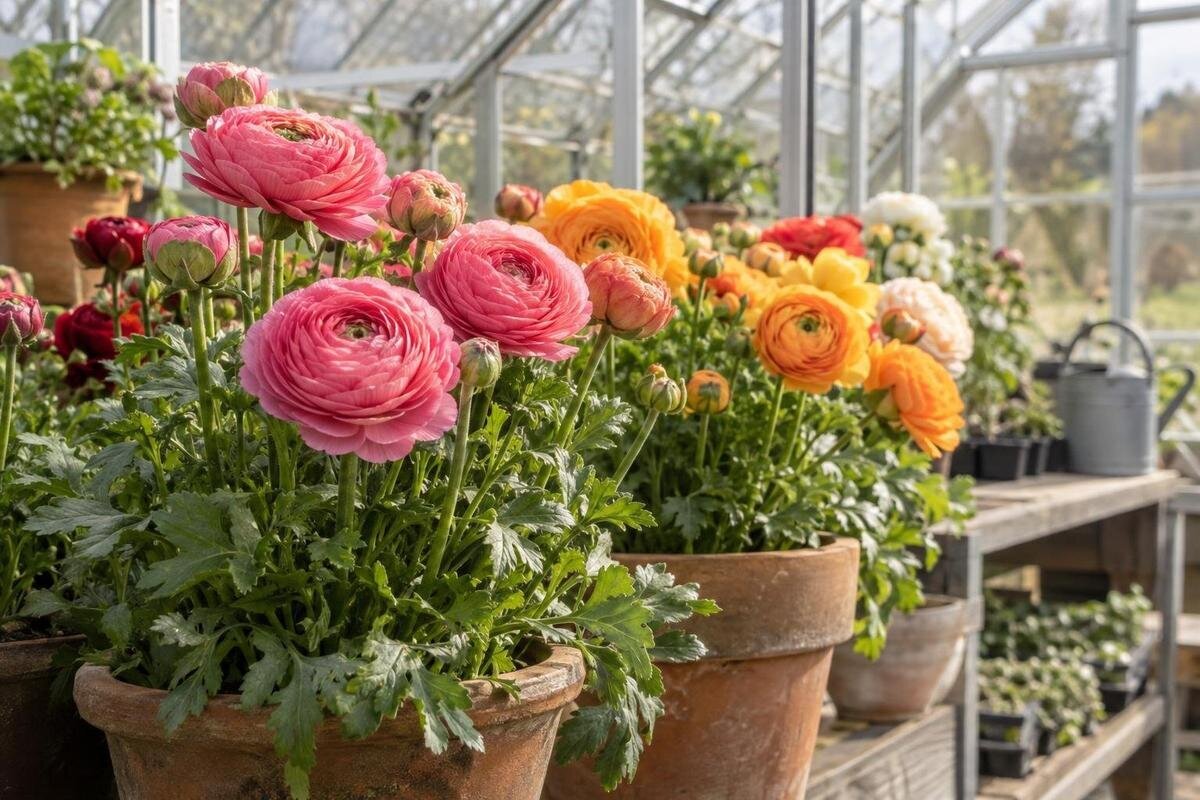
Cool-season greenhouse guide
Ranunculus are cool-season flowers, so a greenhouse is most useful when it protects a carefully timed crop rather than keeping plants hot through summer. In South Africa, the workable window depends on local night temperatures, daytime heat, frost exposure and the greenhouse’s position. A bright, closed house can warm rapidly even during a cool spell; damp, still air can also encourage disease. Plan around readings inside the growing area, not the calendar alone. Healthy planting corms, free-draining soil, measured watering and regular air movement are the foundations of a reliable crop. This guide explains how to prepare and plant ranunculus, manage temperature and moisture, and choose a greenhouse layout without assuming every structure has the same conditions.

Choose the planting window by temperature
Ranunculus asiaticus is a cool-season crop. In the Southern Hemisphere, autumn is generally the time to start watching for a planting window, with growth through cooler weather and flowering often later in the season. The right date still depends on local warmth, altitude, exposure and the greenhouse itself. Before planting a full batch, record daytime highs and overnight lows at plant height for several days. A sunny enclosure can remain warmer than the outside air after a warm spell. Use those readings to judge whether conditions are changing, rather than planting just because the month has changed. Check again after the first sunny spell: one cool morning does not mean the house will stay cool.
Plant when readings are consistently moving into a cool range, not according to a fixed South African month. A small test tray or short row helps establish how your site behaves and whether the crop has time to root before warmer weather returns. Ranunculus may slow, flower poorly or go dormant in sustained heat; extra irrigation cannot correct heat stress. At the other end of the season, an unheated greenhouse is not automatically frost-free, so check overnight minima and follow the stock supplier’s advice if cold conditions are expected. Treat ranunculus as a cool-season crop, not a year-round greenhouse plant. If you stagger plantings, keep the sequence short enough to finish before warm weather returns; late batches can miss the cool window.
Keep temperatures cool and light strong
For active growth, use about 10–18 °C as a practical cool-range reference, not a rigid threshold: cultivar, root-zone conditions and the length of a warm spell all affect the response. Sustained daytime readings in the low 20s can shorten the growing period or bring dormancy forward. A minimum–maximum thermometer near the foliage shows what the crop experiences; a reading beside the door or high on a wall can be misleading. Place it out of direct sun and away from the glazing, and check a sunny afternoon as well as the overnight minimum. A sharp midday spike matters even if the average looks mild. Ranunculus also needs strong light: give it an open, bright position and aim for at least six hours of direct sun where the site allows. In the cool season this supports sturdy growth; heavy shade can leave stems weak and flowering sparse.
Heat control depends on air movement and position, not on keeping the greenhouse dark. Open available vents or doors during mild, sunny spells, and use temporary light shade only if the house is overheating; remove it when conditions ease. A wall can shade an attached greenhouse at some times of day, so check the site’s winter light and access to ventilation before choosing its position. The Lean-to Greenhouse listing gives floor-area options from 3.69 to 14.34 m², but those figures do not show whether a specific wall location receives enough light for ranunculus. Observe the sun and measure temperature in the proposed space before placing beds or choosing a crop date.
Select sound corms and rehydrate them carefully
Ranunculus is commonly sold as a corm, although the planting piece is a tuberous root with several claw-like points. A dormant corm can look dry and unusual; that alone is not a defect. Choose firm, intact stock with no soft patches, wet mould or strong sour smell, and keep colours or varieties labelled. Avoid mixing damaged corms into a tray of sound material. Planting-stock size varies, so use the supplier’s instructions for the variety rather than assuming every pack will produce identical stem strength or flower size. If you order several colours, label them before opening the packs so they are not confused during preparation.
Rehydrate dry stock shortly before planting. A brief soak of about three to four hours in room-temperature water is a common approach; do not leave corms submerged overnight or store them wet. They should feel fuller, not slippery or as if they are breaking down. If you are considering built-in storage for clean labels and tools, the Limited Edition Aluminium Greenhouses with Storage listing identifies built-in storage and sizes from 5.52 to 28.08 m². Check the actual storage layout and conditions before relying on it for planting stock: ordinary greenhouse storage is not automatically cool or dry enough for dormant corms. Keep corms dry until the day you prepare them, and follow supplier directions if they differ from this general method. Buy only as many as you can plant promptly after soaking.
Pre-sprouting and planting depth
Pre-sprouting is optional. It can make it easier to see which corms are starting and to reject stock that fails, but it adds handling and needs a cool, even environment. After soaking, lay corms in a shallow tray of barely moist, free-draining medium and keep them cool; check often rather than keeping the tray wet. When short roots or shoots appear, handle them gently and plant without delay. If the greenhouse is already warm, direct planting into a prepared bed may be simpler than encouraging soft growth in a tray. Label the tray with the variety and date so you can distinguish slow starters from corms that have not grown.
Set each corm with its claw-like points facing down, roughly 5 cm deep, then cover lightly and water just enough to settle the medium. A starting spacing of about 10–15 cm suits many garden-sized plantings, but larger varieties and cut-flower rows may need different spacing; follow the packet and leave room for air movement. For containers, arrange pots so mature foliage will not press against neighbouring plants. Sketch the bed, containers and aisle before buying a greenhouse. The Aluminium Greenhouses range lists floor areas from 3.77 to 28.08 m²; use the stated area as a comparison, then verify usable internal dimensions and door clearance. Avoid squeezing more corms into a narrow strip than you can water, inspect and harvest comfortably.

Prepare a free-draining bed or container
Ranunculus roots need moisture and oxygen, so use a loose, fertile medium that drains freely. In a bed, break up compacted ground and work in mature compost if the soil needs better structure; avoid fresh manure or amendments that leave the bed dense and wet. If water sits on the surface after irrigation, improve the bed or choose containers before planting rather than trying to compensate with less frequent watering. Containers need clear drainage holes and a potting mix that does not collapse into a heavy, airless mass. Before using a full bed, water a small section and see whether excess drains away instead of pooling. Avoid working saturated soil, which can compact the root zone.
Keep the planting material at the intended depth and do not fill pots so close to the rim that they overflow when watered. Clean used containers and remove old roots before reuse; garden soil in a pot may compact and drain differently from soil in a bed. If your plan includes fixed beds or tables, decide where they will sit before choosing a base arrangement. The Bloomcabin Prestige Greenhouse listing identifies a metal base and sizes from 3.77 to 28.08 m²; confirm the base and floor details against your proposed bed or container layout, rather than treating the total floor area as uninterrupted growing space. A straightforward watering route and a reachable edge on each bed make routine checks easier.
Water and feed to match growth
Immediately after planting, moisten the medium but do not soak it repeatedly while the corm is establishing. Once leaves emerge, check the root zone by hand: water when the top few centimetres begin to dry, then let excess drain. The frequency changes with pot size, sunlight, ventilation and the material used, so a fixed daily schedule is unreliable. A bed that stays damp for days needs better drainage or less water; a small pot in bright weather may dry much faster. The surface can look dry while the deeper planting layer remains moist, so check below the surface before watering again. Because greenhouse cover keeps rain off, check the growing medium even when the garden is wet.
During active growth, keep moisture reasonably even; repeated drying to dust followed by heavy watering stresses roots, while standing water favours rot. Water at soil level where practical, and empty trays or saucers after drainage. Water early enough for accidental splashes on leaves to dry. Feed only once growth is under way, using a balanced fertiliser according to its label and the nutrient level of the compost or potting mix. Avoid heavy, frequent feeding, particularly with a nitrogen-rich product, which can encourage leafy growth at the expense of sturdy flowering. Stop feeding dormant stock, and check pots individually because they do not dry at the same rate as beds.
Prevent fungal disease with airflow and hygiene
Fungal trouble is easier to prevent than to reverse in a crowded, damp greenhouse. Grey mould (Botrytis) can take hold on dead petals and leaves that stay wet; waterlogged compost and poor drainage can lead to root or crown rot. Space plants so air can move around their leaves, avoid overhead watering where possible, and ventilate during mild conditions. Air exchange should reduce stagnant humidity without leaving young growth exposed to damaging cold. If condensation persists into the day, adjust the ventilation routine and check whether watering is too late or too heavy.
Inspect the crop at least weekly, including the base of stems and the undersides of leaves. Remove fallen petals, yellowing leaves and any plant that is clearly rotting; bag diseased material rather than leaving it on the bed or composting it where infection may spread. Clean trays and tools between batches, and do not reuse medium from a diseased crop. Wash your hands after handling rotting plants before returning to healthy batches. When comparing greenhouse models, check the actual vent types and positions: the Limited Edition Aluminium Greenhouses range lists areas from 3.77 to 28.08 m², but floor area alone cannot tell you whether a chosen configuration provides enough ventilation for your site. Read the specifications for the precise model you are considering.
Flowering and harvesting
Flowering typically follows a period of cool growth, so the planting date and temperature pattern affect when stems arrive. If you want a longer picking window, plant a small sequence of batches rather than every corm on one date, provided the cool season is long enough for each to establish. Mark each batch with its planting date and variety; this makes it easier to compare flowering and spot a crop that has been pushed by heat. Remove spent stems and damaged petals promptly, and keep foliage in place while it remains green and healthy.
Cut stems with a clean, sharp tool and avoid trampling bed edges while reaching for flowers; this is one reason to include a usable picking aisle from the start. Ranunculus are commonly cut as buds show colour and begin opening, but the best stage depends on cultivar and whether flowers are for display or transport. Trial a few stems and record which stage opens well under your conditions. Put cut stems into a clean container, out of direct heat, while you finish harvesting. If comparing room for rows and picking access, the T-Model Orangery Greenhouse range lists 16.52 to 30 m²; check internal dimensions, headroom and ventilation before assigning the area to a cut-flower layout.

Plan usable greenhouse space
Work out usable crop area, not just the greenhouse’s outside footprint. Draw beds or pot rows, an aisle wide enough to carry a tray, the door swing, hose access and space to inspect foliage without brushing every plant. Leave a route to reach vents and remove old material. Ranunculus plants are not tall, but comfortable working height and headroom still matter when watering, picking and cleaning. If a structure will hold several crops, give the ranunculus a bright, ventilated position away from plants that need a different watering routine. Check the model’s internal dimensions, not only its listed floor area.
A larger area can make separate batches and access easier, but it does not by itself solve poor light, heat or still air. The Spacious Greenhouse range lists floor areas from 47 to 70 m²; use that as a starting point for a scaled plan, then check the exact layout, height and ventilation options for the model under consideration. For a small crop, compare the amount of benching and aisle you actually need before paying for unused area. A greenhouse that can be aired and worked in comfortably is more useful than a nominally large footprint with inaccessible corners. Confirm that doors and vents remain reachable once benches or pots are in place.
Lift corms and reset the growing area
After the flowers finish, keep green foliage until it yellows naturally: the leaves help replenish the underground storage organ. Reduce watering as growth dies back, then lift corms carefully if you intend to keep them. Discard soft, mouldy or diseased material; dry healthy corms thoroughly in an airy, shaded place before storing them in a cool, dry, labelled container. Do not seal damp corms in plastic. If conditions or disease history make reuse doubtful, fresh planting material is the safer way to begin the next crop.
Some growers treat ranunculus as an annual crop; others lift and reuse sound corms, with results depending on the variety and local storage conditions. Keep the growing area clean after lifting and remove spent roots and leaves before the next planting. A final layout review can help: the Pyramid Greenhouse range lists 5.53 to 18.9 m², but the listed floor area does not show how much continuous bed space remains once access is planned. Leave room to clear old material and keep storage separate from wet soil, then review your temperature log before the next cool-season batch. Label stored corms by variety and season, check them periodically and remove any that soften or develop mould.
Frequently asked questions
When should I plant ranunculus in South Africa?
Use autumn into winter as a broad Southern Hemisphere guide, but plant when your greenhouse has cooled into the crop’s suitable range. Record daytime and overnight temperatures; a fixed month cannot account for a warm spell, shade or the conditions at your site.
Can I grow ranunculus in a warm greenhouse?
Not reliably as a hot-season crop. Ranunculus needs cool conditions for active growth; sustained daytime readings in the low 20s °C may shorten the crop or bring dormancy forward. Ventilate and wait for a cooler window rather than adding water to counter heat.
How long should I soak ranunculus corms?
A soak of roughly three to four hours in room-temperature water is a common preparation. Plant soon afterwards, and do not leave corms submerged overnight or store them wet. Follow the supplier’s instructions if they specify a different method.
How often should I water greenhouse ranunculus?
Keep the medium moist but not saturated. Once shoots appear, check below the surface and water when the upper few centimetres begin to dry, allowing excess water to drain. Frequency changes with pot size, weather and ventilation, so avoid a fixed daily timetable.
Can I save ranunculus corms after flowering?
Yes, if the corms remain sound and the foliage is allowed to die back naturally. Lift after the leaves yellow, dry the corms thoroughly and store them in cool, dry, ventilated conditions. Discard diseased or soft material, and test a small batch before relying on saved corms.
For greenhouse ranunculus, timing the crop for cool weather matters more than creating a heated, tightly controlled environment. A few weeks of greenhouse temperature records, firm and correctly prepared corms, free-draining growing space and regular ventilation give the crop a sound start. Keep the planting small enough to inspect and harvest without brushing wet foliage, then use your flowering and corm-storage results to decide whether the next batch should be earlier, later or started with fresh corms. Choose a planting date that gives the crop time to grow and flower in your greenhouse’s cool season, rather than copying a date from another climate.
