
How to Choose Greenhouse Shade Cloth and Position It
Greenhouse growing guide
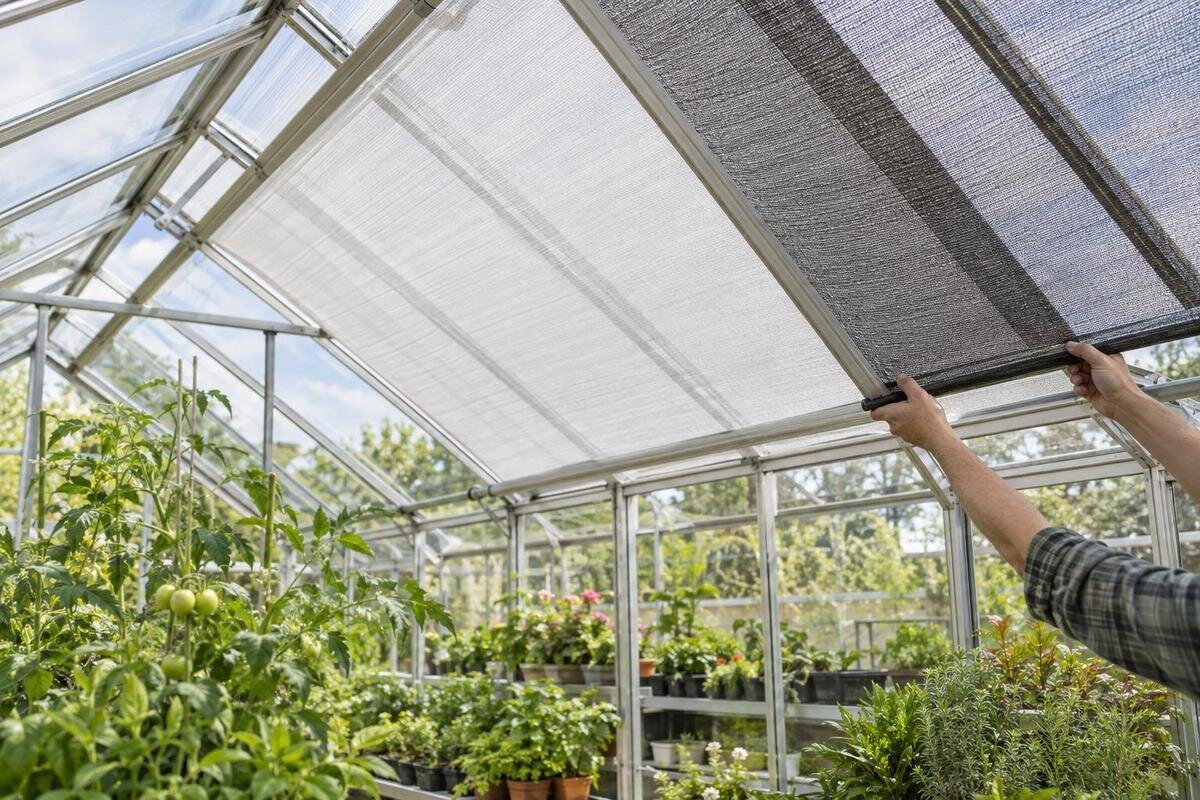
Greenhouse shade cloth is easiest to choose when its percentage is treated as a starting specification, not a recipe. The right coverage depends on the crop, the light already reaching the canopy and the times when exposure is excessive. Bright South African summer conditions can make shade worth considering, but neither season nor a general rule identifies the right cloth for every site. Measure first, compare the readings with crop-specific light guidance, then choose a rating and position that address the actual bright areas without unnecessarily dimming the rest of the greenhouse.

Match the shade level to the crop’s light needs
Begin with the crop’s light requirement, not the number printed on a roll. Look for guidance for the crop and, where available, its variety and growth stage. Some references give a daily light integral (DLI), the photosynthetically active light accumulated across a day; that is not interchangeable with a bright reading at midday. If guidance uses broad terms such as full sun or partial shade, treat them as an initial description. Check any useful range or upper limit and compare it with measured greenhouse light before translating the guidance into a cloth rating. The aim is to address periods when exposure is excessive, not to follow one percentage all season.
List what grows where, including seedling trays, established plants and any planned crop changes. Different crops and growth stages can have different light requirements, so one cloth may be a compromise if they share a space. Mark sensitive beds or benches separately from areas that need stronger light. Alongside each group, record the light guidance you are using and whether it describes a daily total or an instantaneous level. This makes differences between crops easier to recognise before you compare cloths. If only one group is exposed to intense direct sun, shading the whole roof could reduce light for plants that do not need protection. Where crop requirements overlap, shared coverage may be practical; where they differ, consider separate growing zones rather than choosing a percentage halfway between two requirements. A zone-by-zone plan helps you decide whether to cover the whole growing area, shade a smaller section or change coverage when the planting changes.
What a shade percentage tells you
Labels such as 30% or 50% shade generally describe an intended reduction in incoming light, but the definition and test method can differ between suppliers. Check whether the figure means light blocked or transmitted, which part of the spectrum it refers to, and whether the maker describes it as a nominal shade factor. A percentage for visible light or total solar radiation cannot automatically be treated as the same value for photosynthetically active radiation (PAR). If the product information does not define the number, do not compare two percentages as though they guarantee identical results at plant level.
Nor does 50% shade mean that a plant receives half of its recommended light. Glazing, framing, dust, orientation and local shadows already affect the light reaching the crop; cloth adds another reduction rather than providing a set proportion of the crop’s target. To check an actual reduction, compare a shaded reading with a no-cloth reading using the same sensor, position and similar conditions. A simple measured reduction is the difference between those readings divided by the no-cloth reading. Express that result as a percentage when comparing it with a percentage rating. Treat this as an estimate: changing cloud, sun angle or sensor placement can distort the comparison.
Measure light at canopy level
For a crop-focused comparison, use a quantum sensor or PAR meter that reports photosynthetic photon flux density (PPFD), usually in µmol m⁻² s⁻¹. That is an instantaneous reading. A logger that records the day can calculate DLI in mol m⁻² d⁻¹, which is more useful when crop guidance is expressed as daily light. Keep these two measures separate in your notes: record the time beside each PPFD reading and the date beside each daily total. If your crop reference gives only DLI, a midday PPFD reading alone cannot show whether the daily requirement has been met. Place the sensor at the top of the growing canopy, with its face level and facing upwards. Take readings in several representative beds rather than one convenient spot, and avoid casting your own shadow across the sensor. As plants grow, adjust the sensor height so that it still represents the canopy.
If you only have a lux meter or phone app, it can help you compare relative brightness in the same place with the same device, but lux is weighted for human vision rather than plant photosynthesis. It is not a reliable direct substitute for PPFD across different light sources or cloth colours. Record the instrument and units so later readings remain comparable. For planning a new structure, the Limited Edition Aluminium Greenhouses with Storage listing gives an area range of 5.52 m² to 28.08 m²; that catalogue area is not the glazing area to use when ordering cloth.
Record light across the day
A single noon reading can miss both the start and end of the bright period. On a clear day, record light at regular intervals from the first strong sun through late afternoon; a data logger is useful, but repeatable manual readings are better than relying on memory. Add a second set on a more typical partly cloudy day if conditions vary. Keep times consistent when comparing dates, since season and weather shift the sun’s angle and the light reaching the greenhouse. A daily peak alone does not show how long plants experience that level. One exceptionally bright day should not define a year-round shade decision.
Draw a simple plan of the greenhouse and mark sensor points, growing beds, doors, vents, frame shadows and nearby trees or buildings. At each point, note when direct sun arrives and when shade crosses it. Give each measuring point a short label so you can return to the same position instead of comparing different parts of a bed by accident. If you are considering a Bloomcabin Prestige Greenhouse, use the proposed planting layout to mark the areas you will need to assess once the structure is in place. A catalogue model cannot tell you how light will fall across your particular benches. Record cloud conditions, crop stage and whether cloth was in place alongside each reading. Repeat measurements at the centre and edges of a growing zone, then keep the sketch with your notes. This gives you a consistent reference when comparing uncovered and shaded conditions later.

Check whether the problem is light or heat
Treat plant symptoms as a prompt to investigate, not proof that the greenhouse needs more shade. Bleached or scorched leaves can be associated with excessive light, but water stress, root problems and other growing conditions can produce similar signs. Compare actual readings with the crop’s guidance and note which plants and areas are affected. A problem limited to one exposed row suggests a different pattern from symptoms across the whole house, but neither pattern alone confirms the cause. Separating observations from conclusions helps avoid buying dense cloth to solve the wrong issue.
Record air temperature separately from light and make sure the temperature sensor is not sitting in direct sun, which can give a misleading reading. Shade cloth may reduce solar load, but it cannot replace air exchange when hot air is trapped or ventilation is inadequate. Keep vents and openings free to operate, and compare readings with them in their normal positions. The Spacious Greenhouse listing gives an area range of 47 to 70 m²; regardless of greenhouse size, one central reading cannot describe every growing zone. Measure where the plants actually sit.
Choose a percentage from the readings
Use the measurements to identify when and where light exceeds the crop’s advised range. If light is suitable for most of the day but too high for a short period in one zone, local or adjustable coverage may be more appropriate than a heavy, all-day reduction across the roof. If several beds remain above the advised level for much of the day, wider coverage may be justified. Conversely, if light is already low on overcast days or in winter, permanent dense shade can reduce useful light. For guidance expressed as DLI, compare daily totals as well as individual bright readings. Base the choice on the pattern, not on a hot afternoon alone.
When comparing products, use the stated ratings to shortlist cloths that might provide the reduction your measurements suggest. For the same location and conditions, subtract the desired reading from the no-cloth reading and divide by the no-cloth reading to estimate the reduction needed. Express the result as a percentage, but do not assume the printed rating will deliver it exactly. Weave, colour, mounting position, glazing and sun angle affect the result. Keep the greenhouse model and intended cloth position alongside this estimate. If you are comparing the Aluminium Greenhouses range, make a separate entry for the structure you are considering rather than treating the range name as a shade specification. The final cloth choice still depends on measured light at your site.
Place shade over the areas that need it
Use the light map to decide where coverage belongs, rather than simply placing it over the middle of the roof. Observe where direct rays reach the crop during periods when exposure exceeds its preferred range; the angle changes through the day and season, and nearby walls, trees or other structures can create additional shade. Readings at canopy height in each affected zone help distinguish a whole-house problem from one bright strip. If a single bench is exposed, a local solution may preserve more light elsewhere; if all planted areas show the same excess, scattered patches may leave gaps.
Include access and ventilation in the placement plan. Cloth should not obstruct vents, doors, routine access to plants or the operation of existing greenhouse equipment. Mark the coverage edge on the drawing and check how it affects each crop as the sun moves; the edge of a partial covering can leave another section exposed at a different time. If choosing the greenhouse as well as shade, treat siting as part of the plan: the Lean-to Greenhouse listing identifies a product category, while the wall, orientation and neighbouring shade at your site determine your actual light pattern.
Decide how much area to cover
Choose the area to cover only after deciding whether measured excess is widespread. Full coverage may suit a growing area where every planted zone needs a similar reduction; targeted coverage may suit a measured bright zone or a group of sensitive plants. Do not estimate cloth quantity from greenhouse floor area alone. Roofs, sides, overlaps and the shape of the area to be shaded require measurements from the actual structure, and a product’s listed greenhouse area does not specify the cloth cut or fixing arrangement. On your sketch, distinguish the planted area that needs shade from the surface over which the cloth will sit. Label each intended covered section and record its dimensions separately, so a roof panel and a side panel are not confused in an order. Check which plants will remain shaded as the sun moves before deciding on the final coverage.
Think about how needs will change. A permanent cover may suit a stable crop layout with high light throughout the relevant season; removable or adjustable coverage can be useful when crop types, planting positions or seasons change. Check the proposed attachment method and any provision for moving the cloth against the exact greenhouse instructions. If you are considering the Limited Edition Aluminium Greenhouses range, include those questions when discussing the particular model and shade arrangement with the supplier. Establish whether the covering can be moved as planned before relying on that flexibility to accommodate different crops or seasons.

Check cloth specifications and fixing compatibility
Beyond percentage, compare the specification of the cloth itself. Ask what light the rating describes, whether PAR transmission or only a general shade factor is provided, and how the colour and weave influence the light reaching plants. If the supplier gives information about UV exposure, weather use or airflow, check the exact product rather than inferring those properties from the shade percentage. A rating does not, by itself, promise a particular temperature reduction, ultraviolet protection or airflow. Choose according to the intended greenhouse use and the product’s stated conditions, not just the number on the label.
Before buying, check the usable width and length, edge finish, means of attachment, cleaning instructions and whether the cloth is intended for the position you plan to use. Confirm that fitting it will not interfere with vents, doors, glazing maintenance or other equipment. External fixing can involve wind exposure and frame compatibility, so obtain model-specific guidance from the greenhouse supplier or a qualified installer instead of improvising a fixing method. For a T-Model Orangery Greenhouse, identify the exact model and proposed cloth position when asking about suitable attachments. This makes the compatibility enquiry specific to the arrangement you intend to buy.
Recheck light after installation
After installation, repeat the light readings at the same canopy positions, times and sensor orientation used for the baseline. Whenever possible, compare similar weather, or use a logger to capture a full day rather than comparing one moment. Note the cloth position, cloud conditions, vent position and crop stage; this makes it easier to see whether a change came from the covering or the weather. Compare the measured result with the crop’s light guidance, not just with the cloth’s printed percentage. Keep a record for later seasonal checks and repeat the process when crops or planting positions change.
If readings remain too high in a particular zone, check whether coverage is incomplete or the crop’s light requirement has been interpreted correctly. If readings fall below the useful range, reduce or move coverage where the setup allows, then measure again. Change one part of the coverage at a time and note what you changed, so the next set of readings can help you assess that adjustment. Do not respond to one plant’s appearance by changing shade for the entire greenhouse without checking the rest of the crop. Include every intended planting position in the measurement plan for a Pyramid Greenhouse, rather than judging the result from a central reading alone. Keep the final coverage arrangement on your sketch so future checks can be compared with the same setup.
Frequently asked questions
What shade percentage should I use for vegetables?
There is no single percentage that suits all vegetables or growing stages. Check crop-specific light guidance, measure what reaches the canopy and choose coverage for the places and times when light exceeds the useful range.
Does 50% shade mean my plants receive half the light they need?
No. The figure usually describes a stated reduction by the cloth, not the proportion of a crop’s recommended light that remains inside your greenhouse. Glazing, frames, sun angle and existing shadows also affect the result.
Can I use a phone to measure greenhouse light?
A phone app can help compare relative brightness if you use the same device and method each time. It does not measure plant-usable light as reliably as a suitable PAR sensor, so do not treat its lux reading as a direct crop-light target.
How do I know where to position shade cloth?
Map light at canopy height in the places where you grow plants, at several times of day. Use the readings and the sun’s movement to identify whether the whole growing area or only certain beds need coverage.
Should shade cloth stay on all year?
That depends on the crop, the season and your measurements. If light needs or planting positions change, removable or adjustable coverage may help, provided it is compatible with the greenhouse. Recheck light after any change.
A reliable shade plan brings together crop guidance, a light map and a cloth specification you can check against actual conditions. Choose coverage for the places and periods where readings show that light is excessive, then measure again after fitting. The percentage on the label is a useful starting point; readings at the canopy show whether the balance works for the plants you are growing.
