
Adding Greenhouse Shelves and Hanging Baskets Safely
Greenhouse planning
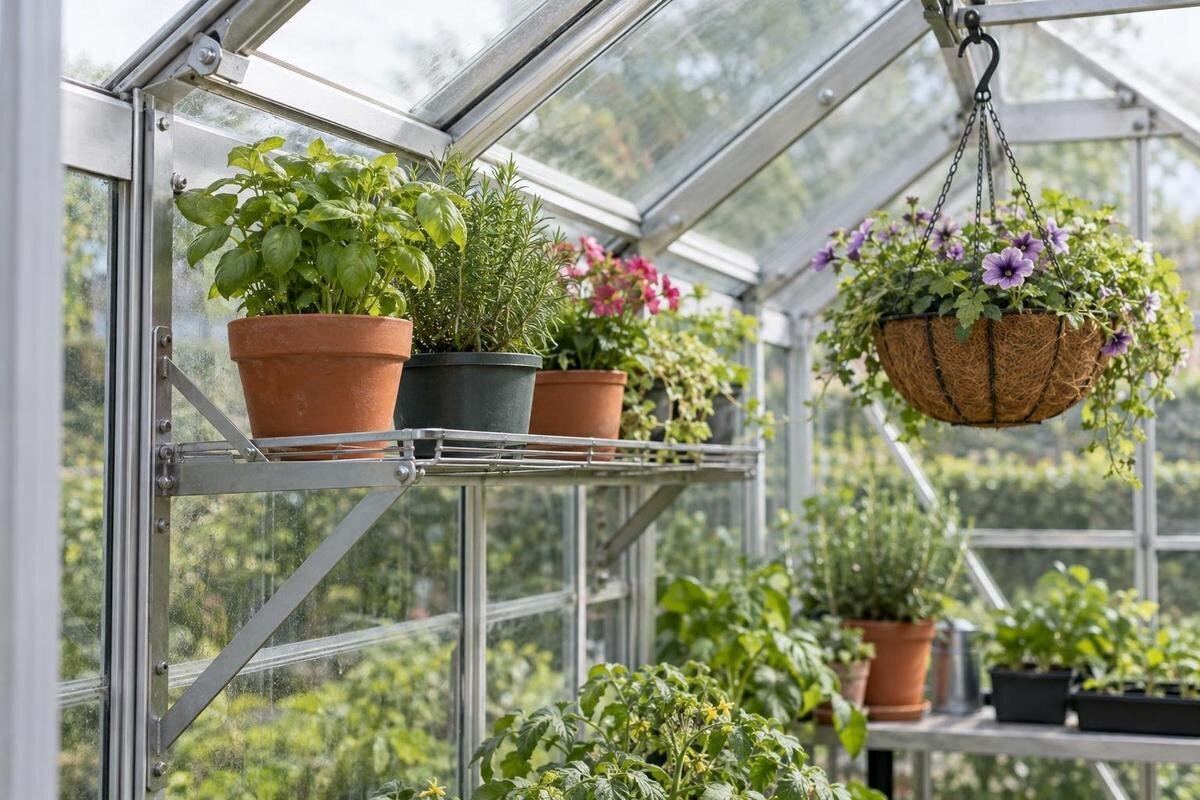
Adding greenhouse shelves or hanging baskets can create useful growing space without increasing the floor footprint, but every accessory transfers weight somewhere. The deciding question is not how sturdy the frame looks: it is whether your exact greenhouse model has a documented fixing point and an accessory load limit for the arrangement. Water, pots and established plants can make a basket much heavier than it looks when empty. Use the manufacturer's instructions to plan the position, check the complete load and decide when a supplier or qualified installer needs to confirm compatibility.

Before buying or fitting an accessory 1
Why greenhouse accessories need a load check
A greenhouse frame is an assembly, and not every rail, joint or profile is intended to carry an added shelf or suspended object. A shelf may send weight through brackets into more than one support; a hanging basket concentrates it at a fixing point and can tug as it is moved or watered. Different attachments transfer weight differently, so a clamp or hook is not equivalent to a supplied bracket. The complete path matters: the accessory, its fasteners, the designated fixing point and the supporting frame must all match the manufacturer's instructions. The appearance of a thick aluminium section, timber trim, ridge or gutter is not evidence of its allowable load. Glazing is not a support.
That distinction matters even when the proposed addition seems light. Several small items can add up, and water retained in a pot or basket changes its working weight after watering. A rack that stands on the floor has a different load path from one fixed to the frame, but it still needs a stable, suitable surface. Check the actual floor or base rather than assuming greenhouse flooring or soil is an even platform; a rocking rack is not a sound place for plants and equipment. Before choosing accessories, decide whether weight will sit on the floor, use a manufacturer-approved shelf rail or hang overhead. Do not improvise a new load path with wire, cable ties, clamps or screws unless the manufacturer has approved that method.
Identify the exact greenhouse model
Begin with the exact model and, if available, its size or version. Look for the original assembly manual, order confirmation, product label or another identification record; do not identify compatibility from a similar-looking frame alone. Two greenhouses in a range can have different profiles, joints or accessory arrangements, and a part for one version may not fit another. Record the model name, approximate age and dimensions. If an invoice or label gives a version, keep its full wording rather than shortening it to a family name. Photograph the frame and proposed fixing area from a safe position; do not remove glazing or climb on the structure to get a closer view.
Use the manual's accessory section and frame diagram to locate permitted fixing points, then match them to the shelf or basket support's exact part number. Check that the document covers the same model version and accessory, and that the diagram shows the part of the frame you intend to use. A product page can help confirm which model you are comparing, but it cannot replace an installation document. For example, the Lean-to Greenhouse listing identifies an aluminium wall greenhouse in floor-area sizes from 3.69 m² to 14.34 m²; neither the name nor floor area states which roof or wall points can carry a load. If you cannot match the greenhouse to a manual, ask the supplier or manufacturer before attaching anything.
Before buying or fitting an accessory 2
Read the accessory load rating correctly
Read a load figure in context. Check whether it applies to one shelf, a pair of brackets, a single fixing point, a rail or the complete accessory system, and whether it describes the contents alone or the whole assembly. The diagram may also specify a position or configuration, so read the figure alongside its fitting instructions. If separate values are given for an individual support, a shelf and a combined arrangement, they are not interchangeable; use the one that matches your installation. A maximum for a manufacturer's shelf is not permission to fit a different shelf to the same-looking section. When comparing accessories for the Limited Edition Aluminium Greenhouses, distinguish the greenhouse's model information from the load rating for the particular shelf or hanger.
Work out the complete working load before placing plants. For a basket, include its container, liner, brackets or chain, plant, growing medium and water that may remain after watering. For a shelf, include the shelf and supports as well as every pot, tray, tool and container likely to stay there. A dry, empty accessory can look deceptively light; assess the heaviest ordinary arrangement you intend to use, not a one-off empty setup. Also consider the arrangement you expect to keep as plants grow or move into larger pots. Do not compare a stated limit with the plant alone or assume the figure includes every component. If the manual or supplier does not explain what it covers, ask for clarification rather than guessing from appearance.
Use only approved shelf fixings
Choose accessories that the manufacturer identifies for the exact greenhouse model. The instructions should show the designated rail or bracket, approved fasteners and any position limits. A part that fits physically is not necessarily supported by the frame, and an accessory described as universal may still depend on fixings the greenhouse was not designed to accept. Do not drill profiles, screw into an unapproved section, cut a member or hang a support from a glazing bar to make a shelf fit. Substituting fasteners changes the installation, even if their dimensions look close. Structural alterations need manufacturer approval and qualified installer review, not trial and error. Keep the accessory's part number with its instructions so you can identify the correct replacement later.
When comparing options, match the exact model identifier to the greenhouse manual rather than relying on a broad product-family name. The T-Model Orangery Greenhouse page identifies the T-Model and lists floor-area sizes from 16.52 m² to 30 m²; a catalogue description does not confirm compatibility with a separate shelf or hanging kit. Ask for the accessory's part number and instructions, not only a general assurance that the range takes shelves. Check whether an approved kit is intended for your greenhouse's particular size or version, and whether it must be fitted in a specific position. If no frame-mounted option is approved, ask whether a free-standing shelf suits the greenhouse's floor or base. It avoids hanging a load from the frame, but still needs firm, level support and must not block access.

Before buying or fitting an accessory 3
Plan shelf positions around access and plants
Plan shelf positions around the way you use the greenhouse. Mark the door swing, main walking route, vents and opening windows before deciding where a shelf will go. Measure the space the shelf will occupy, including its depth and the room needed to stand beside it. Leave room to enter with a watering can or carry a tray, reach plant labels and tend crops without leaning on glazing or an unsupported shelf. Keep the proposed shelf clear of moving vents and doors, and preserve access for cleaning and routine care. A shelf can be physically installable yet make the greenhouse awkward to work in. Sketching positions on paper first can reveal a blocked route before you buy anything.
Consider light and plant growth as well as the frame. A high shelf or hanging basket can shade plants below it, while foliage may eventually reach a vent, window or pane. Allow for the mature plant, not only the empty basket, and leave room to turn or carry trays without clipping overhead items. When comparing sizes in the Pyramid Greenhouse range, listed from 5.53 m² to 18.9 m², sketch the shelves and mature plants within your chosen footprint. Think about which plants need the easiest access, then check the placement of every proposed fixing point in the manual against your layout.
Treat hanging baskets as overhead loads
Treat a hanging basket as an overhead load, not an easy way to use spare headroom. Use one only where the exact model's instructions identify a suitable fixing point and state the permitted arrangement. A ridge, roof bar, glazing support, gutter or brace is not automatically a hanger; if the manual does not name it, do not attach a basket there. A fixing on a moving vent or door would need explicit approval, because movement is part of its normal operation. Do not suspend several baskets from one point or add a hook to a screw, clip or accessory rail unless the instructions allow that combination. If reaching a proposed point would require standing on a shelf or handling glazing, ask a qualified installer to assess it rather than improvising access.
Check clearance around the complete basket, including mature foliage, so it cannot strike glazing, doors, windows or vents during ordinary care. Keep it out of the route people use to move through the greenhouse and position it so watering does not leave a slippery floor or drench items below. Plan to water it without pulling it down or using its fixing as a handhold. Include retained water in the load assessment. If comparing the Limited Edition Aluminium Greenhouses with Storage, consider storage and suspended growing space separately: built-in storage does not establish that additional hanging points are approved.
Before buying or fitting an accessory 4
Check combined loads on shared frame members
A rating for one fixing is not necessarily a rating for a whole side, roof section or greenhouse. If installing more than one shelf or basket, check what the manual says about spacing, total accessory load and shared rails. Two supports may transfer weight to the same frame member, so placing them apart by eye does not prove their loads can be added. Nor does dividing a total between several points establish a safe arrangement unless the manufacturer gives that method. Check whether any stated limit applies to the specific positions and supports shown in the instructions. A manual may provide separate values for individual supports and combined arrangements; use the configuration it names, not the largest number in a table. Do not substitute a home-made calculation.
Check that the instructions cover the exact greenhouse size and the accessory combination you plan to use. A catalogue size range is not a load schedule: the Bloomcabin Prestige Greenhouse listing shows models from 3.77 m² to 28.08 m², but those area figures do not tell you how many baskets or shelves the frame can carry. If the manual gives a limit for one item but says nothing about several accessories sharing a rail, ask the manufacturer or an installer to confirm the arrangement. Be specific about the number of accessories, their intended positions and whether shelves and baskets will be used together. Do not test an uncertain setup by loading it gradually; obtain the documentation first.
Allow for watering and everyday movement
Think through how you will handle plants during watering, pruning and repotting. Baskets can be knocked as you work, so do not treat them as handles or rest tools on them. Check that you can reach the plants without standing on another shelf, leaning across glazing or pulling on a frame member for support. If a basket must be moved whenever you tend a crop, its position will invite repeated handling. Plan routine care so you do not need to twist or lever the support, and reassess the available working space when plants grow or move into larger pots.
Water runoff matters too. Plan where container drainage will go, avoid drips onto walkways, electrical equipment or items that should stay dry, and include a tray's own weight and retained liquid if you use one. A tray catches water but does not remove it from the load assessment. When planning a larger layout, such as the 47 m² to 70 m² models listed for the Spacious Greenhouse, mark watering routes and areas where drainage could affect access or equipment. Include these in the same layout plan as your shelves and baskets, rather than considering drainage only after everything is fitted.

Before buying or fitting an accessory 5
What to do when the manual is missing
If the manual is missing, unclear or for a different-looking version, do not substitute instructions from a similar greenhouse. Contact the original supplier or manufacturer with the model name, order details if available, approximate dimensions, photographs of the relevant frame area and the accessory's exact name or part number. Ask for the model-specific manual and accessory documentation. Take photographs from ground level where possible; never remove glass, climb on the frame or handle a panel just to identify a fixing. If the first reply does not identify your exact model, clarify that point before relying on it. Appearance alone cannot confirm the intended load path.
Ask direct questions: is the accessory approved for this exact model and size; which fixing point and fasteners does it use; what does its load limit include; and does that limit change when several accessories share a rail? Request a written answer if the rating or permitted arrangement is not in the documents. If considering a different greenhouse instead, the Aluminium Greenhouses listing can help compare model names and floor-area options, but confirm the particular model's accessory compatibility and documented loads before purchase. A qualified installer can review a proposed fitting if product documentation remains incomplete.
When to pause and ask an installer
Before placing anything on a shelf or basket, confirm that the accessory, fasteners and fixing location match the manual, and that the greenhouse frame is assembled as instructed. If there is visible damage, movement at a joint, a loose component or glazing that appears displaced, do not add a load or attempt an unapproved repair. Stop and ask the manufacturer or a qualified greenhouse installer to assess it. If fitting the approved part would require moving glazing or altering a structural component, leave that work to an appropriately qualified person with the correct model documentation.
After fitting, use the accessory only within the documented load and positioning limits. Keep the instructions and part identifier so the arrangement can be checked later, and follow any inspection or re-tightening procedure the manufacturer gives rather than inventing one. If a shelf shifts, a fixing moves or a basket hangs differently, keep clear and do not try to tighten or reposition a loaded support; ask a qualified installer or manufacturer before resuming use. Do not climb on shelves, lean on baskets or use them as handholds. Check that the final arrangement still leaves the greenhouse's doors, vents and working route clear.
Frequently asked questions
Can I hang a basket from the greenhouse ridge?
Not by default. A ridge or roof member may look sturdy, but appearance does not establish a safe load rating, and a roof bar or glazing bar is not automatically an approved fixing point. Hang a basket overhead only from a point specified for your exact greenhouse model, using the documented accessory and staying within its stated limits.
What should I include when checking a basket's load?
Check how the manual defines the rating: it may refer to the contents, an accessory or a complete assembly. Include the basket, liner, bracket or chain, plant, growing medium and water that may remain after watering. Ask the supplier to clarify what the limit covers if the documents do not say.
Does a larger greenhouse support more shelves or baskets?
Not necessarily. A listed floor area describes the footprint, not the capacity of a roof rail, profile or accessory fixing. Extra floor space does not prove that a greenhouse supports more overhead weight. Check the manual and load documentation for the exact model; ask the manufacturer or an installer if your planned arrangement is not covered.
Can I use a universal shelf or hanger?
Only if the manufacturer confirms that the accessory and its fixing method suit your exact greenhouse model. A hook that fits a rail, or a shelf that matches the width, does not prove compatibility. Avoid drilling, clamping or attaching it to glazing supports unless the instructions specifically approve that method.
What if the greenhouse manual is missing?
Do not guess from a similar model or a photograph. Give the supplier or manufacturer the model name, order details if available, photographs of the relevant frame area and the accessory's exact name or part number. Ask for the correct manual, approved fixing points and load limits. Leave the fixing unused until these are confirmed.
Extra growing space is useful only when the way its weight is carried is clear. Identify the exact greenhouse, use accessories and fixing points documented for it, and account for the complete watered arrangement rather than an empty pot or shelf. If the manual does not state the fixing point, permitted load or combined arrangement, leave it unused until the supplier, manufacturer or a qualified installer confirms the details. Neither a floor-area figure nor a sturdy appearance can replace that information.
