
Routing Water and Electricity Before Greenhouse Installation
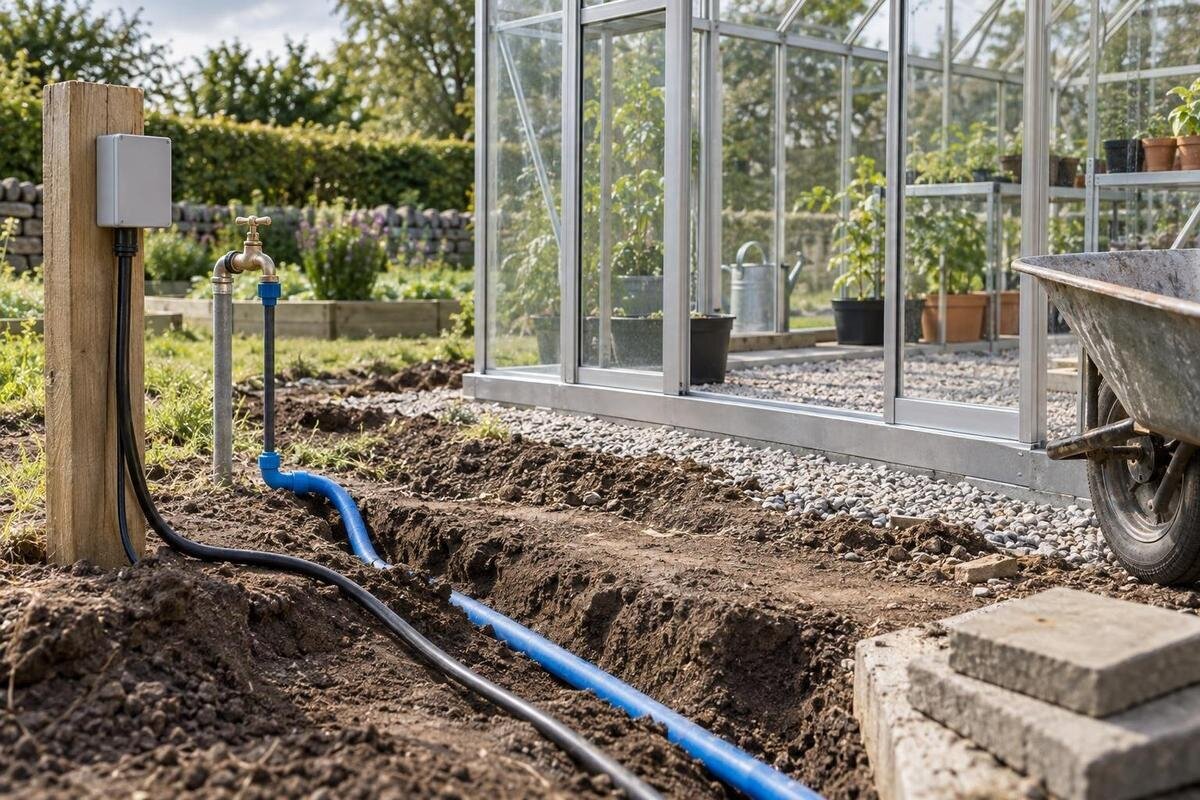
Greenhouse installation planning
Water and electricity are easiest to plan while the greenhouse site is still open; once a base, path or patio is finished, an unplanned route can mean lifting work that was just completed. Set out each service from its source to its final connection point using the exact greenhouse drawing and advice from the relevant tradespeople. This guide covers the decisions and handover records to agree before excavation and hard landscaping. Have a plumber or appropriate water-services professional confirm the water connection. A qualified electrician should design the electrical supply and carry out electrical work; a product photograph or generic trench detail is not a substitute for that design.

Before the base and paving are finished 1
List the greenhouse services you plan to use
Before anyone marks a trench, list the jobs that will need water or power inside the greenhouse and where each job will happen. A hand-held hose, a drip line, a pump-fed system, a controller, task lighting and a circulation fan are different end uses; you may need only one or two. Record which are definite now and which are possibilities, rather than asking a contractor to guess. Include anything outside the greenhouse that shares the supply, such as a nearby tap or tank equipment. This schedule is not an electrical design or plumbing specification. It gives the installer, plumber and electrician a clear brief and helps prevent a convenient route from being mistaken for the right connection point.
Sketch how you move around the growing space: the doorway, benches, pots, storage and places where you expect to water or reach controls. A hose point behind a bench can be difficult to use; a connection in a doorway can obstruct movement. Mark proposed fixtures on a rough plan, then walk the site and check that the arrangement makes sense with your usual gardening equipment. Note which items need regular access for adjustment or maintenance and whether they should be reached from inside or outside. Keep these use decisions separate from pipe sizing, circuit capacity and installation methods, which should be confirmed by the relevant tradespeople.
Match the routes to the exact greenhouse drawing
Once you have a preferred model and configuration, request the current base or foundation drawing and check that it matches what you intend to order. If you are considering the T-Model Orangery Greenhouse, obtain the drawing for your chosen option before fixing service positions. A product photograph cannot establish the exact base outline, door orientation or permitted service-entry details. Compare the drawing with the measured site layout and mark the base edges, door opening and any zones identified for fixings. Check the drawing revision with the supplier, and do not estimate foundation dimensions from an image or copy a route from another model.
Use the drawing to coordinate, not to improvise. Ask the supplier or installer which base edges, frame supports, door movement and approved entry details need to remain clear. If the drawing does not show service penetrations, record that as an open question and get confirmation before anyone drills through a frame, base or wall. Share the same drawing revision with the groundwork contractor, plumber and electrician, and note any site-specific changes. If the model, configuration or orientation changes, review the service plan again: a change can move an entry point or put it behind a bench. Do not let an old sketch stand in for the current plan.
Before the base and paving are finished 2
Put each service route on a measured site plan
Draw the greenhouse, water source, electrical supply point and any intermediate connection points on one site plan. Add fixed landmarks such as house corners, boundary walls, paths and existing inspection covers, so a future worker can locate the route after paving hides it. Label water and electrical services separately, and state each line's source, destination, proposed entry point and responsible trade. If you choose the Pyramid Greenhouse, include its exact configuration in the plan title or file name. Keep the matching base drawing with the route plan, and date each revision so later updates do not create competing versions.
Show turns, crossings, changes in surface and the point where each service is intended to enter the growing area, not just a straight line between two dots. Mark which routes already exist, which are proposed and which still need approval. Ask the responsible tradespeople to confirm the route on site before excavation or paving; the shortest path may conflict with the base, drainage, trees, existing services or future access. Agree how concealed work will be recorded before it disappears. A plan measured from stable landmarks is more useful than a photograph without context, so keep both together with the greenhouse order and installation documents.
Choose a water point that stays accessible
Identify the water source before choosing the greenhouse connection point. It might be an existing garden tap, a supply extended by a plumber or a tank-based arrangement; these options are not interchangeable, so tell the plumber which one you intend to use. If you are considering a pump, timer or automatic irrigation system, describe the equipment and ask what connection and access it needs. When choosing from the Limited Edition Aluminium Greenhouses with Storage range, include your intended storage layout on the plan. This helps the plumber position the water connection and associated equipment where they will remain accessible.
Decide whether you need a hose connection, a fixed irrigation line or both, then mark any valves, filters or controls the plumber says are required. Keep their proposed locations reachable after benches, pots and storage are in place. Ask the plumber to check whether the intended source can serve the planned setup and whether a separate control or equipment location is needed. Do not assume the nearest tap is suitable simply because it is close. Agree how the connection can be isolated and maintained, and how a leak or repair could be accessed without dismantling the greenhouse or lifting finished paving.

Before the base and paving are finished 3
Have a qualified electrician design the supply
Electrical planning starts with an equipment list and a qualified electrician, not with a cable chosen for a guessed route. Explain what you may use inside the greenhouse, such as lighting, controls, fans or a pump, and give the expected locations and patterns of use where known. Ask the electrician to assess the supply and design the electrical work, including the route, isolation, protective measures and equipment suitable for the site conditions. If you are considering a Bloomcabin Prestige Greenhouse, share the chosen configuration and layout with the electrician and greenhouse installer so they can agree the electrical entry point.
Bring the electrician into the project before hard landscaping is completed, even if the greenhouse equipment will be installed later. The electrician can identify what needs to be provided now, where access will be required and what information should be left for the installer. Do not choose a cable type, circuit capacity, protective device or route depth from a generic online diagram. If the eventual equipment is undecided, describe the likely use and ask whether provision for later work is appropriate and how it should be documented. Keep electrical design and installation with a qualified professional, and agree what checks and handover records will be provided when the work is complete.
Coordinate services with the base and finished surfaces
Service routes share the same ground as the greenhouse base, paving, drainage runs, downpipes and existing services. Put them on one coordinated drawing before surfaces are built, then ask each contractor to check for clashes. For a Spacious Greenhouse, bring the exact base drawing together with the plumber's and electrician's route plans. Mark where each service approaches the structure and where installation access is needed. Keep proposed entries clear of door movement and frame supports. Do not assume a pipe or conduit can simply be shifted at the last minute: a change may affect access, surface levels or the entry arrangement agreed with the installer.
If services need to cross or a route approaches the base, ask the relevant tradespeople to agree the detail before work starts. Do not take spacing, depth or sleeve details from a generic greenhouse article; the site and service designs need to be considered by the responsible professionals. Give the groundwork contractor the agreed route, rather than relying on separate verbal instructions. Show the planned finished surface and any access covers on the drawing, then check that connection points will not be buried. If drainage or a downpipe is part of the same area, coordinate it with the services without treating the greenhouse supply plan as a drainage design.
Before the base and paving are finished 4
Work sequence and contractor responsibilities
Write down the sequence from setting out to final assembly: site review, agreed service routes, groundwork, installation of any required pipework or conduit, inspection, covering or paving, then greenhouse installation and connections. The actual order depends on the chosen base and the professionals' designs, so use this as a coordination list rather than an instruction to excavate or connect services yourself. If you choose the Aluminium Classic Greenhouse, ask the supplier or installer which base drawing and installation information the groundwork team needs. Confirm when that information must be available and which tradesperson must approve each service route before it is covered.
Name the person responsible for each handover. One contractor may mark a route, another may install it and a later team may connect equipment; confirm who checks the site positions, approves changes and records concealed work. Ask whether greenhouse assembly includes making service connections or only assembling the structure, rather than assuming those tasks are included. If an installation appointment is arranged, tell the installer where the connection points are and confirm that routes will be complete and accessible. Resolve gaps in responsibility before work is booked, so no one is left with an untested buried service or an expectation that they will alter plumbing or electrical work.
Keep service entries reachable after installation
A connection can be in the right general area yet be awkward to use if it ends behind a frame member, bench or stored item. Mark the intended water and electrical entry points on the layout, then show them to the greenhouse installer before assembly. For a Lean-to Greenhouse, include the adjoining wall and existing building services when reviewing the route on site. Ask the supplier or installer to confirm the entry arrangement for the exact configuration, then let the relevant trade design how to reach that point. Do not cut a frame, base or building surface to create an opening without approval.
Keep anything that needs operation, inspection or maintenance reachable once benches, shelves and paving are in place. This may include the water isolation point and any controls or electrical isolation locations identified by the electrician. Decide which access needs to be inside and which should remain outside, and check that doors can open and people can reach controls without moving heavy equipment. If you expect a later change, such as adding irrigation controls, mention it while routes are being planned. A tradesperson can advise whether provision is suitable. Do not leave equipment in a space that can only be reached by removing a permanent structure unless that arrangement has been approved.

Before the base and paving are finished 5
Inspect and record services before covering them
Arrange a check while pipes, conduits and prepared entry points are still visible. Ask the plumber to inspect the pipework and the electrician to check electrical work at the stages they specify; do not energise or alter an installation yourself to test it. Confirm that the work follows the latest agreed plan, reaches the intended positions and is not damaged or obstructed. If you choose from the Limited Edition Aluminium Greenhouses range, label the inspection record with the exact configuration so it stays with the correct installation paperwork. Wait for the responsible professionals to approve covering or paving the routes.
Before the surface is closed, take clear photographs along each route, including turns, crossings, entry points and connections, with fixed site references in view. Mark any deviations on the drawing and record the date, responsible tradesperson and component details they provide. Have the plumber check the water connection for the intended use and identify any isolation or maintenance points. The electrician should carry out the appropriate checks and provide the relevant records for their work. Keep the plan, photographs and handover documents together where they can be found later. The aim is a reliable record for maintenance and future gardening, not a collection of trench photographs without locations.
Final checks and installation handover
Before the greenhouse is assembled, compare the site with the current plan: model and configuration, orientation, base drawing revision, water source, electrical connection point, route lines and agreed entry details. Ask each trade to confirm its own work and note any outstanding items. A finished hard surface does not mean an unresolved route is complete. Keep the responsible installers' details with the plans, photographs, product paperwork and any inspection or handover records. If the greenhouse or equipment changes, update the same record rather than keeping several sketches that disagree. This makes later maintenance less dependent on someone remembering where a concealed service was placed.
Use a final walk-through to check practical access as well as the drawing. Can you reach the water point, operate the planned controls, open the doors and move a hose without an awkward obstruction? Are connection points still usable after benches and storage are positioned? Do the tradespeople and greenhouse installer agree that the routes match the approved plan? Record any changes on the as-built drawing while the people responsible are still on site. When those points are settled, the water and electrical services can be handed over as part of the greenhouse installation rather than left as assumptions beneath a finished path.
Frequently asked questions
When should I plan the water and electrical routes?
Plan them before excavation, the greenhouse base and nearby paving are finalised. That gives the relevant tradespeople time to agree the routes and connection points while changes are still practical, even if you have not chosen all the greenhouse equipment yet.
Can water pipes and electrical services follow the same route?
Do not assume they can share a trench or decide the separation and protection details yourself. Ask the plumber and qualified electrician to coordinate a route that suits the site and their designs, then show the agreed arrangement on the site plan.
What information should I give the electrician?
Provide the exact greenhouse layout, the proposed supply point and a list of equipment you expect to use, such as lighting, a fan, controls or a pump. Mention possible future equipment too. The electrician can then assess the supply and design the electrical work for the actual site.
Is a product photograph enough to plan service entry points?
No. A photograph or model name does not establish the base layout or an approved entry point. Request the current manufacturer drawing for the exact greenhouse configuration, then ask the supplier or installer to confirm where services can reach it.
What should I record before paving or covering a route?
Keep an updated site plan showing the routes and any changes, along with clear photographs that include fixed site references. Add the connection locations and information supplied by the tradespeople, plus any relevant inspection, test or handover records.
When the water and electrical routes, greenhouse base and finished surfaces are coordinated on one current plan, there is less room for guesswork during installation. The useful outcome is not simply a connection that reaches the greenhouse: each service is accessible, assigned to a responsible trade and recorded for whoever maintains the site later.
