
Hardening Off Greenhouse Seedlings for Planting Out
Greenhouse growing guide
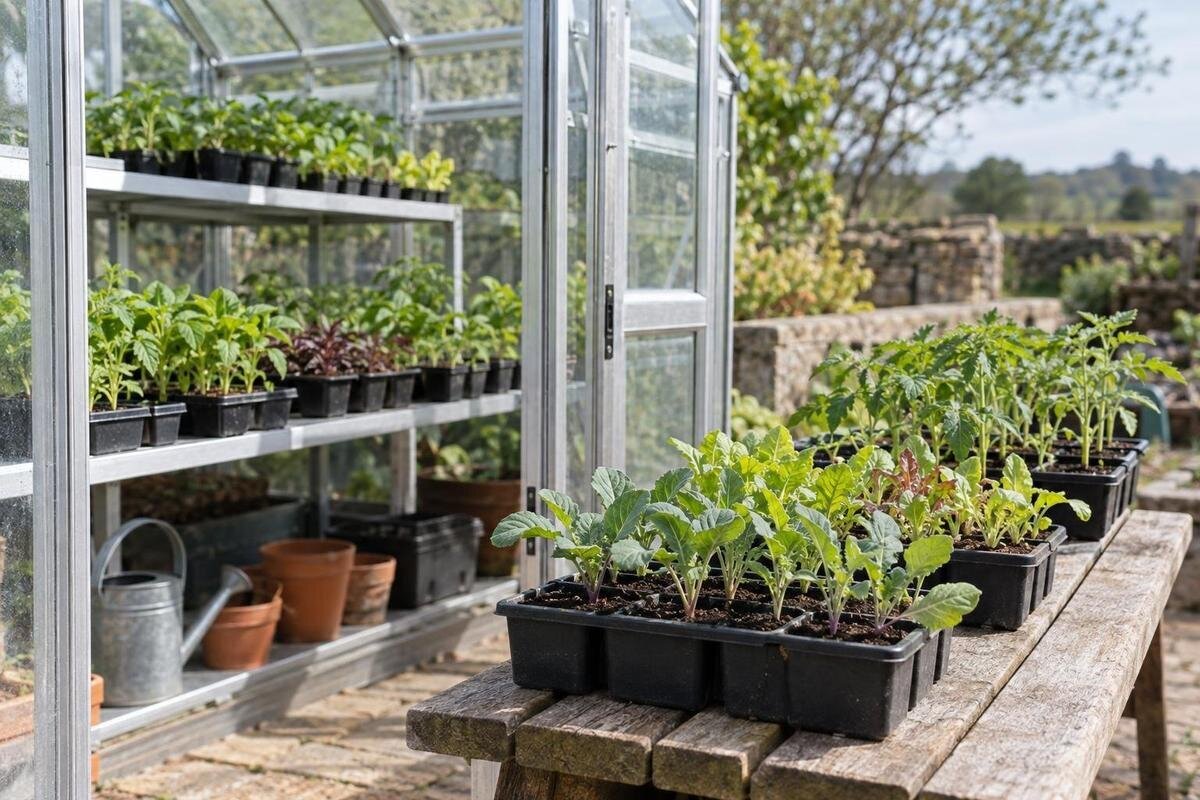
Seedlings raised in a greenhouse have not yet experienced the full force of outdoor sun, moving air and cooler nights. Taking them straight from a sheltered growing space to a bed or container can leave leaves scorched or plants limp, even when the growing medium is moist. Hardening off is a gradual, weather-led transition: expose each batch to outdoor conditions in manageable stages, watch how it responds, and increase exposure only when it is coping. No single countdown suits every crop, season and site. Use the forecast, species-specific growing guidance and the condition of each seedling to decide when to pause, progress and plant out.

What hardening off prepares seedlings for
Inside a greenhouse, seedlings are buffered from some of the conditions they will meet outdoors. Light may be filtered or arrive from a different direction, air movement is often gentler, and temperatures may change less sharply than in an exposed bed. A plant can look vigorous under cover but lose water quickly when direct sun warms its leaves and moving air increases evaporation. Even a greenhouse with good air movement cannot reproduce every feature of the planting site: wind direction, reflected heat and exposure vary around the garden. Hardening off gives seedlings time to adjust before transplanting adds root disturbance.
Several stresses can arrive together: strong sun heats foliage, wind increases water loss, heavy rain can soak a small root ball, and a cool night may set back a tender crop. If you change all these conditions at once, it is difficult to tell what caused a poor response or which adjustment helped. Introduce conditions in stages and assess the plants after each outing. The aim is not to keep seedlings outside until they look different or to deliberately stress them. It is to move them towards the ordinary conditions at their destination without an abrupt shock.
Check each batch before the first outing
Before taking a tray outside, read crop-specific guidance on the stage for transplanting and the minimum temperatures the crop can tolerate. Species and varieties differ in their preferred light, cold tolerance and pace of growth, so germination or a particular leaf count is not a universal signal. Many seedlings are moved when they have a sturdy stem and are growing actively, but use the packet, nursery label or a reliable growing guide for the crop you have. A very young seedling can be damaged by exposure; an overgrown or root-bound one may also establish less easily.
Check each tray, not just its tallest plant. Roots should hold the growing medium together when a cell is eased out, without forming a dense, circling mass; the seedling should be firm and free of obvious damage. Avoid beginning while it is wilting, newly repotted or recovering from another setback. Label the crop and sowing batch so plants with different needs do not get the same routine by accident. Lift trays by their edges rather than pulling on stems. If you are considering the Pyramid Greenhouse for raising seedlings, map out your tray positions, aisle and route to the door. Compare the space needed for handling trays with the layout you intend to use.
Choose outdoor sessions from the forecast
Choose the first outing when conditions are gentle and reasonably settled. A bright, overcast day or a mild period with little wind is often easier than an abrupt move into hot afternoon sun. Check the forecast for the hours the seedlings will be outside and for the following night, not only the temperature when you carry the tray out. Delay exposure during a heatwave, strong dry wind, heavy rain, hail or an unexpectedly cold spell. Cloud cover can clear unexpectedly, so stay nearby during early sessions. If conditions change, shorten the outing and move the tray to shelter rather than insisting on a planned duration.
Use your garden as well as the forecast: a courtyard, balcony, exposed slope or paved area can behave differently from a sheltered bed. Begin with a short, supervised outing, then add time or stronger exposure on later suitable occasions. There is no need to add a fixed number of hours each day; a run of poor weather can mean repeating an earlier stage. Keep a note of the date, sun, wind and plant response so you can resume sensibly. When considering the Limited Edition greenhouse with built-in storage, plan where labels and other supplies will go without obstructing the route indoors. You should be able to bring trays back promptly if the weather turns.
Increase sunlight without rushing the transition
For the first outing, put seedlings in bright shade or filtered light in a sheltered place, rather than straight into full midday sun. Keep them out long enough to experience the outdoor air while you can watch for wilting, but bring them back before conditions become harsh. Once they tolerate this, introduce gentle morning sun and gradually lengthen the direct-light period. Test stronger sun later only if it suits the crop and its intended planting position. Plants adapted to shade should not be trained towards full sun as though every crop needs it. Temporary shade helps with the transition; it should not deprive sun-loving crops of suitable light throughout the process.
Check leaves during the outing and again after returning the tray to shelter. Bleached, pale or papery patches can indicate sun injury, and damage may appear after the exposure rather than at once. If foliage stays firm and undamaged, increase exposure by one step the next time conditions are suitable. When choosing a position for a greenhouse such as the Bloomcabin Prestige Greenhouse, assess where sunlight will reach the trays. Also identify a nearby outdoor spot with bright shade for the first sessions. The greenhouse position and the outdoor staging area serve different purposes during this transition.

Introduce wind and rain in manageable steps
Wind increases water loss and can bend stems, tip small pots or dry one side of a tray faster than the other. Start in a sheltered outdoor spot with gentle air movement, not in an exposed corner or a narrow passage where gusts are funnelled. As the seedlings cope, move them to a less protected position in stages. If stems are being buffeted or pots are shifting, the conditions are too strong for that stage; move the tray back and try again during calmer weather. Keep trays on a stable surface and use shelter that reduces harsh gusts without trapping plants in stale, humid air.
Treat rain as another exposure, not as a substitute for controlled watering. Gentle rain may be harmless, but a heavy shower can flatten delicate foliage, wash medium from small cells or leave roots saturated. Protect trays from downpours and check drainage after rain. Keep them away from places where runoff collects, and do not leave them out in stormy weather just to meet a schedule. If you are comparing growing areas for several batches, include the Bloomcabin Orangerie in your space planning. Allow for trays returning to shelter as well as those already indoors, so a change in weather does not leave you searching for somewhere to put them.
Treat night temperatures as a separate test
Daytime tolerance does not prove that a seedling is ready for a cold night. Greenhouses can remain warmer than the open garden, but the difference varies with the structure, site and weather, so do not assume the growing space predicts conditions at the planting spot. Check the crop’s recommended minimum temperatures and the local forecast, including frost risk where relevant. Many warm-season crops are more sensitive to cool nights than hardy cool-season plants, but limits vary by species and variety. A warm afternoon outside is not evidence that the night will suit the crop; keep tender seedlings under cover until conditions are appropriate.
Do not make an overnight stay the first outdoor test. After seedlings manage daytime exposure, and only when the expected minimum is within the crop’s guidance, try a sheltered night if that is part of your transition. Check the plants early the next morning for limp leaves, discolouration or other signs of cold damage. If the forecast changes or frost is expected, protect them instead of accepting damage as part of hardening off. If you are considering an Aluminium Classic Greenhouse for raising seedlings, keep the indoor growing conditions and the outdoor overnight conditions separate in your planning. Neither the greenhouse model nor a successful daytime outing tells you whether a particular crop can stay outside that night.
Keep moisture steady as exposure increases
Outdoor exposure can dry a seedling faster, especially in a small cell or pot, because wind and sun increase water loss. Check the growing medium with a finger or by lifting the tray; a dry surface does not always mean the root ball is dry, and a damp surface can hide a dry cell. Water thoroughly when the medium needs it, then let excess drain. Aim for a moist, aerated root zone, not waterlogged cells or repeated wilting. Do not use deliberate drought as a hardening technique, and avoid leaving trays standing in water after watering or rain.
Water in time for the plant to recover before strong heat, and check again after a windy or sunny session. If a seedling droops, inspect its root ball and the weather it has just experienced; adding water to already wet medium may make matters worse. Trays can dry unevenly, so check several cells, including those at exposed edges. When planning tray positions in a Lean-to Greenhouse, leave access for inspecting and watering each batch. Being able to reach the whole tray makes it easier to check individual cells rather than judging moisture only from the nearest edge.
Recognise stress and adjust the next session
Assess the whole plant, not just whether it looks a little different at midday. Leaves becoming limp in hot conditions can be a warning to reduce exposure, while persistent wilting, crisp edges, bleached patches or tissue that looks water-soaked call for a pause and closer inspection. Move seedlings back into bright shade or shelter, check moisture and keep them out of direct sun until they have recovered. Do not add another stressor to see whether they can tolerate it. If damage continues despite improved conditions, or several plants show unusual symptoms, consider pests, disease or root trouble rather than assuming outdoor exposure is the only cause.
Change one factor at a time where possible. If a batch reacts after stronger sun, return to the previous light level before also testing wind or colder nights; this makes the next decision clearer. Record which tray went out, the conditions and what changed on the leaves. Keep recovering batches distinct from those ready for longer outings, so they are not moved outside together by mistake. If the Limited Edition Aluminium Greenhouse is on your shortlist, include separate positions for these groups in your proposed layout. Clear batch identification matters more than giving every tray the same routine.

Plant out when the crop and site are ready
Plant out when the seedlings have completed a gradual transition and the crop is at its normal transplanting stage, not simply because a set number of days has passed. They should cope with the ordinary sun and air movement at the chosen site, and the expected conditions should remain within the crop’s growing guidance. A plant hardened for a sunny bed may still struggle in a colder or windier position, so match the transition to where it will actually grow. Soil temperature matters for some crops; follow species-specific advice. If frost, heat or severe wind is forecast, delay planting when practical.
Choose a cooler part of the day for transplanting when possible, and water the seedlings if their root balls need it. Set them into prepared soil without leaving roots exposed, then keep checking moisture while new roots establish. Temporary shelter can reduce sudden stress after planting, but adjust it as conditions ease so plants receive the light appropriate to the crop. For successive batches, plan how trays ready for planting will leave the greenhouse without getting mixed up with younger seedlings. When comparing the T-Model Orangery Greenhouse, consider that movement through the proposed layout as well as the space occupied by trays under cover.
Manage mixed crops and separate sowing batches
Hardening off a mixed tray takes more judgement than moving a uniform batch. Crops differ in cold tolerance, preferred light and planting season, and seedlings sown on different dates may not be at the same stage. Group trays by crop or similar requirements, then label each one clearly. If a tray contains both tender and hardy plants, do not leave the more sensitive seedlings out for as long as the tougher ones simply because they share a tray. Keep the seed packet or crop notes nearby so decisions follow the plant, not its position on a bench.
Microclimates can change the routine from one bed or container to another, and the weather can shift between outings. Repeat or shorten a stage after a sudden change in sun, wind or temperature; a missed day is not lost progress. After planting, keep observing new growth and moisture rather than assuming the transition ends when the seedling leaves its tray. A concise log of crop, exposure and response can help you refine later batches without turning the process into a fixed calendar. The useful measure is whether each seedling is coping with its destination.
Frequently asked questions
How long does hardening off take?
There is no universal number of days. A sturdy seedling in mild weather may progress faster than a tender crop facing strong sun, wind or temperature swings. Use stages rather than a deadline: repeat an exposure if the weather has been poor or the plant has not coped, and increase exposure only while the seedling remains in good condition.
Can I harden seedlings off by opening the greenhouse door?
Opening a door may introduce some air movement, but it does not expose seedlings to the light, wind and temperatures at their actual planting site. It can be a small adjustment when conditions are safe; follow it with supervised outdoor sessions. Do not leave a door open in severe weather or assume that airflow alone has fully acclimatised the plants.
Should seedlings go into full sun on their first day outside?
Usually not. Start in bright shade or filtered light in a sheltered spot, then introduce gentle morning sun as the seedlings cope. Increase direct sunlight gradually, taking account of the crop and its intended position. A plant suited to shade should not be moved towards full sun simply because other seedlings in the tray need more light.
Can I leave seedlings outside overnight?
Only when the crop can tolerate the expected minimum temperature and the forecast is suitable. Daytime exposure does not prove that a seedling is ready for a cool night. Keep tender crops under cover until conditions meet their growing guidance, and take local frost risk into account where relevant.
What should I do if seedlings wilt or develop pale patches?
Pause the exposure and move the tray to bright shade or shelter. Check the root ball before watering: dry medium may need water, while already wet medium does not. Pale or papery patches can follow sudden sun exposure, but symptoms are not always specific. Wait for the plants to recover before trying a gentler session.
Hardening off works best as a series of decisions, not a countdown. Start with healthy seedlings at the right crop stage, choose suitable weather, offer shade and shelter first, and increase exposure to sun, wind and cooler conditions only as the plants cope. A pause during hot, windy or cold weather is part of the routine, not a failure. The final test is whether each batch is ready for the conditions at its actual planting position. If the forecast turns against it, keep the seedlings protected and wait for a better window.
