
Lean-To or Freestanding Greenhouse: Plan Around Your Site
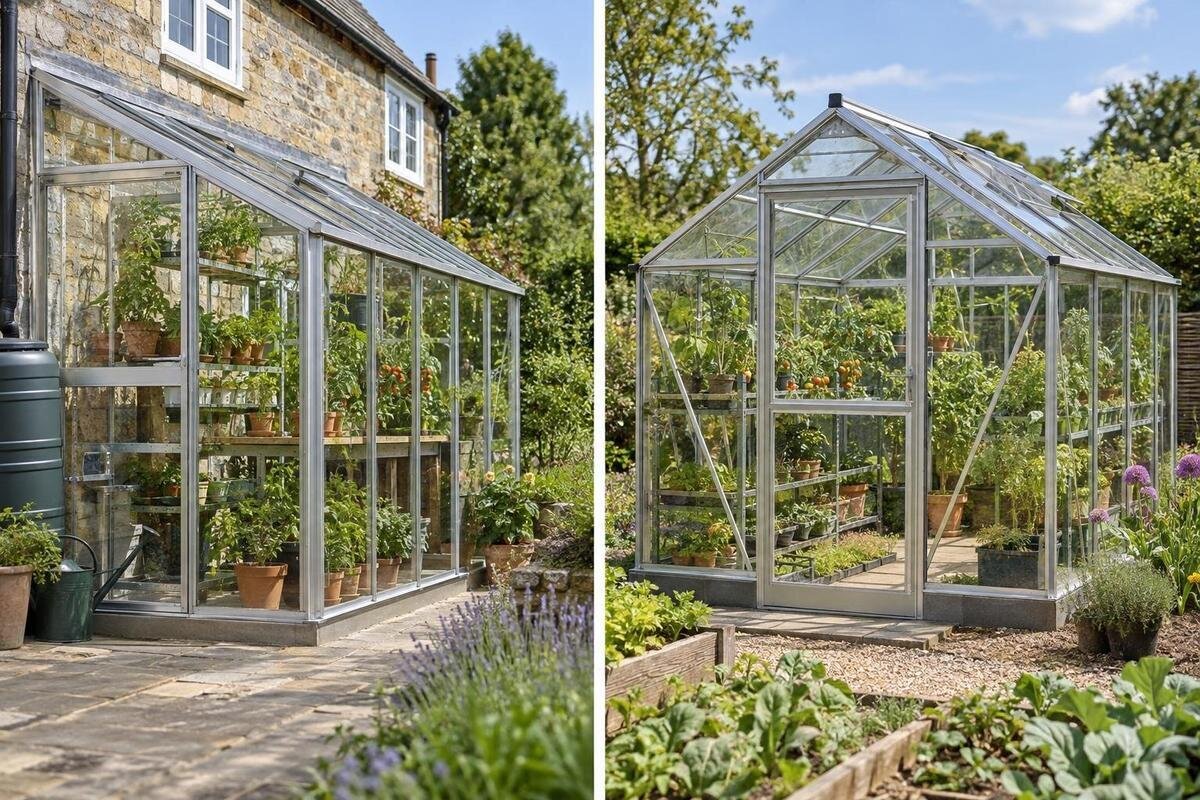
Greenhouse site planning
Choosing between a lean-to and freestanding greenhouse is a site-planning decision as much as a question of floor area. The wall, daylight, entrance route, ground conditions and remaining garden space all affect how practical each layout will be. Compare both on the same measured plot, then test the space inside each footprint against your intended growing routine.

A like-for-like plan of the site
A measured plan of the whole available area is a better starting point than a product photograph or the greenhouse footprint on its own. Mark fixed edges and obstructions: house walls, fences, gates, paving, trees, taps, drains, doors and windows that need to open. Include the route from the nearest garden entrance and the space needed to carry long items or a wheelbarrow. Then draw two outlines to the same scale: a lean-to against a candidate wall and a freestanding greenhouse elsewhere in the same plot. If the ground narrows, mark its tightest clear width rather than assuming the whole area is a rectangle.
Compare the working envelope around each outline as well as the structure itself. A lean-to needs a usable approach to its entrance and suitable access to the exposed sides and wall junction for inspection or maintenance. For a freestanding option, allow room around whichever sides you intend to reach. Do not assume it uses more of the garden simply because it stands apart, or that the lean-to saves space because it touches a building. Trace the routes you will still use when plants, tools and water containers are present. Distinguish the external footprint from clear working space and existing circulation. On an irregular plot, mark any corners that are difficult to walk around; a scale drawing can hide a tight turn.
Wall suitability for a lean-to greenhouse
First check what a wall-based layout would involve. Identify a clear, suitably positioned stretch of wall at the required height, then mark every window, door, downpipe, vent, cable, light and change in wall line. Measure the uninterrupted length between these features, not the full wall length. Check that the proposed greenhouse would not block an opening or make a regularly used route awkward. Inspect both faces of the wall for openings or services that affect access. Also check that the greenhouse will not obscure a window or light that matters inside the building. If the building is rented, shared or controlled by another owner, confirm permission before planning around an attachment.
Note the wall's condition and finish, roof eaves, overhang and any junction that could affect the fit. Do not assume an existing wall is suitable for the proposed fixings or weatherproof connection: the attachment and underlying structure need assessment by a competent installer or other qualified professional. If these points are uncertain, draw a freestanding alternative rather than treating attachment as a shortcut. The listed Lean-to Greenhouse options range from 3.69 m² to 14.34 m²; those area figures do not tell you the wall length or projection needed for a chosen configuration. Use the exact model dimensions and installation requirements.
Daylight and shade at each position
Map daylight across the area each greenhouse would occupy, rather than judging the plot at its centre. Mark shade from the house, boundary walls, mature trees, neighbouring buildings and any structure that may change. Observe the site at several times of day; if winter light matters to your planting plan, consider how the sun's path and any seasonal leaf cover differ then. A lean-to may inherit shade from the building immediately behind it. A freestanding greenhouse can be placed elsewhere only if that location is available and suitable. Neither form guarantees better light. Note whether a shaded strip falls over planned beds, seedlings or a bench, and whether tree shade may shift as the canopy changes.
Record direct sun and shade separately for both proposed positions, noting which edges change through the day. A single midday observation is not a year-round verdict. If the garden is already shaded, moving the greenhouse a few metres helps only if the alternative spot has a demonstrably different exposure. When comparing sizes in the Aluminium Classic Greenhouse range, listed from 3.77 m² to 28.08 m², overlay the chosen footprint on your shade plan. Check which planting zones would receive direct sun and which would remain shaded. This lets you compare the light available to your intended crops, rather than treating the whole greenhouse as equally sunny.
Entrance routes and everyday access
Think through arriving with seed trays, watering cans, compost or harvested produce. Draw the route from the gate or house, including turns, steps, narrow passages and surfaces that are awkward in wet weather. A lean-to may sit beside an existing paved route, but its entrance could face away from it; a freestanding greenhouse may be easier to approach from another direction, yet beds, a fence or a patio can leave only one practical entry. Door position and opening direction vary by model, so use the selected plan rather than assuming the entrance will be on a convenient end. Test the route with the widest item you expect to carry, not just a person walking through.
Mark where the door opens and leave a clear standing area outside it. Check for conflict with a house door, gate, bin route or normal work area, and make sure a hose or trolley will not obstruct the entrance. If two people need to pass, allow for that too; reaching the door is not enough if there is no room to step aside while carrying a tray. For a model from the Limited Edition Aluminium Greenhouse range, listed from 3.77 m² to 28.08 m², confirm the entrance position on the selected configuration. Draw the approach right up to the threshold, including the final turn, before deciding that either site offers convenient access.

Footprint dimensions and clearances
Compare external length and projection as well as total area. On a lean-to plan, the length along the wall and the distance into the garden determine how much of each edge remains free. On a freestanding plan, length and width show the occupied patch but not the clearance you may want around it. Write down the exact dimensions for the version under consideration, including any base or frame dimensions that the supplier specifies. Check whether stated dimensions refer to outer edges, not just internal area. Do not estimate from a photograph or assume two shapes with similar square metres will fit the same gap. Include any fitting or maintenance clearances specified for the chosen model.
Measure from the actual boundaries to the proposed outer edges, not from the centre of a sketch. Allow for gate swings, downpipes, handles and items that must remain accessible, then check the narrowest pinch point rather than averaging the available width. The T-Model Orangery Greenhouse options are listed from 16.52 m² to 30 m². For the configuration you are considering, record each external dimension beside the corresponding edge on your site plan. This makes it easier to identify where the outline approaches a path or boundary. Keep the greenhouse dimensions and the surrounding clearances separately labelled so that space needed for access is not mistaken for spare planting space.
Drainage, ground levels and the base
Look at the ground at the exact proposed position, including level changes, paving edges, soft ground and places where water collects or runs after rain. Note downpipes, roof runoff and existing drains; a greenhouse against a wall should not occupy a route that needs to remain clear. A freestanding option can be moved to another patch only if it also has workable access and light. If you can, compare positions after rain as well as on a dry day, and note where water travels. Avoid choosing a spot solely because it looks level; check how runoff and access work there too. These observations help identify questions about the base and site preparation before you commit to a location.
Check the selected model's stated base requirements and ground preparation; an existing patio, lawn or wall does not automatically provide suitable support. A slope, retaining edge or position close to a building may need assessment by a qualified installer or building professional. Do not infer ground suitability from an area figure or from the name of a base accessory. If you are considering the Bloomcabin Prestige Greenhouse, listed in sizes from 3.77 m² to 28.08 m², identify the exact version before discussing preparation of either site. Keep your notes on levels, drainage and existing surfaces together so the requirements can be considered for the actual position, not an assumed level patch.
Water, services and maintenance access
Consider how you will bring water to the greenhouse and manage hoses, tools and any equipment you plan to use. Mark the nearest tap and the route a hose would take, including any point where it crosses a doorway or main path. A lean-to beside a house may be closer to services, but proximity does not mean a tap or outlet is suitable for the intended use; a freestanding position may require a longer route. Decide whether routine watering can be done without trailing a hose through the busiest circulation area. If electrical equipment is part of your plan, ask a qualified electrician about the proposed location and installation rather than planning wiring yourself.
Include access for maintenance and repair on the same drawing. A side wall tight to a fence can be hard to reach; a greenhouse against a house can make its wall junction less accessible. Mark where you would stand to reach each exposed side, rather than counting every unoccupied strip as usable access. When considering the Pyramid Greenhouse options, listed from 5.53 m² to 18.9 m², place the selected configuration alongside your tap and service-route markings. Trace the watering route to the intended beds and decide where the hose will be stored afterwards. Compare this with the lean-to arrangement, including whether either route would regularly obstruct a door or main path.
Usable growing space inside each layout
Draw the inside before choosing the outside. Mark the doorway, main path, beds, pots, shelves and bench space, then allow for the height and reach needed by the crops you actually grow. Keep a route to each working zone rather than adding beds until no one can reach the back. Check the narrowest point with doors open and plants mature, not only when the greenhouse is empty. A lean-to's wall side can provide a clear planning edge, but do not assume the full length is available for benches or tall plants: fittings, the model layout or the wall itself may affect its use. Allow room to reach the door and any items you need to operate, following the model's instructions.
Separate gross floor area from usable growing area. An aisle, storage and potting space take room, even when they make the greenhouse more useful. The Limited Edition Aluminium Greenhouse with Built-in Storage is listed in sizes from 5.52 m² to 28.08 m²; its stated range does not show how much growing space remains in each layout. Check the exact configuration for the position and dimensions of storage, then place beds around it. If you plan the same crops in both alternatives, draw that same layout inside each outline and note what has to be removed, narrowed or moved. This reveals whether the smaller footprint still suits your growing routine.

Boundaries, views and future garden use
Look beyond the greenhouse edges to the way the garden is used. A lean-to keeps the structure close to a building, but that position may affect a window, patio or established path. A freestanding greenhouse becomes a separate destination; make sure the route to it remains convenient and that it does not divide a lawn or access line you rely on. Mark boundaries, views from living spaces, gates and areas reserved for play, seating or future planting. Consider whether shade or privacy planting could grow into the space. View both outlines from the kitchen or patio too: a structure that fits the ground may still change an important outlook. These details show how each position fits the whole garden.
Allow for likely changes, too: a new bed, a larger tree, a relocated tap or a different growing routine can affect space around a permanent structure. Identify what must remain reachable and what could be moved before treating a narrow gap as available. If you are considering the Spacious Greenhouse range, listed from 47 m² to 70 m², mark the chosen configuration alongside the garden areas you want to retain. Compare what each alternative would displace, not just whether it fits. A useful site plan should show the seating, planting and circulation you intend to keep as clearly as it shows the proposed greenhouse.
How to choose between the two layouts
Once both plans are complete, compare them against the same list rather than judging one by its strongest advantage. Assess the wall option for wall suitability, light, entrance, internal layout and outside access; assess the freestanding option for its alternative position, approach routes, clearance and site preparation. Separate deal-breakers from preferences. A wall that cannot be assessed, a blocked door route or a footprint that leaves no workable aisle can rule out a layout even if it looks compact. A freestanding plan should not win simply because it can be rotated; the new position must still work for daylight, access and drainage. Write down your non-negotiables, such as a clear route or space for a particular crop, before comparing the two.
If both remain workable, compare your regular routine: where you enter, where you stand, how you move plants and water, and how you reach the outside for care. If only one option works after those routes are drawn, the site has supplied a clear answer. If the result is close, wait to settle on a configuration until any uncertain wall, level or base detail has been checked by a suitable professional. Choose the form that preserves garden circulation and gives your intended planting a coherent layout. The best fit is the one that remains accessible after planting, not merely the one that fits within the boundaries.
Frequently asked questions
Does a lean-to always use less garden space?
Not necessarily. It can occupy a strip beside a building, but the approach to the entrance and space needed for inspection still belong in the site plan. If the layout makes an access path unusable, the apparent footprint saving may be offset by lost circulation. Compare the complete working area, not just the rectangle beneath the frame.
Does a wall make a lean-to greenhouse warmer?
Do not assume so. A wall changes conditions on that side and may cast shade; any temperature effect depends on the building, position, glazing and weather. Treat the wall as a site factor, not a guaranteed heating benefit. Base the choice on observed exposure and the specifications for the selected greenhouse.
Should I compare floor area or dimensions?
Both matter, but they answer different questions. Floor area describes the total space; length and projection show whether a greenhouse fits the available gap, while internal dimensions help you plan beds and an aisle. Use the exact drawings for the chosen configuration, then test your intended layout. Two models with similar areas can occupy different proportions of a plot.
What if I am not sure the wall is suitable?
Do not judge suitability by appearance alone. Have the wall and proposed attachment assessed by a competent installer or relevant building professional before relying on that position. In the meantime, draw a freestanding alternative on the same site plan so you can compare space and access without assuming the wall is available.
Can I put a freestanding greenhouse anywhere with open ground?
Open ground is only one consideration. Check light, exposure, drainage, levels, access, base requirements, boundaries and the clearance needed to use or maintain the structure. An apparently empty patch may be a route to a gate, a future planting bed or a place where water collects. Assess the actual position, not just whether the footprint fits.
A lean-to makes sense when the wall and the space beside it work together; a freestanding greenhouse makes sense when a separate position improves the overall layout. Neither is inherently more efficient. The decisive test is whether the selected footprint preserves useful growing zones, garden circulation and practical access. If both pass that test, let your planting plan and everyday routine settle the choice.
