
Fitting a Potting Station Around Greenhouse Plants
Greenhouse planning
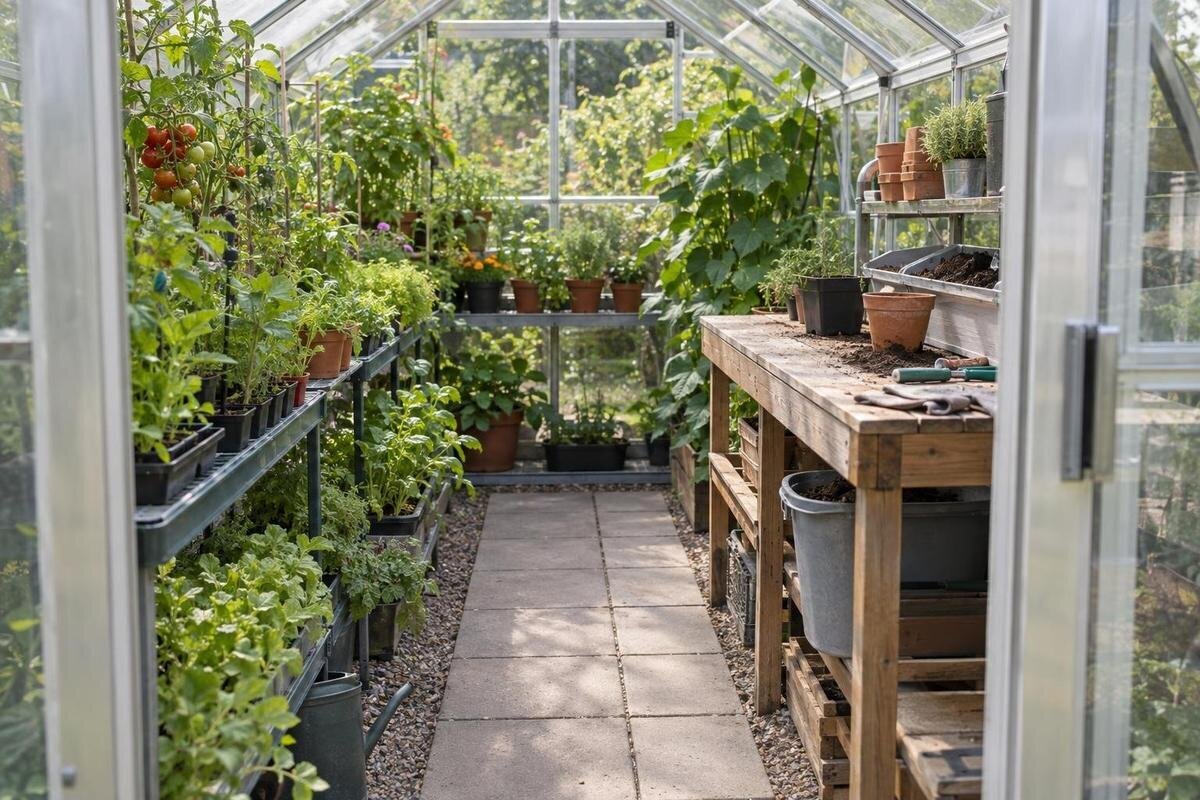
Fitting a potting station around greenhouse plants means planning for more than the bench itself. The surface needs enough depth for the jobs you do, while the person working there needs room to stand, handle trays and reach supplies. Plants also occupy more than the empty floor visible between pots: their planned positions, expected growth and care access all matter. Treating the station as a measured work zone—with its storage and temporary tray space—helps keep it useful without gradually taking over productive growing area.

01
Plan the complete work zone
Measure the station's full working footprint, not just the worktop. Record the top's width and depth, then add legs, drawers, bins or shelves that project beyond it. Mark where you stand and the space needed to pull out a container, set down a tray or step back. These movements occupy floor area even though they are not part of the furniture's stated dimensions. Record both the closed dimensions and the space occupied when drawers or lids are open. Include handles and any tray that extends beyond the top. This separates the station's permanent footprint from the extra space needed while you work, so neither is overlooked when you compare it with the available growing area.
Start with internal dimensions from the selected model's dimensioned drawing. Plot existing beds, pots, frame members, the door opening and any controls before placing the bench. A worktop 900 mm wide and 500 mm deep is an illustrative planning example only—not a product size or prescribed standard—and the user and handling space still need to be added around it. Mark the outline on the floor and test a tray. The Aluminium Greenhouses range lists options from 3.77 m² to 28.08 m²; that span helps compare broad scale, but does not show the clear working rectangle in any particular option.
Choose worktop depth for your potting jobs
Choose depth from the tasks, rather than from a generic bench measurement. Lay out the largest seed tray you routinely handle, a pot, a scoop and the container you use for potting mix. Put them in the order you use them and measure from the front edge to the furthest item. If you open a bag, rotate a tray or line up several pots, include that temporary spread as well. Check how much of the top is actually flat if it has a raised edge or rail. A narrow ledge may suit a hand tool but leave little room to fill containers; a much deeper surface can push the back row out of easy reach and extend into the aisle.
Use the actual trays and pots you own: sizes vary, and a tray that fits on the top may still be awkward to lift off if there is no room for your hands. Mock up two possible depths with cardboard, then carry out one potting task from start to finish. Keep frequently used items toward the front. Where only tools need extra room, consider a separate side shelf rather than making the whole top deeper, provided it does not narrow the route. The Lean-to Greenhouse range lists options from 3.69 m² to 14.34 m², but those area figures do not specify a suitable worktop depth. For the selected model, compare its internal drawing with the measured task footprint before settling on the bench.
02
Keep the approach and route clear
A station needs a clear approach and room to work at the front. Stand at the proposed front edge, reach across the top, turn with a loaded tray and step back. Trace those movements against the route between the entrance and the planting area. If you have to sidestep around a bucket, brush past foliage or move pots before every task, the apparent space saving is not practical. Decide which side you will approach from and check whether someone else can pass without disturbing the work. Test with the greenhouse door in its normal open and closed positions, as a location that works in one position can obstruct the other.
Keep access to beds and to the door clear; also note any vents, taps or controls that are actually present, so a storage box or bench does not sit in front of them. Check an open drawer and a tub on the floor as separate positions, because each can narrow the route differently. The Bloomcabin Prestige Greenhouse listing spans 3.77 m² to 28.08 m² across its options; use the drawing for the size you are considering to check movement around the station rather than treating its listed area as spare floor. If the station works only when everything is tucked away, decide whether that routine is realistic.
Put supplies where they will not crowd the bench
Sort supplies by how often you use them. Hand tools, plant labels, empty pots and a small amount of mix are regular items; spare trays, unopened bags and seasonal equipment can be stored elsewhere or on a less accessible shelf. Place the active set near the work surface, but test whether a side shelf, drawer or lower container suits it best. Under-bench storage can free the top, yet bulky tubs may take up foot space and force you to stand further back. A side unit is easy to reach but can take width from the route. Include the protruding edge of handles, drawers and lids in your sketch, and check that the largest container can be removed without shifting everything else.
Make a short inventory before choosing shelves: container footprints, tallest pot, number of small tools and any materials you want kept clean and dry. Keep dirty tools and loose potting mix from being piled over seed packets or finished trays, and leave some spare capacity so a new batch of pots does not default to the floor. The Limited Edition Aluminium Greenhouses with Storage page lists options from 5.52 m² to 28.08 m². The product name identifies a storage option, but the selected model's drawings and details are what you need to judge its arrangement and capacity; do not assume it replaces a worktop of the depth your jobs require.

03
Reserve a temporary zone for seedling trays
A bench that works in a quiet spell can be overwhelmed when seedlings are ready to pot on or several trays need attention at once. Estimate peak use, not the weekly average: count the trays usually in progress during the busiest period and measure their actual length and width. Include pots waiting to be filled and trays set aside after watering; if you use covers, include their footprint too. Do not count every visible patch of floor as spare staging space; beds, mature plants and the route to them already have jobs. A temporary tray area should be flat, accessible and separate from the planting positions you want to preserve.
Mark that seasonal zone on the plan beside the station or on a movable surface, then check the whole tray footprint and the room needed to lift each one out. Decide when trays move to a bed or shelf and where empty ones go, so a temporary landing area does not become permanent clutter. Avoid stacking planted trays unless your growing method calls for it: upper trays can damage seedlings and make lower trays difficult to inspect or water. The Pyramid Greenhouse listing spans 5.53 m² to 18.9 m², but a listed area cannot tell you how many trays fit beside a work zone; check the selected layout against the trays you measured.
Test the layout before fixing it
Before buying or fixing furniture, mark the bench, lower storage and seasonal tray zone at full size on the greenhouse floor. Tape works for outlines; cardboard boxes can stand in for bins or pots. Then act out an ordinary potting session with an empty tray, the container you use for mix, a full pot and a container for waste. Check whether you can reach the back of the top, turn a tray and clear away tools without leaning into plants or stepping into a bed. Ask everyone who will use the station to try it, since a layout that suits one person may not suit another. Allow for the space your plants will occupy at their fullest, even if they are still small during the test.
Repeat the test during a busy version of the job: open drawers, leave a tray on the top, move a completed pot and walk past carrying something. Note where tools and finished plants naturally accumulate; if that is a route or growing bed, change the plan rather than asking yourself to remember an awkward workaround. Use the Limited Edition Aluminium Greenhouses page to identify the options you are comparing, then base the mock-up on the dimensions for the precise option. Keep your tape marks until you have checked them against that option's internal drawing, not just a product photograph.
04
Compare fixed and movable stations
Consider a fixed station if you pot regularly and know which part of the greenhouse can stay devoted to it. If demand peaks only during sowing or repotting, a removable table or fold-away top may let floor space return to plants at other times. Draw both the in-use and stored positions: folded furniture, legs, handles and any bin tucked beside it still occupy space. A portable surface can be set up elsewhere for a messy job, but only count that option if the route and conditions make it practical. A folded top does not create usable growing room if permanent shelves or boxes remain in the same area.
Whichever form you prefer, include where the station will be kept between jobs and how it will be put away; otherwise the greenhouse may acquire a second storage problem. If comparing the T-Model Orangery Greenhouse, listed area options range from 16.52 m² to 30 m², but a larger figure alone does not identify a clear bench position or route. Wall-mounted or suspended furniture also raises questions about the suitability of the fixing point and its load capacity. Where either is uncertain, check the model information and ask the supplier or a qualified installer; do not guess at fixings or calculate a load from the greenhouse's general description.
Read area figures alongside internal dimensions
Square metres help compare broad greenhouse options, but they hide the shape and location of usable floor. For a potting station, check the selected model's internal width and length, door opening, frame members and any fixed features shown on its dimensioned drawing. Confirm whether each measurement is internal or external before plotting furniture, and check the dimensions at the location where the station will stand rather than relying on a single overall span. Do not subtract a rounded worktop footprint from a listed area and call the remainder productive space: the station's handling envelope, routes, plant containers and fixed obstructions all take room. A simple sketch drawn to the same scale as the internal plan is more revealing than an area total.
A size selector can help narrow the options, but it cannot replace the drawing for the chosen configuration. If a measurement is missing or ambiguous, request confirmation instead of estimating from a photograph. The Spacious Greenhouse range lists options from 47 to 70 m²; those area figures still do not specify internal clearances or guarantee a useful potting-station layout. Compare verified dimensions with the beds, station and seasonal tray space together. Check whether any remaining strip is wide enough for access or planting before treating it as usable space or adding more shelves.

05
Protect the area needed by growing plants
A clear patch today may already belong to a crop that has not grown into it yet. Tomatoes, climbing crops and other plants can spread beyond their pots or need supports and room for routine care; use the variety's growing guidance or your established planting plan to estimate their mature footprint. Mark the pot, foliage or support area and the side from which you will prune, tie in or pick. Keep the station's edge and the space to stand outside that working area. Do not make a bench fit by crowding crop spacing without checking what the plants need.
Review the plan at the stage when the greenhouse is fullest, not just at planting time. Check that an open potting tub, a tray waiting to be moved and the person at the station will not block access to a row or brush repeatedly against foliage. If irrigation pipes, hanging supports or other fixed equipment are present, mark their real positions too; their locations vary and should be measured on site. Focus on the boundary between the station and the plants: both the furniture and the movements involved in potting need to fit outside the growing area you intend to keep.
Keep the station from expanding over time
Set a simple reset routine so the station does not become a permanent landing place for everything brought into the greenhouse. Return hand tools to their storage, remove spilled mix, clear empty pots and move finished trays to their planned growing position after each job. Keep the standing area and the surface usable for the next task. A small inventory also helps: if spare containers or bags no longer fit their assigned space, decide what to relocate rather than filling the aisle or stacking supplies around plants. Put away the items used for a one-off task instead of building the worktop's depth around them.
Recheck the layout when the season changes or the crop plan shifts. The busiest tray period may require a temporary surface, while mature plants may claim space that was open earlier. If the station begins to expand, first review the supplies, storage and workflow; do not let an extra shelf silently reduce the planting area or block access. A useful potting zone is the one that supports your actual jobs, keeps the plants you planned to grow accessible and can be reset when the task is done. Its success is measured in how it works, not in the size of the bench.
Frequently asked questions
How deep should a greenhouse potting bench be?
There is no single depth that suits every greenhouse or potting routine. Measure the largest tray, potting container and tools you use together, then include the room needed to fill pots, turn a tray or lift it off the surface. Mock up the proposed depth with cardboard or a board and try a real task. Treat any sample measurement as illustrative, not as a product specification.
Where should I put trays while I pot?
Mark a temporary tray area on your plan, close enough to handle trays without crossing a growing bed or blocking the route. Base it on the number and dimensions of trays you use during your busiest period, not on the quieter weeks. Decide where trays will go after potting and where empty ones will be stored, so the temporary space does not become a permanent pile.
Is built-in storage better than a separate unit?
Neither is automatically better. Compare the items you need to store with the location, access and usable capacity of the storage shown for the selected greenhouse. A separate shelf or container may be easier to place where you work, but it also takes space. Check the actual model details and include drawers, lids and bins in your layout rather than relying on the product name alone.
Can I fit a potting station in a small greenhouse?
Possibly, if the complete work zone fits without blocking access or taking space assigned to plants. A compact or movable surface may be worth testing, but include your standing position, storage and tray handling in the mock-up. Check the selected greenhouse's internal drawing: a listed area does not show the clear floor available at the spot where you want to work.
How much space should I allow for seedling trays?
Count the trays you expect to handle at the busiest point in your growing cycle, then measure the trays you actually use. Allow enough room to set them down and lift them out; a tray's footprint alone may not represent the working space it needs. Mark this area separately from permanent planting space and check that it does not overlap the route to your beds.
A potting station fits well when you can use it during the busiest tray period without encroaching on plants or blocking access. Measure the surface, storage and handling space as one zone, then compare that sketch with the internal drawing and mature crop plan. If a fixed arrangement takes space your plants need, a smaller or seasonal station is a better choice than a permanent bench that gradually reduces the growing area.
