
Preparing Greenhouse Pipes, Pumps and Tanks for Winter Frost
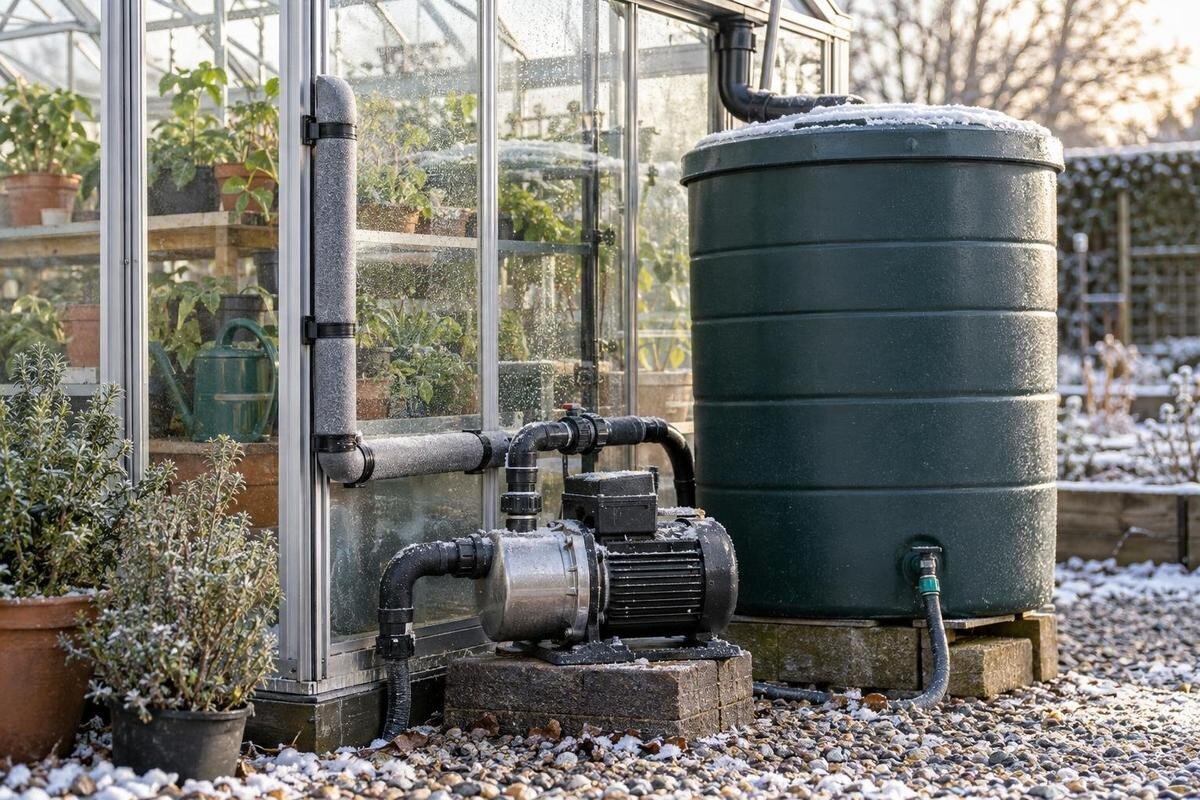
Greenhouse water systems
Greenhouse irrigation is easy to shut off at the tap and still leave water trapped in a filter bowl, valve, pump casing or low loop. When that water freezes, expansion can crack a component or create a leak that appears only after the system is pressurised again. Winterising is therefore a component-by-component task, not general greenhouse winter care: identify what will stay in use, isolate the supply, drain what can be drained and store removable parts as their makers specify.

Plan the drain-down before the first frost
Use a frost forecast for your own site rather than a fixed date. Decide whether the system must keep watering through winter or can be shut down; that choice determines whether you drain the full installation or only sections taken out of use. Trace the route from mains supply or tank through pump, filter, main pipe, branches and outlets. Mark exposed runs, buried sections, high and low points, capped ends and any line hidden behind benches. A short dip or closed branch can hold water even when the visible hose drains. If you are choosing a greenhouse too, the Lean-to Greenhouse listing gives an area range of 3.69–14.34 m²; use the chosen layout, not area alone, to plan a tank position and accessible pipe route.
Read manuals before opening any housing or removing a fitting. Record the specified drain points, valve positions and storage instructions for the pump, tank and filters; these can differ between models. Identify a safe route for water to drain, particularly if it contains fertiliser or sediment, and avoid leaving it across paths or beside electrical equipment. Photograph labels and connections, then mark both ends of any part you detach. For buried or fixed lines you cannot trace, ask an irrigation installer to identify them rather than cutting, forcing or guessing at a connection. If one valve group cannot drain through a single outlet, record it as a separate task on the system map.
How frost damages greenhouse water systems
Water expands as it freezes. In a full, confined space—inside a valve body, filter bowl, pump chamber or closed length of pipe—the pressure can damage a housing or joint. A crack may be small and hard to see while the system is empty, then show as a leak when water returns. Exposure is not limited to open air: a valve near a door, pipe behind a bench or tank outlet in a shaded corner can be colder than the central growing area. Pay particular attention to valves, filter cups, exposed pipe connections and tank outlets; these small cavities are easier to overlook than a long pipe. Check the whole route, including short branches and low points, rather than covering only the longest pipe.
Do not assume that the greenhouse itself provides frost protection. The Aluminium Greenhouses range has listed floor areas of 3.77–28.08 m², but floor area does not tell you the temperature at a pump, valve or water-filled line. Insulation can slow heat loss on an exposed section, yet it cannot remove trapped water or guarantee frost-free conditions. Use the maker’s stated temperature limits where provided, assess the coldest points in the actual installation and drain vulnerable unused parts. A minimum-maximum thermometer near a pump or exposed connection during cold nights can help identify local cold spots, but one reading is not an equipment rating. Keep components within their specified operating conditions if they must remain in service.
Drain pipes, hoses and drip lines
Start by shutting off the source so the system cannot refill while you work. Stop the pump in the manner stated in its manual, then open designated taps or drain points in the order intended for the system. If line drainage relies on air entering, use a designed outlet or vent; do not loosen a joint that may still be pressurised. Let gravity do the work and check low points, end caps, loops and branches separately. A line that stops flowing is not necessarily empty if a valve, check valve or dip retains water. Note which branch drains last, as it may reveal a low point or a blocked route.
Disconnect removable garden hoses and drip lines only as their makers allow, drain them fully and store them without tight bends or heavy objects on top. Emitters and small connectors can retain pockets even after a flush, so flushing alone is not a winter drain-down. The Limited Edition Aluminium Greenhouses range is listed from 3.77 m² to 28.08 m²; for any chosen footprint, mark the real pipe run and its low points rather than estimating water retention from floor area. If a fixed line cannot drain, ask an irrigation specialist about the equipment-approved solution instead of cutting it. Label coils by zone so the correct run returns to its original outlet.
Drain the pump according to its own instructions
Pump designs do not share one drain-down procedure. Check the exact model’s manual for isolation, pressure release, casing drain points and whether the pump must be removed, left in place or stored in a particular way. Water may remain in a strainer, priming chamber, volute, short inlet or outlet section after hoses are detached. Do not assume that opening a nearby tap empties the pump. Some pumps have a drain plug; only open the part identified in the instructions, rather than treating any cap as a drain. If a pump is hard-wired or connected to fixed plumbing and you are unsure how to isolate or remove it, use a qualified installer or electrician as appropriate; do not open the motor housing.
Submersible pumps, surface pumps and small inline units can have different requirements. Remove a unit only if its instructions permit it, and handle its cable and lifting points as specified; drain the water-containing parts and store it only in the conditions named by the manufacturer. Keep plugs and openings protected from dirt, but do not seal a damp housing in a way the manual forbids. Never run a pump dry in an attempt to clear water. When planning a system around a T-Model Orangery Greenhouse, its listed area of 16.52–30 m² is not a pump specification: selection and placement depend on the actual water source, route and pump data. If storage requirements are unclear, contact the maker before removing it.

Empty filters and valves without forcing them
Filters and pressure regulators often hold water in a bowl, cap or internal chamber. Once the supply is isolated and pressure has been relieved as directed, remove and drain only the parts the manual identifies as user-serviceable. Clean a screen with the method approved by the maker; do not use a wire or aggressive chemical that could damage it. Check seals for dirt or wear, but avoid stretching them or tightening a housing beyond its instructions. Dry or store filter elements according to the manual; a wet component sealed away for months may not be the specified method. If a filter is permanently installed or part of a backflow or mains arrangement, do not dismantle it unless you are qualified to do so.
Valves need their own check because a closed valve can leave a water-filled cavity on either side, while a solenoid valve may have internal sections that do not drain with the pipe. Follow the valve maker’s position and drain instructions rather than assuming open or closed is always correct. Keep removed screens, caps and seals together, labelled by location, and store them clean and dry only if specified. When planning a Pyramid Greenhouse layout, use the selected plan to leave filters and shut-off valves reachable; product area alone does not show where service points will fit. Note flow direction before reconnecting any filter or regulator, and use its specified seals rather than improvising replacements.
Winter care for watering controls
A timer’s off setting is not proof that the water supply is isolated; find the system’s actual shut-off point. Keep electronic controls separate from wet components. A timer, controller, sensor or powered valve may have batteries, plugs or a fixed connection, and each maker can specify a different winter storage method. Follow the manual on whether to remove batteries, disconnect a detachable controller or leave it installed; keep water away from connections and do not open a sealed enclosure. If wiring is fixed or unclear, have a qualified electrician handle isolation or reconnection rather than improvising.
Work through the hydraulic side too: empty any water-filled valve, manifold or filter connected to the controller, and label wires and pipe zones before disconnecting anything authorised for removal. A greenhouse listing such as Limited Edition Aluminium Greenhouses with Storage does not establish that its storage section is frost-free or suitable for electrical equipment; confirm the chosen layout and the controller maker’s location requirements. Do not store controls in a damp space unless their instructions allow it. Keep manuals and small removed parts together so the spring setup can be restored correctly.
Prepare the water tank and its fittings
Treat the tank body and its fittings as separate items. Check the maker’s instructions for frost exposure and the correct water level during storage; there is no universal rule to leave every tank full or empty. Some tanks are intended to remain outdoors, while others need a protected position, and an outlet tap, gauge, float valve or filter can be more vulnerable than the body. Do not assume a large volume of stored water protects exposed fittings, or that an empty tank is automatically safe for its installation. Check any level indicator, drain valve and external filter as separate water-holding parts.
If draining is specified, isolate the supply and empty the body through its intended outlet, then separately drain the pipe from tank to pump and greenhouse; water left in the connector can freeze even after the tank is low. Follow instructions for the inlet, overflow, vents and caps so water can enter or escape as designed; do not block a designed vent or overflow to keep cold air out. For a fixed tank or one whose support is unclear, confirm the emptying procedure with the supplier or installer. The Bloomcabin Prestige Greenhouse listing spans 3.77–28.08 m²; compare the tank’s actual footprint and service access with the chosen layout rather than assuming floor area guarantees a fit.
If irrigation needs to stay in use
If watering must continue through winter, decide what can remain live only after checking frost limits for every exposed pipe, fitting, pump and tank connection. Drain sections that are no longer needed; do not leave them full just because a nearby line remains active. Move removable items to a maker-approved protected place where possible. Insulation helps reduce exposure but is not a substitute for draining a vulnerable idle line, and an unheated greenhouse should not be treated as a frost-free room. After a cold night, inspect the system for leaks before relying on it again. If you cannot confirm that a component can remain in service, ask the maker or an irrigation professional.
Keep the route from water source to crop as simple as possible for the cold period: use only approved components, avoid temporary joins that leave trapped water and keep the pump from running without water. If rainwater storage or a watering layout is being planned, the Spacious Greenhouse listing covers 47–70 m², but that figure does not determine pipe length or exposure; measure the proposed route and identify drain points before installing it. If a fixed system must operate in a frost-prone spot and maker guidance is unclear, an irrigation professional can advise whether it can be protected or should be isolated.

Thaw, inspect and recommission carefully
After a frost or suspected freeze, leave the pump off and do not pressurise the system until every component has thawed. A fitting can still contain ice even when its outside looks clear. Let it thaw gradually according to the equipment maker’s instructions; avoid an open flame, boiling water or sudden high heat, which can damage materials and create a hazard. Inspect the pump casing, filter bowls, valves, hose ends, tank outlet and visible pipe joints for bulges, splits or movement. Replace cracked parts before restarting. If you suspect damage in a concealed line, have it assessed rather than assuming it is sound because no leak is visible.
Once thawed and checked, reconnect parts only in the correct positions, restore filters and seals as directed, and prime the pump exactly as its manual requires. Refill gradually through the intended procedure while watching joints and housings; stop if water appears where it should not. Test outlets one zone at a time so a leak does not go unnoticed, then check that the tank valve and overflow arrangement work as designed. Do not ask a pump to run dry to test it. If it loses prime, trips or makes an unusual noise, switch it off and seek the maker’s instructions or qualified service before continued use. Check again after the first operating cycle, since a small leak may only show under pressure.
Record the drain-down and avoid unsafe shortcuts
Use your system diagram to record the completed drain-down, not just the pipe route. Label the drain points and isolation valves, note which branches have been emptied, and identify any filters, controls or pump parts removed for storage. Keep the record with the labels and connection photographs taken before dismantling. This brings the separate component checks together without relying on memory when the system is reassembled. Record any part that cannot be drained or whose instructions remain unclear, and resolve it before the next frost warning. Keep sections still in use clearly distinguished from those shut down for winter.
Do not pour automotive antifreeze into an irrigation system or use chemicals unless the maker explicitly specifies an approved procedure. Chemical residue can affect water and growing media and may harm components. Compressed air is not a universal alternative to draining: use it only if the equipment instructions give an approved method and limits. Otherwise, it can damage low-pressure lines, emitters or valves. Where the system has no clear way to release trapped water, ask an irrigation professional about the appropriate method rather than substituting chemicals, guessing an air-pressure setting or forcing a fitting open.
Frequently asked questions
Do I need to drain every pipe?
Not necessarily: the right scope depends on which parts will remain in use and the frost limits for each component. Drain exposed or idle sections, plus any filter, valve or pump cavity that can retain water. A branch shut off at both ends may still hold water. If a fixed or buried run has no clear drain point, have it assessed rather than assuming it will empty.
Is pipe insulation enough to prevent frost damage?
Insulation slows heat loss; it does not remove water or guarantee protection during a cold spell. Check the component maker’s frost limits and consider the actual exposure. Where the instructions allow, drain vulnerable lines that will not be used. An unheated greenhouse can still become cold enough for water in exposed components to freeze.
Should I leave my water tank full or empty?
There is no universal water level that suits every tank. Follow the maker’s frost and storage instructions, and consider the tank body, outlet, gauge, filter and connected pipe separately. If emptying is specified, confirm that this is suitable for the tank’s installation and drain the connections as well. A large volume of stored water does not protect every fitting.
Can I use compressed air to clear the lines?
Only if the irrigation and component manufacturers specify an approved procedure and limits that you can follow. Excessive pressure can damage low-pressure drip lines, emitters, filters or valves, and can expel debris. Without clear instructions, use the designed drain points or ask an irrigation professional; do not guess a pressure setting.
When can I switch the pump back on?
Wait until every component is fully thawed, then inspect it before restoring pressure. Reconnect parts as directed, prime the pump according to its manual and refill gradually while checking for leaks. Test one zone at a time. Stop if the pump runs dry, loses prime, trips or a joint leaks, and arrange any necessary repair before using it again.
Good winterising means accounting for every water-holding part, not assuming the system is empty because the main pipe has drained. Follow the route from source to outlets, treat the pump and tank separately, and leave uncertain fixed equipment to someone qualified to inspect it. When the weather warms, thaw and check each component before restoring pressure; a labelled system map makes the next shutdown and spring restart easier.
