
Greenhouse Thermostat Placement for Reliable Heating
GREENHOUSE HEATING
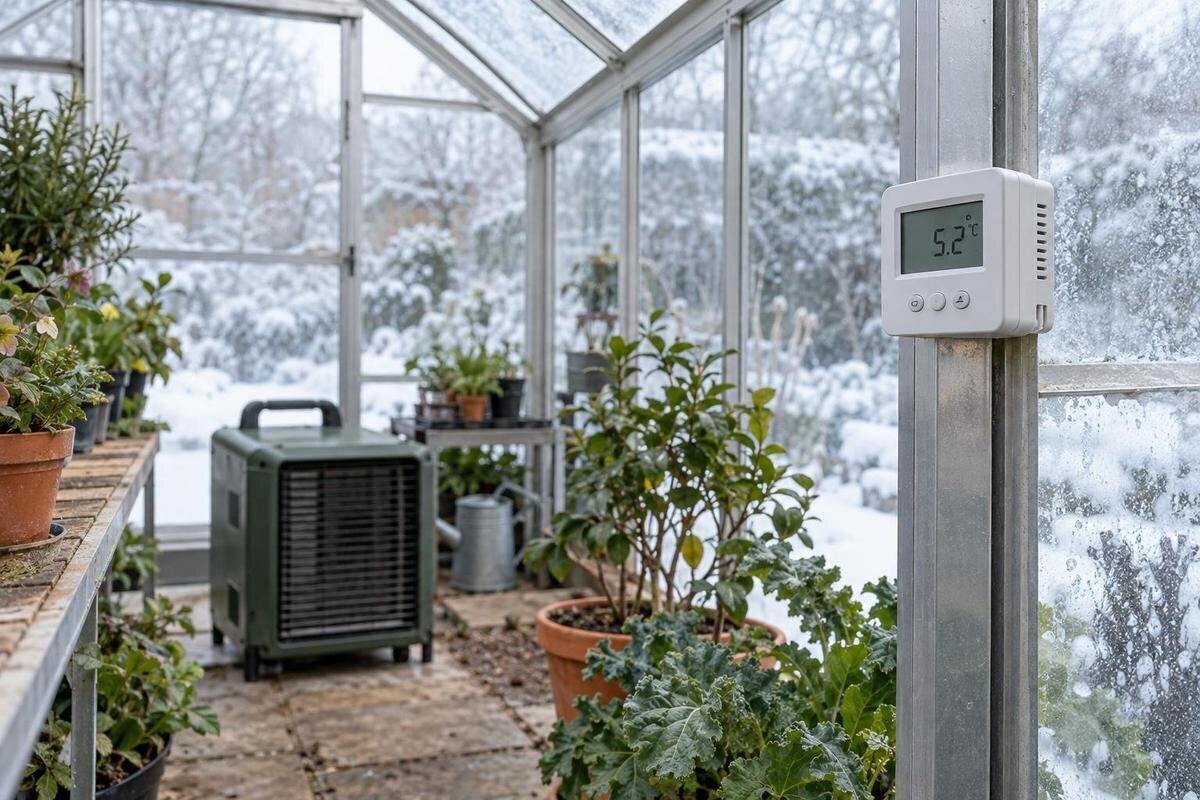
An automatic greenhouse heater can only respond to the air around its thermostat sensor. A probe in direct sun, a heater's warm air stream or a chilly draught may record a temperature that does not match the plant zone. The reliable approach is to choose a representative crop-level position, then check it against independent measurements during real heating cycles.

The sensor measures only its immediate surroundings
An automatic greenhouse heater responds to the temperature around its sensor, not to an average taken across every bench. The sensing element samples local air; the controller then operates according to its set point and design. A reading can be accurate for that spot and still fail to describe plants elsewhere. Air around a low bench, a high shelf, a glazed edge and the centre of the growing area may differ at the same time. Leaves, pots and roots also exchange heat differently from air, so a thermostat cannot directly report every plant's temperature. Treat its value as one control measurement in a changing enclosure, not proof that all crops share it.
Distinguish a chosen setting from an observed temperature. A dial may show the target, while a screen may show measured air temperature as well; the display depends on the controller. Read its instructions for the sensor location, any stated tolerance and how heating switches around the setting. With a remote probe, the sensing tip—not simply the display unit—needs to sit in representative air. With an integral sensor, the position of the whole control unit matters. These details explain why the same numerical setting can produce different crop-zone conditions when the sensor is moved, or when sunlight and airflow change around it.
The crop zone should guide sensor placement
Decide which plants the heater is meant to protect before choosing the sensor point. One control point is most useful when nearby plants share broadly similar temperature requirements and occupy a similar part of the enclosure. A reading among one group cannot confirm conditions at benches elsewhere, especially when plants are spread between the middle and exposed edges. Use the plants' growing requirements and current growth stage to choose the priority zone. The easiest spot to reach is not automatically representative. Nor must the greenhouse be identical at every point; the practical question is whether the measured air reflects the crops whose conditions should govern heating.
Sketch the benches, containers and heater position before fixing the control. The Pyramid Greenhouse is listed in size options from 5.53 to 18.9 m², so base your planting plan on the size you are considering. Mark the priority crop zone and a possible sensor location within it, away from an unusual hot or cold pocket. If the planting plan is not settled, treat that position as provisional and test it after arranging the plants. A location chosen in an empty greenhouse may not remain representative once shelves, foliage and containers change how the growing space is used. Keep the sketch so later measurements can be traced to the same positions.
Set the sensor at the height of the plants
Set the sensing element at the level of the plants whose conditions should govern heating. If the protected crop is on a bench, a reading near the floor or roofline answers a different question from a reading beside that canopy. For taller plants, choose a representative foliage height rather than a convenient spot above them where the surrounding air may differ. Keep the sensor clear of leaves, pots, bench surfaces, glazing and the frame: contact can make it respond to a surface instead of freely moving air. There is no universal height in centimetres that suits every crop layout; tie the position to the plants you intend to protect.
If crops grow at several heights, decide which group takes priority and use independent checks to understand conditions at the others. When planning the layout of a Limited Edition Aluminium Greenhouse with Storage, mark the intended bench and shelf heights as well as their floor positions. This gives you a starting point for placing the probe beside the relevant plants rather than simply choosing a convenient mounting point. Recheck its position as crops grow or seasonal planting changes the canopy. Record the sensor's height and which plant group it represents, so later comparisons remain meaningful even if containers are moved or the planting arrangement changes.
Keep the sensor out of direct sunlight
Direct sun can warm the sensor itself faster than the surrounding air. The thermostat may then read warmer than the shaded crop zone and reduce heating before that area reaches the conditions you intended. This is not simply a warmer air reading: the sensing element can absorb radiant heat. The effect depends on where the sun falls, and a spot that is shaded during one visit may be exposed later as the sun moves or the seasons change. Observe the intended position at different times of day. If the reading seems unexpectedly high, compare it with a separate thermometer placed in nearby shade and at the same height.
Keep the sensing element out of direct sun without wrapping it or putting it in a closed container. A cover that restricts air movement can create a different local bias; use only a shield or enclosure permitted by the equipment manufacturer. If you are planning a Bloomcabin Prestige Greenhouse, include the proposed sensor position in your observations of where sunlight falls across the growing area. Note when that position is shaded and when it becomes exposed, rather than judging it during a single visit. If the sensor has an integral shield, still assess its position rather than assuming the shield removes every effect of exposure.

Keep the probe out of the heater's air stream
A sensor close to a heater can be warmed by its discharge before the rest of the plant area catches up. The thermostat may then stop the heater early, even though its reading is valid for the warm air around the probe. The reverse can happen if the sensor sits in a persistently cold pocket: the heater may keep running after the main crop area is already warm. Avoid the direct path of heated air and any local radiant warmth from the appliance. Follow the heater and thermostat manufacturers' placement and clearance instructions; do not move or modify equipment to correct a mismatch without suitable professional guidance.
The listed Spacious Greenhouse options cover 47 to 70 m², making it important to distinguish the heater's immediate surroundings from the crop locations you want to monitor. On your layout plan, mark the heater, its discharge direction and the proposed control point. Place the control to represent the target crop zone, then use separate measurements elsewhere to see how conditions compare while the heater runs. This helps you identify a probe that warms ahead of the plants rather than assuming the setting is wrong. If the heater's instructions specify a sensor position, follow that guidance before relying on a general placement rule.
Avoid door draughts and stagnant pockets
Doors, vents and other openings can create local air movement that differs from conditions around most plants. A sensor directly in an incoming cold draught may prompt longer heating, while one beside a warm outgoing stream can give an unrepresentative reading in the other direction. This does not mean ventilation should be blocked to make a thermostat reading look steadier. Instead, place the sensor outside direct gusts while keeping it in the normally circulating part of the crop zone. If plants are intentionally grown beside an opening, include that area in your priority decision and measure its conditions rather than assuming they match the centre.
At the other extreme, a probe hidden behind dense foliage, stored items or a solid partition may sit in stagnant air that does not track the rest of the greenhouse. Do not tuck it into a corner just to protect it from draughts. When arranging one of the Aluminium Greenhouses, consider the sensor's position alongside the space needed for plants, storage and access to openings. Check that the final arrangement leaves the probe exposed to normally circulating air rather than screened off behind objects. Revisit this after moving stored items or adding plants: the mounting point may be unchanged even though its immediate surroundings are quite different.
Map temperature differences around the greenhouse
Temperature differences are easier to diagnose when you map them instead of moving the thermostat repeatedly. In colder conditions, compare air at the priority canopy with a few other likely planting positions, such as the centre, a far corner and a point near an opening. Repeat when sunshine is changing the greenhouse temperature. Use the same thermometer and height for like-for-like comparisons, and note each location. A pattern that persists may indicate a real difference between zones; one unusual reading may capture a short-lived gust or sun patch. This map helps show whether a single central control point represents the plants, or whether some areas need separate attention.
For a Lean-to Greenhouse, include planting positions beside the wall as well as those towards the outer glazing in your temperature map. Keep the thermometer clear of both surfaces so you are comparing air readings rather than measurements affected by direct contact. Label each position on the plan and use the same measurement height when comparing similar plant groups. If sensitive plants will sit near an edge, retain that position in your records rather than dismissing it as an irrelevant outlier. The purpose is to understand the conditions where plants will actually grow, not to find a single spot that makes the whole enclosure appear uniform.
Compare the control with an independent thermometer
Use a separate thermometer to check whether the thermostat reading is a useful guide to the plant zone. Put the second instrument near the control sensor, at the same height, but do not let the devices touch or shade one another. Compare their readings at the same time. Then move the independent thermometer to the crop position that matters, allow it to respond according to its instructions, and compare again with the control. Keep it out of direct sunlight and away from heater airflow, cold draughts, glass and solid surfaces. Record the time of each comparison so changes in the air are not mistaken for differences between locations.
Check the independent thermometer's instructions for placement, resolution and stated accuracy. A small disagreement between instruments does not, by itself, establish which reading is closer to the actual air temperature. A min/max thermometer or data logger can show changes between checks, provided you follow its sampling and reset instructions. For a planned Limited Edition Aluminium Greenhouse, identify the crop locations you want to monitor before deciding where comparison instruments will go. Keep readings beside the control distinct from those taken elsewhere: the first comparison concerns the instruments, while the second also involves location. Label each record with the date, time, height and position.

Test the sensor through ordinary heating cycles
One spot check is not enough to judge a thermostat location. Observe the control and independent thermometer while the heater is operating, after it has stopped, during a colder part of the night and when sunshine is changing the greenhouse temperature. Record the set point rather than altering it for every observation, along with whether the heater is on and whether a door or vent has been opened. Repeat over representative day-and-night cycles. This helps separate a steady offset from a position that becomes misleading only when a heater plume, draught or sun patch reaches it.
Use the pattern to decide what to change. If the control consistently reads warmer than air at the priority crop, review sunlight, heater airflow and sensor position first; changing the target may hide the bias without correcting it. If readings differ only in one distant area, map that area separately. When planning a T-Model Orangery Greenhouse, mark any distinct planting groups on the layout so your observations cover the areas you intend to use. Change one aspect of sensor placement at a time and record it, rather than losing track of which arrangement produced each result. If the controller still appears inaccurate after correct placement, consult its manual or manufacturer about calibration and service.
Different crop requirements and separate control zones
If you grow plants with substantially different temperature requirements in separate parts of the greenhouse, one thermostat cannot independently control each group from a single reading. Setting the control to suit a cold pocket may overheat the main crop zone; setting it for the centre may leave another group outside its required temperature range. First consider whether plants can be grouped according to their requirements in one representative area. If not, ask a qualified greenhouse-heating or electrical professional whether the equipment and controls are designed to support separate zones. Do not alter wiring or bypass control features outside the manufacturer's instructions.
Multiple instruments can reveal a difference, but they do not create independent control. A second sensor is useful as a monitor unless the heating system is designed to respond to it in a separate zone. After any professionally approved change to the control arrangement, repeat the placement checks at each zone's crop height and compare readings through ordinary heater cycles. Revisit sensor positions when plant groups, benches or the everyday use of the enclosure changes. The most dependable reading is not necessarily the most central one; it is the one that consistently represents the plants the relevant control is meant to protect.
Frequently asked questions
Where should a greenhouse thermostat sensor sit?
Place it in freely moving air at the height of the plants the heater is meant to protect. Keep it out of direct sun, heater discharge, draughts and contact with glazing or other surfaces, and follow the equipment manufacturer's instructions.
Can the sensor be in direct sunlight?
It is better to keep it out of direct sun. Radiant heat can warm the sensor itself and make its reading higher than the surrounding air. Check the position at different times of day, as the sun's path and shadows change.
How can I check whether the thermostat reading reflects the plant zone?
Use a separate thermometer near the control sensor and another reading at the crop position you care about. Compare them at the same time, away from sunlight and draughts, and record the readings over normal heater cycles.
How far should the sensor be from the heater?
There is no universal distance that suits every heater and thermostat. Keep the sensor out of the heater's direct warm-air stream and follow the placement and clearance guidance supplied with the equipment.
Can one thermostat manage crops in different parts of the greenhouse?
One thermostat responds to the air around one sensor, so it cannot independently control separate areas from different readings. For crops with different requirements, ask a qualified professional whether the equipment is designed for separate control zones.
Thermostat position determines which part of a greenhouse drives heating. Start with the crops that need protection, place the sensor in freely moving air at their height, and keep it clear of sun, heater discharge and unusual draughts. Then compare readings beside the sensor and at the crop zone through the conditions that matter. If the gap changes with time, address the local bias or consider separate, properly designed zones; a set point is not a guarantee for every bench. Keep the location and measurements consistent so adjustments respond to patterns, not a single surprising number.
