
Moving a Greenhouse to Another Area of the Garden
Greenhouse relocation guide
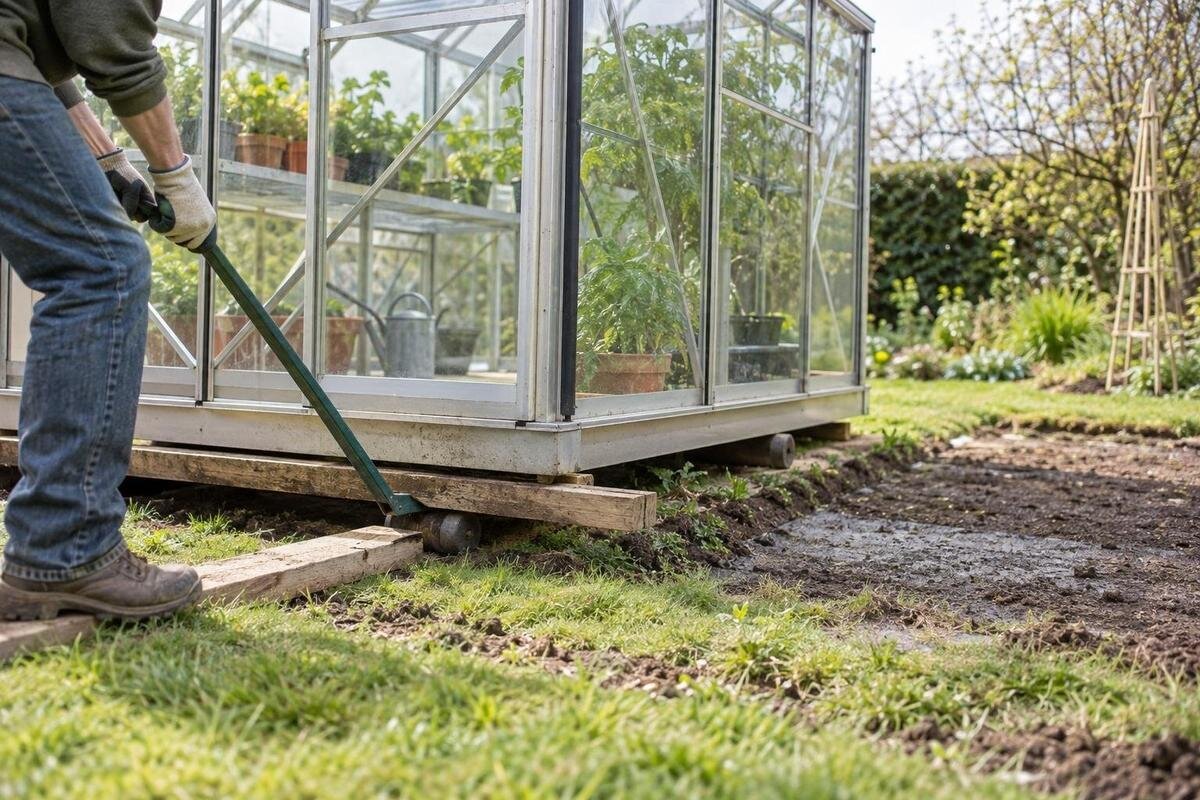
Moving a greenhouse to another part of the garden can improve access or make better use of the space, but it needs a carefully planned removal and reassembly process. Do not assume it can simply be lifted from one patch to another. The frame, glazing, fittings and base all need to be identified and checked against the original instructions. Before any panels are removed, assess the greenhouse, confirm the new position and base, and agree the handling and transport method with a qualified installer. This guide explains what to document and what to settle before work starts, while leaving glass handling and structural decisions to the appropriate professional.

Decide whether the greenhouse is worth moving
Begin with two separate questions: can this particular greenhouse be dismantled and reassembled in its present condition, and will its current layout work in the proposed position? A structure that stands in one place is not automatically suitable for a move. Record visible damage, missing glazing, stiff doors or vents, loose-looking connections, and any earlier repairs or alterations. These notes help an installer assess the job; they are not a structural inspection. Ask the original supplier or a qualified greenhouse installer to confirm whether the frame, panels and fittings can be reused, and what should be replaced. If the model or installation history is unknown, identify it before setting a moving date.
Compare a written relocation scope with a replacement quotation, rather than weighing only the cost of transport. Ask for separate allowances for dismantling, packing, transport, removing or leaving the old base, preparing the new one, replacement parts, reassembly and final checks. Clarify who is responsible for any work on the old site after the greenhouse is removed. If moving becomes uneconomic or parts cannot be identified, a new-model enquiry may be more sensible. The Classic Greenhouse listing is one catalogue reference for that separate comparison, not proof of a like-for-like match. Confirm the exact variant, footprint, glazing and base requirements before treating it as an alternative.
Record the exact model and its current condition
Collect the original order confirmation, supplier details, model name and any serial or model label, assembly manual, drawings and parts list. Include the year installed if known, records of repairs, and notes about components that have been replaced. Keep the documents together rather than relying on a product name remembered from years ago: names can cover different versions, and a family name alone may not identify a specific part. If a label is difficult to reach, ask the installer how to record it; do not remove a panel or frame member just to find it. The more exact the identification, the less likely a quote or parts request will be based on guesswork.
Photograph all sides, the interior, roof, doors, vents, glazing pattern, frame joints and base from safe, accessible positions. Take wide shots that show where each detail sits as well as close-ups; a close-up alone may not identify its location. Photograph documents and part labels too, then keep copies where the installer can see them. If measurements are needed, use the original drawing or ask the installer to take them; do not infer a frame size from a photograph. Record the planned new location and the intended direction of the door. Together, these records document the original arrangement and give the installer a reference during reassembly.
Assess the destination before dismantling
Spend time at the destination before booking dismantling. Observe how shade from trees, walls and neighbouring structures changes during the day, and consider how it may change as plants grow. Look for places where water collects or runoff from nearby structures may reach the base; note overhanging branches and likely garden maintenance. Check that the greenhouse will be reachable for everyday watering, opening, cleaning and moving plants, with enough clear space for its doors and vents to operate as designed. The installer should assess the site conditions for the exact model rather than assuming the old and new positions are equivalent.
Map the route into the new position as carefully as the position itself: gates, steps, narrow paths, turns and low branches can affect how dismantled components are brought in and how deliveries reach the site. Identify nearby water or electrical services and have any disconnection or reconnection reviewed by appropriately qualified tradespeople; do not improvise service changes as part of the move. If the proposed site is beside a wall, treat that as a separate design question. The Lean-to Greenhouse page is for a listed aluminium wall greenhouse, but it does not mean a freestanding greenhouse can be converted or attached to a wall. Ask the manufacturer or installer which arrangement is suitable for the site.
Confirm the requirements for the new base
Base preparation is one of the decisions to settle before removal. Find the installation drawing for the exact model and use it to confirm the required footprint and fixing arrangement with the installer. The existing base may be too small, out of level, damaged or laid out for a different model; its presence is not evidence that it can be reused. Do not guess foundation dimensions or alter fixing points to make the greenhouse fit. Have a qualified installer or suitable building professional review the proposed base against the manufacturer’s instructions and the actual site conditions, including how water drains around it.
Ask who will prepare the base, when it must be ready, and what checks need to be completed before the frame is reassembled. Confirm how the exact greenhouse attaches to it and whether any support or fixing components are part of the original kit. Keep these details in the quotation so that responsibility for the base and its connections is clear. If you are also considering replacement, the Prestige Greenhouse with Metal Base listing identifies a configuration to include in that enquiry. Establish which base components are supplied and which site preparation remains separate; do not assume the existing base will suit the replacement.

Plan for plants, equipment and access
Empty the greenhouse before dismantling starts. List plants, pots, growing media, benches, shelves, watering equipment and tools, then decide where each will go during the work. Plan for plants according to their needs and the conditions at the temporary spot; if a crop is especially sensitive, use appropriate horticultural advice rather than assuming it can remain outside or in a box. Remove loose items so they cannot be damaged or obstruct the installers, and arrange any connected equipment with the relevant professional. Make sure both the old and new areas are accessible for moving contents, not just for the greenhouse frame.
Use the move to note what the greenhouse must accommodate when it is rebuilt: working space, bench positions, storage, a potting area and access to doors or vents. Decide whether you are recreating the existing arrangement or asking for a different one; the latter may require a replacement design rather than changes to the old frame. If storage is important in a replacement enquiry, consider the Limited Edition Greenhouse with Built-in Storage listing. List the tools and supplies you want to store, then compare that list with the available configuration and documented layout. Check that the proposed arrangement leaves enough room for your growing area and everyday access.
Agree a dismantling method with a qualified installer
Do not assume that an assembled greenhouse can be lifted intact. Moving it in one piece may stress the frame or glazing differently from normal use, so only use that method if the manufacturer’s instructions or a qualified installer confirms it for the exact model. If it needs dismantling, the sequence may depend on the framing, glazing and fittings. Ask who will handle panels, vents, doors, fasteners and the connection to the base, and what protection and transport arrangements will be used. A generic online dismantling sequence is not a substitute for the correct manual.
Agree the work in writing: what the installer will remove and rebuild, which items are to be inspected or replaced, who will arrange transport, and how missing parts will be dealt with. Ask what must be ready at the destination and what should happen if the manual is unavailable or damage is found. Include a point at which you can review the cost before further work is authorised. If the assessment favours replacement, use the Limited Edition Aluminium Greenhouses page for a separate model enquiry. Keep that quotation distinct from the relocation agreement, including which removal, transport and preparation tasks would still be needed if you changed plans.
Track each component from removal to delivery
Ask the installer to make a component record as the greenhouse comes apart. Photographs at each stage can show where panels and fittings belong; the position and orientation of each part matter when several pieces look similar. Use the manual’s part names or identifiers where available, and keep small fittings separated and labelled by section as the installer recommends. Do not mark glazing or frame surfaces unless the manufacturer approves the method. Record anything that is cracked, bent, corroded, missing or no longer moves correctly, rather than placing it in the reuse pile without review. An inventory gives the reassembly team a way to account for components at the new site.
Transport and temporary storage need the same care as dismantling. Ask the installer how each type of component should be packed, supported and protected from movement or weather, and who is responsible for handling fragile glazing. Do not stack, carry or wrap glass based on guesswork, and do not use broken panels as packing material. Keep identified fixings with their labelled sets, but do not assume they can be reused merely because they survived removal; the manual or installer should confirm their condition and suitability. On arrival, check the inventory and note damage before assembly begins. If the delivery is incomplete, resolve the discrepancy instead of substituting a convenient part.
Reassemble to the original specification
Reassembly should follow the instructions for the exact model, using components confirmed for that model. The installer can compare the inventory with the manual, identify missing or damaged parts and confirm the correct order of work. A familiar-looking greenhouse or a drawing for a related model is not enough to verify that pieces are interchangeable. Do not ask the installer to drill new holes, cut frame members, omit fittings or adapt glazing to make a part fit. If instructions are missing, seek the correct documentation from the supplier or manufacturer before work proceeds. This prevents a relocation from quietly becoming an unapproved redesign.
Keep the original layout unless the manufacturer or a suitably qualified professional approves a change. Moving a door, altering a panel arrangement or changing how the structure meets the base can affect the assembly and should not be improvised on site. If the garden’s new use calls for a different overall form, price that as a separate design rather than modifying the existing greenhouse. The T-Model Orangery Greenhouse page is one catalogue option for that comparison. Use its model-specific drawings to discuss where you would place benches, how you would enter the greenhouse and how the layout would relate to nearby paths. Keep those replacement plans separate from instructions for rebuilding the current structure.

Resolve missing parts before assembly is completed
Resolve each missing or doubtful component by exact identifier before the installer finishes. Send the supplier the greenhouse model and version, the part number from the manual if available, the location of the part, and clear photos showing both the component and where it fits. Include a quantity and note whether the part was present before dismantling or damaged during removal. If a measurement is requested, ask how it should be taken safely and accurately. Do not order by appearance alone: similar profiles, clips or panels can differ, and a generic substitute may not be approved. If an identifier cannot be found, ask the original supplier or installer to confirm it rather than guessing.
Do not assume a missing item can be fitted later if it is needed to complete the assembly. Ask the installer what work can safely continue and what must wait for the correct part, and agree how the dismantled components will be protected during the delay. Record outstanding items so they are not overlooked when work resumes. If a component is discontinued or the structure cannot be reassembled to its manual, compare replacement with further repair work before committing to more expenditure. The Pyramid Greenhouse listing can be included in a new-model enquiry at that stage. Ask for a complete replacement quotation rather than comparing the product price alone with the remaining relocation costs.
Compare replacement options if relocation is not viable
A replacement may be the more practical route if the frame or glazing cannot be reused, essential parts cannot be sourced, the new base would require extensive work, or the old layout no longer suits the garden. These are prompts for an installer and supplier to review, not a rule that every older greenhouse should be replaced. Compare like-for-like work scopes: removal and disposal, site and base preparation, supply, delivery, assembly and any parts needed for the old site. Ask whether the new structure has identifiable parts and current instructions. Keep relocation and replacement estimates separate so you can see what each decision includes.
If the new brief calls for a different amount of growing or working space, use the published plan and footprint rather than an area figure alone. The Spacious Greenhouse listing gives an area range of 47 to 70 m², but that figure is not an external dimension or a base drawing. Compare the exact model dimensions with the proposed position, including door clearance and space around the structure. Review the access route, base design and site requirements with the installer as part of the same comparison. The useful choice is the model that accommodates your planned activities within the available space, not simply the one with the largest nominal area.
Frequently asked questions
Can I move a greenhouse without dismantling it?
Only if that method is confirmed for the exact model in the manufacturer’s instructions or by a qualified installer. An intact move may stress the frame or glazing differently from normal use. Do not assume it is suitable because the greenhouse looks rigid or was delivered assembled.
Can I reuse the existing base?
Possibly, but the installer should compare its size, fixing arrangement and condition with the model’s instructions and the requirements of the new site. A base that worked in the old position is not automatically suitable in the new one. Do not alter fixing points to make a mismatch fit.
What if I cannot find the assembly manual?
Contact the original supplier or manufacturer with the model details, any label information and clear photographs. Ask for the correct instructions before dismantling. Do not rely on a manual for a similar-looking model or a generic online sequence.
When should I move the plants?
Plan to remove them before dismantling begins, and arrange a temporary spot that suits their needs for the expected length of the work. Consider the crop cycle and local conditions. For particularly sensitive plants, use suitable horticultural advice rather than assuming they will be fine in any temporary location.
Can I replace a cracked greenhouse panel myself?
Do not handle or fit glazing on the basis of a guess. Keep people clear of broken material and ask a qualified greenhouse or glazing professional to identify the correct replacement and handle the work.
Treat the move as a fresh installation at a new site: carry forward the exact model records, but re-check the base, surroundings and parts for the new position. With a qualified installer responsible for the model-specific removal and rebuild, you can decide on relocation with a clearer view of the work involved. If those checks do not support reassembly, a properly specified replacement is more sensible than forcing the old greenhouse to fit.
