
Self-Watering Pots for Greenhouses with Paved Floors
Greenhouse watering
Self-watering pots can make container watering in a greenhouse more consistent, but a reservoir does not guarantee that roots stay at the right moisture level or that excess water will vanish. On paving, the consequences of a spill are easy to overlook until water pools, crosses a joint or runs towards an entrance. The useful checks are the reservoir layout and refill opening, how water reaches the growing medium, and the route taken by overflow and top-watering runoff. Work through those details before buying several pots or filling a whole row.

Before you choose 1
What self-watering pots actually do
Self-watering describes a delivery method, not a promise that the plant can be left alone. In a common design, a raised platform separates the growing mix from a reservoir, and a wick or column draws water upwards. Other pots let part of the mix touch a water chamber. Check a cutaway or the maker’s instructions to see where the water sits, how the connection works and whether any section can be removed. The outer pot’s height alone does not tell you the reservoir volume or the amount of usable root space. A reservoir also cannot judge whether a particular crop needs less water or alert you when it is empty.
On a paved floor, a spill does not disappear into garden soil; it may sit under a pot, spread along a joint or run towards a doorway. If you are choosing a greenhouse as well, the Spacious Greenhouse range is listed from 47 to 70 m², but headline area is not the same as clear floor space for containers. Mark the door opening, benches, paths, drains and pot positions on the selected layout. Think of each pot as a working station, not just a circle on a plan: it needs access for topping up and room to collect or direct excess water. Leave enough open paving to inspect the base and spot a slow leak.
Compare the reservoir layout
Compare how the water chamber is formed. A built-in reservoir beneath a false floor keeps water inside the pot; a separate tray may supply it from below; a wick-fed container bridges a chamber and the growing mix. Some units use a fill tube, while others expose a filling opening at the base. Look for a diagram showing the normal water line, overflow opening, barrier between roots and stored water, and any parts that lift out. Do not assume that similar-looking pots use the same arrangement. If the maker does not explain the route from reservoir to medium, it is difficult to judge whether your chosen mix and crop will work with it.
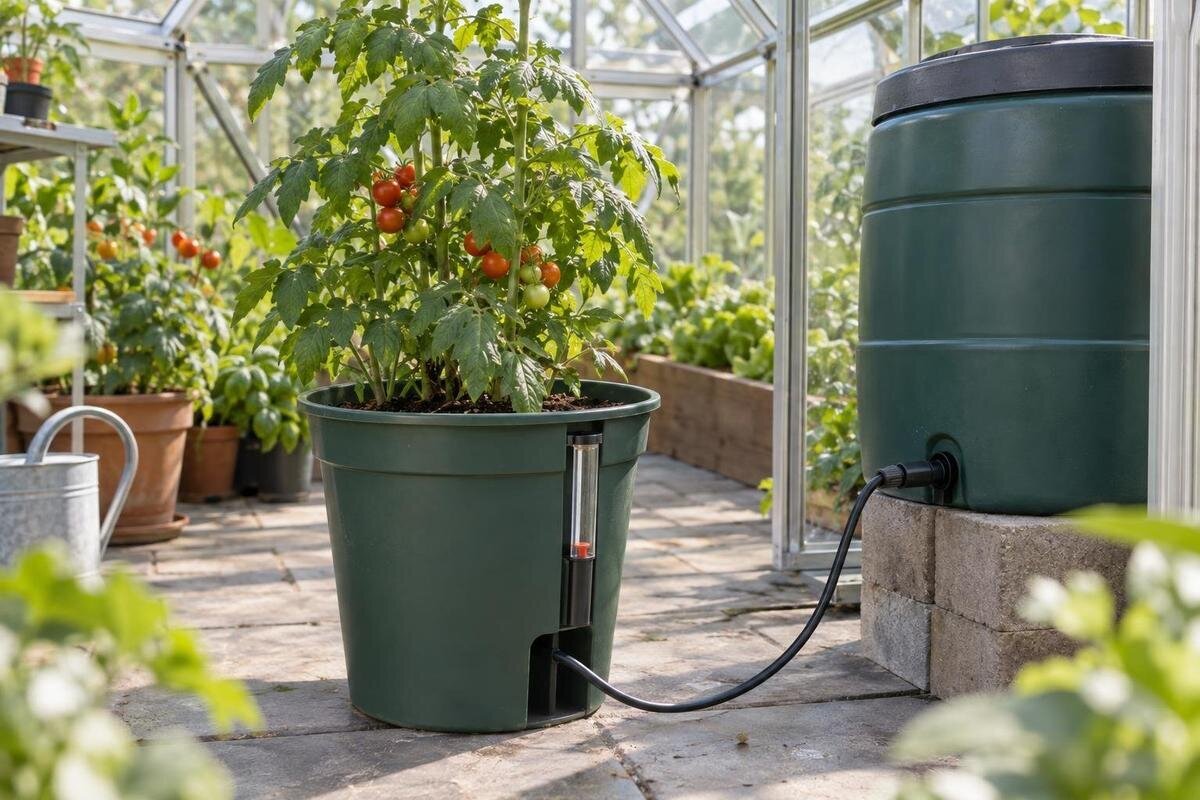
Ask what an indicator measures and where overflow exits. A float or window reports the water level in the chamber; it does not measure moisture around the roots. Check that the overflow hole remains visible when the pot sits in its saucer and that a tray does not block drainage. When planning containers for the Aluminium Classic Greenhouse range, listed from 3.77 to 28.08 m², mark which way each indicator and outlet will face. You should be able to read the level and inspect the outlet from the access path, without turning a planted pot.
Before you choose 2
Check capacity and refill access
Reservoir volume is not the same as the number of days between refills. A larger chamber may hold more water, but a mature leafy plant, a fruiting crop and a small transplant will not draw it down at the same rate. Warmth, light and air movement also affect demand. Check whether the stated volume is the full chamber or the usable water before overflow, and whether the maker gives a capacity in litres. Treat any refill interval as an estimate until you have watched your own crop in its actual greenhouse conditions. Capacity is most useful for comparing designs, not for promising a particular gap between refills.
Refill access matters once a pot is planted. A narrow tube needs a jug spout or hose end to reach it; a base-fill design may require lifting the container, which can be awkward as roots and foliage grow. Position pots so you can reach the opening without leaning over leaves or dragging a full container across paving. For a Lean-to Greenhouse, use the exact chosen layout to check that fill points remain accessible, including those on pots beside the wall or behind other plants. Plan a route for carrying water that does not cross a wet or crowded floor.
Find the overflow route
Find the overflow before filling the reservoir. Some designs have a port set at a maximum water level; others discharge through an opening or base, and conventional drainage holes may carry top-watering runoff separately. Follow the container instructions to tell which is which. If the pot has a stated fill line, stop there rather than trying to increase storage by filling to the rim. Keep the outlet unobstructed by a tray, floor mat or debris, and check whether excess water falls straight onto the floor or can be caught in a collection tray designed for that pot.
Then trace the discharge on the actual paving. Pavers may have joints, a drain or a threshold nearby, but their presence does not prove that water is directed away from the greenhouse. When planning pots for the Prestige Greenhouse with Metal Base, check how the base meets the paving and whether it affects the overflow route. Confirm the chosen base and floor details from relevant drawings or the installer, and note any low spots and doorways. If the route is uncertain, do not rely on paving to absorb routine overflow. Decide how to capture or direct excess water before putting pots in place.

Before you choose 3
Check moisture around the roots
In a reservoir pot, water has to move from the chamber into the mix and onward to active roots. The lower part of a pot can remain wetter than the surface, so a dry-looking top is not enough reason to top up the reservoir. Conversely, a visible water level does not prove that the mix is evenly moist if a wick is too short, poorly seated or unsuited to the medium. Follow the maker’s instructions for the wick and keep the plant’s growing zone in mind. Reservoir level and root-zone moisture are related, but they are not the same reading, especially while a plant is establishing.
Check moisture below the surface using a method suitable for the potting mix and plant, and compare it with the crop’s normal needs. If you are testing a new arrangement, note how the medium feels around root depth while the chamber is full and as its level drops. If the mix remains waterlogged, or a plant wilts despite water in the reservoir, inspect the connection, drainage and medium instead of simply adding more water. Do not change the routine solely because an indicator moves. Separate pots can help you keep plants with different moisture preferences from sharing one watering schedule.
Match the pot to the crop and medium
Match the container to the crop before matching it to the floor. Plants that prefer steady moisture may suit a reservoir design if its medium keeps enough air around the roots; crops that need a drying interval, or are vulnerable to a continuously wet mix, may be a poor match. Requirements vary by species and stage, so follow established growing guidance for the particular plant rather than treating all greenhouse pots alike. Seedlings and newly transplanted plants may have a smaller root zone than an established crop. Pay particular attention to whether water reaches those roots and whether the surrounding mix stays too wet.
Growing medium matters as much as reservoir shape. Use the type specified for the container where one is given, and avoid a compacted mix that holds water without enough air or a very coarse mix that cannot make reliable contact with a wick. The Pyramid Greenhouse range is listed from 5.53 to 18.9 m²; whatever greenhouse shape you use, allow separate groups if crops need different moisture routines. A shared row is convenient only when each plant’s water needs and container setup are compatible. Record the mix used in each pot if you are comparing results.
Before you choose 4
Leave room for access and cleaning
Leave working room around each container. You should be able to see the fill opening and overflow, lift out any removable insert, clean under a pot and carry away water without shifting neighbouring plants. Include the full footprint of the pot, its tray if used, and the clearance needed for your hands and a watering jug. Avoid placing a heavy, full reservoir where it blocks the route to the greenhouse door, a drain or another plant you need to inspect. If pots stand on benches rather than paving, check that the support is suitable for the combined weight; water adds substantial weight.
If your greenhouse has fixed storage or other built-in features, include them in the usable-space sketch before allocating room for pots. The Limited Edition Greenhouse with Built-in Storage is listed from 5.52 to 28.08 m². Use the actual layout to measure the space available for containers and watering access, rather than treating the whole area as growing space. Keep access to storage clear as well, so routine watering does not require moving boxes or planted pots. On paving, leave a visible strip around containers so an overflow is not concealed behind boxes, stands or a row of leaves.
Trial one pot before setting out a row
Trial one container in the intended place before buying or filling a row. Assemble it as directed, use the intended medium and plant, and fill only to the stated line. Observe both the reservoir level and root-zone moisture over several checks; note how quickly the water disappears under ordinary growing conditions in your greenhouse. A trial can reveal an awkward fill tube, a tray that is hard to clean or a wick that does not distribute water as expected. It also shows whether the pot fits the walking space once foliage grows, not only when the floor is clear.
Check overflow and top-watering drainage as separate events. Follow the maker’s guidance for filling and any initial wetting of the medium, then look closely at where extra water exits and whether it remains around the base. Do not deliberately flood paving to test a route you have not confirmed is suitable; where drainage is uncertain, ask the installer or property owner first. If you are planning a paved area, the Limited Edition Aluminium Greenhouse listing covers 3.77 to 28.08 m². Use the exact selected configuration, rather than that range, to plan a trial spot and clear access.

Before you choose 5
Inspect reservoirs and adjust the routine
Reservoirs need inspection and cleaning, not just refilling. At routine checks, look for a blocked fill tube or outlet, roots entering a chamber where the design does not allow them, residue, cracks and a float or indicator that has stuck. Clean removable parts only as the maker directs; a harsh or unsuitable cleaner may damage some materials, and there is no universal cleaning method for every pot. Before reusing a container, confirm that drainage ports and overflow openings are clear and that the parts are assembled in the correct order. This is easier when containers can be reached from the aisle.
Water use changes as plants grow and as conditions inside the greenhouse shift. A reservoir that lasted through a cool spell may empty sooner when light, heat, foliage or fruiting increases demand, so set refill checks from what you observe rather than a fixed promise on a label. If you use fertiliser, confirm whether it belongs in the reservoir or should be applied another way; residues and nutrient salts can build up in containers. Follow product guidance for refreshing the medium or rinsing it, and manage any runoff so it does not collect on the paving.
Compare the details before you choose
Before choosing, compare the details that affect everyday use: stated usable reservoir volume, the normal fill level, how clearly overflow is described, where the fill opening sits and whether the chamber is accessible for inspection. Check whether the maker identifies a suitable growing medium, which parts can be cleaned or replaced, and any limits on plant type or size. A litre capacity without an outlet diagram or fill guidance leaves important questions unanswered. Ask for a clear design description if information is missing; do not infer compatibility with your greenhouse floor from a product name or appearance.
The T-Model Orangery Greenhouse range is listed from 16.52 to 30 m², but total area does not show what remains once paths, storage, benches and self-watering containers are in place. Use a measured layout for your own greenhouse and the pot dimensions from its maker, including access to refill and clean each one. Compare reservoir size and indicators alongside the less conspicuous details: a reachable fill point, an accessible chamber and a clear overflow route. The best choice is the arrangement that suits the crop and remains practical to manage once the pots are planted.
Frequently asked questions
How often will I need to refill a self-watering pot?
There is no reliable number of days based on pot size alone. Usable reservoir volume, plant size and growth stage, the growing medium, and conditions inside the greenhouse all affect how quickly water is used. Check the reservoir and the moisture around the roots, then establish a routine for your own plants. Do not assume a full reservoir will last for a particular length of time.
Can I place a self-watering pot directly on paving?
You can, provided the pot is stable, its drainage and overflow openings are not blocked, and you know where excess water will go. Paving may not absorb a spill, and joints or nearby thresholds do not guarantee a safe drainage route. Leave the base visible enough to inspect, and do not place it where you cannot monitor a leak.
Does an overflow hole need to connect to a drain?
Not automatically. Some containers release excess water through an opening or into a collection tray; a compatible hose connection is not guaranteed. Check the maker’s instructions for the outlet’s purpose and any approved fittings. Avoid improvising a connection, and choose a position where you can manage the water that leaves the pot.
Can every greenhouse plant grow in a self-watering pot?
No. A reservoir may suit plants that grow well with a steady supply of moisture, but it is not right for every crop or growing medium. Some plants need a drying interval, and a persistently wet mix can be unsuitable. Check the needs of each plant and use separate containers where different crops require different watering routines.
Does a water-level indicator show whether the roots are moist?
No. An indicator generally shows the level in the reservoir, not the moisture in the growing medium. Water may not be reaching the mix as intended, or the lower part of the pot may be wetter than the surface. Check moisture around the root zone as well as the reservoir level.
On paving, good container watering depends as much on where overflow travels as on how the reservoir feeds the roots. Choose a design you can fill and inspect without moving a planted pot, check that the crop and growing medium suit its watering method, and trial one container before setting out several. If the floor’s joints, drainage or route to a doorway are unclear, resolve that before making the pots part of your routine. A visible, reachable base makes small problems easier to notice and manage.
