
Starting Dahlias in a Greenhouse Before Garden Planting
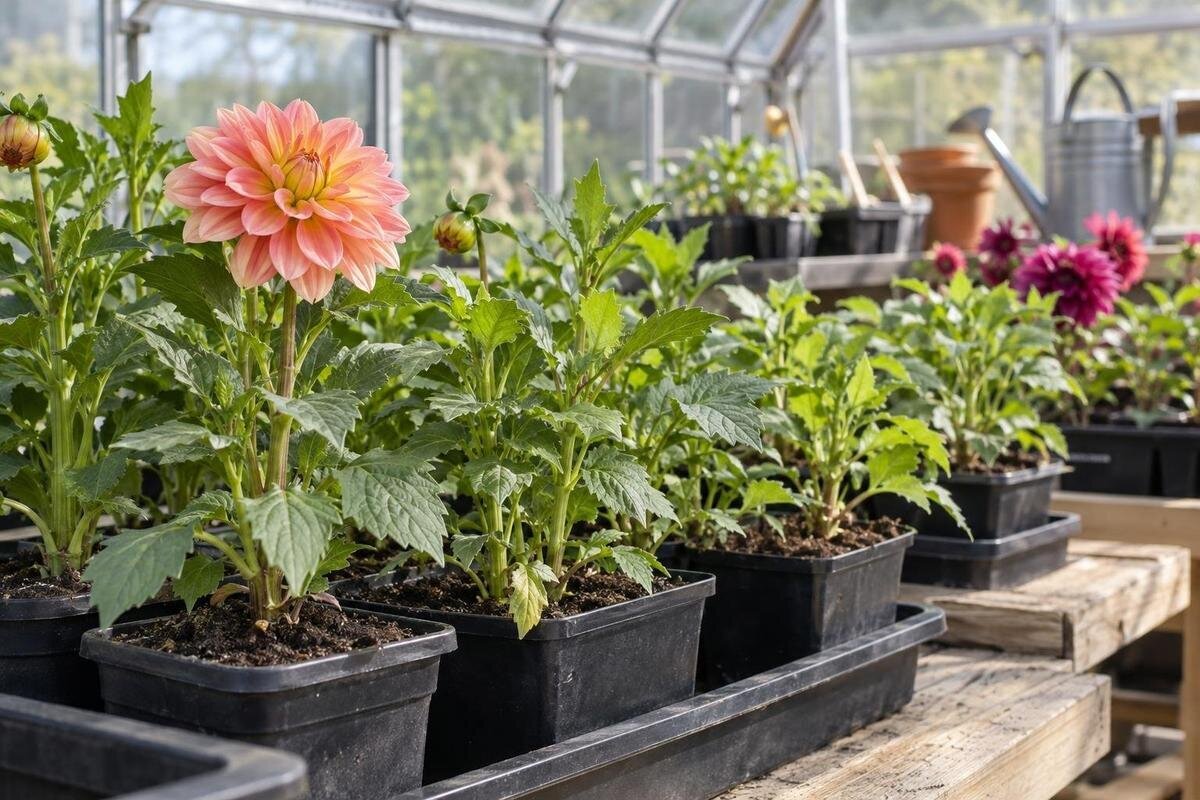
Greenhouse growing
Starting dahlia tubers in a greenhouse can give shoots time to establish before the garden bed is ready, but an early start only helps if you can manage light, moisture and cold. A greenhouse is a staging space, not a guarantee of frost protection. Potting too soon can leave plants crowded while outdoor conditions remain unsuitable; wet mix can also damage a dormant tuber. Plan from the garden's local frost pattern, pot sound tubers individually, and leave room to water and move them. Then harden the young plants off gradually before planting them outside.

01
Why start dahlias in a greenhouse?
Starting tubers under cover is a way to bring dahlias into growth before the outdoor bed is ready, not a shortcut that removes the need to acclimatise them. A greenhouse gives you somewhere to watch shoots and manage a small batch away from some rain and wind. It does not automatically stay warm at night: an unheated structure can approach outdoor conditions, while sunlight may raise the daytime temperature quickly. The head start helps only if there is enough light and you can respond to changing weather. A start that is too early can leave you holding long, soft growth in pots when the garden is still unsuitable. If planting straight into the bed is already practical and frost is not a concern, potting first may add handling without a clear benefit.
Think of this as a temporary nursery stage. Once shoots appear, each tuber needs light, airflow, a label and room to be handled; a few crowded pots can be more awkward than a larger collection in a planned layout. Count the pots and reserve a route for watering and carrying them before choosing a structure. The T-Model Orangery Greenhouse listing includes area options from 16.52 m² to 30 m², but stated area is not the same as usable bench space. Compare the selected configuration with your own plan for pots, an aisle and access, including space for plants waiting to go outside. Measure using the full pot footprints, not just the tubers.
When to pot dahlia tubers
Late winter into early spring is a useful broad planning period, but there is no single South African potting date that suits every garden. Frost risk, exposure, elevation and the season's weather all affect when an outdoor bed is ready. Work backwards from a realistic planting window: the greenhouse must be available, pots need light, and you must be able to protect young growth from cold. Potting too early means keeping plants in containers for longer, when they may need more room and attention. If your greenhouse stays cold at night, leave tubers dormant or wait rather than assuming the covering supplies warmth. Use local observations and forecasts at the garden bed, not a date from another growing area.
Use the frost pattern at the bed, not only the weather beside the house; a sheltered corner and an exposed plot can behave differently. Where frost is common, wait until the risk has eased before planting out; where frost is unusual, soil condition and plant growth still matter. A staged start can reduce pressure: pot only as many tubers as you have room to tend, then start another batch later if needed. The Pyramid Greenhouse listing offers area options from 5.53 m² to 18.9 m²; treat that as a footprint comparison, then count pots and walking space against the actual option. Your batch size should suit your own layout, not the product category name.
02
Choose sound tubers with a viable crown
Lay out stored tubers before potting, with enough light to see the crown and each tuber's narrow neck. Dahlia tubers are swollen roots; shoots develop from eyes at the crown, so a root without a crown or viable eye is not a reliable planting unit. Eyes can be small before growth begins, so handle the crown gently rather than scraping or cutting it to make them easier to see. Keep attached tubers intact unless you are dividing a clump and can identify a viable eye on each portion. If a label has come away, keep it with the correct group instead of trying to identify varieties from tuber shape alone.
Firm, intact material is a better starting point than a tuber that is soft, leaking or badly rotted. Separate questionable pieces from healthy ones, and remove damaged material with clean tools only if the sound portion can be separated without injuring its crown. Where a clump can be divided into portions with viable eyes, individual pots make those divisions easier to label, monitor and move. They also make it easier to isolate a plant that develops poorly. Record the cultivar or source name, number of divisions and potting date. That small inventory makes it easier to match plants to the garden plan and notice which batch is developing more slowly.
Select pots and a free-draining mix
Choose pots with unobstructed drainage holes and enough room to lay each tuber in its natural shape without forcing it into a tight coil. Individual pots make it easier to judge moisture, separate varieties and move plants at different rates. A very large container is not automatically better: extra wet mix around a dormant tuber takes longer to dry and is harder to manage. Pick a size that covers the tuber and allows its first roots to develop, then move it up only if the plant genuinely outgrows it before the bed is ready. Place pots where you can inspect and water them without lifting a heavy container over other shoots.
Use a clean, free-draining potting mix suited to container growing rather than heavy garden soil that may pack down in a pot. The mix should retain some moisture after watering without staying saturated; drainage holes cannot help if the pot stands in a full saucer. If the mix is very dry, moisten it lightly, then avoid soaking it before the tuber has roots and shoots to use water. Keep fresh material separate from old potting mix containing rotting plant debris. If greenhouse storage is part of your comparison, the Limited Edition Aluminium Greenhouses with Storage listing is worth checking against your potting-supply plan; the selected layout still needs practical room for pots and handling.

03
Position tubers and label every pot
Set the tuber horizontally where its shape allows, with the crown and any visible eye uppermost. Cover it with mix while keeping the crown close to the surface, so a new shoot does not have to push through a deep layer. Avoid snapping the narrow neck or pressing firmly on the eye. If the orientation is unclear, look for the crown before covering the tuber; turning it repeatedly can cause damage. Choose a pot deep enough to cover the tuber while leaving a little room at the top for watering, rather than filling right to the rim. If a tuber is too long for the pot, choose a broader container instead of forcing it into position.
Label every pot when you plant it, not after green shoots have appeared. Include the cultivar or source name and the date; if you are working in batches, add a simple batch mark as well. Labels prevent mix-ups when young plants look alike and help you trace differences in growth. Keep each label visible when pots are grouped and maintain a written list as a backup. The Bloomcabin Prestige Greenhouse listing spans area options from 3.77 m² to 28.08 m²; sketch your pots and access route in the selected plan rather than assuming the full stated area is open work space. Leave room to reach labels without moving neighbouring pots.
Give young shoots enough light and space
Place newly potted tubers where they receive bright natural light as shoots appear, without letting the greenhouse overheat in strong sun. A bright structure can still contain deep shade beside benches, stored supplies or taller plants, so check conditions at pot level over the day. Shoots that stretch towards the light are a signal to reassess their position rather than a reason to add warmth. The amount of light can change as the season progresses, so do not assume a spot that suited a dormant tuber will suit leafy growth. Rotate pots if growth consistently leans one way, but avoid repeatedly shifting tender plants between very different conditions. Keep labels visible and leave room to inspect new growth.
Plan pot positions before filling the greenhouse. Leave working room between groups so you can reach the back row, remove a pot without scraping adjacent shoots and carry it out for hardening. If the number is large, mark the proposed area on the floor or place empty pots first; this exposes space problems before plants are growing. The Spacious Greenhouse listing covers area options from 47 m² to 70 m², but those figures alone cannot show how a particular bench and aisle layout will work. Check the selected plan, usable height and openings against your pot count and the height you expect plants to reach before planting out. Allow room for trays and plants temporarily moved aside.
04
Manage greenhouse temperature and watering
Temperature can swing quickly under cover: a sunny spell may heat a greenhouse while nights remain cold. Do not judge conditions by the air at the door or by daytime comfort; use a minimum–maximum thermometer near the pots and note readings over several days. Ventilate when heat builds, using the openings available in your structure, and adjust them as the weather changes rather than trapping hot air. These steps reduce extremes but do not make an unheated greenhouse frost-proof. If a cold night is forecast, delay potting any remaining dormant tubers and move pots with exposed young shoots to a more protected place if you can.
Water according to the state of the mix, not a fixed weekly schedule. Before growth, check below the surface and let the pot drain; a tuber in constantly wet mix is vulnerable to decay. As shoots and roots develop, plants use more water, but they still need drainage and should not be left standing in runoff. Water the mix rather than regularly soaking the foliage, and check smaller pots more often than larger ones because they dry at different rates. The Aluminium Classic Greenhouse listing spans 3.77 m² to 28.08 m²; check the exact specification for vent arrangement and usable height, since area alone says nothing about air movement at plant level.
Keep growing plants manageable until planting
Once shoots are growing, check their rate of growth, leaf colour and whether roots are beginning to fill the pot. A pot that dries unusually quickly or roots emerging from drainage holes can indicate the plant needs more room, though one root at a hole is not by itself a reason to repot. If the garden is nearly ready, avoid moving a healthy plant into an oversized pot solely to postpone planting. If the bed is not ready, move it carefully into a slightly larger draining pot and keep the rootball intact for the later transplant. Do not let strong growth become an excuse to hold plants in a crowded, dim position.
Correct light before trying to manage shoot height by cutting. A tall, weak stem can indicate that the plant needs brighter conditions or has been kept in growth for too long; cutting it back can alter branching and flowering. Follow guidance for the cultivar and the shape you want rather than trimming every plant automatically. Keep a clear path from each pot to the greenhouse door for moving full containers. The Lean-to Greenhouse listing includes area options from 3.69 m² to 14.34 m². If you compare this format, check the selected drawing for internal height, access and openings, not just the stated area.

05
Harden dahlias off gradually
Plants grown under cover have not yet experienced the full changes in sunlight, wind and temperature outdoors. Harden them off gradually rather than taking a lush shoot straight from the greenhouse to an exposed bed. Begin in a sheltered position out of harsh direct sun and strong wind, then increase the time outside and the amount of sun over several days. Bring pots back under cover if conditions turn cold or windy, and avoid letting them dry while they are outside. The point is acclimatisation, not an attempt to make dahlias frost-proof; a hardened plant still needs a frost-aware planting date.
Look at the whole forecast as well as one warm afternoon. If overnight cold remains possible, keep the pots in their protected staging place and continue hardening when the weather allows. A brief move outdoors does not mean the tuber is ready to live in garden soil. When pots and hardening trays must share the greenhouse, allow enough clear floor or bench space to bring everything back in without crushing shoots. The Limited Edition Aluminium Greenhouses listing includes area options from 3.77 m² to 28.08 m²; compare the specific plan with this temporary overlap rather than treating the area range as a measure of usable floor space.
Plant out after local frost risk has passed
Prepare the garden bed before carrying out the pots. Choose a position with plenty of sun and soil that drains, and loosen the planting area so the rootball can be set in without being compressed. If the site holds water, address the drainage or choose another spot; a greenhouse start does not compensate for persistently wet soil. Check the cultivar's mature size and spacing instructions, because dahlias differ in height and spread. Decide where any support will go before the plant grows large, so later staking does not damage roots or the tuber.
Plant when local frost risk has passed and the soil is no longer cold and saturated; in a frost-prone garden, waiting is safer than relying on a greenhouse-grown shoot to tolerate a late cold snap. Lift each plant with its rootball intact and handle the stem gently. Set the rootball at the same depth as it grew in the pot, firm the soil lightly and water to settle the root zone without leaving it waterlogged. Keep the label beside the plant until its identity is clear, and water according to weather and soil rather than a fixed calendar. If conditions change, delay planting or protect the plant where practical instead of rushing all pots outdoors together.
Frequently asked questions
Can I start dahlia tubers in an unheated greenhouse?
Possibly, if the nights and potting mix remain suitable, but an unheated greenhouse is not frost-proof. Check conditions beside the pots; if a cold spell is expected, wait or keep the tubers dormant. Daytime warmth alone is not a reliable guide.
How can I tell which way a dahlia tuber should sit?
Find the crown, where the eyes form, and place it uppermost. Handle the narrow neck connecting the tuber to the crown carefully. Lay the tuber across the mix and keep the crown near the surface. If there is no crown or viable eye, do not assume the tuber will sprout.
How often should I water a potted dahlia tuber?
There is no useful fixed interval: pot size, mix and weather all affect how quickly it dries. Before shoots form, keep the mix only lightly moist and let excess water drain. As roots and leaves grow, check more often, but do not leave the pot sitting in runoff.
How should I harden off greenhouse-grown dahlias?
Begin in a sheltered outdoor spot for a short period, then increase the time outside and exposure gradually over several days. Avoid moving tender growth straight into harsh sun or wind. Bring pots under cover if cold conditions return; hardening does not make dahlias frost-proof.
Can I plant greenhouse-started dahlias out before the last frost?
If your garden has a meaningful frost risk, wait until it has passed rather than relying on greenhouse-grown shoots to withstand a late cold snap. Where frost is rare, still check the soil and forecast. The right date depends on the planting site, not just the greenhouse.
A good greenhouse start balances care for the dormant tuber with the needs of the growing shoot. Give each plant enough light, airflow and room without letting it outgrow its pot. Local frost risk helps determine when to plant out; hardening prepares the foliage for outdoor conditions but cannot replace suitable timing. With pots labelled and a clear route for watering and moving them, this early stage stays manageable and plants are less likely to be rushed into cold or crowded beds.
