
Testing a Central Island Bed in a Greenhouse
Greenhouse layout guide
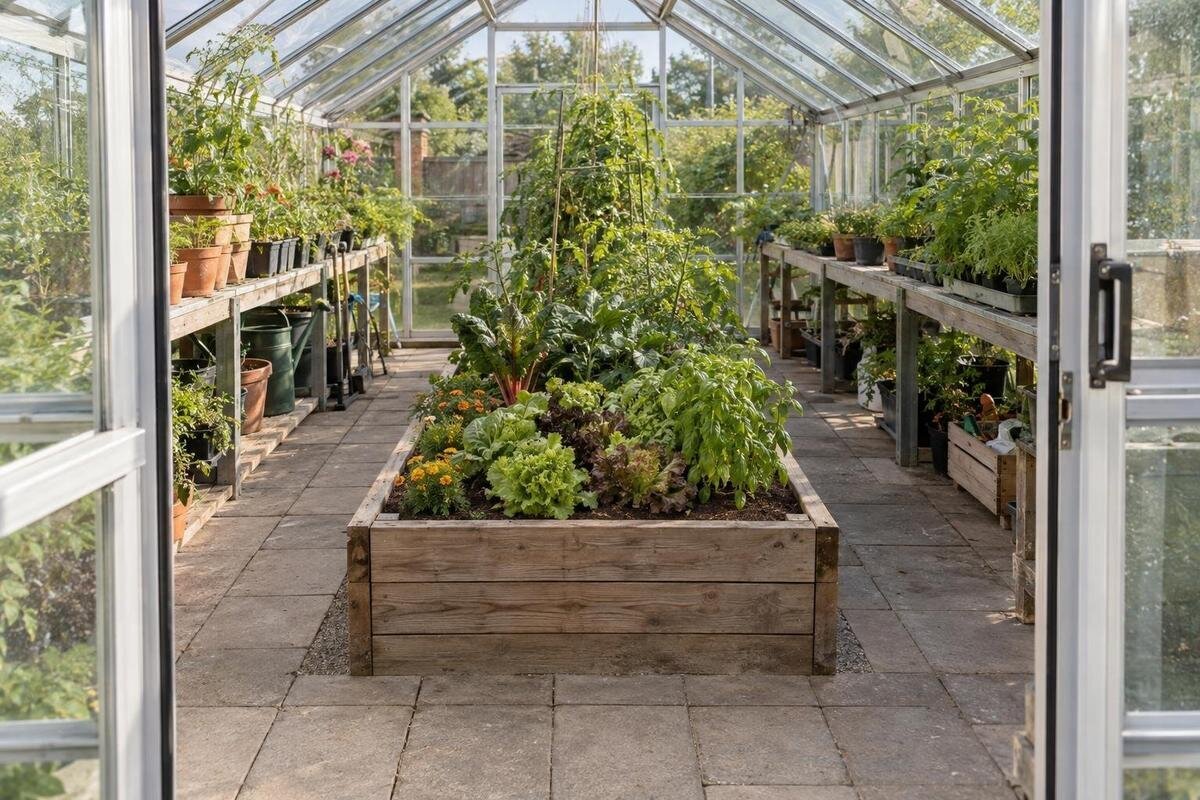
A greenhouse with a central island bed can make plants reachable from both long sides, but it divides the floor into separate routes. The real test is not whether a bed fits on a sketch; it is whether you can tend every part, turn with the things you carry and keep the entrance clear once plants mature. Compare an island and perimeter beds on the same clear internal footprint. Bed depth, your comfortable reach and the jobs you do most often determine which arrangement works.

Why put a bed in the centre?
A central island bed is a freestanding planting area with a usable route along each long side and, if the floor plan allows, around its ends. You gain two working edges, so you can tend a row from more than one direction. In exchange, the bed takes the middle of the greenhouse, where an uninterrupted walkway, a tray or turning space could otherwise fit. It also divides one open floor into two lanes: if you carry plants or tools from the entrance to a work area beyond the bed, you may need to go around it. That is manageable only if both routes remain usable after planting.
Compare layouts by clear internal dimensions, not only by advertised floor area. The Classic Greenhouse range is listed from 3.77 m² to 28.08 m²; the Classic Greenhouse size range can help with early shortlisting, but the area figure cannot tell you the usable width and length of a selected greenhouse. Check that model’s internal dimensions and draw in the frame, entrance and any fixed items. Two footprints with similar area can be narrow and long or closer to square, giving very different space around the same island.
Measure the clear internal floor
Work from the inside faces of the greenhouse and use the narrowest clear width, not an outside measurement. For illustration only—not an available product size—take a clear rectangle 2.4 m wide by 3.6 m long. Centre a bed 0.7 m wide and 2.0 m long: each side passage is (2.4 − 0.7) ÷ 2 = 0.85 m; each end gap is (3.6 − 2.0) ÷ 2 = 0.8 m. If you offset the bed, calculate the two side passages separately. This arithmetic gives a starting sketch, not a comfort guarantee, and assumes the stated inside floor is completely clear. Label the dimensions so you can distinguish the bed’s outside edges from its planted surface. If an edging board or container projects beyond the soil, use that outer edge when measuring the passage. Keep all measurements in the same units, and note which figures come from the greenhouse drawing and which are provisional bed dimensions. This makes later changes easier to compare without confusing assumptions with measurements.
On the actual plan, mark the entrance and its opening area, the threshold, frame members, shelves, containers and the edges of any raised beds. Measure between these obstructions at the narrowest points; a single wall-to-wall figure can hide a pinch point. Lean-to Greenhouse options are listed from 3.69 m² to 14.34 m²; the Lean-to floor-area options are useful for comparing available floor areas, but do not show how much passage width a particular island would leave. Use verified internal dimensions for the selected size, or ask for them if a drawing gives only outside measurements.
Test reach from both sides
Measure reach in the position you will actually use. Stand on the planned path and mark the farthest part of the bed you can tend without stepping into the growing area, leaning heavily on the soil or stretching awkwardly. Repeat from the opposite path. The reachable areas should meet across the middle; if an untouched strip remains, make the bed narrower or choose another arrangement. Check the corners as well as the centre, since a pot, stake or cross-support can obstruct the approach even when the middle of each long edge is accessible.
Do not set the island width at the limit of an outstretched arm. Allow for the way you work, where stems and supports will sit, and whether plants will spread across the edge. The Limited Edition Aluminium Greenhouse range is listed from 3.77 m² to 28.08 m²; the Limited Edition greenhouse sizes need the same reach test for the chosen internal width, rather than an assumption based on total floor area. On your drawing, mark any strip you cannot comfortably reach and see whether moving a row or reducing the bed width solves the problem before adding more planting.
Allow for entry, turning and end routes
Movement around an island depends on the ends as well as the side passages. If the two side routes cannot connect at either end, you may have to reverse the way you came or move a tray simply to switch sides. Mark the door approach and opening area, then draw a continuous route from the entrance to each side of the bed. If the entrance opens into one passage, check that the door does not take up the space needed to stand, turn or carry a harvest basket.
Test turning with something you really carry, such as a seed tray or watering can. Set a box on the floor to represent the island, then walk in, reach a bed edge, turn and leave without stepping into the planted area. The clear space required depends on the item and on how you move, so one turning measurement is not a universal answer. The T-Model Orangery range is listed from 16.52 m² to 30 m²; the T-Model Orangery size options still need a floor plan that places the entrance, bed and turning area together.

How perimeter beds compare
Compare with a perimeter plan on the same illustrative 2.4 m × 3.6 m clear rectangle; these figures are planning examples, not available product sizes. Two strips 0.45 m deep along the long walls would use 2 × 0.45 × 3.6 = 3.24 m² for planting and leave a nominal 1.5 m-wide central route, before door or frame intrusions. The example island of 0.7 m × 2.0 m uses 1.4 m² of bed area. This is not an equal-area comparison: it shows how perimeter beds can use more of the floor for planting while leaving one broad aisle.
For a like-for-like test of planted area, one illustrative perimeter strip 0.45 m deep by about 3.1 m long is roughly 1.4 m², close to the island’s footprint. It creates a different circulation pattern and is reached from one side only; its far edge still has to be within your working reach. Keep the entrance, fixtures and storage in the same positions on both comparison drawings. Otherwise, one arrangement may appear more spacious simply because an obstruction has been left out. Mark any floor left over after placing the equal-area beds, and decide what it would actually be used for. This separates the question of how much soil fits from whether the remaining space supports your routine. The Pyramid Greenhouse range is listed from 5.53 m² to 18.9 m²; the Pyramid Greenhouse options should be compared using the exact chosen floor dimensions, not by assuming an area total tells you how a perimeter bed or island will fit.
Plan for everyday maintenance
Maintenance is a separate test from reaching the planting surface. Map the jobs you actually do: sowing, thinning, tying, pruning, harvesting and clearing fallen leaves or spent plants. At an island, both edges can make work convenient, but the paths must remain passable while you carry tools, a basket or a container. Decide where those items can sit temporarily, and whether you can remove or refresh growing medium without blocking the route you use to exit. For seasonal clearance, trace the movement from the plant to the collection container and then to the door. Include the space occupied by the container while you work, rather than only while carrying it. Compare which bed edges you can clear from that position and where you would need to relocate the container. This is a more useful maintenance test than walking around an empty bed with nothing in the aisles. If routine care requires stepping over the bed or squeezing past a stored item, the plan has not allowed enough working space.
Treat storage as part of the floor plan, not as free space outside it. The Limited Edition Aluminium Greenhouses with Storage range is listed from 5.52 m² to 28.08 m²; the models with built-in storage call for a drawing that shows where the storage sits and whether it uses space you planned for growing or circulation. Do not assume the listed area is all open planting space. Plot the storage, bed and everyday route together, then check that a tool or harvest basket can be carried in and out without a detour through the plants.
Leave room for mature plants
Measure the bed for plants at their planned mature spread, not just for bare soil or newly planted seedlings. Stems and leaves can extend across a path; supports, ties and pots may widen the occupied zone or make the centre awkward to pick. Draw the expected canopy as a band around each row, using the plant spacing guidance you already follow, then preserve the path outside that band. Check access to the whole crop for harvesting and removal too: a plant that is easy to water from one side may still be awkward to prune or lift from the same position.
The Prestige Greenhouse range is listed from 3.77 m² to 28.08 m². When comparing the Prestige Greenhouse sizes, use the exact selected footprint to position the bed and allow for mature plants. A larger floor-area figure is not a promise of more plantable space: paths, frames, containers and crop spread all compete for clear floor. Mark the bed edges and the expected spread of mature plants separately on the sketch, so space needed for a path is not also allocated to overhanging crops.
Match the bed to the floor shape
Floor shape can change the result even when the area is similar. Try the island lengthways and across the room on a dimensioned sketch, then note the narrowest side passage and end route in each version. A tapered or multi-sided plan can leave less room at one point than the centre measurement suggests, so use the tightest point rather than an average. For perimeter beds, mark the actual wall edge and any corners where a planted strip would become too deep to reach from its aisle. The aim is not to fill every part of the outline but to keep each planted zone and its access route usable.
The Spacious Greenhouse range is listed from 47 m² to 70 m²; the Spacious Greenhouse range offers a larger floor area, but area alone cannot confirm the clear width, floor shape or positions of internal features. In a larger plan, sketch all the zones you intend to use, not just the island, and preserve a route between the entrance, the bed and other work areas. Make this check against the exact model’s internal dimensions; do not enlarge a smaller layout by area alone.

Try the layout at full scale
Before fixing bed edges, reproduce the layout at full scale where you can. Mark the clear inside rectangle with tape, chalk, string or removable markers; mark out the proposed bed and any shelves, storage or containers. Include the entrance opening and route, then add markers for mature plant spread and support positions. This reveals whether a path narrows beside a corner, whether both sides remain usable and whether a wide bed leaves enough end space. A paper plan can hide small encroachments that become obvious when you walk the outline. If you plan a raised bed, represent its edge at the intended height as well as marking its footprint. A floor outline alone does not reproduce the position from which you will reach over that edge. Use a stable temporary marker and keep the trial area clear of trip hazards. Try the same reach test against the proposed perimeter bed, rather than comparing a physical island mock-up with a perimeter arrangement that exists only on paper. Record the changes you make so the final drawing matches the tested layout.
Walk through the tasks in order: enter carrying an item you regularly use, set it where intended, reach the farthest row, turn and leave with a tool or harvest. Repeat the work from the other side. If you must move a fixed fixture or step into the bed each time, adjust the layout rather than relying on occasional rearrangement. Keep temporary items in the test; a path that is clear only when the watering can, seed tray and tools are put away is not the route you will have during normal work.
Choosing between island and perimeter beds
Choose an island when its two-sided access is genuinely useful and both side passages, the route around the bed and the entrance pass your reach and movement tests. Choose perimeter beds when keeping a continuous central route matters more, or when the width needed for an island would reduce the paths to narrow lanes. If neither plan fits, make the bed smaller, shorten it or leave part of the floor open. An island need not run the full length of the greenhouse; leaving an end clear may provide turning space that the first sketch lacked.
Do not compare only the square metres of soil. Put the plans beside each other and check the farthest plant reach, narrowest clear passage, room to turn with the items you usually carry and access for seasonal care. One arrangement may offer a larger planted strip but make the far edge awkward to tend; another may leave a broad route but less bed area. The better layout is the one you can maintain without repeatedly shifting pots or crossing the growing surface.
Frequently asked questions
Does a central island bed create more growing space?
Not automatically. It can use floor that would otherwise be open, but its side and end routes also take up space. Compare the bed area only after drawing the paths, and allow for mature plants; the greenhouse’s total floor area is not the same as planted or reachable area.
How wide should an island bed be?
There is no universal width. Measure your comfortable working reach from each planned aisle and check that the reachable areas meet across the bed, with room for plants and supports. Test the corners as well as the centre, and reduce the width if you would need to step into the bed or stretch awkwardly.
Can a central bed work in a small greenhouse?
It can, but clear internal width is the deciding measurement. A narrow bed may leave two usable paths; a slightly wider one could turn them into tight lanes. Draw the bed and both paths from exact inside dimensions. If the entrance or fixed items take up the routes, try a perimeter layout.
How do perimeter beds compare for reach?
A bed against a wall is reached from one side, so its far edge must be within your working reach from the aisle. In return, the centre can remain one continuous route, and the bed does not need paths along both sides. Test that one-sided reach as carefully as you test an island.
Are advertised floor-area figures enough to choose a layout?
No. Area helps you shortlist, but it does not give the exact inside width, length, entrance position or effect of fixtures on clear floor. Use the selected model’s verified internal dimensions or a dimensioned drawing. If those measurements are not available, ask for them before planning the bed.
A central island works when its planting surface remains reachable from both sides and the routes left around it are as useful as the bed itself. Perimeter beds are often more practical when one uninterrupted aisle and straightforward turning matter more than two-sided access. Use the clear internal plan, account for mature plants and let the full-scale movement test—not the advertised floor area—settle the comparison.
