
Can a Rainwater Tank Feed Greenhouse Drip Irrigation?
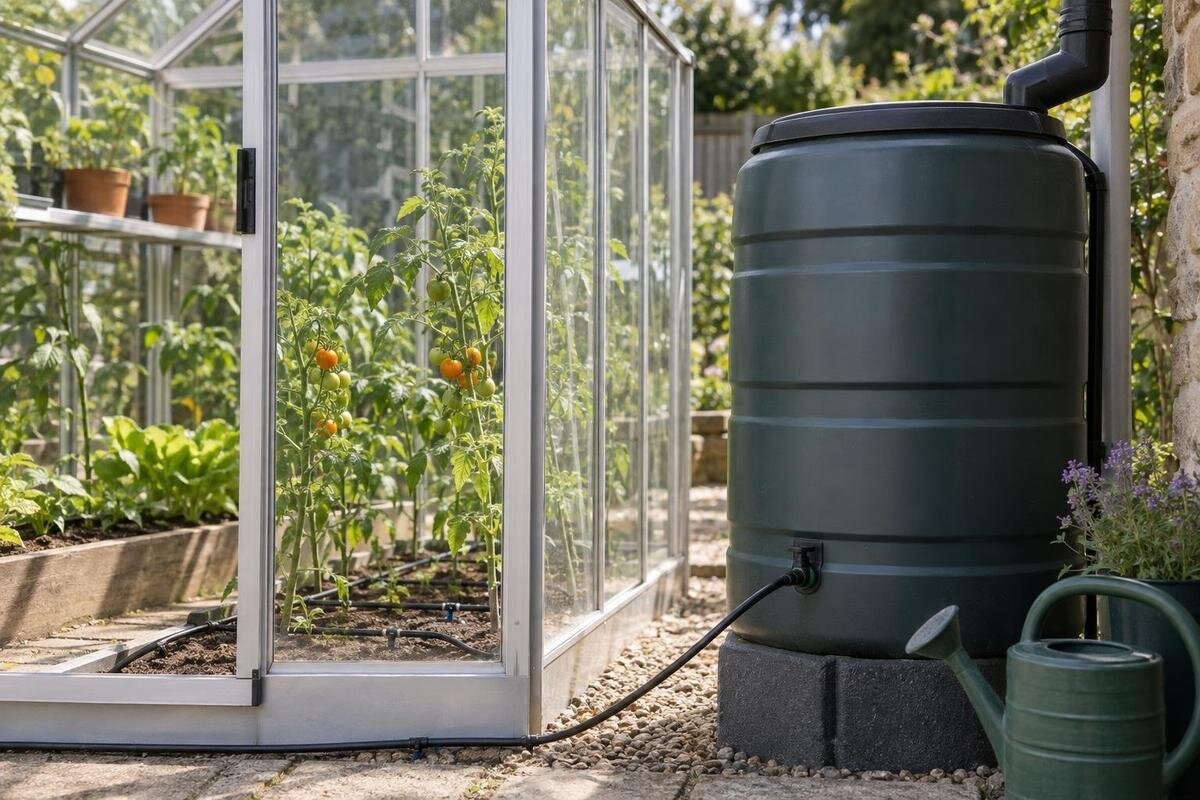
Greenhouse irrigation
A rainwater tank can feed greenhouse drip irrigation by gravity, but only when the water surface provides enough head for the chosen emitters and the rest of the line. Tank capacity is not the same as pressure: a full tank on low ground may still deliver poorly, and a system that works after rain can slow as the level falls. Test the complete setup, including its filter, valves, pipework and farthest outlets, at the lowest water level you expect to use.

When gravity-fed irrigation works from a tank
Gravity-fed irrigation is possible without a pump when the available head meets the requirements of the emitters and every other component. In plain terms, the water needs enough vertical drop to push through the line. A large reservoir on low ground can still provide little pressure if its water surface is close to the drippers; a smaller tank positioned safely higher may provide more. Water appearing at the tank outlet is not proof that the far end will deliver a steady, useful amount. A short, simple run with well-matched parts may work, while a longer run or many open outlets may not. The word drip on a kit is not proof that it can run on gravity alone.
Treat the tank outlet, filter, shut-off valve, timer, main pipe, branches and emitters as one system. Each can add resistance, and a dirty filter or narrow fitting can make a marginal setup weaker. The number of open outlets also affects the total flow the network must supply. Check the operating requirements of every part instead of assuming that one gravity-compatible emitter makes the whole kit suitable. If you are also comparing greenhouse sizes, the Aluminium Greenhouses range spans 3.77 m² to 28.08 m². Use the selected floor plan to map the complete watering system; the greenhouse’s area alone does not establish its dimensions or water connections.
Measure the height from the water surface
Gravity head comes from the vertical difference between the tank’s water surface and the emitter, not simply the height of the tap or outlet. As water is used, the surface falls and so does the head available to the line. Check the highest and farthest outlets, not only the first dripper beside the tank. On uneven ground or stepped benches, emitters on the same line can sit at different heights and receive different pressure. Mark the lowest water level at which you plan to irrigate, then consider the most demanding outlet at that level. A full-tank test alone can overstate what the system will deliver later. A bottom outlet helps draw water from the tank; it does not raise the water surface.
There is no standard stand height that suits every setup. Compare the emitter’s minimum operating pressure with the head available in your actual layout, and check any stated requirements for the filter, timer, regulator and valves too. If the manufacturer does not explain what tank-to-emitter height is needed for the complete system, ask the supplier or an irrigation specialist to confirm it. Raising the tank can increase head, but a filled tank needs a suitable, stable support. Do not stack it on an improvised platform to compensate for weak flow.
Pipe length and restrictions affect delivery
Pipework can use up a substantial share of the available head in a low-pressure system. Long runs, narrow passages, many bends, tees, valves and filters all add resistance, while a kink or crushed section can interrupt flow. Follow the irrigation maker’s stated pipe sizes and maximum run lengths; do not assume that spare garden hose, extra connectors or a long extension will behave like the specified layout. Keep the route as direct as practical and protect tubing from pinches at doorways, bench legs and greenhouse entrances. These details matter most at the end of the line, where available flow may already be weakest.
Sketch the tank, main line and individual laterals on the greenhouse plan before buying tubing. When considering a Lean-to Greenhouse, available in areas from 3.69 m² to 14.34 m², trace the route from the proposed tank position to the furthest outlet in your chosen layout. Allow for branches, changes in height and the route around entrances rather than measuring only the straight-line distance. This gives you a clearer basis for checking the irrigation maker’s run-length limits. If the plan needs several long runs, confirm that the chosen low-pressure components support them or divide the layout into zones rather than extending the line by guesswork.
Select emitters for low-pressure operation
Look for emitters explicitly described by their maker as suitable for gravity feed or low pressure. A conventional pressure-fed kit may pass some water at low head and still deliver too little or too unevenly for its stated operation. A low nominal flow rate does not prove that an emitter needs little pressure; its opening and internal design still have a minimum requirement. Pressure-compensating drippers can even out output only within their specified operating range. They do not create pressure, and a model with a higher minimum may not start properly from a water tank. If a product’s instructions omit the minimum pressure, request specifications before buying rather than assuming it will work.
Check the minimum operating pressure, expected output at that pressure, filter recommendation and any limits on pipe length or spacing. Match the outlet arrangement to the growing area: a pot may need an individual dripper, while a bed may use a line with specified spacing, but the emitter’s instructions must guide that arrangement. For a model in the Limited Edition Aluminium Greenhouses range, which spans 3.77 m² to 28.08 m², count the planned watering positions on the selected floor plan before choosing emitter quantities. Use the emitter maker’s flow data to assess that arrangement. Avoid mixing models with different pressure requirements in one line unless the manufacturer confirms they can operate together.

Filter rainwater without restricting the line
Rainwater can carry roof grit, leaf fragments, pollen, dust and other debris into a tank, and sediment can reach small emitter passages. Use the filter grade or mesh recommended for the chosen emitters; a coarse screen at the tank inlet may catch larger material but does not necessarily replace the irrigation filter. Filtration also affects gravity flow: a restrictive or dirty element can reduce delivery, so a system that worked when clean may weaken as debris builds up. Check the tank’s outlet screen as well as the irrigation filter. If output changes after windy weather or a long period without rain, inspect for debris before assuming every dripper has failed.
Choose a filter specified for the emitters and water flow, and place it where it can be inspected and cleaned without dismantling the watering system. Keep the tank outlet and filter accessible; routine maintenance is harder if a bench, storage unit or dense planting blocks access. When planning a Pyramid Greenhouse, available in areas from 5.53 m² to 18.9 m², mark this maintenance space alongside the beds and pipework on your layout. Do not remove a required filter to disguise weak flow. Clear any blockage, repeat the flow test and check the available head or component compatibility if delivery remains poor.
Use a layout that suits the available flow
Map the plants, pots or beds and the route each line will take before deciding on emitter numbers. For pots, mark each container that needs its own outlet; for beds, follow the maker’s line spacing and the area to be watered. Keep tubing clear of doorways and main walkways, avoid kinks, and keep emitters at similar heights where the layout allows. If bench or bed levels differ, include both high and low outlets in the flow test. Leave the line ends accessible for flushing if the selected system calls for it, rather than hiding them behind permanent fixtures.
If the total number of open outlets makes delivery inconsistent, split the layout into zones and run fewer emitters at once. That reduces simultaneous demand but does not overcome an emitter’s minimum pressure requirement. Confirm that valves, timers and any regulator are designed to work with gravity feed; some need a specified inlet pressure or introduce resistance that a low-head system cannot spare. Each zone should be simple to isolate and test. For the Bloomcabin Prestige Greenhouse range, which spans 3.77 m² to 28.08 m², mark the beds and their separate branches on the chosen floor plan so you can identify exactly which outlets each valve controls.
Test the line at its lowest normal water level
Test the assembled system, not a loose dripper or a line connected to mains pressure. Fit the filter, valves, timer and all intended branches, then use the same tank outlet and pipe route planned for normal watering. Check for leaks and let the line fill according to the component instructions. Test first when the tank is at a usual high level, then repeat at the lowest water level you intend to use. Run the full set of zones or branches you expect to operate together, because testing one emitter alone hides the combined demand. If you only test when the tank is full, you may miss a problem that appears as the water level falls.
Put measuring cups or jugs under outlets near the tank and at the far end; include the highest and lowest positions if levels differ. Catch water for the same timed interval at each point and record the amount in millilitres or litres. Compare the results with one another and with any emitter output specification for the pressure confirmed in your setup. Look for leaks as well as low output. If you are planning a model from the Limited Edition Aluminium Greenhouses with Storage range, listed from 5.52 m² to 28.08 m², mark these test points on its watering plan. Choose them by outlet position and height, not simply by dividing the floor area.
Troubleshoot weak or uneven drippers
If all drippers are weak, start at the tank and check the water level, outlet screen, valve position, filter condition and any kink or timer in the common supply. A low water surface or restriction before the branches affects every zone. If only the farthest or highest outlets are slow, inspect that route for blockage, extra fittings, excessive length or elevation changes. One weak dripper may have a local clog; several weak outlets at the end of a line point more towards a distribution or pressure problem. If possible, test a clean, known-good emitter in place of a suspect one before replacing a whole section of the system.
Change one thing at a time: clean the filter, flush the line as instructed, remove a kink or isolate one zone, then repeat the same timed catch test. Opening a valve further will not fix an emitter that needs more pressure, and adding outlets can increase total demand. Keep a simple record of tank level, open zones and collected amounts so you can compare tests. If the system still falls outside its maker’s operating conditions at the lowest normal level, simplify the layout, choose documented gravity-compatible parts or ask an irrigation specialist about a suitable pressure source.

Place the tank on a safe, accessible base
Tank height can improve head, but a filled tank puts a substantial load on its base. Place it on stable, level support suitable for the filled tank; do not use a bench, shelf, greenhouse frame or roof unless the structure’s maker or a qualified professional confirms that it is appropriate. A greenhouse is not automatically designed to support a tank, and an improvised stand is not a safe fix for weak flow. If the necessary elevation cannot be achieved on a suitable support, consider a gravity-rated layout that needs less head or get professional advice about a pressure source.
Leave room to reach the lid, outlet, filter and valves for inspection, and route pipes where they will not be crushed or become a trip hazard. Plan an overflow route so excess water does not pool beside the greenhouse or across a walkway. For a Spacious Greenhouse, listed in areas from 47 m² to 70 m², include the tank and its service access on the site plan as well as the greenhouse footprint. If you intend to collect greenhouse roof runoff, check the gutter and downpipe arrangement for the specific structure. Do not assume that compatible collection fittings or suitable tank support are included.
Decide whether gravity is reliable enough
Base the decision on the weakest normal condition, not the day the tank is full. The system should deliver what the selected emitters require at the far end when the tank is at its lowest planned level, with the normal filter and control parts fitted and all intended outlets operating together. If it works only at a high water level or with some lines closed, it is dependable only if you can maintain those conditions. Mark the lowest level that passed the test and avoid drawing below it unless you test again. Rainfall and watering use both change the tank level, so repeat the test after a dry spell or a layout change.
If results fall short, check the parts’ low-pressure specifications, clean the filter, reduce unnecessary restrictions or divide the line into zones, then test again. A pump or other pressure source may be an alternative, but it must suit the emitters and controls; do not assume any pump or timer will solve a compatibility problem. Keep the watering plan up to date as planting changes. In a T-Model Orangery Greenhouse, listed from 16.52 m² to 30 m², moving growing positions may alter pipe routes or the number of outlets in use. Adding emitters or extending a run can change demand even when the tank stays at the same height, so repeat the test after those changes.
Frequently asked questions
Does a bigger rainwater tank provide more pressure?
Not by itself. Tank capacity tells you how much water it can store; gravity pressure depends mainly on the height of the water surface above the emitters. The water level falls as the tank empties, so check the system at its lowest planned level.
How high should the tank be above the drippers?
There is no universal height. It depends on the emitters’ minimum pressure and the resistance from the filter, valves and pipework. Compare the requirements for the complete system with your layout, and get the supplier to confirm the needed height if the specifications are unclear.
Will an ordinary drip-irrigation kit work from gravity?
Only if its emitters and other components are suitable for the available low pressure. A kit designed for mains pressure may deliver too little water, even if water reaches the lines. Check the requirements for the filter, timer, regulator and valves as well as the drippers.
How can I check whether the drippers deliver evenly?
Run the complete system at the lowest tank level you expect to use. Collect water from near, far, high and low outlets for the same timed interval, record the amounts and compare them with one another and with any manufacturer output specification for your setup.
Can a filter or timer prevent gravity-fed irrigation from working?
Yes. A filter can become blocked or add resistance, and some timers or other controls require a minimum inlet pressure. Check that each component is suitable for gravity feed, keep the filter clean and include every part in the flow test.
A gravity-fed tank can work well with a short, low-pressure layout, but the result depends on the whole system rather than the tank’s capacity. Choose components with clear gravity-feed requirements, follow their limits and base your decision on a test at the lowest water level you expect to use. If that test falls short, adjust the layout or components rather than assuming the tank will always be full.
