
Trace the Cause of Greenhouse Puddles After Watering
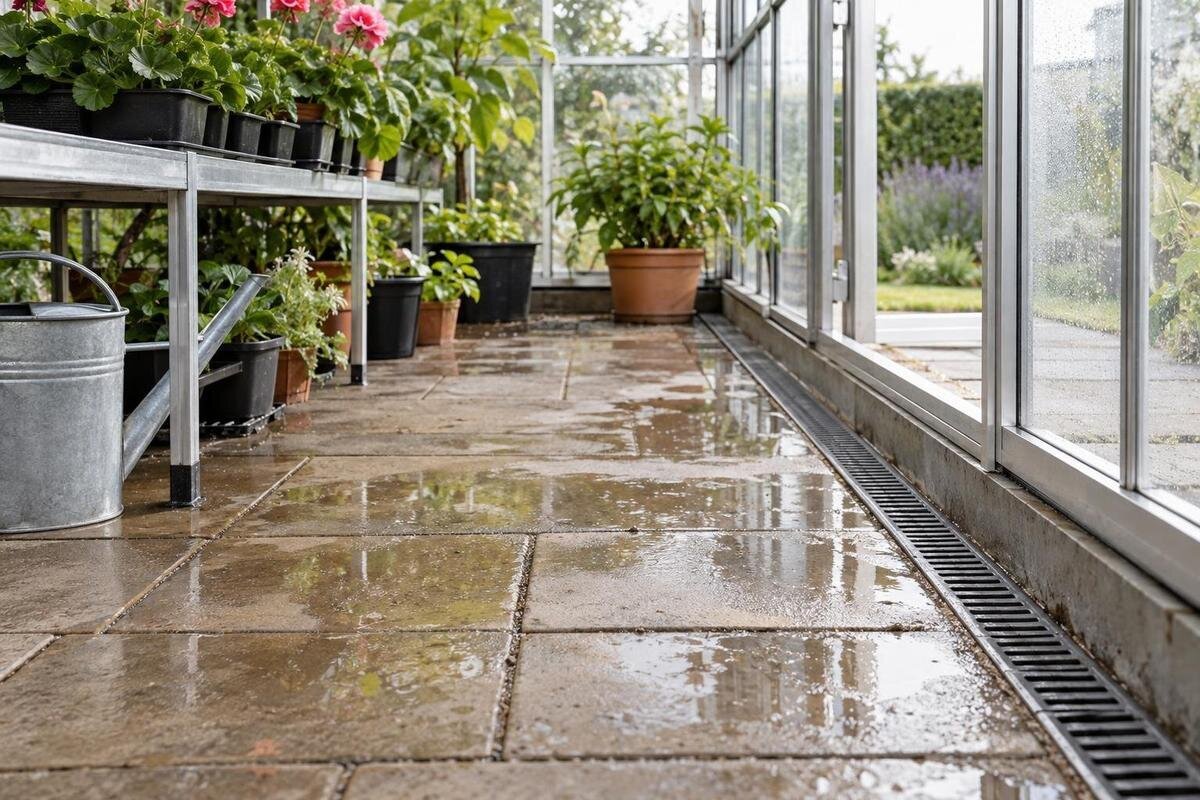
Greenhouse drainage
After watering, a puddle can point to a spill, a leaking container or hose, a low spot, a blocked outlet, or water arriving from outside. Its position alone rarely identifies the cause. A simple plan of the greenhouse and its surroundings, paired with a small, repeatable watering test, helps show where water first appears and which route it follows. Record rainfall, watering, outlets and the puddle on the same diagram before changing the floor or drainage. That evidence makes a practical fix easier to choose and gives a qualified site professional something specific to review if the route remains unclear.

Record where and when the puddle appears
A puddle shows where water has stopped, not necessarily where it entered or was applied. The wet patch may sit below a leaking pot, along a floor joint, at a low point, beside a doorway, or downstream from a spill elsewhere. Before sweeping it away, note its outline and depth by eye, whether it is a single pool or a thin sheet, and which edge appears wet first. Take a photograph from the same position each time. Record whether the floor was dry beforehand and how long after watering the water appeared. Those details help distinguish a local spill from a route across the greenhouse.
Do not treat one observation as a diagnosis: a plant tray may have been overfilled, a hose may have been moved, or someone may have walked through a wet patch. Record what was running at the time—irrigation, hand watering, a hose, or none—and whether it had rained recently. If the greenhouse stands against a wall, include the wall-side edge and look for a visible trail after rain. A wall greenhouse such as the Lean-to Greenhouse makes that boundary especially important to show, but a mark there is only a clue; it does not prove that water is entering at the wall or that the floor is at fault. Keep the first observation simple, then test one possible source at a time.
Draw the greenhouse and its water routes
Start with a plan viewed from above. Draw the greenhouse outline and mark the door, wall edges, growing beds, benches, shelves, thresholds, floor joints and any change in surface. Add visible floor drains, channels, grates, pipe ends and taps, plus downpipes and the nearest outside paving, soil or garden bed. Water can cross a threshold or follow an edge before collecting, so include the route immediately beyond the structure rather than drawing only the interior. The sketch need not be to scale, but keep its orientation fixed: label the door side and another edge, and use the same viewpoint for later photographs. Mark unknown features as unknown instead of filling gaps with assumptions.
Use one symbol for a feature you have seen and another for something you suspect; arrows should show a route only when you have observed it. Identify the exact greenhouse variant before drawing its footprint. The Limited Edition Aluminium Greenhouses range is listed from 3.77 m² to 28.08 m², so use the chosen variant's manufacturer base drawing rather than tracing a catalogue image. Add confirmed doors and base edges only when they appear on that drawing. Mark an outlet you have located separately from one shown on a plan, so planned features are not mistaken for existing ones. This distinction is useful when a puddle sits near the perimeter or when you are planning paving around the greenhouse.
Separate watering from rain and other sources
Make a source list beside the map. Include hand watering, a hose, any automated watering that is present, containers that drain after watering, visible plumbing, drips from above during rain, water entering at a doorway and any outlet that appears to back up. Record whether each source was operating when the puddle formed. If you cannot identify a pipe or gap, mark it as unknown rather than ruling it out. Water left from an earlier event can also confuse a later check, so note whether the floor was genuinely dry before each observation.
Compare one source at a time where practical. On a dry day, note whether puddling occurs without watering; once the floor has dried, test hand watering or one irrigation zone with the other sources off. Separately observe the greenhouse after rain when plants have not been watered. When mapping the site for a T-Model Orangery Greenhouse, include nearby walls, surface levels, downpipes and paths as well as the greenhouse outline. These surrounding features belong on the source map because water may arrive from beyond the area being watered. Do not draw a firm conclusion from one wet event; water may have been left over from an earlier source or carried in on footwear.
Run a small, repeatable watering test
Begin when the floor is dry enough for a new wet mark to be clear, and choose a time when rain will not confuse the result. If the surface is already wet, photograph and record it, then wait for it to dry rather than treating the next patch as a new result. Keep the test modest: use no more water than that area would normally receive, and do not flood the floor. Select one plant or irrigation zone. If you suspect a hose connection instead, observe it separately during normal use. Keep other water sources off if practical, and note any source you cannot isolate. Avoid moving several pots or changing the watering routine at once; the aim is to keep everything but one factor steady.
For hand watering, use a measuring jug to repeat the same small volume, keeping the position and watering method consistent. For an irrigation zone, keep the settings and running time the same for each test. Water the selected plant or area as usual, not the bare floor, and record the time and the first place water appears. Observe at the same intervals and photograph the wet edge, not just the largest pool. After the floor has dried, repeat the test; then test a different source separately. If planning for a Pyramid Greenhouse, use the selected model's actual outline when marking test areas and possible water routes on your sketch. Stop if water reaches electrical equipment or spreads beyond the test area.

Follow the water across the floor
Watch for the first wet point rather than waiting for a large puddle. Add an arrow to the diagram from the source to that mark, then follow the edge as water spreads. Note whether it runs along a floor joint, follows a wall or bench leg, crosses a change in surface, or appears at a doorway. A narrow moving film may reveal direction better than a pool, but do not infer a surface fall from shape alone: an obstruction or uneven finish can divert water. Keep your position and observation times consistent, and record where water disappears as well as where it collects. If it vanishes through a gap, mark that gap as a possible outlet, not a confirmed drain.
Test one zone at a time and move only lightweight items that obscure the view; do not shift heavy benches or connected equipment just to follow the water. For a greenhouse with storage, such as the Limited Edition Aluminium Greenhouse with Built-in Storage, mark the storage area separately so you can tell whether the wet patch starts there, crosses into the growing area or stays on one side. Record the floor finish in each area and any seam or boundary the water crosses. Where stored items hide part of the route, mark that stretch as unobserved rather than assuming the water follows a straight line. Photographs before and after a test can also show whether a later pool is new or simply leftover moisture.
Check visible outlets, joints and edges
Look closely at any visible channel, grate or floor outlet. Note whether it is covered by leaves, soil or other loose debris, whether the water reaches it, and whether staining or residue suggests that water has collected there before. A hole or gap is not automatically a drain; it may be part of a floor or base detail. Check joints and edges for a wet line that leads towards or away from the puddle, but do not assume that the nearest seam is the source. Compare what you see with the relevant drawing, and record anything that is unclear rather than forcing an interpretation.
Identify what belongs to the greenhouse base and what is an actual water outlet. The Bloomcabin Prestige Greenhouse with Metal Base listing names a metal base; that alone does not establish a floor outlet or water route. If an intended outlet is clearly visible and accessible, deal only with loose surface debris if it can be done safely without dismantling anything. Do not push tools into hidden pipework or cut, drill or pry at the floor or base to make water escape. If water backs up, the outlet is inaccessible, or you cannot confirm what a gap is for, arrange a suitable professional inspection.
Look for water entering from outside
If puddles follow rain, inspect the ground and paving beside the wet area as well as the greenhouse interior. Look for a visible trail at the doorway or wall, water collecting beside the structure, soil or debris against an edge, or a downpipe discharging close to the route. A nearby tap or hose connection may also leak independently of watering. Compare the outside and inside photographs from the same orientation. These clues can help show whether water is crossing a threshold, travelling along an edge or appearing first beneath the roof or wall; none alone proves the route.
Make observations from a safe position at ground level; do not climb to check a roof or gutter. If a downpipe, roof edge or other area is hard to see, note it for a qualified person rather than trying to reach it. The Spacious Greenhouse range is listed from 47 to 70 m², so the exact footprint matters when you relate a site plan to nearby paving, paths and water outlets. Divide a large plan into labelled observation areas, but use the selected model's actual drawing. Avoid changing ground levels or redirecting water based only on a puddle's apparent direction.
Match the puddle pattern to a likely cause
Use the timing and first wet point together. A puddle that appears only after watering one pot points towards that container, its tray or the way water is applied. Water that appears after rain when no watering has taken place calls for a closer look at roof, wall, threshold and outside routes. A wet patch that starts at an outlet, or water that seems to return through it, makes the outlet worth checking. If water always collects at the same low point from several sources, the floor surface may be contributing. These are leads for the next test, not certain diagnoses.
Repeat the relevant test before settling on a cause, and change only one variable at a time. For example, test one pot separately from a hose, then compare the result with an observation made without watering on a dry day. When assessing an installed Aluminium Classic Greenhouse, record its actual floor surface, visible joints, outlets and the route water follows. Keep these site observations separate from the model details on your diagram. If two sources produce the same puddle, note both rather than forcing the evidence to fit a single explanation. A clear diagram should show what is confirmed, what remains possible and what still needs inspection.

Choose a response that fits the cause
For a local spill or pot that drips onto the floor, contain the water at that point and repeat the same test to see whether the puddle stops. If a hose connection visibly leaks during use, stop treating that as a floor-drainage problem and arrange an appropriate repair. If loose debris is blocking an accessible outlet whose purpose is clear, removing it may be enough to check whether water can reach the outlet again. Keep the original diagram so you can compare the result. Do not cut a channel, drill a hole or alter the base simply because a pool is inconvenient.
Get a qualified drainage or groundwork professional to review recurring water from outside, a suspected problem with the floor's surface fall, an outlet that backs up, or a route you cannot trace. Share the diagram, photographs, test notes and the manufacturer's base drawing for the exact model. A site review can consider how the installed floor, outlet and surrounding ground relate to one another; generic dimensions or a product image cannot answer that. If water reaches sockets, lights, heaters or other electrical equipment, keep clear and contact a qualified electrician. Do not handle wet electrical equipment while trying to continue the test.
Repeat the test after making a change
Once a cause has been addressed, repeat the same test under comparable conditions: the floor should start dry, the same area should receive the same measured volume, and other sources should be kept off where possible. Compare the time water first appears, its first wet point and the route marked on your original diagram. If you change several things together, a better result will not show which change helped. For a rain-related problem, observe the next suitable rainfall from a safe position and keep that record separate from the watering test.
Keep a short log with the date, recent weather, water source, test area, first wet point and outcome. Add a note when the route changes or returns, rather than replacing the earlier observations; a pattern across several events can be more useful than one photograph. If the puddle persists after you have contained a spill or cleared an accessible outlet, update the diagram and pass the record to the professional reviewing the site. The aim is not to produce a perfect drawing, but to make the route visible enough that a repair can be checked against the same evidence.
Frequently asked questions
Why is the puddle away from the place where I watered?
Water can travel along a floor joint, past a pot or bench, or towards a low point before it collects. Note where the floor first becomes wet, not only where the largest pool appears. A single observation may suggest a route, but repeat the test before deciding what caused it.
How can I tell whether the water came from watering or rain?
Compare what happens on a dry day when you water one area with what you see after rain when no watering has taken place. Record both separately on your diagram. If the floor was already damp, wait for it to dry before using a watering test to identify a new source.
Can I use a garden hose to test for puddles?
A hose can introduce extra variables, such as a change in position or a leaking connection. A measured amount applied to one plant or zone is usually easier to repeat. If the hose or its connection is the suspected source, observe it separately during normal use rather than flooding the floor.
Should water always run towards a floor drain?
There is no single layout that applies to every greenhouse floor. First confirm whether a visible gap, channel or outlet is actually intended to carry water, then compare the installed arrangement with the relevant drawing. If water keeps pooling or an outlet seems to back up, ask a qualified professional to assess it.
When should I get professional help?
Seek a qualified drainage or groundwork review if water repeatedly enters from outside, returns through an outlet, or seems linked to a change in surface level or ground condition. Share your diagram, photographs and the drawing for the exact greenhouse model. If water reaches electrical equipment, keep clear and contact a qualified electrician.
Reliable drainage diagnosis follows a sequence: record the puddle, map the likely routes, isolate a source, test it consistently and check the result. A pool that disappears when one spill is contained calls for a different response from water that repeatedly enters at a doorway or resurfaces through an outlet. Do not alter the floor or base based on appearance alone. A clear diagram and the correct model drawing can narrow the question; when the route or ground condition remains uncertain, a qualified site review can help identify a suitable response.
