
Tracing Greenhouse Water from Roof, Ground or Condensation
Greenhouse troubleshooting
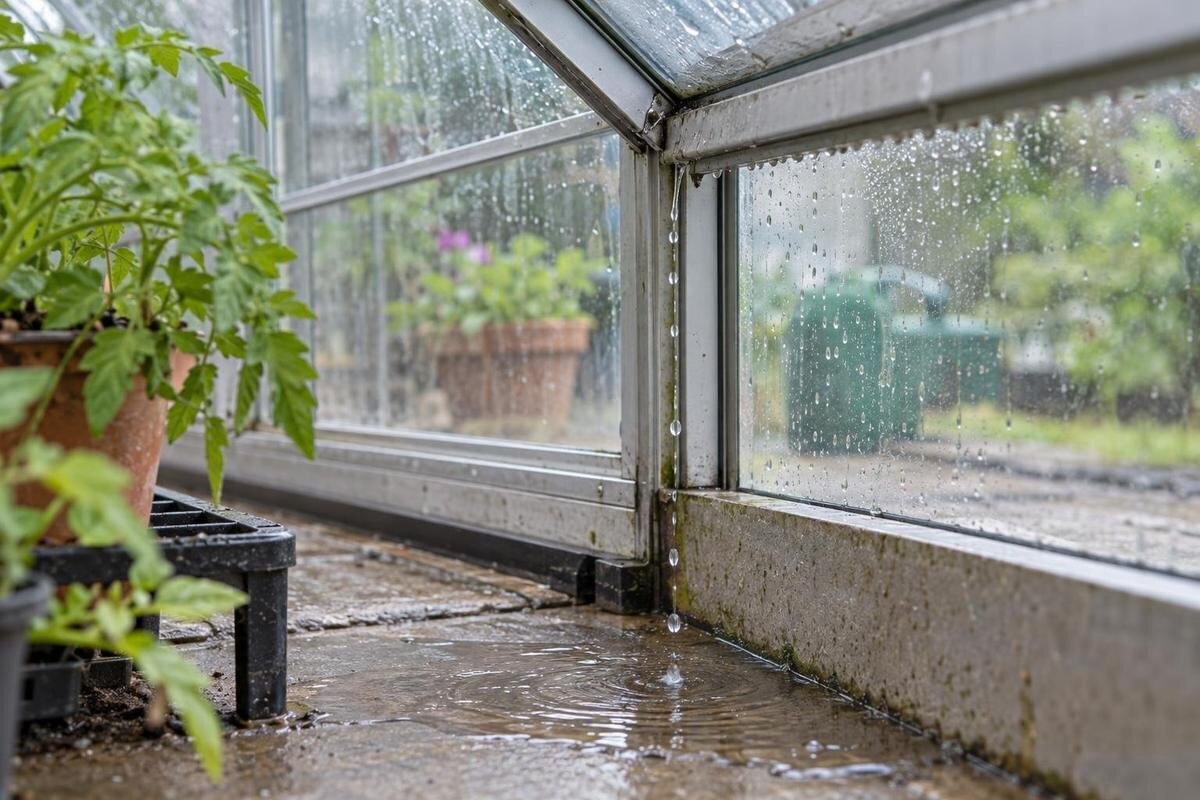
Water on a greenhouse floor does not, by itself, prove that rain is coming through the roof. It may enter at a low edge, travel in from nearby ground, arrive through irrigation or form as condensation on the inside before dripping down. The useful clues are the timing, the first wet point and the conditions that accompany it. A controlled sequence of observations can narrow the source without removing glazing or changing the structure.

Before requesting a repair 1
Start with when the water appears
A puddle shows where water collects, not necessarily where it enters. Before wiping everything, write down when you first noticed the water and what happened beforehand: rainfall, wind direction if known, watering, misting, a hose nearby or a change in ventilation. Note whether the floor was dry earlier and whether drops were actively falling, surfaces were beaded or the floor simply felt damp. ‘After rain’ is useful, but ‘during steady rain on the side facing the wind’ gives a more precise clue. If you did not see the water arrive, record the time as an estimate. Distinguish the time you discovered the patch from the last time you know the area was dry. For example, finding water in the morning does not establish that it arrived overnight unless you checked the floor the previous evening. This keeps the sequence clear without guessing.
Use timing as an initial clue, not a verdict. Moisture that appears only with rainfall suggests outside entry or runoff, but a rainy spell can also coincide with condensation. A patch after watering may come from a spill, a pot or an irrigation line. Dampness after the soil around the greenhouse has been wet for a while makes a low entry route worth checking. Drops on inner surfaces without rain point towards condensation. More than one cause can operate at once, so keep separate possibilities in your notes rather than forcing every wet spot into one explanation.
Map the first wet point
Once the floor is dry, where practical, sketch the greenhouse and mark the first place that becomes wet as well as any puddle that forms later. Use fixed landmarks such as a corner, door, frame line or growing bed so that you can compare observations on another day. If you see separate damp patches, mark each one rather than joining them into a single trail. A photograph from the same position can make small changes easier to spot, especially when the water appears gradually. Give each location a simple label and use it in your notes and photographs. Keep an observed water trail distinct from a route you only suspect: draw a connection only where you actually saw water travelling. This makes the sketch useful even when you have not yet identified the source.
The place where water collects may be some distance from where it entered. If safe, put a small piece of dry absorbent paper on the floor at a few suspected points and check which area becomes damp first; this can narrow the location, but it cannot identify the cause on its own. Keep the paper away from electrical equipment and do not place it on glazing or a frame. Record the model name from your paperwork too: if it says Bloomcabin Oasis Pyramid Greenhouse, copy that wording rather than relying on a vague description.
Before requesting a repair 2
Inspect for rain entry from above
During or after natural rainfall, look from a safe position inside for fresh beads, trails or drips on the underside of the roof. Note whether a mark begins at a joint, continues along a frame or appears beneath the same area each time. Compare the first wet point with the eventual floor patch; water can follow a frame before falling, so the puddle may not sit directly below the entry. A recurring route is more useful evidence than a single wet mark after a storm.
Use a normal standing position and do not climb onto the roof, lean on glazing or prise at a panel to inspect behind it. If a pane looks cracked, loose or displaced, stop and arrange an installer’s assessment. Avoid applying sealant to the nearest visible joint before the route is clear, since that can obscure the source. A range label such as Aluminium Classic Greenhouse is not enough to identify a particular panel or seal; include the full model variant when asking which documentation applies.
Separate wind-driven rain from a roof leak
Rain does not always enter from directly overhead. Wind can carry it towards a door, vent, side edge or wall junction, and water may also run down an outside surface before reaching a low opening. Note whether the dampness appears only when rain comes from a particular direction, and compare the exposed side with more sheltered areas. Moisture around an opening is a clue to inspect, not proof that a seal has failed; splash, runoff or an opening left ajar may also explain it. Record whether nearby doors and vents were open or closed when the wet patch appeared. If their position changed during the rain, note that too. Describe the conditions you observed rather than calling the opening defective, so that an installer can distinguish the location of the water from your suggested explanation.
For a wall-connected greenhouse, keep the wall junction separate in your notes from the roof-to-frame joints. Look from ground level for a visible wet trail on the wall and record where it meets the greenhouse, but do not remove trim or attempt to reseal the connection. If your paperwork identifies the unit as a Lean-to Greenhouse, include that model name and describe the wall-side location when seeking its instructions. Do not assume that advice for a freestanding structure applies to this junction.

Before requesting a repair 3
Investigate moisture around the base
Water near the perimeter can enter at a low edge, arrive as surface runoff or be associated with wet soil around the base. After rain, compare the inside floor with the ground immediately outside and note whether the dampness begins at one point or appears along several sides. A wet patch beside the base does not establish that the base is faulty: roof water can travel across the floor, and water from a nearby source can also reach the same area. Record whether the outside ground was already wet before the interior became damp. Where you can observe both safely, make paired notes for the same location inside and outside. State whether you saw water crossing the edge or only found wet surfaces on either side. The latter is still useful, but it does not establish the direction in which the water travelled.
Do not dig beside the greenhouse, lift the base, loosen fixings or alter the surrounding structure as a test. Those actions can change the conditions you are trying to understand and may need professional review. Photograph the wet area and note how it changes after rain or a dry period. If your records name a Prestige Greenhouse with Metal Base, give the complete model name in a repair enquiry, but do not treat the wording as proof that the base is the route water is taking.
Rule out irrigation and nearby runoff
Check whether the wet patch follows an ordinary watering routine. Look for spilled water, dripping pots, wet trays, a hose left nearby or a visible leak in an irrigation line. Note where watering takes place and when the floor becomes damp; a drip from a plant container can be mistaken for water entering from the structure. Keep routine conditions as consistent as practical while observing the greenhouse, so that a change in watering does not coincide with a change in rain or ventilation.
Also look for water coming from outside the greenhouse, such as runoff from a nearby downpipe, a garden tap or another surface. Compare the interior after rainfall with a period when it has not rained, and do not redirect runoff or dig to see what happens. If the paperwork identifies a Limited Edition Aluminium Greenhouse with Built-in Storage, mark whether the dampness is beside the storage, in the growing area or in both places. Keep those locations separate in the record rather than describing the whole interior as wet. If watering and rainfall occurred together, mark the observation as inconclusive instead of attributing it to either source. A later observation under different conditions may help separate them. This is more useful than changing the watering routine and the surrounding drainage at the same time.
Before requesting a repair 4
Recognise condensation on internal surfaces
Condensation forms when moisture in the enclosed air meets a cooler internal surface. It can appear as beads across glazing, frames or leaves, then run down and collect on the floor. A broad pattern on several inside surfaces, particularly when there has been no rain, is consistent with condensation; a single drip repeatedly starting at one joint deserves a separate check. The floor may become wet after the surfaces, so look at what is damp first rather than relying only on the puddle.
Note whether the beads are present before the floor becomes wet, whether they appear across several areas and whether the pattern recurs without rainfall. Record watering and ventilation at the same time, since both help describe the conditions inside. Compare the distribution of moisture, not just the amount: widespread beads and a distinct trail at one joint should remain separate observations in your notes. If one clears while the other remains, record that difference rather than treating all moisture as a single event. When requesting model-specific guidance, use the exact name from your paperwork and identify the affected surfaces. The Spacious Greenhouse listing can help identify the product you are asking about, but the observed pattern is what makes your moisture enquiry useful. Do not label every drop condensation when a repeatable entry point is visible.
Compare the likely sources in a controlled sequence
Begin with a dry baseline and your map of the floor and interior surfaces. Keep routine watering and ventilation as consistent as practical, then observe what happens during the next natural rainfall: note when the first beads or damp patch appear and where they begin. In a period without rain, check whether watering or condensation coincides with moisture instead. Compare observations from more than one occasion when possible, because a repeated pattern is more informative than an isolated event. Review each suspected source against the same questions: was it present, where did the water first appear, and did you see it arriving? A dry result is also worth recording, together with the conditions at the time. It provides a comparison, although one dry occasion does not explain every earlier wet patch.
Change only one manageable condition at a time. If a non-essential hose or watering source can be paused safely, record that change and see whether the pattern differs; do not alter several routines at once and then guess which one mattered. Avoid pressure washers or spraying the whole roof to imitate a storm: high-pressure water can enter where ordinary rain would not. If a controlled test is needed, ask the manufacturer or an installer for a safe procedure. Never climb onto the glazed roof or remove panels to test a suspected leak.

Before requesting a repair 5
Prepare a model-specific repair enquiry
Give the manufacturer or installer a concise record: the model name as printed on your paperwork, the first wet point, dated photographs and the conditions when the water appeared. Include wind direction if you know it, whether it was raining, where watering takes place and whether beads were visible on internal surfaces. A photograph of the whole greenhouse alongside close views of the damp area helps show its position. Lead with the clearest repeated observation, then add any exceptions. For example, distinguish a trail you watched forming during rain from a puddle you discovered later. If two areas behaved differently, describe each separately rather than combining them into one suspected leak. Label observations as certain or estimated rather than filling gaps with a guessed explanation.
Ask which manual applies and, if a part may be involved, for its exact spare-part identifier. A broad range name is not always enough to match a component, so copy any variant stated in your records; for example, Limited Edition Aluminium Greenhouse should not be assumed to identify every version or part. If the route appears to involve glazing, a frame or an inaccessible joint, request an installer’s review rather than removing or adjusting components yourself.
Know when an installer or replacement enquiry is needed
Pause the checks if glazing is cracked or displaced, the frame appears to have moved, the suspected route is inaccessible or you would need to climb or handle a panel to investigate it. Do not attempt glass work, loosen structural parts or make an unsupported alteration to the base. Share your map, photographs and timing notes with a qualified installer, who can review the greenhouse and its manufacturer’s instructions. A visible leak is useful evidence, but it does not by itself tell you which component should be repaired.
If an installer confirms that an appropriate repair is not available or that replacement is worth considering, treat it as a separate product enquiry. Do not assume parts from another model will fit or that a new greenhouse will resolve a water source that has not been identified. A listing such as T-Model Orangery Greenhouse can help you identify a product under consideration, but it does not establish dimensions, compatibility or suitability for your site. Check the specifications for the exact model before making a decision.
Frequently asked questions
How can I tell whether rain is entering through the roof?
Look for a repeatable trail or drip that begins on an upper interior surface during or after rainfall, and record where it first appears. A puddle directly below a roof joint is a clue, not proof: water can travel along a frame before dripping, while rain can also enter at a side or low edge.
Can water beside the greenhouse base come from the roof?
Yes. Water may run down a frame or across the floor before collecting at the perimeter. Compare the first wet point with the eventual puddle, and note whether the outside ground is wet as well. Do not assume that a puddle near the base means the base itself is the source.
Could condensation make the floor wet?
Yes. Beads on the inside of glazing or frames can run down and collect on the floor. Condensation is more likely when moisture appears on several internal surfaces without rain, but a concentrated drip at one joint may have another cause. Record what becomes wet first.
Should I spray the roof with a hose to find a leak?
Avoid pressure jets or spraying the whole structure, as they can force water into places ordinary rain may not reach and make the result difficult to interpret. First observe what happens during natural rain. If a controlled water test is needed, ask the manufacturer or an installer for a safe, model-appropriate method.
What should I include in a repair enquiry?
Provide the model name as shown on your paperwork, the first wet point, dated photos and notes about rain, wind, watering and condensation. Say whether the pattern has repeated and whether you can see water arriving. Do not remove glazing or guess at a replacement part; ask for the relevant manual or exact part identifier.
Keep roof entry, water around the base, irrigation and condensation as separate possibilities until the observations connect them to a repeatable route. A dry baseline, a map of the first wet point and notes about rain and watering often make the next decision clearer. If the route is unsafe or hidden, stop rather than dismantling the greenhouse; a precise record gives an installer a better starting point for checking the right manual and identifying an appropriate repair.
