
Separate Irrigation Zones for Greenhouse Pots and Beds
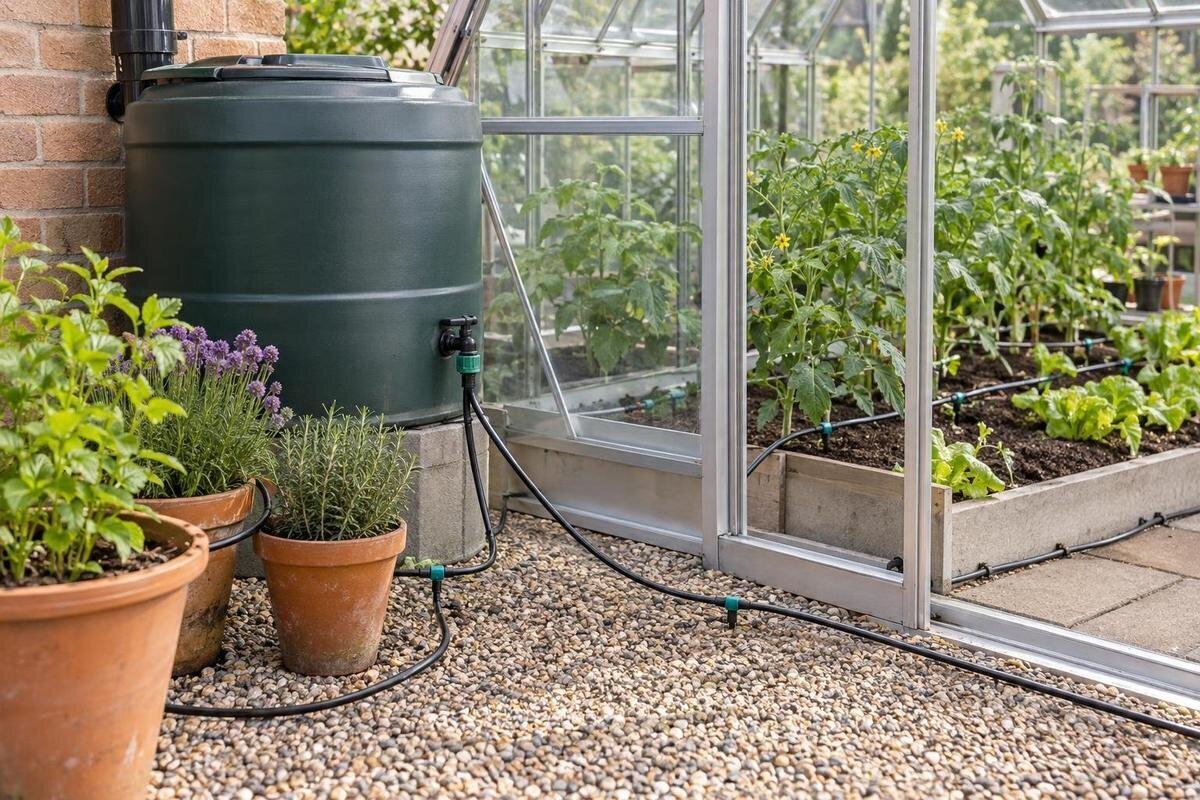
Greenhouse irrigation
Pots and planted beds can share a greenhouse without sharing a watering programme. Containers hold less growing medium and may dry at a different rate, while beds vary with soil, planting and depth. Separate irrigation zones let each group follow a schedule suited to its root space. The key is to group plants by observed moisture needs, then check actual delivery before relying on timer settings.

Why pots and beds often need different schedules
A pot and a bed can sit in the same greenhouse yet behave like different watering environments. A container holds a finite volume of growing medium, and its sides are exposed to moving air; depending on its size, medium and position, it may lose moisture faster than the bed. A bed offers a larger, connected root area, but its moisture still varies with soil texture, depth, compaction, planting density and drainage. A timer controls how long water is delivered; it does not measure what remains around the roots. One programme can therefore leave pots too dry while a bed is still damp, or keep pots wet while a bed needs more water.
Treat a zone as the outlets that are switched together and receive the same programme. Separate pot and bed zones are useful when checks show that they need different durations or watering intervals. They are not a rule that every greenhouse needs two circuits: a group of large pots may behave much like a bed, while small pots and mature containers may differ from one another. Start with the growing areas that show a real moisture difference. Add another independently controlled zone only when that difference is consistent and cannot be handled by grouping plants or adjusting emitter placement. The goal is not to water every plant separately; it is to stop one group’s requirements dictating the other’s.
Map the growing areas and water routes
Before buying a timer, valves or tubing, draw the greenhouse footprint and mark every bed, pot cluster, bench, doorway and main walking route. Add the water source and likely controller position, then sketch a main pipe route with branches to each growing area. Note which containers are likely to move, where paths must stay clear, and which beds need access for planting or harvesting. Label proposed watering groups even if you later combine them; this makes it easier to see whether a pot line needs its own run or would cross a working area. Include the tap or reservoir where it actually sits, rather than assuming it can be moved to a convenient point.
The Pyramid Greenhouse options are listed across floor areas from 5.53 m² to 18.9 m², so use the exact selected footprint when planning irrigation. A range alone does not show your benches, door position or pipe route. Mark those on the chosen plan, then check that each branch reaches its group without crossing a working path or relying on a pot staying where it may later be moved. If you are comparing structures, redraw the layout for each one; a change in footprint can alter where a bed, pot cluster or control point will fit.
Group plants by root space and water demand
Group plants by how much root space they have and how they use water, rather than putting every container in one category. Seed trays, small pots and large tubs hold very different volumes of growing medium. A small pot may need attention sooner, while a large container can remain moist longer, depending on its crop and mix. In beds, crops with similar demand can share a branch, but a high-demand crop beside a low-demand one may not suit the same schedule. Soil that drains freely also behaves differently from heavier or compacted soil. Keep the grouping practical: separate plants only when their needs justify independent control.
Make a short note for each proposed group: its crop or crop stage, root space, growing medium and usual drying pattern. Avoid mixing newly planted seedlings with established plants simply because they occupy the same bench. If storage affects the growing-area plan, mark its position before assigning pot clusters. The Limited Edition Aluminium Greenhouses with Storage range covers stated areas from 5.52 m² to 28.08 m². Work from the selected layout to see how storage, plants and access routes fit together. Use that plan alongside your notes on drying patterns to decide which containers can share a line and which need a different schedule.
Choose how each zone will be controlled
Once the plant groups are clear, decide which ones must be controlled independently. A straightforward arrangement might give pots and beds separate controller outputs, with another split only if a further group consistently needs a different schedule. Two pipe branches on the same valve still receive the same timing; they are not separate zones in the scheduling sense. Check the timer instructions to see whether outputs can run different programmes and how many independent channels it supports. Match the control plan to the irrigation system diagram rather than counting connectors or assuming that a multi-outlet timer gives each outlet a separate schedule.
Before selecting valves or a controller, verify that the parts work together with the water source and the irrigation system you intend to use. Check the stated operating requirements and whether the planned arrangement can supply each zone as intended. If you are also choosing a structure, the Prestige Greenhouse listing covers floor areas from 3.77 m² to 28.08 m². Keep the greenhouse specification separate from your irrigation equipment list: the structure’s size does not establish the number of channels, available water pressure or component compatibility. Do not assume watering components are included; base the control arrangement on the irrigation equipment you actually intend to buy.

Check root-zone moisture before setting a schedule
Set an initial programme from what the growing medium does, not from a universal number of minutes. For pots, check a few representative containers, including more than one size if the group is mixed. Look below the surface and around the root area rather than judging by the top layer alone. In a bed, check at a consistent depth where the crop’s roots are growing, and compare more than one spot. A surface can appear dry while deeper soil is moist, or look damp after watering while the root area remains too dry.
Record what you find before a planned watering and after a test run, then check again before the next planned run. Change one setting at a time—duration or interval—so you can tell what made a difference. Note unusual weather, changes in ventilation and crop stage alongside the results. When planning one of the Spacious Greenhouse options, listed from 47 m² to 70 m², mark the moisture-checking points for each proposed crop group on your layout. This keeps observations tied to identifiable growing areas rather than treating the whole floor area as one watering group. Avoid deliberately letting crops wilt to discover how long they can go without water.
Measure what the outlets actually deliver
A timer’s duration does not tell you how much water reaches a pot or bed. Emitters, tubing, the layout of a run and the supply can all affect delivery. To compare outlets, run one zone for the same measured period and collect water from representative points, including near and far along the line. Use the same kind of measuring container and record the volume in millilitres or litres. Repeat the check if results seem inconsistent. This simple test helps distinguish a scheduling problem from a delivery problem before you change the programme.
Compare your observations with the irrigation components’ instructions and any system diagram. Check for a kinked line, a leak, a blocked outlet or another obvious difference between points; do not lengthen the whole zone to compensate for one weak emitter. If delivery remains uneven, check actual pressure and flow rather than relying on an assumed figure. When drawing up an irrigation layout for a model from the Aluminium Classic Greenhouse range, mark the outlets you will use for these comparisons on the plan. Record their positions with the measurements so that later checks cover the same points. If pressure readings, flow measurements or system requirements are unclear, ask an irrigation professional to assess the setup.
Route separate lines where they remain accessible
Plan branches so each one reaches the pots or bed it serves without obstructing normal work. Keep pipe runs out of main walking routes where possible, and consider where you will need to reach them for planting, harvesting or inspection. Pots can be moved, so avoid treating a temporary position as permanent when deciding where a branch ends. Label each line by zone at a point you can still see after the greenhouse is in use. Clear labels make it easier to identify which control and outlets to inspect when a group dries differently from the rest.
Use the final structure plan to check door access, benches and the route from the water source before fixing pipe positions. If you are considering the Lean-to Greenhouse range, draw the proposed branches on the selected footprint alongside the beds and pot groups. Follow each route on the plan and note where planting, harvesting or moving a container could make access awkward. Keep the controls and line labels accessible as well as the outlets. Include any proposed gutter connection or other watering accessory in the equipment list, but confirm its availability and compatibility separately rather than assuming it comes with the greenhouse or suits the irrigation design.
Review schedules as crops and conditions change
A programme that works for one stage of the growing cycle may need adjustment later. Crop size, root development, planting density and the amount of growing medium can change over time. Conditions inside the greenhouse also vary with season, ventilation, shade and the position of plants. Check the root zone again when these conditions change instead of relying on an old timer setting. If one group repeatedly dries sooner than the rest, consider whether its containers, medium or position have changed before increasing the duration for every outlet on that zone.
Keep track of containers that move between benches or are replaced by pots of a different size; a group that once behaved consistently may no longer do so. If you are planning a layout for a model from the Limited Edition Aluminium Greenhouse range, mark both the initial pot positions and any intended seasonal changes before deciding where fixed lines will run. When the arrangement changes, check that each outlet still reaches its intended root area. Compare the needs of the containers now sharing each branch, rather than keeping them on the same schedule simply because the connection is convenient. Update the group notes when a move changes which plants belong together.

Programme and test each irrigation zone
Once the controller and valve arrangement are chosen, assign each watering group to its own labelled control. Record the programme for each zone, including its watering duration and interval, so the settings can be compared with your moisture observations. Check the controller instructions when entering the programmes: several outlets on a screen do not necessarily mean that each can follow a different schedule. Make sure the settings preserve the differences you identified between pots and beds. If the available controls cannot do this, revisit the choice of controller or compatible valve arrangement rather than settling for a shared programme that does not suit either group.
Test each zone on its own and confirm that the intended outlets receive water while the other zones remain under separate control. Match the controller label to the corresponding pipe label, then check that the programmed duration and interval agree with your record. For a planned layout using the T-Model Orangery Greenhouse range, listed from 16.52 m² to 30 m², use the same zone names on the layout and programme record. This makes it easier to connect a moisture observation with the setting responsible for that growing area. Complete the test by checking moisture at root depth and comparing delivery at representative outlets before relying on automatic watering.
Maintain the lines and reassess the zones
Include the irrigation lines in ordinary greenhouse checks. Look for leaks, loose connections, kinked tubing and emitters that no longer deliver as expected. Inspect and clean filters or outlets only as directed by the equipment manufacturer, and replace parts with components confirmed to be compatible. A blocked or damaged outlet can make a healthy schedule seem wrong. After cleaning or repair, run the affected zone and compare delivery again; the previous timing may not suit the system if its output has changed.
Use plant and soil observations as prompts to investigate, not as automatic instructions to extend a timer. A dry pot alongside a damp bed may point to different zone needs; several dry points on one line may instead suggest uneven delivery. Check the medium, outlet performance and placement before changing the schedule. Keep a simple log of programme changes, moisture checks and repairs for each zone. Over time, that record helps you distinguish a seasonal adjustment from a recurring fault and keeps independent pot and bed schedules useful rather than complicated.
Frequently asked questions
Can pots and beds use the same watering zone?
They can if checks show that both groups need a similar watering interval and duration. If pots dry sooner, or the bed needs a different amount of water, give them separate control. The aim is to match the schedule to root-zone moisture, not to separate plants simply because they are in different places.
How many irrigation zones does a greenhouse need?
There is no fixed number. Create enough independently controlled zones for groups that consistently need different schedules. Pots and beds are a useful starting division, but similar containers may share a zone, while a mixed bed may need a split if its crops have different water needs.
How do I work out the watering duration?
Check moisture around the roots before and after watering, and measure what representative outlets deliver over the same timed run. Adjust the duration or interval gradually, then check again. There is no universal run time: outlet flow, growing medium, pot size, crop and greenhouse conditions all affect the result.
Do I need a separate timer for pots and beds?
Not necessarily. A controller can manage both groups if it supports genuinely independent programmes or outputs, or if it works with a compatible valve arrangement that provides separate control. Two branches connected to one output still share its schedule.
Can one type of emitter water both pots and beds?
Possibly, if the equipment is suitable for both layouts and its operating requirements match the actual water supply. Check where water needs to reach each root zone, compare measured delivery at representative outlets, and follow the irrigation-system instructions. Use separate controls if the groups need different schedules.
Separate zones work best when they reflect a real difference in root space, drying rate or crop demand. Map the growing areas, group plants with similar needs, give genuinely different groups independent control, and verify both moisture and outlet delivery. Recheck the arrangement when crops, containers or greenhouse conditions change. That way, pots and beds can follow schedules that fit their own growing conditions without making the system more complicated than it needs to be.
