
How to Plan an Outdoor Sauna on Sloping Ground
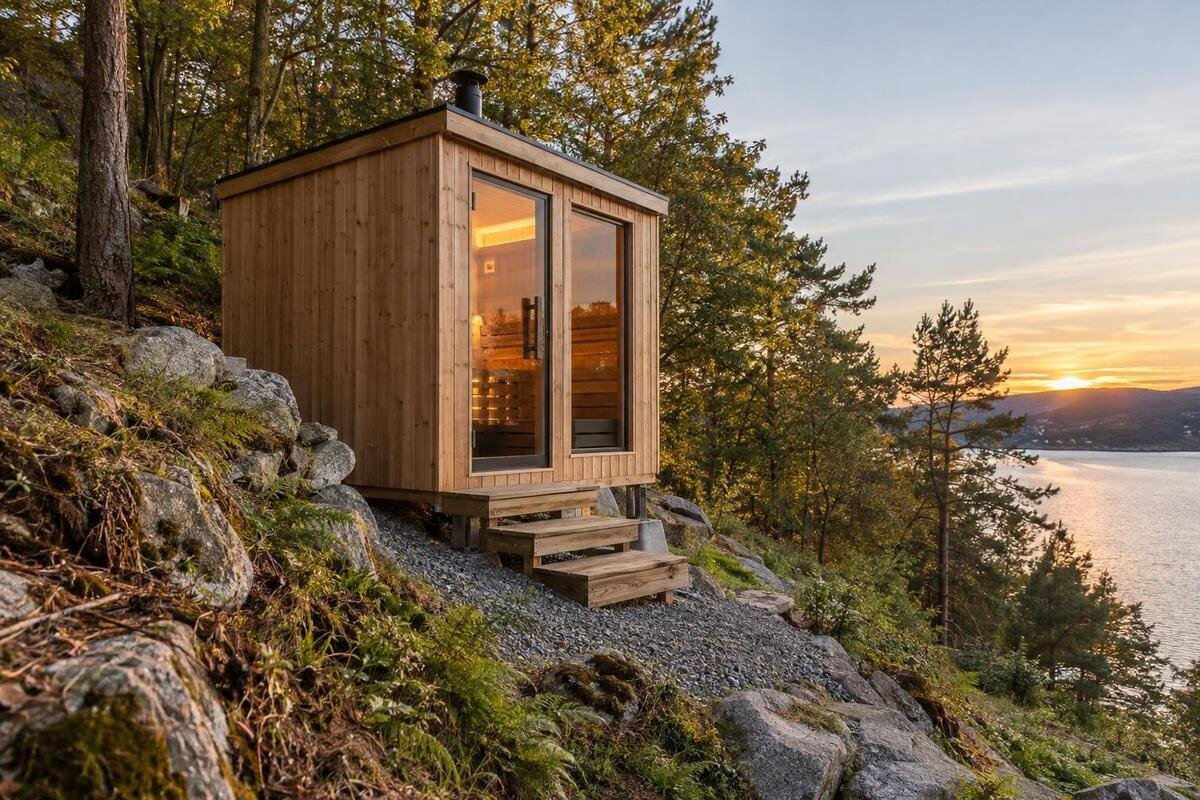
Outdoor sauna planning
An outdoor sauna can be planned on a sloping block, but the gradient affects more than how the finished space looks. It changes the relationship between the floor, entrance, supports and surrounding ground, and can alter where water travels after rain. A spot that looks nearly flat from one direction may still fall across the footprint; a broad slope may also conceal hollows, fill or seepage. Plan from measured levels and current documentation for the selected sauna, then get site-specific structural and drainage advice before deciding on a support arrangement or earthworks.
01
Assess the proposed sauna site
Treat the location as a small site-planning exercise, not a search for a patch that looks level from the patio. Mark the likely sauna footprint, the entrance and everyday approach, plus the space the manufacturer specifies around the selected unit for assembly, inspection or maintenance. Include ground above and below the footprint that could affect support or runoff, not just the area directly beneath the sauna. Note fixed features such as retaining walls, fences, trees and existing structures, along with boundaries and areas that must remain undisturbed. A slope just outside the outline can still influence water flow and access.
Walk the proposed area in dry weather and, if practical, after rain. Note where water crosses the site or sits, whether the surface shows rills or soft patches, and whether previous work appears to have changed the ground. Record observations rather than diagnosing them: a damp patch could reflect surface runoff, seepage or recent weather. Photograph broad views and each marked edge, and write down known fill, retaining work, drainage lines or buried services. Note when you saw a problem and whether it returns after rain. If you are considering two locations, record them separately. This gives the surveyor, drainage adviser and structural designer a shared starting point, not a substitute for their assessment.
Measure the slope across the footprint
Ask a surveyor to record levels at the proposed sauna location and along the route to its entrance. Mark the intended footprint corners, threshold, path edges and nearby high and low points before the survey is done. One measurement at the uphill edge cannot show whether the ground falls evenly, twists across the width or contains a hollow that may collect water. A block with a simple overall fall can still have smaller changes in direction. The information should be detailed enough for the support and drainage professionals to design from; the surveyor can advise whether a broader topographic survey is needed.
Use a clear fixed reference level, often called a datum, so the designer, builder and installer are comparing the same heights. Compare levels across the exact footprint and access route, not only from the front of the block to the back. A long fall may be gentle in one direction and sharper across the width, affecting the entry height and support layout. When requesting documents for Sauna LC-260, ask for the current external outline and any specified support or contact points. These details allow the designer to relate the sauna's position to the surveyed ground. Keep the original measurements with the plan so later estimates do not use a different reference.
02
Choose the position and orientation
Once the levels are clear, compare more than one possible position if the site allows it. Moving the sauna uphill or downhill, or turning it relative to the contours, may change the amount of level adjustment, the route to the entrance and the way water moves around the structure. A position roughly along a contour can reduce one kind of cross-fall, but it is not a rule: the ground may curve, and the entrance, drainage and designed supports must still work together. Compare each option for how much of the approach would change level, not simply which spot appears to have the smallest fall.
Mark the door side and approach on each option. Consider how the entrance relates to the house, privacy, outlook, path space and any retaining feature; leave enough room for the door to operate as the manufacturer specifies. Also check that the route can meet the threshold without sending surface water directly towards it. If Thermowood Barrel Sauna HCF-300 is on your shortlist, confirm the exact configuration and entrance position from current manufacturer information before finalising the sketch. Show the approach on each layout so you can compare everyday access as well as the outlook from the sauna.
Set the finished floor and threshold levels
Agree a finished floor level in relation to the ground after landscaping, rather than using the present lawn as the reference. Consider the floor, support arrangement, path and exposed downhill side together in a cross-section drawing. If the floor is set high, the approach may need a designed step or landing; if it is low, rainwater and surrounding surfaces can create problems at the threshold. Neither issue has a universal answer based on slope alone. The proposed height depends on measured levels, the sauna's installation instructions, the access route and the drainage plan. Include planned paving, edging or garden beds, as these can change the way surface water travels.
Ask the designer to identify both the proposed finished floor level and the finished ground level around the sauna, including its uphill and downhill edges. Show how the path meets the entrance and where any step, platform or landing would sit; confirm who will set these levels out. For Sauna LCF-300, request the current model-specific installation drawing and check which surfaces or points the stated levels refer to. Label these references clearly on the site drawing so the floor, threshold and supports are not confused. Clear level notes also help prevent a later path or garden finish from obstructing the planned drainage.
03
Have the support arrangement designed for the site
On sloping ground, a level-looking platform is not automatically a stable one. The support arrangement needs to suit the exact sauna, its specified support requirements, the surveyed levels and conditions beneath the proposed points of contact. The design should address differential movement and how the structure will be supported and restrained for that site. Do not choose a foundation type, support spacing, retaining system or amount of cut and fill from a general online diagram or a neighbour's installation. A detail that worked elsewhere may not account for your soil, slope, drainage or sauna model. The visible top surface is only one part of the support design.
Ask a structural engineer or another suitably qualified building professional to specify the stable support arrangement and any required connections, restraint and tolerances. Provide the exact manufacturer's drawings and explain the slope, surface condition, exposure, access limitations and known changes to the ground. For a candidate such as Sauna S-140, get the instructions for that exact model and configuration before the support design is settled. The designer should say whether further site investigation or specialist input is needed. Do not fill gaps in the design with improvised packing or on-site alterations; ask the designer to resolve uncertainties in the documented arrangement.
Check ground conditions and existing retaining work
The surface is not a reliable description of what lies below it. A sloping garden may include natural soil, imported fill, a buried garden bed, rock, erosion or moving water; past landscaping can leave conditions that are hard to judge from the lawn. Note visible signs such as settlement, cracks in nearby paving, exposed roots, washouts or a retaining wall that appears to have moved, but do not diagnose their cause. A wall is not automatically suitable to support a sauna, and signs of movement should be raised before the support arrangement is chosen. Even changes that look minor may affect a professional's assessment.
Tell the structural designer about known earthworks, retaining walls, drainage outlets, trees, services and any history of pooling or ground movement. Ask whether a geotechnical assessment or another investigation is warranted before the design is final, particularly where there is fill, a steep cut or evidence of change. Avoid planning a flat pad by cutting into a bank or adding fill without site-specific advice; those choices affect both support and water flow. Show the proposed position of Sauna HC-150 or your other shortlisted model so the assessment covers the ground where its supports would sit. Old landscape plans or photographs may help explain what was changed, but ground conditions still need to be assessed as part of the site design.
04
Plan drainage for the whole slope
Trace water across the whole slope, not just around the sauna footprint. Consider runoff arriving from higher ground, rain falling on the sauna, nearby roofs or paved areas, and low points below the proposed supports. Observe the site after rain if you can; note seepage, ponding, rills and places that stay damp, and record where the water appears to continue. Conditions can vary between dry and wet periods, so one visit may not show the full pattern. A drainage plan should deal with water sources and a suitable outlet, not merely hide a puddle at the uphill edge.
Have a drainage professional assess how finished levels, paths and any drainage measures can work with the support design. Ask where collected water is intended to discharge and whether that route suits the site; do not assume a trench, outlet or diversion can simply be added after construction. Avoid concentrating runoff against the uphill face, beneath supports or towards neighbouring land. For Sauna HC-225, request the current footprint and installation information so the drainage plan can be coordinated with the exact sauna rather than drawn around an assumed rectangle. The drawings should show the intended flow routes and how they meet the surrounding ground.
Design the everyday route to the entrance
Plan the ordinary walk to the sauna alongside the permanent support, not after it is in place. Draw the route from the house or main garden area to the entrance, including where it meets the threshold. A downhill approach, tight turn, uneven paving or abrupt change in level may be awkward in wet weather or after dark. Consider who will use the sauna, how they will carry towels or footwear, and whether the route needs a stable landing, steps or a handrail. The appropriate arrangement depends on actual users, site levels and applicable guidance. If users have different mobility needs, discuss those before the route is set.
Ask the designer to show the approach in plan and, where helpful, in a side view with finished path and entrance levels. That makes changes in height visible before work begins and allows steps, a platform or a handrail to be coordinated with the support structure. Do not copy a standard step layout without checking the available space and relevant local requirements with a suitable professional. If considering Sauna N-210, verify the door arrangement and selected configuration in current documents before fixing the path. Include the path finish in the drainage review so the route does not become an afterthought.
05
Coordinate services and maintenance access
Resolve the operating requirements of the chosen sauna before setting final levels. The selected heater, and any associated electrical, fuel or flue arrangements, may affect service routes, clearances and the access a qualified installer needs. Requirements vary by model and configuration, so use current manufacturer instructions and advice from appropriately qualified trades rather than a generic sketch. On a slope, an exposed support area or a high downhill edge can affect where services pass and how they remain accessible. Show proposed routes on the site plan before the support design is fixed, not after the platform has been built.
Include maintenance access as well as the route used by sauna users. Confirm how the chosen unit is assembled, what needs to remain accessible for inspection or servicing, and whether path finishes or drainage features would obstruct that access. Have relevant trades coordinate service routes with the support and drainage designers; do not make an unreviewed change to the structural arrangement to accommodate a late route. If Thermowood Barrel Sauna N-250 is your preferred model, request current installation instructions for the exact sauna and heater configuration and put those requirements on the same plan as the levels, path and runoff. Record any options that change service requirements.
Keep the site plan coordinated
Before site work begins, bring the survey, current sauna documents, support design, drainage advice and access layout together. Confirm they use the same footprint and height reference and show intended finished ground, entrance position and service routes. If one drawing assumes a level pad while another shows a raised or stepped support, ask the designers to resolve the mismatch rather than leaving the installer to reconcile it on site. A location or ground change after design may alter support needs or water flow, so report it to the relevant professional before proceeding. Keep a dated issue of the coordinated plan so everyone can identify the current version.
Ask who will set out the levels, who will confirm the prepared site matches the design, and who will record any agreed changes. Check with your local council or a relevant building professional which approvals or other requirements apply to your site and proposed work; circumstances vary, so a general guide cannot settle that question. Keep the final drawings available to the installer and whoever maintains the site. A coordinated plan gives everyone a shared reference and leaves fewer decisions to guesswork, especially where the approach meets the sauna entrance.
Frequently asked questions
Is there a maximum slope for an outdoor sauna?
There is no single slope limit that suits every sauna and site. The relevant factors include the exact model, ground conditions, support design, drainage and access. Have the proposed location surveyed and assessed by suitable professionals rather than treating a slope measurement as proof that a particular installation will work.
Can I level the area by cutting into the bank or adding fill?
Do not choose a cut or fill approach without site-specific advice. Either can change ground support and water flow, and the implications depend on the site. Ask the structural designer whether further ground assessment is needed, and have the drainage implications considered before any earthworks are planned.
What foundation should I use on sloping ground?
There is no universal foundation choice for a sloping block. The support arrangement needs to suit the sauna's current installation requirements, surveyed levels and ground conditions. Ask a structural engineer or suitably qualified building professional to specify an arrangement for the actual site; a detail used elsewhere may not apply.
How do I plan drainage around a sloping sauna site?
Observe where water comes from, crosses the proposed area and goes after rain. Include runoff from higher ground and nearby surfaces, as well as the intended path and sauna position. A drainage professional can assess the finished levels and suitable discharge route alongside the support design; do not rely on an improvised diversion.
Should the entrance face uphill or downhill?
Neither direction is right for every site. Compare possible orientations against the surveyed levels, everyday approach, threshold height, door arrangement and water flow. Confirm the selected sauna's configuration from current manufacturer information, then have the path and support arrangement designed around that specific position.
A sloping block does not automatically rule out an outdoor sauna, but it makes the relationship between ground, support, water and entry a design problem. Measure the full footprint and route, define the finished levels, and have the support and drainage assessed together for the particular site and sauna. Use current manufacturer information and qualified advice before choosing earthworks or fixing the final position. When those decisions appear on one coordinated plan, the installer can work from defined levels instead of trying to make a difficult site fit a generic solution.
