
Why Is My Automatic Greenhouse Vent Opener Still Closed?
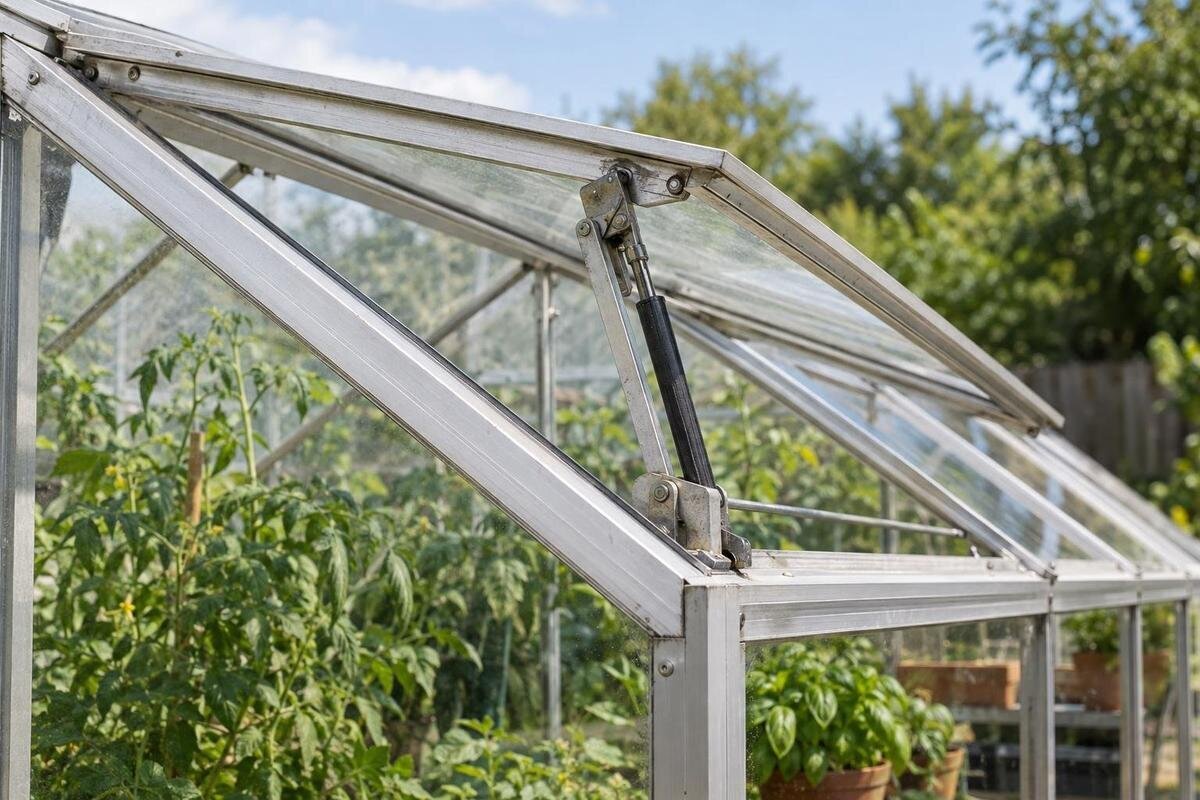
Greenhouse ventilation troubleshooting
An automatic greenhouse vent opener that stays closed is not necessarily faulty. It may not yet be warm enough at the actuator, an adjustment may be wrong, or the vent may be obstructed or carrying more load than the opener is designed for. Because designs and adjustment methods differ, use the manual for the exact opener model. Work through temperature, setting and movement checks in that order; note what you see before changing anything or trying to move the vent by force.

What the opener is designed to respond to
Most automatic greenhouse vent openers respond to temperature, but systems differ: a mechanical unit reacts to heat around its actuator, while an electronic setup may rely on a separate sensor and controller. A vent that is shut at one moment is not, by itself, proof that the opener has failed. The device may not yet have reached its specified opening condition, even if the centre of the greenhouse feels warm. Glass, frames and the air around each opening can warm at different rates, so diagnose the particular vent rather than assuming every window should move together. In an electronic system, the panel’s reading may come from a sensor elsewhere.
Find the opener’s make and exact model from its label, receipt or installation paperwork, then locate those instructions before touching an adjuster, pin, bracket or controller. Similar-looking units can have different operating ranges, travel and test methods. Check whether yours is temperature-responsive or electronically controlled, and whether its sensor is separate from the actuator. If the label is unreadable, photograph it and ask the supplier or installer to identify it. A generic guide cannot establish the correct opening temperature or a safe test procedure for an unidentified model.
Measure the temperature beside the opener
Use a separate thermometer close to the actuator or sensor, without touching, covering or obstructing it. Record the time, the reading and whether the vent is fully shut, starting to move or partly open. Compare that reading with the opening temperature or range in the exact manual, if one is given; do not substitute an outdoor forecast, a hand on the glass or a reading from the opposite end of the greenhouse. Let the thermometer settle and take subsequent readings in the same place. If the manual specifies where a sensor should sit, do not move it to coax a response or make the readings easier to compare.
Take several readings through a warm part of the day and, if useful, as the greenhouse cools. Keep the temperature beside the opener separate from any general greenhouse reading. Humidity is useful context, but a temperature-only opener will not use it as a command; check the manual for a humidity sensor or controller before treating moisture readings as relevant. Record the structure’s exact range name alongside the opener model, for example Classic aluminium greenhouses, so a support enquiry identifies the greenhouse as well as the mechanism. The product name alone does not confirm vent specifications.
Allow for gradual movement before calling it a fault
Allow for gradual movement. On a temperature-responsive unit, the condition at which opening begins may not be the condition for full travel, and the manual may describe a range rather than a single switching point. A brief spell of sun is not a reliable test if the actuator has not warmed through; likewise, a vent may not close at the same moment that it began opening as conditions change. There is no universal number of minutes that applies to every opener. Judge the response against the instructions for that model, not another greenhouse owner’s timing.
Watch the same vent over more than one suitable cycle, noting whether it stays still, moves part-way, starts and stops, or opens and later closes. These patterns help separate a temperature question from a movement problem, but they do not identify a failed part on their own. Mark exactly which opening you observed; on a Lean-to greenhouse, saying which vent you mean is clearer than recording only that the greenhouse stayed shut. Another vent may have different exposure or fittings, so it is not a reliable calibration point. Do not pull or push the sash to speed up the observation.
Change an adjustment only as the manual directs
Adjustment is model-specific. Some openers let the user alter the temperature at which movement begins; other designs may provide a separate travel or stop setting, while some have no user adjustment at all. Those settings do different jobs. Read the exact manual to find what the adjuster changes, whether adjustment is permitted while installed and what direction or increment is specified. If the instructions do not identify a part as an adjuster, do not treat a screw, nut or threaded section as one. With an electronic system, also distinguish a temperature setting from a timer or operating mode.
Before an authorised change, note or photograph the original position and follow the stated method exactly. Change only one setting at a time, then repeat the same temperature and movement observations so you can tell what changed. If the response worsens, use the manual to establish whether and how to restore the original setting. Do not copy a turn count from a different brand, or heat the unit with a flame, hot water or a heat gun. For an opener fitted to a Limited Edition aluminium greenhouse, check whether the adjustment instructions are included in the greenhouse assembly guide or supplied in a separate opener manual.

Check the vent’s path for obstructions
Inspect the visible path around the vent while it remains in its normal installed position. Look for a plant tie, hanging net, shade fabric, cable, label, latch or debris catching on the sash, and check whether a handle or catch is still engaged. Look along the hinge and frame for a part visibly fouling movement. A small obstruction can stop a window even when the actuator itself is working, but do not assume that is the cause until temperature and permitted settings have been considered. A path that looks clear with the vent closed may still be obstructed as it moves. Work from a safe position; do not climb on the greenhouse, lean on glazing or reach over an unstable opening.
Note where motion stops if the vent begins to move, but do not force it to locate a sticking point. A fault at one part of the travel can point to a catch, rubbing frame or attachment; a stationary vent still needs the other checks. Do not remove the opener or lift the sash to test it unless the exact manual gives that procedure and you can do it safely. Photograph the full window, frame and surrounding area, and label the image with the house range, such as T-shaped orangery greenhouse. Stop if glazing is cracked or the frame shifts.
Confirm the opener is matched to the vent’s load
An opener must be specified for the particular vent and used within the maker’s stated limits. Compatibility may depend on the window’s size and weight, hinge arrangement and mounting position; a product title or a similar-looking actuator does not establish any of those details. A screen, blind or shade attached to the moving sash can add resistance or snag, as can a plant support or tie. Check the opener and greenhouse instructions for what is allowed, and do not try to estimate the load by lifting the window or judging it by feel. Ask the supplier what details are needed if the instructions are unclear.
Think about what changed before the fault appeared: a new accessory, altered hinge, replacement vent or shifted fitting can change movement. Wind may also affect a window while it is open; note whether the symptom occurs only in particular conditions rather than compensating with an unapproved adjustment. Do not add a second opener, spring, counterweight or improvised support unless the manufacturer confirms it for that vent. When comparing replacement openers for a Pyramid greenhouse, ask about the particular window and any accessories attached to it. A match needs to account for the vent as it is currently fitted, not simply the greenhouse range.
Inspect the mounting and hinge without forcing them
Without dismantling the assembly, look for a bracket that appears to have shifted, an obviously loose fixing, a bent arm, a pin out of place or visible hinge damage. Check that the actuator and linkage sit as shown in the installation instructions. A changed angle or an incorrectly seated connection can interfere with movement, but sight alone cannot show whether a component is safe to tighten or reposition. Do not test the bracket by shaking it, straighten a bent part, pull out a retaining pin or tighten an unfamiliar screw. If the frame moves, the glazing is damaged or the vent feels unstable, stop and seek help.
Take clear photographs from the side and front, showing the bracket, hinge and closed vent, without putting your hands in the linkage. Compare them with the instructions for the exact opener rather than an image of a similar unit. If the instructions show several mounting arrangements, identify the one intended for your vent before drawing conclusions about a bracket's position. For a Limited-Edition aluminium greenhouse with storage, use the installation information for that exact model rather than a similarly named range. Note any visible difference for the installer, but follow the manual before attempting to re-seat a connection or reposition a fixing.
Record readings and take useful photographs
A short fault log makes changing conditions easier to separate. For each check, record the date and time, temperature near the opener, general greenhouse temperature if available, humidity if you already monitor it, and whether the vent is shut, partly open or moving. Add relevant observations such as direct sun, shade, wind or a recent change to the fitting. Keep the thermometer in the same place and use the same scale each time. A sequence of comparable readings is more useful than a single peak temperature or a note that the greenhouse simply felt hot.
Photograph the opener’s label, its installed position, the hinge and the whole vent path; do not remove a cover or cylinder just to find a marking. If recording movement, keep hands and tools clear, and add the time and temperature to your notes rather than trying to hold the sash. Give each photograph a clear description so the supplier can connect a close-up with the correct window. Record the greenhouse model, such as Prestige greenhouse with a metal base, once at the top of the log, with the opener details beneath it. Keep observations separate from guesses about which component has failed.

Keep the greenhouse ventilated while you investigate
If the closed vent is causing an immediate heat concern for plants, use another door or opening only if it can be operated safely and the greenhouse maker’s guidance permits it. Do not wedge the vent open, disconnect the actuator or bypass an electronic controller unless the exact manual describes a safe method. A temporary change can leave the structure differently ventilated as conditions alter. Keep clear of moving parts, and do not leave a sash unsupported or unsecured where it could move unexpectedly. If you are unsure whether another opening is safe to use, ask the installer rather than improvising a prop.
Shading can reduce direct sun reaching the greenhouse, but it cannot repair an opener that is shut because of a setting, obstruction or mismatch. Keep shade fabric, insect netting and any cable clear of the moving sash and linkage; remove an attachment only in a way its maker permits. Avoid creating a new snag while trying to address heat. If no other opening can be used safely, do not force the stuck vent: contact the greenhouse supplier or installer for a suitable temporary option. Keep the temperature record going so the effect of any safe change is clear.
When to contact the supplier or installer
Contact the opener supplier, greenhouse maker or a qualified installer if the vent remains shut at the operating conditions specified in its manual after visible obstructions and authorised settings have been checked. Stop sooner if a bracket or hinge is damaged, the sash binds, glazing is unsafe, or inspection would require climbing or forcing the assembly. Ask whether the opener is intended for your exact vent, which adjustment is user-serviceable and whether there is an approved manual release or test. For an electronic system, include any message visible on its display without opening the housing. Share the log and photographs rather than naming a failed component on guesswork.
Before ordering a replacement, confirm the opener model, greenhouse range, vent position and compatibility instructions; appearance alone is not enough. If ordering for a spacious orangery greenhouse, make clear whether you need a complete mechanism or a replacement part for the existing unit. Give the supplier the vent details requested and ask which existing fittings, if any, are intended to remain in use. Keep the proposed replacement details with your fault log so the enquiry covers both the original problem and the part being considered. Leave the assembly undisturbed while the correct replacement and test method are being established.
Frequently asked questions
Why does the vent stay shut when the greenhouse feels warm?
The air beside the actuator or its sensor may still be below the opening condition in the manual, or the unit may need more time to respond. A thermometer at the other end of the greenhouse, direct sun on one pane or a short spell of warmth can give a misleading impression. If readings beside the opener repeatedly meet the manual’s stated conditions without movement, check the permitted adjustment and visible obstructions before seeking model-specific help.
How long should an automatic vent opener take to open?
There is no universal time. The response depends on the opener’s design, how quickly the actuator or sensor warms, the conditions specified in the manual and whether the vent moves freely. Observe the same window as conditions change and compare what happens with the exact model’s instructions. Do not heat the opener or pull the sash to speed up the test.
Can humidity stop a greenhouse vent opener from opening?
A temperature-only opener does not use humidity as a trigger. An electronic controller may have additional sensors or settings, so check the manual for the exact system. Record humidity as context if useful, but treat it as a control input only if the instructions say it affects ventilation.
Can I push the vent open or turn the adjuster by hand?
Do not force the sash or move it while the opener is connected unless the exact manual describes a safe override procedure. Adjust only a part specifically identified as user-adjustable, using the stated method. Forcing the window can damage the linkage or hide where it binds; an incorrect adjustment can also change when opening begins.
Should I replace the opener if it stays closed?
Not on that symptom alone. Compare the temperature at the opener with its manual, then check only authorised adjustments and visible obstructions, loading and mounting. If it repeatedly fails to respond under the specified conditions, or parts appear damaged, ask the supplier or installer to confirm the opener’s compatibility and the correct test method. Share the model details, readings and photographs.
Treat a closed vent as a symptom to investigate, not proof that the opener needs replacing. A temperature reading taken beside the actuator and compared with its own manual can help distinguish a normal response from a problem. Then check only documented adjustments, visible movement, loading and mounting. Keep notes as you go, and stop if the vent or frame looks unsafe. When the opener still does not respond under the specified conditions, model-specific advice is safer and more useful than forcing the mechanism or fitting a similar-looking part.
