
Calculating Greenhouse Bench Space for Spring Trays
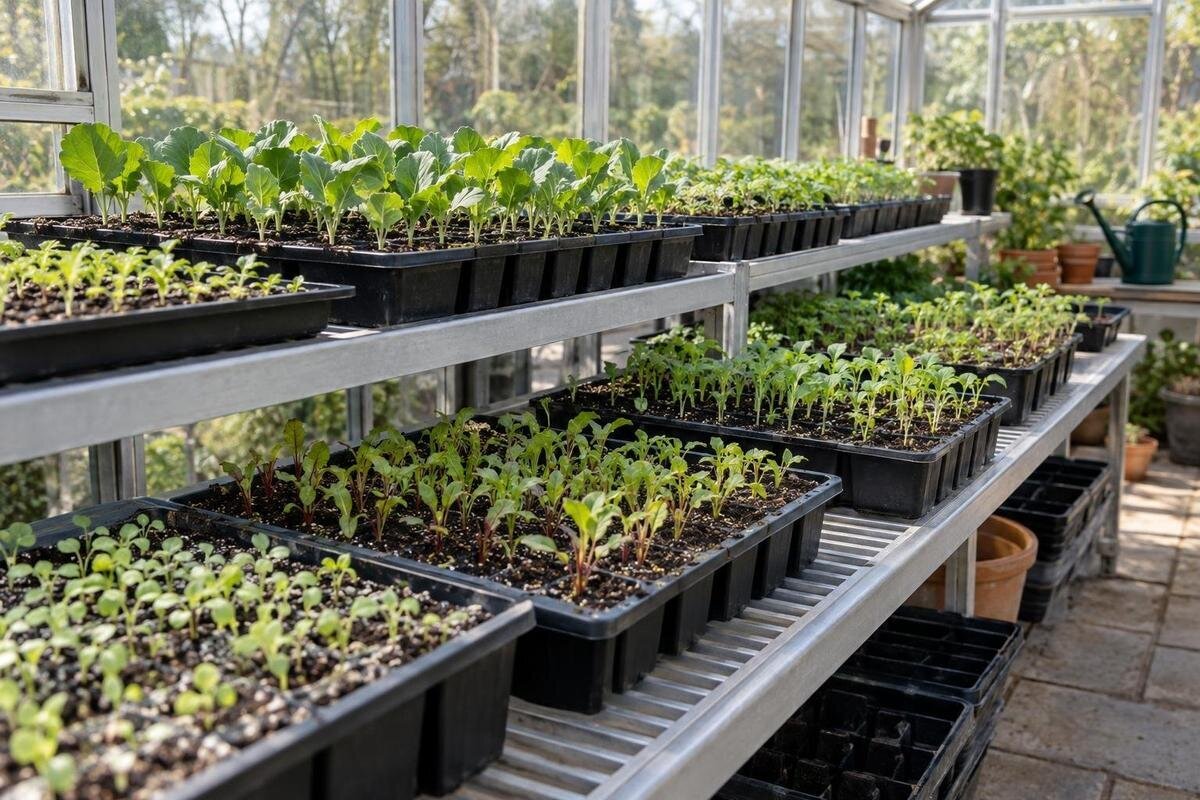
Greenhouse planning
Spring tray space is easy to underestimate when each sowing is considered on its own. The tightest point comes when an earlier batch is still on the bench as the next one arrives, or when seedlings move into larger containers. A useful plan combines a dated sowing schedule with the dimensions of every usable bench and the outside footprint of each tray. The result is a peak-capacity figure you can compare with a physical layout, rather than a guess based on greenhouse floor area.

Calculate peak demand from overlapping batches
Plan around simultaneous occupancy, not the total number of seeds sown across spring. One batch may leave the bench before a later sowing arrives, while two others may overlap. For each batch, note when it reaches a greenhouse bench and when it leaves that surface. If an early stage is in a separate propagator, record that time separately: it does not use greenhouse bench space until the trays move there. Your peak is the highest number of tray footprints present together, not the number sown in a month. The Classic greenhouse range is listed from 3.77 m² to 28.08 m²; that floor-area range is a building-size reference, not a calculation of your busiest week’s tray demand Classic greenhouse sizes.
Set up a calendar with weeks or dates along the top and one line for each batch. For example, batch A might use four trays from week 1 to week 4, batch B three trays from weeks 2 to 5, and batch C five trays from weeks 4 to 6. The combined totals are four, seven, seven, twelve, eight and five trays across those weeks, making week 4 the peak. These figures are illustrative, not a sowing recommendation. If trays move part-way through a week, record the actual dates so a weekly total does not imply that batches overlap when they do not. Repeat the count for every batch that could arrive before earlier plants move on.
Measure the bench surfaces you can actually use
Measure each bench, shelf or other intended tray surface independently. Record the clear length and depth of the top that can hold trays; do not substitute greenhouse floor dimensions or a product’s floor-area figure. Where a bench is interrupted by a post, fixed unit or cut-out, measure the usable parts separately. If its outline is irregular, sketch it and divide it into simple rectangles that do not overlap. A surface counts as usable only if trays can sit there without covering a permanent fitting or making the area inaccessible for ordinary care.
Label every measurement on a rough plan, keeping bench tops separate from aisles, door space, worktops and other working areas. Add different surfaces only after checking that each can take the tray sizes you intend to use; a long, narrow run and a square bench with the same area may fit different numbers of trays. The Lean-to greenhouse range is listed from 3.69 m² to 14.34 m², but the chosen layout still needs a measured bench plan because floor area is not tray-bearing surface Lean-to greenhouse sizes. Count shelves as separate levels only if they are accessible and suitable for the plants. If you are unsure whether a shelf is intended to support your use, check with its supplier rather than assuming it adds capacity.
Keep access and work areas out of the tray count
Bench area and working area have different jobs. Mark the places you need to open doors, reach plants, move trays, label seed and set down equipment. A tray might physically fit in a walkway, but treating that space as permanent propagation capacity can make routine work awkward or block access. If you plan to use a surface for temporary staging, label it as staging and note when it is occupied instead of silently adding it to every week’s capacity.
Give fixed zones their own labels on the sketch: for example, a surface for newly arrived seedlings, space used while pricking out, and an area for potting or tools. That makes clear which surfaces can change use and which cannot. Do not count a worktop as full-time tray space if you need it for another task during the same peak. When comparing sizes in the Limited Edition aluminium greenhouse range, listed from 3.77 m² to 28.08 m², include these work and access zones in each proposed layout. This keeps essential working space visible alongside the benches you intend to fill.
Measure the outside footprint of each tray
Use the outside dimensions of each tray or carrier, not the cell size or number of seeds. Measure the widest edges, including a rim, handle or attached base if it stops trays sitting flush. If trays sit inside a larger carrier, count the carrier’s footprint. Record each type separately: seed trays, module trays and trays holding larger pots may not occupy the same area. Also note whether you deliberately leave room to lift trays or reach them during care. Your plan should reflect how you will actually arrange and handle the trays, rather than an idealised layout that is difficult to use.
For a worked example, suppose a bench is 180 cm long and 60 cm deep, and a tray measures 52 × 31 cm. With 52 cm along the bench, three trays fit along its length and one across its depth: three in total. Rotate the tray and five fit along the length and one across the depth. The bench area divided by one tray’s area gives about 6.7, but that does not mean six trays fit; the leftover strips are in the wrong proportions. Check any gaps you need for access, as they may reduce the count further. When considering the T-Model orangery greenhouse sizes, listed from 16.52 m² to 30 m², use your tray measurements to test the proposed benches in this way.

Test tray layouts on each bench separately
For a rectangular bench and one tray size, test both orientations. Divide the bench length by the tray length and its depth by the tray width, round each result down to a whole number, then multiply them. Rotate the tray and repeat. These are maximum grid counts before any additional clearance you need. For several bench sections, calculate each one separately and add the results; a leftover strip on one bench cannot fill a gap on another. If tray footprints differ, draw the actual combination instead of dividing total bench area by an average tray area.
A scaled sketch makes awkward corners, posts and access gaps easier to see. Use graph paper or a drawing where each square represents a set number of centimetres, then mark the benches, fixed fittings and tray rectangles. Test the mix required for the peak week, not just one batch. If you are considering the Pyramid greenhouse range, listed from 5.53 m² to 18.9 m², make a separate sketch for the size you have in mind. Before relying on a drawn fit, check the actual internal plan and intended bench positions, including any interruptions to the surfaces you have drawn.
Record bench occupancy dates
Occupancy dates matter as much as tray counts. For each batch, record its name or crop, sowing date, first date on a greenhouse bench, tray count, each move to another container and the date its trays leave that surface. Use species-specific growing guidance and your own propagation records to estimate the interval; there is no single spring timetable for every crop and growing set-up. Mark estimated dates as provisional. After the season, replace them with actual dates so the next overlap calculation is based on what happened rather than on an untested assumption.
Separate time in a propagator or another location from time on the greenhouse bench, and record each transfer. If a batch moves in stages, enter the groups separately when their dates change the weekly peak. Your calendar should also identify the bench or zone each group will occupy. For a layout using the greenhouse with built-in storage, listed from 5.52 m² to 28.08 m², mark the storage zone on the accompanying plan. Keep it separate from the growing surfaces assigned to batches so the calendar and layout describe the same available space.
Allow for the change to larger containers
Include the change in footprint when seedlings move out of small seed trays. The item count may fall while the surface needed grows, because larger cells, pots or pot trays take up a different area. For each batch, keep separate counts for the seed stage and the later stage, using the measured dimensions of the containers that will actually sit on the bench. Replace the earlier footprint when those trays leave; do not add both stages unless your real handling process keeps both groups on the bench together.
For example, four original trays might become three larger pot trays. Three is a smaller item count, but it does not prove the new group fits into the old space. Draw the pot trays at their measured size and check any period when the transfer is only partly complete. This move can create a second peak after the sowing rush, so include it in the same dated or weekly totals. When comparing the Prestige greenhouse sizes, listed from 3.77 m² to 28.08 m², test the later-stage container layout as well as the seed-tray layout before settling on a bench arrangement.
Choose a reserve based on likely delays
Treat the calculated peak as a baseline, not a promise that every batch will leave on the planned date. A postponed potting session, a delayed transfer or a deliberately larger sowing can keep trays in place longer. Rather than applying an arbitrary percentage to the whole greenhouse, review your records and test a practical contingency. For instance, calculate what happens if one batch occupies its bench for an extra week or needs one more tray. Keep the assumption visible so you know whether the plan depends on a specific transfer date or batch size.
Suppose your normal peak is twelve tray positions and your records support keeping two more positions free. In that example, plan for fourteen positions of the relevant footprint; it is not a universal rule. If you are comparing the Spacious Greenhouse sizes, listed from 47 m² to 70 m², mark the reserve positions explicitly on each proposed bench plan. A reserve is useful only when it is on a measured surface you can reach and use. If no suitable spare positions remain, treat that as a scheduling or capacity issue rather than assuming spare floor area will solve it.

Resolve a shortfall before the busiest week
If the peak layout exceeds the available benches, identify the exact week and tray sizes causing the shortfall. Consider whether a batch can be staggered within an appropriate sowing window, whether fewer plants meet your needs, or whether another suitable growing area can take some trays. Each change affects timing or care, so use the guidance for those crops rather than moving a date just to make a spreadsheet balance. If you add or alter benches, count only surfaces intended for the purpose and accessible for normal tasks.
Recalculate every week after making a change. A later sowing may reduce one overlap but create another; moving a group frees bench space only if its destination and timing are workable. Keep the original and revised peak side by side so you can see which change reduced pressure. If you are still choosing a greenhouse, compare the required bench map with verified internal dimensions for the particular size. Do not infer bench length, bench height or room for paths from a stated floor area.
Keep a record for next spring
Store the plan in a simple spreadsheet or notebook that you can reuse. Give each batch a line and record its planned sowing date, tray count and footprint, expected bench entry and exit dates, later container footprint, and the bench or zone it will use. A weekly total beneath the batch entries shows when demand rises above the capacity you measured. Add a separate note for reserve positions so spare capacity is not confused with trays already occupying the bench. Mark estimates clearly until the dates are confirmed.
At the end of the season, compare the predicted peak with the actual one. Note which batches stayed longer, which containers changed footprint and whether a planned surface was unavailable for normal work. Update the measurements if benches or tray types change instead of carrying forward an old capacity figure. A useful summary names the busiest dates, the number and size of trays present, how many the measured benches held and how many positions remained. That record gives next spring’s calculation a practical basis.
Frequently asked questions
Can I estimate bench capacity from the greenhouse’s floor area?
Not reliably. Floor area describes the greenhouse footprint, while trays sit on particular bench surfaces. Measure each usable bench, allow for its shape and access, and test your tray dimensions against the surface. Two layouts with the same floor area may provide different usable bench arrangements.
How do I count overlapping sowings?
Record how many trays from each batch are on a greenhouse bench during each week or date range. Add only the batches that are actually there at the same time, including any overlap during moves to larger containers. The highest combined total is your peak demand.
Is dividing bench area by tray area enough?
It is a rough check, not a capacity count. A tray can leave unusable strips even when the area calculation suggests it should fit. Measure the tray’s outside footprint, test both orientations on each bench, and account for gaps or access you need.
What if I do not know how long each batch will occupy a bench?
Use species-specific growing guidance and any propagation records you have to make an estimate, and mark the dates as provisional. Record actual bench entry, transfer and exit dates during the season. Those observations make the next spring’s overlap calculation more useful.
How much spare bench space should I leave?
There is no universal percentage that suits every layout or schedule. Use your records to estimate likely delays or extra trays, then test a practical contingency in the calendar. Count spare positions by their actual tray footprint, and keep them on a surface you can reach and use.
A bench plan comes down to two checks: which trays will be present together, and whether those exact footprints fit on surfaces you can use. Once you have measured the benches and recorded actual occupancy, you can see the busiest dates, the number of trays they require and where a reserve is needed. Keep those measurements and observations for the next spring schedule; they make future planning more accurate than a floor-area estimate.
