
Calculating Rainwater Tank Size for a Greenhouse
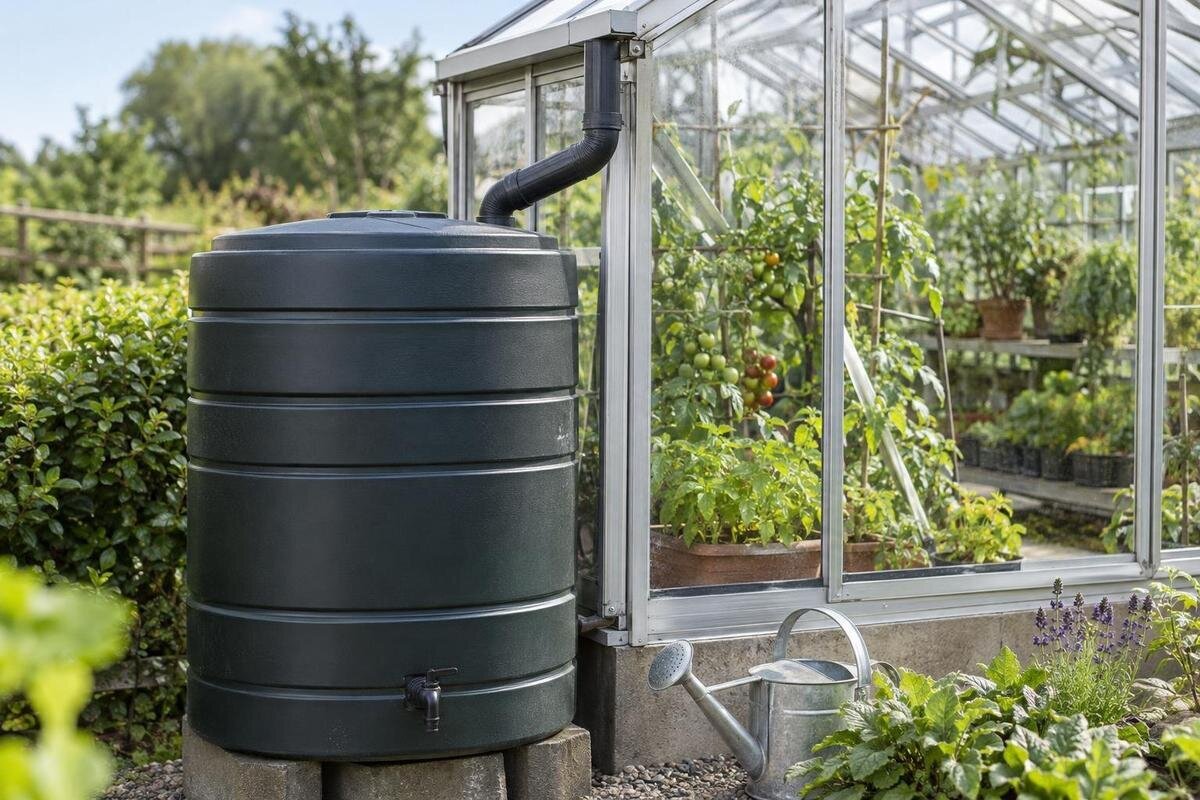
Greenhouse water planning
To calculate greenhouse rainwater tank size, begin with the roof area that actually drains to the tank and the rainfall over a useful time period. Then estimate how much water your plants use through a dry spell. Roof collection gives a possible inflow; measured watering demand gives a storage target. Those figures are not interchangeable, and neither a greenhouse’s floor area nor an annual rainfall total is enough on its own. A month-by-month or weekly balance, an allowance for collection losses and a safe overflow route turn a rough estimate into a practical plan.

Before choosing a tank 1
Size the tank for both collection and demand
Rainwater tank sizing has two separate sides. The greenhouse roof limits what can be collected; plant use and the length of dry spells determine how much needs to be stored. In wet weather, a modest tank may fill and overflow even though the yearly harvest looks large. In a dry spell, a bigger tank cannot make up for a catchment that has not collected enough water. Check capacity against both inflow and demand rather than choosing from roof size alone. It is possible for yearly collection to exceed yearly use while the tank is empty during a period of high demand.
Choose the tank’s purpose before doing the sums. You might want a reserve for a set number of days without useful rain, or hope to cover most greenhouse watering over the growing season. A tank intended as a reserve alongside mains water can be smaller than one expected to supply every watering, but it still needs an overflow route. Write down whether other garden uses draw from the same tank; that simple boundary prevents the estimate omitting water for seed trays, cleaning or outdoor beds. Be clear, too, about whether your dry-spell calculation assumes the tank starts full. If you plan to top it up from another source, record that separately rather than counting it as stored rain.
Measure the roof catchment that feeds the tank
Use the total horizontal projection of the roof sections that actually send runoff to the tank, measured in square metres. Rain falls vertically, so the sloping surface area of a pitched panel is not the same measure. For a simple roof plan, multiply the connected length by width; add the horizontal projections of separate sections only if they feed the collection system. Leave out a roof face or edge that spills elsewhere. If you collect from one side only, count that side rather than the entire greenhouse footprint. Where the roof layout is complicated, mark each connected section on a plan and check that you have not counted the same area twice.
Floor area can help compare greenhouse footprints, but it does not tell you the runoff area. The Limited Edition Aluminium Greenhouses are listed across floor areas from 3.77 m² to 28.08 m². For the size you are considering, use its roof plan and trace the route into the tank; the floor-area figure alone cannot provide the catchment. Check which edges have gutters and ask for selected-size dimensions if they are not clear. Do not assume that an overhang or roof section contributes water unless it drains into your collection route.
Before choosing a tank 2
Convert rainfall into a collection estimate
One millimetre of rain falling on one square metre equals one litre before losses. The gross collection estimate is therefore connected roof area in m² × rainfall in mm. For example, a 12 m² connected roof under 25 mm of rain has a gross potential of 300 litres. Keep the rainfall and collection period matched: if the rainfall figure covers a week, the resulting estimate is for that week, not for a day. It is a potential inflow, not a promise that the tank will contain 300 litres. Water can be lost before it reaches storage, and a tank that is already full will spill some.
Use a capture factor to represent what reaches the tank after losses, and label it as an assumption until you have site measurements. For illustration, an assumed factor of 0.8 turns the example’s 300 litres into 240 litres; it is not a guaranteed efficiency for every greenhouse or gutter arrangement. Losses can arise from leaks, splash, debris management or water diverted before storage. When comparing sizes in the T-Shaped Orangery Greenhouse range, listed at 16.52 m² to 30 m² of floor area, calculate collection separately for each selected roof plan. Keep the connected roof area, rainfall period and assumed capture factor together in your notes so the estimate can be revised when you have observed the system in use.
Use local rainfall records, not an annual average
Annual rainfall can hide the timing that matters. Rain that falls when the tank is full may overflow, while a dry interval during active growth can draw the level down. Look at monthly rainfall for a broad seasonal check, then use daily or weekly figures to test the longest dry spells you want to plan for. For a local starting point, consult Met Éireann rainfall records where available or keep a gauge at your site. A nearby station provides context, but its readings are not a measurement of the rain reaching your greenhouse.
Apply the same connected area and capture assumption to each period rather than dividing an annual total into twelve equal parts. Compare wetter and drier years if records allow, or make a cautious test by reducing the rain assigned to the critical period. If you are considering a Pyramid Greenhouse, listed with floor areas from 5.53 m² to 18.9 m², use the connected roof area of your chosen size throughout this comparison. Changing both the greenhouse size and the rainfall assumptions at once makes the results harder to interpret. Keep a separate calculation for each size, using the same rainfall records and growing season, so you can see how the estimated supply changes.

Before choosing a tank 3
Measure greenhouse watering demand
Estimate use from the plants you intend to grow. Pots and beds, crop mix, plant size, season and weather can all change how much water is needed, so a generic litres-per-square-metre figure may mislead. During a representative warm, dry period, record the litres you add each day or week. Use a meter or a container with known markings if that makes your records more reliable, and include water for trays or other uses that share the tank. If the greenhouse is new, begin with a cautious estimate and revise it after you have a season of observations.
Use a peak-use figure for a dry-spell reserve, not the quiet-month average. If your records show 24 litres a day and you want to cover ten days without useful rain, the basic usable reserve is 24 × 10 = 240 litres. When planning the planting layout for one of the Limited-Edition Aluminium Greenhouses with Storage, listed from 5.52 m² to 28.08 m² in floor area, distinguish growing space from storage and working space in your demand estimate. Record the pots, beds and trays you expect to water rather than assigning demand to the whole footprint. Include other uses only if they will draw from this tank, and avoid counting water supplied from a separate source as rainwater use.
Turn a dry-spell target into usable capacity
For a first estimate, multiply daily demand by the number of days you want to bridge without meaningful replenishment: daily litres × dry-spell days = usable reserve. If demand changes from day to day, use a high but plausible daily figure or add the expected use for each day in the chosen period. A 14-day target is an example of a planning scenario, not a recommendation for every greenhouse. Choose a period that suits the tank’s role and the backup water available. If the tank is meant to cover only part of demand, state that assumption so the result is not mistaken for full independence.
Distinguish usable water from nominal tank volume. Some water may remain below the outlet or be unavailable in normal operation, so ask for the usable capacity and the level at which the tank can no longer supply water. Leave a margin for uncertain demand or rainfall rather than sizing exactly to the arithmetic result; note what that margin is intended to cover. For a selected size in the Bloomcabin Prestige Greenhouse range, listed from 3.77 m² to 28.08 m² in floor area, keep the required usable reserve alongside the tank’s advertised volume. These are separate figures: one describes the water you need, while the other describes the tank. Compare options by the usable water they can supply during your chosen dry spell.
Before choosing a tank 4
Check whether rain arrives when you need it
A seasonal balance is more informative than a single annual yield. For each week or month, estimate effective inflow, add it to the water already in the tank and subtract planned use. Cap the resulting balance at the tank’s usable capacity; anything above that is overflow. If demand exceeds the starting water plus inflow, record a shortfall. This ledger shows the difference between annual collection potential and a supply that is available when plants need it. Use a weekly step when checking a short dry spell, because a monthly total can conceal the order in which rain and watering occur.
For example, suppose a tank with 250 litres of usable capacity starts a week with 200 litres. If 80 litres are drawn before 150 litres of effective inflow arrive, the balance reaches 270 litres: 20 litres overflow and 250 litres remain. If the following week has no inflow and use is again 80 litres, 170 litres remain. The order matters; rain arriving before the first week’s watering would produce a different result. When assessing a size in the Spacious Greenhouse range, listed with floor areas from 47 m² to 70 m², use its estimated roof inflow and crop demand in this balance. Test a realistic starting level, and use shorter time intervals where a weekly total could conceal overflow or a shortfall.
Confirm the gutters and route into the tank
Before relying on a roof estimate, confirm that runoff can actually be collected. Check the greenhouse’s gutter arrangement, which roof edges feed it, where downpipes can discharge and whether the proposed connection is compatible with the structure. A roof with no connected collection route contributes no useful litres to your calculation. Screens, leaves, leaks and a first-flush arrangement, if used, can also affect the amount delivered. Allow for maintenance and losses rather than assuming every drop at the roof edge reaches storage; if the route is not clear, resolve that before choosing capacity.
For the model and size you are considering, get the collection-system details and confirm whether any accessory you need is offered and compatible. The Aluminium Greenhouses listing covers floor areas from 3.77 m² to 28.08 m²; check the gutter and downpipe arrangements for the selected size rather than assuming they are the same across the range. Do not assume a gutter, downpipe or connector is included. Trace the proposed route from each connected roof section to the tank and identify any section that drains elsewhere. This gives you a clear basis for the catchment figure and highlights connection details that still need to be resolved before you rely on the estimated supply.

Before choosing a tank 5
Plan where surplus water will go
Even a correctly sized tank will be full during some wet periods, so overflow is part of the system rather than an optional extra. Decide where surplus water will go when rain continues, and make sure the route will not send it towards greenhouse foundations, paths, buildings or neighbouring property. The right destination depends on the site and its drainage conditions; a tank-volume calculation cannot establish that a particular outlet is suitable. Ask a competent installer or drainage professional if you are unsure about the route or the effect of releasing water at the proposed location.
Check that the overflow can be inspected and is not easily blocked by leaves or debris. Consider what happens when the tank is full during heavy rain, not just the average amount collected. For a selected size in the Lean-to Greenhouses range, listed from 3.69 m² to 14.34 m² in floor area, consider the tank position and proposed discharge route together with the greenhouse layout. Mark where surplus water would go and whether that route remains accessible for inspection. If you compare different tank positions, include overflow in each option rather than considering only the connection from the roof. Increasing storage can delay overflow, but it cannot replace a suitable discharge route.
Refine the estimate after the first season
Treat the calculation as a starting point to test, not a guarantee. Use a lower-rainfall period and a higher realistic watering demand in your balance, then see whether the proposed usable capacity meets your dry-spell target. Add a margin when records are sparse, but do not make it an unexplained percentage; record which uncertainty it covers. Once the system is in use, note rainfall, tank levels, overflow and water drawn for the greenhouse. If the tank often fills and spills, your storage may be small for the rainfall pattern; if it stays low despite rain, revisit the collection route, losses and demand assumptions.
Keep the key numbers together before settling on a tank: connected roof area, rainfall by period, assumed or observed capture factor, peak daily use, target dry days and usable capacity. Record the collection route and overflow destination alongside them. Ask the greenhouse supplier for the selected size’s roof and drainage details, and the tank supplier or installer for usable volume and a site-appropriate overflow plan. A full tank is heavy, so have its support and location checked for the intended installation rather than judging suitability by its empty footprint.
Frequently asked questions
How do I calculate rainwater from a greenhouse roof?
Multiply the connected roof’s horizontal projected area in square metres by rainfall in millimetres; the result is the gross collection in litres. Apply a clearly stated capture factor to allow for losses. For example, 12 m² under 25 mm of rain gives 300 litres before losses.
Is greenhouse floor area the same as roof catchment area?
No. Floor area describes the building footprint, while catchment is the horizontal projection of the roof sections that actually drain into your collection system. Use the selected greenhouse size’s roof plan and count only connected sections.
How many days should a rainwater tank cover?
There is no single target that suits every greenhouse. Choose a dry-spell period based on the tank’s role and any backup water supply, then multiply measured daily use by that number of days to estimate the usable reserve.
Should I size a tank using annual rainfall?
Use annual figures only as a broad check. They do not show whether water will be available during a dry spell or whether rain will arrive when the tank is already full. Compare rainfall and demand by week or month instead.
Where should tank overflow go?
Plan a site-appropriate route that will not send water towards buildings, paths or neighbouring property. The right destination depends on the site and its drainage conditions; ask a competent installer or drainage professional if you are unsure.
A sound estimate comes from two measured realities: the roof area that delivers water and the litres your plants use between useful rain events. Use local rainfall in a time-based balance, allow for real collection losses, and size against usable rather than merely nominal capacity. Then give overflow its own safe route. This method shows why annual rainfall alone can be misleading and makes the tank choice depend on the water your greenhouse can actually collect and use.
