
Diagnosing Plant Scorch on One Side of a Greenhouse
Greenhouse troubleshooting
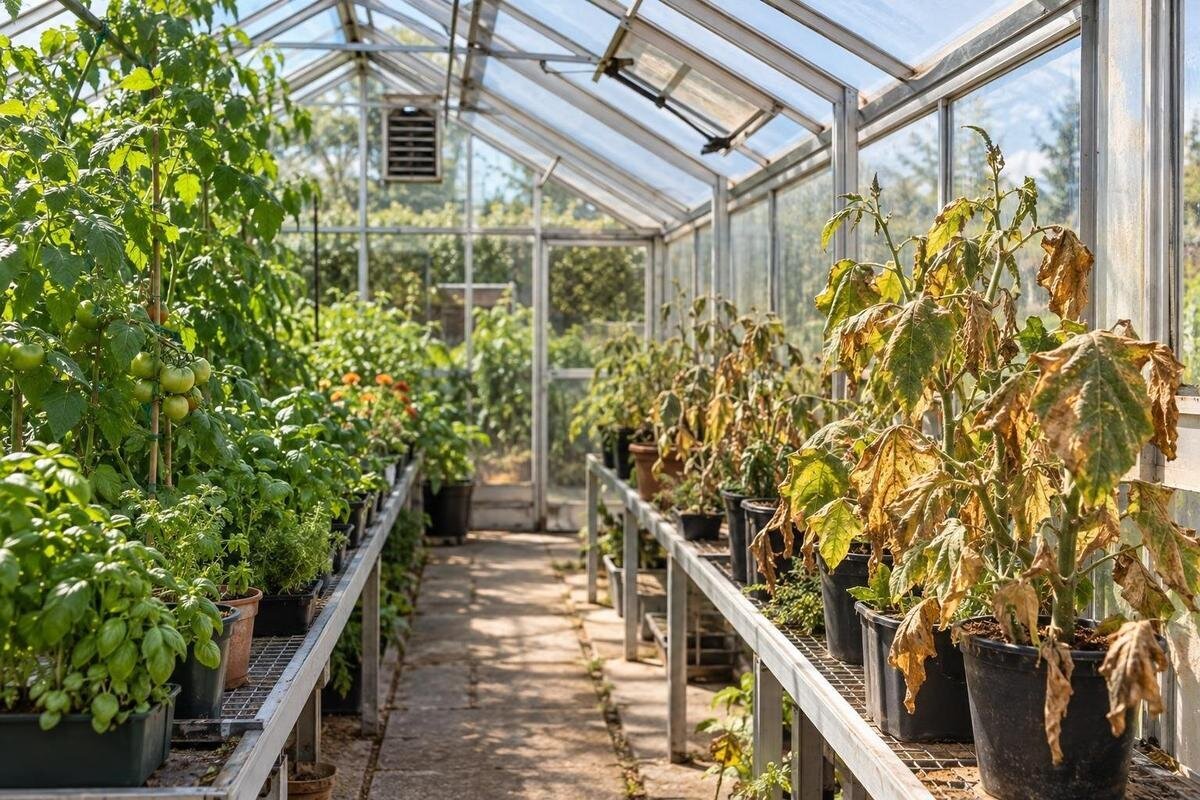
If leaves are scorching in one part of a greenhouse while nearby plants look unaffected, the cause may be a local patch of intense sun, reflected warmth or weak air movement, rather than a uniformly hot house. The pattern is a clue, not a diagnosis: dry roots, a recent spray or plant-specific damage can look similar. Map affected leaves, follow sunlight during the hours when symptoms develop and compare conditions at canopy height before making a lasting change.

Check that the damage pattern fits scorch
Look closely at the leaves rather than relying on the word scorch. Strong light or heat can leave a bleached, pale or tan patch that becomes dry and papery, often on the surface facing the brightest exposure. The timing may lag behind the exposure, and different plants respond differently. On some crops, marks appear first on upper or outward-facing leaves while sheltered leaves remain intact. Brown tips or edges alone are less specific: dry roots, irregular watering, fertiliser salts and some diseases can look similar. Describe the damage in your notes: is it a broad patch, a narrow brown edge or a series of separate spots? Record whether the opposite side of the same plant is unaffected. These details make later comparisons more useful than simply labelling every brown leaf as scorched. Treat an exposure pattern as a clue, not a diagnosis.
Compare the pattern across the greenhouse. If several plants, including different kinds, develop fresh damage in the same corner or on leaves facing the same direction, a local condition becomes more plausible. If only one plant is affected, check its pot, roots and recent care before blaming that side of the greenhouse. Note whether marks are on upper leaves, outward-facing leaves or older growth; look underneath for pests, webbing, sticky deposits, spots or distortion. Photograph representative leaves before pruning. Old brown tissue alone cannot show whether a later change has worked, so keep track of any new damage.
Map the affected plants and the greenhouse layout
Make a rough plan viewed from above. Mark doors, vents, glazing, benches, shelves, bed edges, fixed shades and nearby walls, trees, windows or paved areas. Put a mark for each affected plant and an arrow for the side of its foliage that was exposed. Add the date and time when you notice new damage. A simple sketch is enough: a leaf near the roof may receive a different beam of sunlight from one on a low bench. Give each bench or group of pots a simple label so that photographs and readings can be matched to the right place. Mark a few healthy plants too, especially those of the same kind as the affected plants. This gives you comparison points without having to reconstruct their positions later. If you do not know the compass direction, call a side door-facing or path-facing rather than guessing.
Photograph both the whole greenhouse and affected leaves from repeatable positions, adding the date and time. This preserves the pattern before you move pots or change shading. A plan is useful if you are considering a replacement as well: account for growing space separately from storage. The Limited-Edition Aluminium Greenhouses with Storage listing spans 5.52 m² to 28.08 m². Check the chosen model’s drawing to see where built-in storage sits in relation to planting positions, rather than treating total floor area as all growing area.
Follow the sun and inspect nearby reflective surfaces
Observe sunlight at several points during the day on the side where the injury appears, especially in conditions similar to those when the damage began. Follow the beam and moving shadows across leaves, pots and the greenhouse structure; a brief look at midday can miss an earlier or later hot spot. At each visit, note when the affected foliage is in direct sun and when it returns to shade. Distinguish light falling on the leaves from light falling only on the bench or path. If you cannot watch continuously, record the times you did check rather than estimating a full exposure period from one photograph. Repeat the observation if symptoms recur at another time of year, as sun angle and nearby foliage change. Record the exposure you actually see rather than assigning a permanent sunny side from compass direction alone.
Look beyond the greenhouse for windows, glazed doors, glossy metal or other surfaces that might redirect bright light towards a particular patch. Sunlit paving can also add warmth around pots and lower foliage, although a pale wall or hard surface is not automatically harmful. A lean-to layout puts the adjoining wall into the site assessment. The Lean-to Greenhouses listing covers 3.69 m² to 14.34 m²; if you are comparing that format, map the wall’s exposure at the proposed site rather than assuming it will either shade the plants or cause scorching.
Compare readings at leaf height
A single thermometer near the centre can miss a local difference. If possible, use two similar temperature and humidity loggers, placing them at similar heights within the foliage in the affected and unaffected areas. Keep them out of direct sunlight and away from glass, metal, soil and pot sides; follow the manufacturer’s guidance on shielding. Label the readings by location and use the same recording interval so that you can compare corresponding times. Note any period when a sensor was moved or its position became shaded by growing foliage. If you have one logger, move it between the two locations at matching times on days with comparable conditions and repeat the comparison. Record differences in weather and vent positions: readings taken on separate days are not a simultaneous comparison. Note how long a difference lasts as well as the highest reading, since a brief peak and a recurring warm period are not the same pattern.
Use readings to compare places and times, not to search for a universal temperature limit that suits every crop. Relative humidity changes with air temperature, so read it alongside the temperature and plant condition; neither value alone proves the cause of leaf damage. If your map leads you to compare a different footprint, the Aluminium Greenhouses listing gives area options from 3.77 m² to 28.08 m². Use a model plan and your site observations to assess growing positions; a listed floor area is not a measured climate correction.

Check airflow where the leaves are
Look at the affected plants in relation to vents, doors, dense foliage, shelving and corners. An opening can be unobstructed while air movement remains weak around a particular group of leaves. Note which openings are open and whether they appear to operate as expected; consult the equipment manual before adjusting an automatic opener or other mechanism. Include the position of tall plants and objects stored beneath or beside benches in your sketch. Look at the route between an opening and the affected foliage, rather than checking the opening alone. If you temporarily move an obstruction, record its original position so that the observation can be repeated without changing the whole layout. Compare the affected area with a more open part of the greenhouse rather than assuming that one open vent creates the same conditions everywhere.
A light ribbon held briefly at leaf height can show whether movement differs between two spots, but it does not measure the amount of ventilation or prove that conditions are adequate. Repeat the observation when symptoms usually appear, and note the weather and opening positions. If you are comparing another model, check its own drawings and instructions for opening positions. The Bloomcabin Prestige Greenhouse listing covers 3.77 m² to 28.08 m²; its area range does not identify its vent arrangement.
Check roots, watering and recent treatments
Check moisture where the roots are, not just at the soil surface. A pot in a brighter or warmer patch may dry sooner than one elsewhere, while a plant with poor drainage can show stress for a different reason. Compare the affected plant with a healthy one at the same time of day, taking account of container size and the plant’s usual watering needs. Use your layout labels to record which containers were watered, when they were checked and whether their root zones were dry or still moist. Avoid assuming that all pots on one bench received the same care simply because they were watered together. This separates the watering history of an individual plant from the exposure shared by the whole group. Record recent watering rather than responding to crisp leaves by soaking every pot; the same action can help one plant and create a problem for another.
Review recent feeding, foliar sprays and other treatments, including when and where they were applied. Residue or a change in care may help explain why one group of leaves is damaged, but appearance alone cannot confirm the cause. Check leaf undersides and stems for signs of pests or disease as well. If the evidence suggests that you need separate areas for different crop groups, the Spacious Greenhouse listing spans 47 m² to 70 m². Review an individual plan and your site map before assuming a larger area can separate those groups.
Test one change at a time
Once you have a likely cause, make a small, reversible change. For a movable pot, try a nearby position outside the bright patch, or adjust its orientation as a short test. Keep the watering routine and other conditions steady while you observe what happens. Write down the question the trial is meant to answer, such as whether fresh damage stops when a plant is moved out of a particular beam of sunlight. Where practical, leave a similar, healthy plant in its usual position as a comparison, without deliberately exposing it to damaging conditions. If you change the position, shade and watering together, you will not know which change mattered. Compare photographs and look for fresh damage after similar periods of exposure; older scorched leaves will remain marked even if conditions improve.
For a fixed bed, the map can show whether plant positions could be altered without blocking access or openings. The Limited Edition Aluminium Greenhouses listing gives area options from 3.77 m² to 28.08 m². If you are planning a different layout, use the specific model drawing to assess where beds and plants could sit in relation to glazing and vents; a change of footprint by itself is not evidence that the hot spot will disappear.
Use shade only where the evidence supports it
Consider shade when observations show that a particular area receives more intense or prolonged light than the plants there can tolerate. A limited trial over the affected zone is more informative than immediately shading all the glazing, which can reduce light for healthy plants elsewhere. Define the area you want to shade using your sketch and sun observations, including the height of the affected foliage. Check the trial at the time when the bright patch usually appears: a screen may be in place without covering the leaves you intended to protect. Note which neighbouring plants also fall within its shadow so that their conditions are included in the comparison. Compare similar plants or positions, and keep a record of any change in new damage. Assess whether the shaded area matches the observed problem before extending the coverage.
If you trial a temporary screen, use a material and fixing method compatible with the greenhouse and its instructions, and keep vents, doors and operating parts clear. An external screen intercepts sunlight before it reaches the glazing; an internal one reduces light reaching plants after it enters. With a multi-part layout, check each area separately. The T-Shaped Orangery Greenhouse listing spans 16.52 m² to 30 m²; use the actual plan and site sun path to assess exposure in each part before deciding where shade might be needed.

Plan growing positions around recurring hot spots
Once you have identified a recurring bright or warm patch, use the map when arranging plants. Where practical, place more sensitive plants away from the strongest exposure and group crops with similar light needs. Account for plant height as well as the position of the pot or bed: taller foliage can cast shade, while dense growth may reduce air movement around nearby leaves. Keep access and ventilation openings clear, and check the arrangement again when plants grow or nearby shade changes.
A model name or floor-area range cannot show how light will fall on a particular site. The Pyramid Greenhouse listing gives area options from 5.53 m² to 18.9 m². If you are comparing that form, use the specific drawing to locate the proposed growing positions and openings, then overlay the sun observations from your site. This is a more useful check than assuming that a particular shape will provide even light or suit a particular crop.
Reassess the pattern before changing the structure
Bring the map, photographs, readings and notes about watering or treatments together. If new damage repeatedly appears where a bright beam falls, exposure is a stronger possibility; if the area is consistently warmer or stiller, look more closely at local airflow. If readings and light observations do not match the damage, or only one plant continues to suffer, return to its roots, care and signs of pests or disease. These patterns help narrow the cause, but no single observation is conclusive.
Repeat checks under comparable conditions before making a permanent change, since sunlight and plant growth vary over time. If the cause remains unclear, ask a qualified horticulturist or plant-health service to assess the symptoms. For a vent, shade or structural adjustment, follow the greenhouse manufacturer’s instructions; have changes involving the frame, glazing or opening mechanisms assessed by an appropriately qualified professional. One damaged patch is reason to investigate, not proof that the whole greenhouse needs changing.
Frequently asked questions
Does one-sided scorch always mean too much sun?
No. Direct sunlight is one possibility, but a local warm patch, weak air movement, dry roots, fertiliser salts or a recent treatment can cause similar damage. Check whether several plants share the same exposure and compare the timing with your observations before deciding that sunlight is the cause.
Can the thermometer in the middle of the greenhouse miss a hot spot?
Yes. A central reading describes conditions at that sensor, not at every plant. Compare readings at leaf height in the affected area and a healthy area, at the same time. Keep sensors out of direct sun, which can warm the sensor itself and distort an air-temperature reading.
Why might one kind of plant scorch while others stay healthy?
Plants vary in their tolerance of strong light and heat, and they may also be in different positions or containers. Check the affected plant’s root-zone moisture, drainage and recent care, then compare it with another plant of the same kind in a different spot. One species alone does not rule out a local exposure problem.
Should I rotate the affected pots?
Rotating or moving a pot can be a useful short-term test, but it may simply expose a different side to the same hot spot. Change one thing at a time, note the new position and look for fresh damage. Existing scorched patches will not show whether the change has worked.
Should I shade the whole greenhouse?
Not as a first response to damage in one area. A whole-house change can reduce light for plants that are not affected. First map the exposure, then try a limited shade change only if the evidence points to excessive light, using a method compatible with the greenhouse and keeping openings clear.
Scorch confined to one side of a greenhouse is most useful as a location clue. Match it to the sun’s path, nearby surfaces, plant-level readings and the plants’ own care history, then test one likely cause at a time. That approach helps distinguish a local exposure problem from a watering or plant-specific issue and avoids changing light or ventilation across the whole greenhouse when the evidence points to just one area.
