
How to Fit a Potting Station Without Crowding Plants
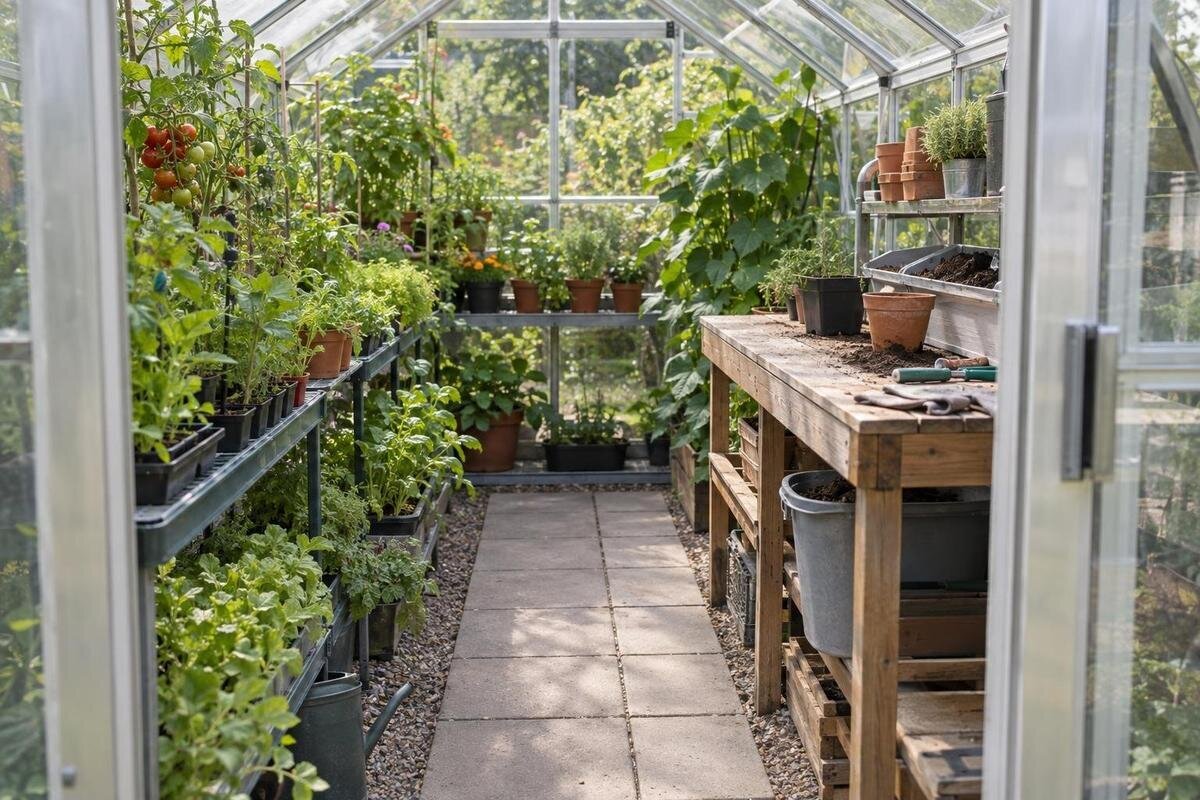
Greenhouse planning
A greenhouse potting station can make sowing and transplanting more orderly, but the bench is only one part of its footprint. You also need room to stand and handle pots, somewhere to keep supplies, and a place for trays when several batches overlap. Plan those needs around your busiest potting period, then check what remains available for growing and routine plant care. The goal is a useful station whose permanent footprint is no larger than the jobs require.

01
Plan around the jobs you do
Begin by listing the tasks the station must handle: filling pots, sowing, pricking out, labelling or cleaning containers. The largest item used sets the practical working envelope. A broad tray, deep pot or compost bag may need to sit on the top while tools remain within reach. Note which jobs need a clear surface and which can wait until an item has been moved. If you work in batches, record how many pots or trays are open at the same time, and where empty containers go. A bench that looks tidy on a plan may be too small for your regular task, while a top sized for every occasional job can take space from plants.
Separate equipment that needs to stay on hand from stock that can be put away. Set your widest tray, largest pot and usual tools together on a trial surface; include a watering can or compost scoop if it is used during the same job. Measure the top's width and depth separately. A wide, shallow surface may suit a tray better than a narrow, deep one, while extra depth can bring the back edge out of easy reach. The Limited Edition Aluminium Greenhouse options cover listed floor areas from 3.77 m² to 28.08 m². Use this range to shortlist sizes, then compare your trial surface with the internal drawing for the chosen model.
Choose worktop depth with real pots and trays
Depth is the distance from the back edge of the worktop to the edge facing you. Too little depth means a tray or pot has to be balanced near the edge; too much can make items at the back awkward to reach and use floor area that could support plants. Start with the widest tray and largest pot you actually use, rather than a generic bench measurement. Check the tray in the orientation you will work with: a top can have enough area overall but the wrong proportions. Leave the front edge available for your hands and for setting down a container. If compost bags need a place, decide whether they sit on the top or floor rather than making a narrow sowing surface do both jobs.
Use full-size cardboard or tape to compare two candidate depths in the intended position; for example, 35 cm and 50 cm are illustrative trial measurements only, not product sizes or universal recommendations. Lay out the actual tray and pot, then work from the front edge: can you reach the far side without reaching over fragile seedlings, and can you move the largest item without knocking something over? Test both marks with the door open and a typical set of tools in place. For the T-Shaped Orangery Greenhouse, listed from 16.52 m² to 30 m², compare these trial depths with the selected configuration's internal dimensions. Check how much room each option leaves in front of the bench.
02
Include standing and passing space
Measure the working footprint beyond the bench legs: it includes the place where you stand, the edge you reach across and any drawer or cupboard when open. A stool, bucket or compost bag left beside the station also occupies usable floor space. If you need to carry trays past while working, test that route with a loaded tray rather than merely drawing an empty aisle. Allow enough room for routine plant care without having to move equipment at every potting session. There is no single clearance that suits every greenhouse; your reach and the largest item you carry matter more than a generic aisle figure.
Use removable tape to mark the front edge and nearby storage, then stand at the bench holding a tray as you would carry it. Check that you can set it down, leave the station and reach the beds or shelves you still need, without brushing plants. Include doors and drawers in their open positions, not just their closed outlines. When considering the Pyramid Greenhouse, put the selected model's dimensioned plan beside your sketch and compare the internal measurements. You need to establish both the available bench length and the clear approach to it; total floor area alone cannot show whether your proposed working position leaves nearby plants accessible.
Separate everyday tools from bulk supplies
Storage is part of the worktop decision because every pot, packet or tool left on the surface takes away clear space. Group supplies by frequency: hand tools, labels and small pots belong near the active station; reserve cupboards or lower shelves for spare pots, empty trays and unopened compost. Estimate storage by counting containers and bags, including the largest sizes, rather than trying to house every item in the greenhouse. If pots nest together, allow for the stored stack rather than treating each one as a separate item. Keep the main surface clear enough to switch from filling pots to sowing without first moving a pile of equipment.
Consider weight, access and mess together. A compost bag is bulky and can be heavy, so plan a suitable stable place rather than stacking it above the bench; use a shelf only within its stated capacity. Keep boxes and cupboard doors easy to reach, and don't let stored objects press against glazing or plants. The Limited-Edition Aluminium Greenhouses with Storage range is listed from 5.52 m² to 28.08 m². Before assigning your supplies to the storage section, check its dimensions and position in the chosen model. Compare those details with your stored pots, trays and bags, and mark the growing space that remains alongside it.

03
Use vertical and under-bench storage carefully
Vertical storage can free the worktop, but the wall behind a bench is not automatically unused. A deep shelf can obstruct a vent or window, shade plants beneath it or make a covered tray difficult to lift out. Keep frequently used labels and hand tools in a shallow, reachable strip; store less-used items lower or elsewhere. Under-bench boxes can use the floor area, provided they do not stop you standing close to the top or taking a tray out. Leave access to inspect and clean behind any fixed unit, and consider whether plant growth will change that clearance later.
Before fitting hooks, rails or shelves, check the greenhouse maker's guidance for approved fixing points; do not assume a glazing bar, panel or frame member is intended to carry extra loads. A freestanding rack avoids relying on an unverified fixing but still needs its own footprint. If you are considering the Bloomcabin Prestige Greenhouse, whose listed options range from 3.77 m² to 28.08 m², check the selected model's instructions alongside the internal drawing. Establish where a rack or fitting can go without obstructing opening parts or the worktop. Keep stored items within reach from your working position, and allow room to take them down without disturbing a tray.
Reserve room for the busiest tray period
Plan for the week when the most trays overlap, rather than the quietest part of the year. Count trays waiting to be pricked out, new sowings and finished pots that cannot yet be moved; include trays that temporarily occupy the bench while you prepare another batch. Measure the trays you own, including covers or propagator lids, and note which need a clear top and which can be staged elsewhere. The number depends on your growing routine, so an assumed single tray is a poor basis if you sow in batches or pot up several groups together.
Draw each occupied tray as its full footprint and leave room to lift it off without scraping surrounding foliage. If a cover or young plant needs headroom, check the vertical clearance below any shelf as well as the surface area. Do not count one patch twice, for example as permanent compost storage and as a place for trays at peak sowing time. The Spacious Greenhouse page lists options from 47 m² to 70 m². To assess temporary tray capacity in a selected size, mark the fixed planting areas and access routes on its internal plan first. Then place your tray outlines in the remaining space, including any trays waiting beside the bench.
04
Space for a movable or folding worktop
A fold-down surface or trolley can serve as extra potting space during a busy spell, but assess it in both states. Draw the top when open, including legs, handles or wheels, and draw where it parks when folded or stored. The open position may overlap the route used to carry a tray; the parked position may occupy the only suitable place for plants. Consider who will move it and how often: a solution that requires shifting several pots each time may soon be left unused. Check that it sits securely in its working position and can be opened or stowed without first clearing the greenhouse.
Rehearse a complete task: bring compost to the surface, fill a few pots, set the trays down and return the tools. If the trolley has nowhere to park, or the fold-down top forces you to remove a tray each time, its extra capacity may not help. When comparing the Aluminium Greenhouses range, listed from 3.77 m² to 28.08 m², mark both the working and stored positions on the chosen model's internal drawing. Keep the intended planting areas visible on the same plan. This lets you judge whether the extra surface genuinely frees space between tasks or simply moves an obstruction from one part of the greenhouse to another.
Use internal drawings to confirm the available wall run
Model drawings help answer whether a bench can fit along the intended wall. Compare internal dimensions rather than external overall measurements, and mark any door, vent, frame posts, low eaves, built-in storage or other feature that interrupts the available run. Check the intended bench width and depth together with its supports, lip or handles; a top may fit between two points while the legs do not. Note how the station affects access to plants behind or beside it. A clear rectangle on a brochure is not necessarily uninterrupted usable wall space.
The Lean-to Greenhouse range page lists floor-area options from 3.69 m² to 14.34 m². Once you have shortlisted a size, use the dimensioned drawing for that specific configuration to check the internal width, door position and any wall-side restrictions. These details matter when assigning a bench to a particular wall. If an internal drawing is not readily available, ask for the correct one instead of measuring from a photograph: perspective and framing make pictures unreliable for exact clearance. Keep your marked station on a copy of the plan, with the remaining beds and temporary tray positions shown beside it, so you can compare their space requirements.

05
Mock up the station before moving plants
Before installing the station, build a full-size mock-up from boxes, cardboard and masking tape. Set out actual pots, a scoop, labels and the largest trays, then carry out a potting task from fetching supplies to moving the finished tray. Check whether you can stand close to the front, reach the whole work surface and put a tray down without shifting other plants. A mock-up also shows if the compost bag has been assigned a place too far away or if the worktop becomes narrow once tools are on it. Repeat the task from the positions other people are likely to use.
Test the setup with plants at the size you expect during the busiest period, not just when seedlings are small. Open the door and any windows or vents you normally use, and see whether the bench, storage or tray queue interferes. If the season is quiet, reproduce the peak load with empty trays and pots, leaving space for covers. Write down what must move for each job; if established plants or bulky storage need to be shifted every time, change the footprint or operating routine before fixing shelves. Include tidying away tools and putting trays in their next place.
Set a limit for the permanent station
Give the permanent station a clear space budget: the worktop, fixed storage and room you need to stand and work. Draw temporary tray space separately and reserve it for the highest number of trays likely to be present together. This makes the trade-off visible: a larger bench can be convenient, but if it takes the edge of a bed or blocks access to plants you intend to tend, its cost is more than the floor below it. Make the permanent top as large as the regular tasks require, and no larger by default.
If the marked plan is tight, change one element at a time: reduce top depth, store bulk supplies elsewhere, use a separate staging shelf or make an extra surface movable. Then test the complete sequence again. Avoid a solution that works only when trays are empty or cupboards are shut if that is not how you work. Review the arrangement after a busy potting session and adjust the storage or routine before adding more fittings. The right station handles your real jobs while keeping seasonal tray clearance separate from the growing space you mean to preserve.
Frequently asked questions
How deep should a greenhouse potting worktop be?
There is no single depth that suits every task. Measure your widest regular tray and largest pot, then test whether they fit with the tools you use. A full-size mock-up helps you check reach and clearance before choosing a worktop.
Can I put the potting station at the end of the greenhouse?
Only if the station leaves the door, opening parts and nearby plants accessible. Check its full footprint in use, including any open drawer or stored tray, and compare it with the internal drawing for the model you are considering.
How much space should I allow for seed trays?
Count the maximum number likely to overlap during your busiest potting period. Include covers and the room needed to lift each tray out. Keep tray parking separate from the space already assigned to permanent storage or active work.
Will a greenhouse with built-in storage hold all my potting supplies?
Not necessarily. The name alone does not tell you the storage compartment's dimensions or position. Check the selected model's details, then plan separately for a clear worktop and somewhere to place trays while you work.
Is a trolley or folding table a good alternative to a fixed bench?
It can be, if both its working and parked positions fit without disrupting plants or access. Include its legs, handles or wheels in the footprint, and test where a full tray will go during a potting task.
A potting station earns its place when its depth suits the actual work, supplies stay off the active surface, and there is a defined temporary space for trays at the busiest time. Measure and mock up that combined footprint before committing. You can then keep the remaining area available for plants rather than lose it to an oversized bench.
