
How to Winterise Greenhouse Pipes, Pumps and Tanks
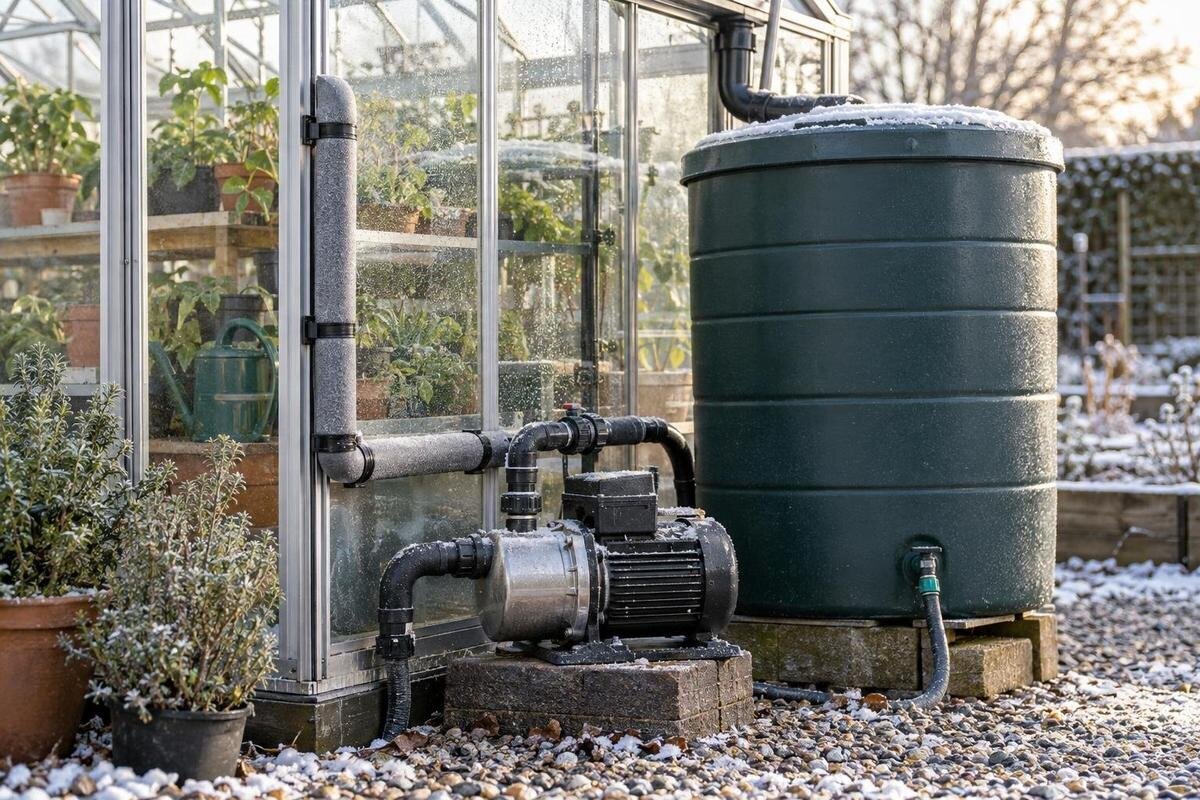
Greenhouse watering systems
Greenhouse irrigation can look shut down while water remains trapped in a filter bowl, pump casing, low pipe bend or tank outlet. When that water freezes, expansion can split fittings or damage housings; turning off the tap is not enough. Winterising means following the route from source to last emitter, then dealing with each component according to its design. This guide covers a full shutdown, including pipes, pumps, filters, tanks and drip lines. If you need the system to keep running, use a separate frost-protection plan rather than assuming an enclosed greenhouse is safe.

Choose between a full shutdown and continued use
Decide whether the water system will be shut down or kept in service; those are different plans. A full shutdown suits equipment that will not be used and can be drained in line with its instructions. Keeping it running leaves pipes, fittings and controls exposed to frost, even when watering needs are low. If plants still need water, arrange a safe alternative, such as carrying water by hand, rather than assuming an idle automatic system is protected. Note which beds or containers still need water, and do not disconnect a supply until you know how to meet that need. A mixed plan is possible only where branches can be separated safely.
Use the weather forecast as a prompt, rather than choosing a fixed calendar date, and allow time to trace and drain the system before frost is expected. Conditions can vary within a greenhouse: a line near a doorway or outside wall may be more exposed than one among growing benches, and an unheated space offers no guarantee that water will stay liquid. If you are considering a lean-to greenhouse, plan the water route alongside the layout, leaving access to isolation valves and drain points. Base the winter shutdown on the actual site, pipe route and any periods when the greenhouse will be unattended.
Map the entire water route
Start at the water source and follow every pipe in the direction of flow. Record the stop valve, pump, filter, pressure regulator, controller, manifold, taps, tank connections, drain points, hoses and final emitters. A simple sketch or annotated photo can save time when fittings are hidden behind shelves or beds. Mark which branches can be separated and which are shared with another tap or supply; one open outlet may not empty every branch. Include lines that pass through a wall, under a bench or across a threshold, not just the visible pipework.
Then mark changes in height, bends that dip below a drain point and any section that ends with a closed valve or cap. These can hold water even when the main line appears empty. Note the make and model of the pump, filter, controller and tank fittings so you can find their care instructions before undoing anything. When planning watering for a Limited Edition aluminium greenhouse, use a layout sketch to record proposed outlet positions and pipe runs; update it to show the actual installation once fitted. Record which joints are designed to disconnect, and photograph valve positions before changing them.
Isolate the supply and release pressure
Shut off the supply at its intended isolation point before opening a drain or disconnecting a hose. If the system draws from a tank as well as a mains or hose connection, identify and stop each feed; switching off the pump does not necessarily stop water entering from another source. Check whether the valve also serves another part of the garden, so you do not interrupt it unknowingly. If a fixed or mains-connected arrangement is unclear, consult its system drawing or installer rather than loosening a fitting to find out. Keep track of which valves you have closed.
Follow the manufacturer’s sequence for relieving pressure before opening a filter bowl, pump drain or pressurised line. Keep a container ready for residual water and direct discharge where it will not pool on a path or run into equipment. Do not remove a cap or housing that is still under pressure. If you are planning rainwater collection around a T-shaped orangery greenhouse, identify the collection line, overflow and tank connections separately from the irrigation supply. Your shutdown sketch should distinguish these routes so that draining one is not mistaken for isolating another. If you cannot confirm that pressure has been released, stop and get qualified help.
Drain pipes, taps and hoses
Open outlets and drain points in a controlled order, starting at the supply side and moving towards the ends, while following any maker’s procedure. Open taps and valves only as instructed, and give gravity time to empty each run; a brief flow from the tap can leave water in a dip, capped branch or fitting below the drain. Check low points and separate lines individually, including short sections serving a tap or raised bed. If a section has no accessible drain, do not improvise by forcing a joint apart, especially if it is fixed or may still be pressurised. Ask the installer how that section should be emptied or protected.
Disconnect garden hoses and detachable irrigation tubes, drain them along their length and store them somewhere dry and protected from frost. A hose coiled while full can retain water at several points, so empty it before coiling and check any spray gun or connector separately. Use compressed air only if the equipment maker expressly gives a safe procedure for that exact system; otherwise it can damage fittings or propel debris. When planning hose routes for a pyramid greenhouse, consider how each detachable length will be reached, disconnected and taken out for storage. Keep access to those connections clear rather than hiding them behind permanent beds or shelving.

Drain filters and valves and store removable controls
Remove and clean a filter element only as its instructions allow, then empty the housing or bowl; a clean mesh does not mean the casing is dry. Check regulators, gauges, valves and solenoid bodies for small chambers that can retain water. Flush any fertiliser injector or dosing unit only by its specified method, and handle leftover concentrate according to its label. Avoid adding general-purpose antifreeze, oil or cleaner to irrigation water: compatibility, plant exposure and spring flushing are product-specific. Keep removed seals and filter parts together rather than leaving them loose on a bench.
Battery timers, controllers, sensor units and removable solenoids need their own storage instructions. Remove batteries only as directed, label leads before disconnecting anything the maker permits you to remove, and keep small caps, seals and screws in a labelled dry container. If you are considering a Limited-Edition aluminium greenhouse with storage, decide separately where removed irrigation equipment will spend the winter: a storage area is not necessarily dry or frost-free. Keep each unit’s model reference with it so the spring reconnection is straightforward. Leave sealed electronic housings closed; follow their care guidance instead of opening them to look for water.
Winterise the pump according to its design
Pump care depends on whether the unit is surface-mounted, submerged, inline or part of a pressure system; these designs do not all drain in the same way. Read the manual for the model, locate its approved drain or winter setting, and check whether the casing, volute, strainer or built-in pressure vessel retains water. Do not remove a plug, housing or fastener unless the instructions identify it as a service point. If the manual is missing, identify the model and obtain the maker’s directions before taking the pump apart. A pump can appear drained while water remains in its internal chambers.
Where the instructions allow removal, take the pump out using its specified handling method, dry the exterior and store it in the stated conditions; do not lift a submersible pump by its cable. Keep inlet and outlet parts labelled, and protect open connections from dirt. Do not run a pump dry to test it or assume switching it off has drained it. For a planned water system in a Bloomcabin Prestige greenhouse, include access for pump servicing and removal when deciding where equipment will go. A fixed or hard-wired pump, or one with no clear drain procedure, needs attention from a qualified person.
Prepare tanks and rainwater connections
Do not apply a one-size-fits-all rule to tanks. Whether a tank should be left full, partly filled or emptied depends on the maker’s frost guidance, its material and design, how exposed it is, and the fittings connected to it. A tank described for outdoor use does not automatically mean its tap, sight tube, float valve, filter or outlet pipe tolerates freezing. Check the model instructions and deal with the tank and its attached plumbing separately. If you are comparing layouts for a spacious greenhouse, include the tank position and outlet access in your plan, whether the tank will be inside or beside the structure.
If emptying is required, use the designated drain and manage the water without creating a slippery patch, flooding a bed or sending it towards a building. Drain the outlet, inlet, overflow and any short connector pipes that the instructions identify as vulnerable; water can remain in valves even when the main tank is empty. Secure the cover against debris while keeping any required vent or overflow unobstructed. Clean the tank only by its maker’s method, and do not climb inside it. For a rainwater system, account for the downpipe diverter and overflow as well as the tank, so thawing water does not meet a blocked route.
Drain drip lines and small fittings
Drip irrigation, micro-irrigation tubing and small-bore distribution lines are easy to overlook because they contain little water, but their emitters and connectors can still trap it. Shut off the feed, flush or drain the lines by the manufacturer’s method, and check every end, tee, filter and valve. Open detachable ends only when the manual permits; an emitter that looks clear from outside may still hold water internally. Where the system has separate beds or benches, treat each branch as a separate run rather than assuming the header empties all of them. Do not assume an automatic flush function has drained the far end.
Label removable emitters and connector pieces with their line or zone, and keep matched parts together during storage. Avoid forcing brittle fittings apart in cold conditions. Before putting them away, check that you can identify which piece belongs at each branch end; a labelled photograph can help where several connectors look alike. When planning drip lines for a Classic aluminium greenhouse, mark their routes along the frame, floor or walls and leave the ends accessible for seasonal draining. Follow the equipment instructions on whether those ends should be capped, left open or otherwise protected from debris once the lines are empty.

If watering must continue through winter
Sometimes winter watering is necessary because plants remain in active growth. In that case, do not treat an ordinary shutdown as adequate protection, and do not rely on the greenhouse alone to keep water above freezing. Check the stated operating and storage limits for every exposed component, not just the pump: this includes pipe, valves, filter housing, controller, tank fittings and emitters. The least frost-tolerant item can determine whether the whole route can stay in service. If any specification is missing or unclear, ask the maker or installer rather than guessing from a component’s appearance.
Use only a frost-protection approach designed for the particular equipment, and involve a qualified person where electrical work or fixed plumbing is required. Insulation can slow cooling, but it does not prove that trapped water will remain liquid; joints, valves and unheated sections may still freeze. Plan how the system will be checked during cold weather and what you will do if protection fails, especially when the greenhouse is unattended. If that level of monitoring is impractical, hand-water as needed and drain vulnerable equipment instead of leaving it connected without a reliable plan.
Check the shutdown and plan the restart
Before you leave the system for winter, walk the route once more with your sketch. Confirm that the source is isolated, pressure has been relieved as directed, drains and low points are empty, and removable parts have been stored. Look for water still sitting in filter bowls, hose ends, pump housings or tank valves. Keep a brief record of what was drained, what remained in service and which parts were removed; a photo of the final valve position can be more useful than relying on memory. If a component will not drain as expected, do not force it.
At restart, inspect pipes, hoses, housings, tank fittings and seals for splits, distortion or leaks before relying on automatic watering. Refit parts according to their manuals, clean and flush as directed, and prime a pump only by its specified procedure; never run it dry to see whether it works. Bring the system back into use in stages, watching for drips as water is restored and checking that each branch reaches its intended outlet. If you find damage, a pressure problem or a fixed connection you cannot verify, stop using that section and get competent repair advice. A careful inspection can reveal freeze damage before a timer runs unattended.
Frequently asked questions
Do I have to empty the water tank completely?
Not necessarily. Follow the tank maker’s frost guidance: the right approach depends on the tank’s design, material and location. Whatever water level is specified, check and drain vulnerable outlet pipes, taps and valves separately; an empty tank does not mean every connected fitting is dry.
Will the greenhouse keep the pipes from freezing?
No. Temperatures can vary within a greenhouse, and an enclosed space is not automatically frost-free. Keep a system in service only if the operating limits of every component and the protection plan are suitable for the conditions.
Is opening a tap enough to drain the system?
Usually not. Water can remain in low bends, separate branches, filter housings, pump casings, hoses and emitters. Follow the water route and drain each part using its maker’s instructions.
Can I blow compressed air through the pipes?
Only if the manufacturer gives a safe procedure for that exact system. Otherwise, do not improvise with a compressor: air pressure can damage components or propel debris. Use the system’s approved drain points or ask a qualified person.
When should I winterise the irrigation system?
Allow time to inspect and drain it before frost is expected, rather than relying on a fixed date. Check local forecasts and consider how long the greenhouse will be unattended; some components may need attention before a cold spell is imminent.
Winterising means checking the whole water route, not simply turning off the supply or emptying the tank. Drain each component that can retain water, using the maker’s instructions where the procedure is not obvious. If any part needs to remain in service, treat that as a separate frost-protection arrangement and check it through cold weather. Keep your labelled sketch with the stored parts so that, in spring, you can reconnect each branch and inspect the system before automatic watering resumes.
