
Bringing a Greenhouse and Pergola into One Plan
Garden planning
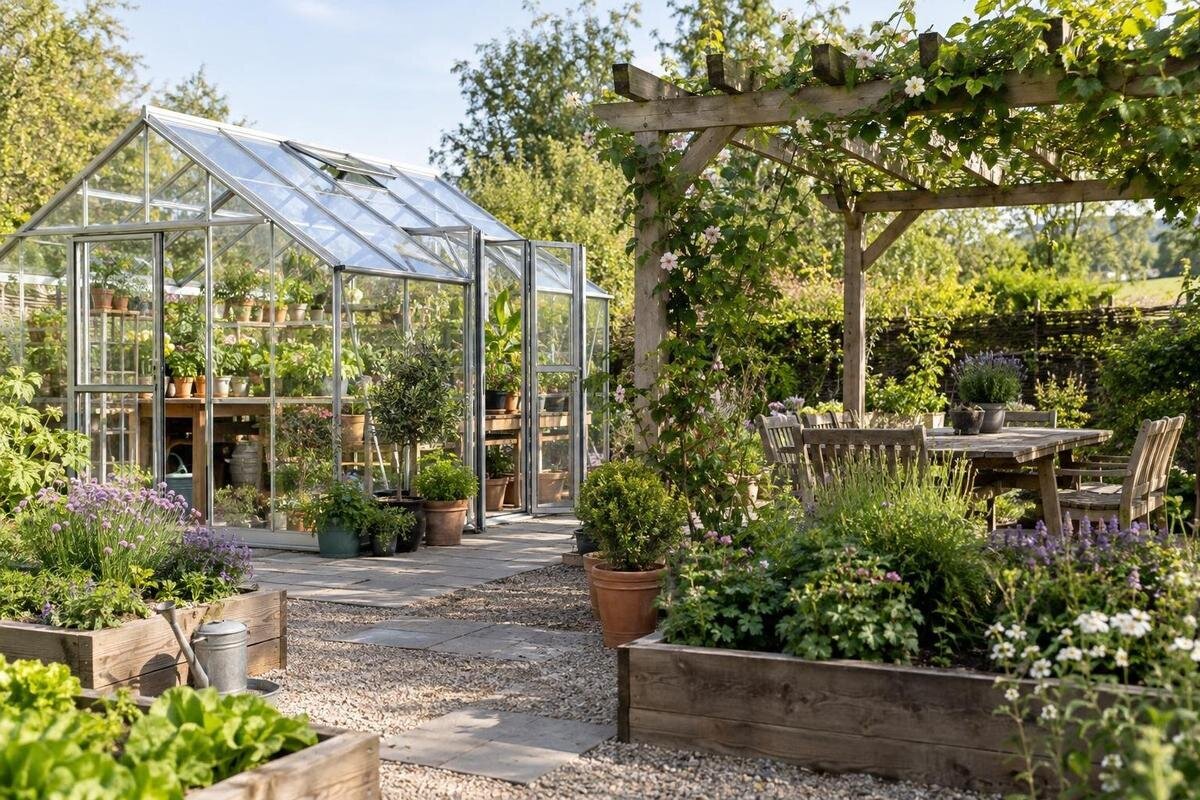
One garden can accommodate both growing and sitting, but the layout has to protect the greenhouse’s light and working space while making the pergola useful. Plan their purposes separately, then test shade, routes and any shared water or power on one measured drawing. The result should show not only where each structure stands, but how people move between them.

Give the greenhouse and pergola separate jobs
Write down what each structure is expected to do before choosing a position. A greenhouse is a working space for plants under cover: list the crops, propagation, watering, potting and storage you expect it to support. A pergola is more often a place to sit or dine, or a transition between the house and garden; how much shade it offers depends on its design, cover and planting. Treat the two as separate briefs, rather than calling both outdoor rooms. Decide whether the pergola will be uncovered, partly covered or planted over, since that affects what you expect from it. Clear purposes make it easier to see when one position serves one use at the expense of the other.
Then identify which activities should be close and which should remain separate. You may want a short trip from the greenhouse to outdoor beds, while keeping pots, wet boots and watering tasks away from dining chairs. Perhaps a view from the pergola into the greenhouse matters, but a path through the seating area does not. List who will use each space, what they carry and when the garden is busiest. A greenhouse entrance that opens into the main sitting zone can interrupt both work and relaxation. If several people use the garden, note when they need to pass one another. The plan should preserve both uses, not turn one structure into a corridor or overflow store.
Draw the garden accurately before placing structures
Build a simple scaled plan from measurements, not an impression of how much room seems available. Mark the house, boundaries, doors, windows, steps, existing paths, trees, sheds, raised beds, taps and visible drainage features. Note changes in level and the space taken by roof overhangs or gates when open. Separate fixed features from items that could move, and include places people already use even if the new layout may change them. A bin, water butt or stack of pots can take up a narrow corner, so show these too. Measure existing routes at their narrowest points rather than describing them as generally wide or narrow. If you do not know where buried services run, mark that as an unresolved point and check before any digging or construction. Include a maintenance route as well as the proposed structures.
Area figures help you shortlist but do not provide an exact outline. For example, the Aluminium Greenhouses listing gives a range from 3.77 m² to 28.08 m²; when choosing a model, draw its confirmed dimensions rather than the range or product-family name. Give the greenhouse and pergola separate outlines, then add paths and working space as additional shapes. If you are still comparing models, use a provisional zone based on a realistic shortlist and label it clearly. Check whether the information for the selected model shows projections and the opening position that affect the space around it. That prevents a broad catalogue range from becoming a misleading promise that a preferred layout will fit.
Map sunlight and shadow at different times
Sunlight is a moving part of the plan, not a single compass direction on a drawing. Note when direct sun reaches the proposed growing area and the seating area, and which buildings, walls, fences or trees cast shade. Revisit the same spots at different times of day; where possible, check again in another season, because the sun’s height and shadow length change over the year. A few observations from one bright day are a starting point, not a complete picture. Record both shaded areas and parts that stay exposed, and take notes from more than one point in the garden. Distinguish shade from trees and seasonal planting from shade cast by walls, so the plan records what creates each shaded area.
Now draw both structures over those observations. The greenhouse’s light needs depend on what you plan to grow, so compare the expected light in its proposed position with the needs of those crops. Decide where pergola shade is welcome and at what time; its roof pattern, any cover and any climbing plants can change how much shade reaches the garden. Plant cover develops over time, so do not treat a new planting scheme as a fixed screen. If the planned crops or seating use vary by season, note those periods separately. If you cannot observe the site across seasons, record that uncertainty and leave scope to adjust the layout before installation.
Allow room around the greenhouse for growing tasks
Separate the greenhouse’s usable growing layout from the space it occupies outdoors. Inside, sketch benches, staging, beds, door access and the tasks you will do; outside, allow for opening the entrance, carrying trays, moving tools and reaching the structure for routine care. The listed area alone cannot tell you how much working room there will be around benches or how a doorway meets a path, so check dimensions for the exact model. Decide what must be stored inside and what can stay elsewhere. If a wheelbarrow or trolley needs to reach the greenhouse, include a place to turn or stop without blocking the entrance. If seasonal pots may sit outside, show where they will go rather than letting them spill onto the route. These choices affect both the route from the pergola and the space left for planting.
The Limited-Edition Aluminium Greenhouses with Storage range is listed from 5.52 m² to 28.08 m². If built-in storage is part of the brief, list what it is meant to hold and identify any everyday tools or potting tasks that still need a separate place. Compare that list with the storage arrangement of the option under consideration. Include space to bring materials in, put them away and retrieve them without blocking the entrance. This will help you decide whether storage belongs within the greenhouse or elsewhere in the combined layout. Request any missing arrangement details before finalising paths or adjacent beds.

Keep the route between growing and seating spaces clear
Treat the path between the house, greenhouse, pergola and outdoor beds as a working route. Draw where people will walk with seed trays, compost, watering cans or a wheelbarrow, and test whether the route remains clear when someone is sitting under the pergola. Note door positions and the space needed to approach them; a clear line on paper can be blocked by an open gate, a step or a chair. If a route also serves bins, compost or maintenance access, consider whether these activities could obstruct everyday movement. Where more than one person uses the garden, consider where they can pass or pause without standing in a doorway. Aim for a route that suits ordinary tasks, not just a shortcut between two rectangles.
Choose a route that works for the people and equipment that will use it, and keep hoses, stored tools and temporary pots from becoming permanent obstacles. If a lean-to greenhouse is being considered, the Lean-to Greenhouses listing gives an area range from 3.69 m² to 14.34 m². Pay particular attention to how its proposed position relates to the wall, doors and windows. A smaller footprint does not necessarily leave a generous path if the entrance opens at a narrow point. Measure the clear route where it narrows, turns or meets the pergola, and check whether someone carrying a tray can approach the entrance comfortably. Include access for routine care as well as daily movement.
Place the pergola where its shade is useful
Plan the pergola around the part of the garden where shade is useful, not simply the first open space that will accept its footprint. Mark the intended seating, the direction people will face and the times when shade matters. Then check whether that position would cast unwanted shade on the greenhouse or nearby beds. There is no universal side of a greenhouse on which a pergola belongs: buildings, boundaries, trees and the sun’s changing angle affect the result. You can mark the proposed seating with chairs or temporary markers and compare different positions before fixing the layout. If the cover is not yet decided, test more than one arrangement. The aim is to reconcile the two spaces on your site, not rely on a direction that may suit a different garden.
Do not draw the shade line as if it were the pergola’s frame outline. Posts, slats, a solid or retractable cover, and later planting can create different patterns, so note the exact proposed arrangement. When comparing options in the Bloomcabin Prestige Greenhouse range, listed from 3.77 m² to 28.08 m², use the selected greenhouse’s dimensions in this shade study. Show which parts of the proposed growing space would be affected, rather than simply marking that the two structures are close together. Draw the pergola cover separately from its supports, and compare any alternative cover or planting arrangement that could change where the shadow falls.
Consider sightlines, privacy and the shape of each footprint
Check the view from the house, the seating area and the greenhouse entrance. A greenhouse can add a focal point, while a pergola may frame a view or screen part of it; either can also interrupt a sightline if its position is chosen only to fit unused space. Consider privacy from neighbouring windows and the view into your own garden, then note whether any screen would be created by a structure, a fence or planting. Plants grow and lose leaves at different times, so distinguish an existing screen from one that will take time to develop. Judge the outlook from seated and standing positions, and keep the entrance and route legible when the garden is in leaf. A tall screen can affect both shade and views, so include it in the same test.
A listed area does not describe how an outline sits against a boundary or path. The Pyramid Greenhouse listing gives options from 5.53 m² to 18.9 m². Place the selected version’s outline on the drawing alongside the pergola supports and any intended screen, then check the view from normal sitting and working positions. This matters near a gate, corner or window, where a small change can affect both movement and privacy. Compare the space left around each proposed shape, including the view towards the entrance. Two buildings with similar areas need not leave the same space for access or planting.
Make the two structures look related without forcing a match
Visual coherence does not require both structures to share a material or copy the house. Begin with the wider garden: note the roof lines, paving, fence and planting that already organise the view, then decide whether the greenhouse and pergola should align with one of those lines or form a clear contrast. Repeating a small number of colours or planting choices can make separate structures feel considered, while their different jobs remain obvious. Sketch the view from the house and seating area as well as the plan from above. A simple photograph or elevation can help you check proportions, but return to measured dimensions before deciding. Avoid aligning everything by habit if that would put the greenhouse in poor light or make the pergola awkward to reach; appearance should refine a workable layout, not override it.
If the greenhouse form has projections or several connected parts, its full outline matters to this visual test. The T-Shaped Orangery Greenhouse listing states an area range from 16.52 m² to 30 m². On the measured drawing, compare how the selected version’s different parts relate to the pergola and house. Look for any part that reaches into a path or changes the view from the seating area, rather than judging the composition by total area alone. Keep the plan view and a simple view from eye level together: the first checks circulation, while the second helps you judge whether the two structures feel balanced from the places where you live and work.

Plan water, power and drainage as separate routes
List shared services only after you know what each space needs. The greenhouse may need a convenient water point for routine watering, while the pergola may need none or may require provision for lighting. Decide whether rainwater collection is part of the plan, and record where runoff from both structures should be assessed. Do not assume a supply can be shared without checking capacity, or that the shortest route across a path is the best one. Put proposed water and electrical routes on the plan, with access points kept visible and away from doorways and seating. A task list such as hand-watering, irrigation or lighting is more useful than a vague note saying services are nearby. Keep the drainage question distinct from the water-supply question; they involve different parts of the layout.
If a large enclosed option is under consideration, the Spacious Greenhouse listing gives area choices from 47 m² to 70 m². That figure does not determine water, drainage or electrical provision; the operating plan and equipment do. Write down what will be used, where and how often, then ask the relevant qualified tradesperson or designer to assess the connections and routes. Keep electrical work with a qualified electrician, and do not improvise a route through a wet working area. If other people will use the garden, specify who maintains the services and what the actual operating requirements are. For shared, commercial or public use, check requirements for that particular project rather than assuming a domestic layout is sufficient.
Check the plan at full scale before committing
Before settling the layout, mark the proposed footprints on the ground with removable markers or a garden hose and walk the routes in both directions. Stand where the seating will be, approach the greenhouse as if carrying a tray, and check doors, paths and pinch points against the plan. Repeat the test with chairs and large garden equipment in the positions they will actually occupy. A full-scale trial cannot reproduce a finished structure or every season’s light, but it quickly reveals whether a route is too narrow, a door meets a path badly or the pergola takes over the only useful work area. Ask someone who has not been drawing the plan to walk it too; they may notice an awkward turn you now take for granted. Revisit the shade and privacy questions if the trial leads you to move either structure.
Prepare one final schedule showing the greenhouse model and confirmed dimensions, pergola footprint and cover, routes, observed shade, service requirements and unresolved site questions. If choosing from the Limited Edition Aluminium Greenhouses range, which covers areas from 3.77 m² to 28.08 m², record the exact selected option in that schedule. Confirm whether permissions or other approvals need to be checked with the relevant local authority or project adviser, and have structural support, drainage and service connections reviewed by suitably qualified professionals. This is particularly important where the ground, neighbouring structures or intended use call for project-specific assessment. Note who will resolve each open question, and keep the agreed drawing with purchase and installation information so everyone is working from the same plan.
Frequently asked questions
Should the pergola be beside the greenhouse?
Not necessarily. Place them according to the greenhouse’s light and working needs and the pergola’s intended shade and seating. They can be close if the route, door access and shade still work; more separation may be better if one use would disrupt the other.
How can I avoid unwanted pergola shade on the greenhouse?
There is no direction that works for every garden. Observe existing shadows at different times, then map the proposed pergola cover and greenhouse outline. Include buildings, trees and fences, and consider how planned climbing plants may change as they grow.
How much space should I leave between them?
There is no universal clearance. Allow for door movement, access for watering and maintenance, a practical path and any space required around pergola supports. Draw the exact proposed models and test the route on site; a qualified designer or installer can confirm project-specific requirements.
Can the greenhouse and pergola share water or electricity?
Some provision may be shared, but only after the actual demand, routes and access have been assessed. Put intended taps, lighting and equipment on the plan; ask a qualified electrician about electrical connections and a relevant professional about water and drainage. Keep access points clear.
Do I need permission for both structures?
The layout alone cannot answer that. Requirements can depend on the structures, site and intended use. Check the current position with the relevant local authority or a qualified project adviser before starting work; do not rely on a general drawing or an example from another property.
A successful combined plan leaves each structure able to do its own job: the greenhouse has useful light and room for growing tasks, while the pergola offers the kind of outdoor space you intend. Movement between them should be straightforward without cutting through a busy working area or interrupting people at the table. When the measured layout, changing shade, clear paths and service needs make sense together, the two structures can form one coherent garden plan without having to function as one room.
