
Starting Dahlia Tubers Under Cover Before Planting Out
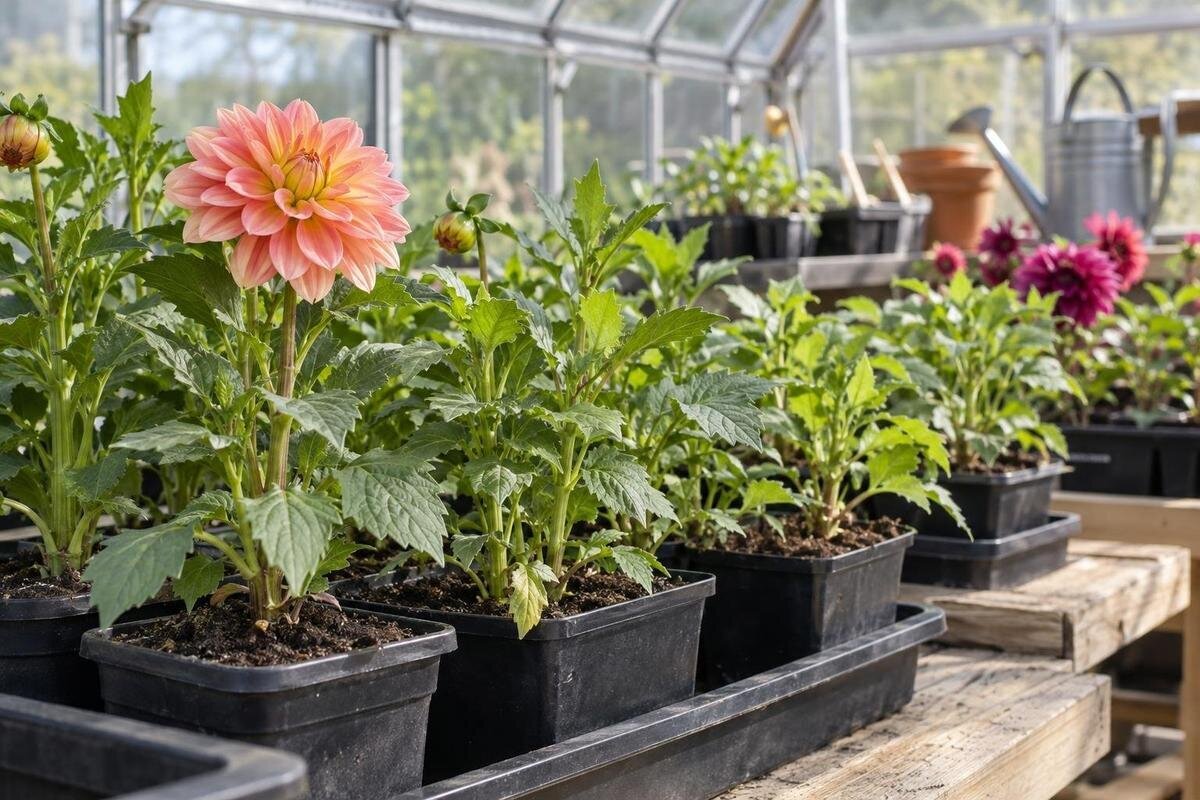
Dahlia growing under cover
Dahlia tubers can be potted under cover to give shoots a protected start before outdoor planting is safe. The advantage is being able to inspect, label and move each plant while the garden is still at risk of frost—not a promise that an unheated greenhouse stays warm. Successful staging depends on sound tubers, free-draining compost, bright light, ventilation and enough room to handle the pots. Use local conditions to guide hardening off and planting out, rather than treating a greenhouse start as permission to plant early.

01
Why start dahlia tubers under cover?
Dahlias are commonly started from tuber clumps rather than seed, and potting them under cover gives the first shoots a protected place to develop before the garden is ready. You can see when eyes begin to grow, keep each variety labelled and move individual pots as conditions change, rather than leaving new growth exposed in a bed. That is useful when outdoor soil is still cold or frost remains possible. It can give plants a head start, but does not guarantee earlier flowers: variety, light, spring conditions and the eventual planting-out date all affect progress. The aim is to manage the early stage, not force growth as soon as possible. Start only as many tubers as you have space to care for.
Treat the greenhouse as shelter, not as a promise of warmth. An unheated structure can become cold overnight and warm rapidly in bright weather, so a comfortable temperature while you work tells you little about conditions around the pots later. A minimum–maximum thermometer placed near plant level helps reveal those swings. Check readings at the coldest part of the night as well as during the day. If frost is forecast, move vulnerable pots to a safer protected place or delay potting; glass alone does not make a greenhouse frost-free. On sunny days, the opposite problem is possible: a closed greenhouse can heat up quickly, so check conditions as the weather changes.
Choose the potting date around local frost risk
Choose the potting date by looking ahead to likely planting conditions in your own garden, rather than following a fixed national date. Early spring—often March or April—can be a useful point to begin checking tubers, but it is a prompt, not a guaranteed planting-out window. Frost risk varies from year to year and with exposure; a sheltered bed may be ready before an exposed one. Use local forecasts, the condition of the soil and the space available under cover together. A mild spell does not rule out a colder night later in the week. If you cannot offer a bright, accessible staging place yet, waiting can be more useful than starting tubers in darkness or cold.
Allow several weeks between potting and your hoped-for planting-out period, so shoots can develop without spending too long in crowded pots. Start very early and growth may become tall and soft while outdoor conditions still prevent planting; start later and there is less time for growth under cover before transfer. Work back from a flexible date and keep a reserve plan: continue growing in pots if a cold spell delays planting, or pot only part of the collection first. Record the potting and first-shoot dates for each batch. That history can guide next spring, but one season should not be treated as a rule, because weather and garden conditions change.
02
Check greenhouse access, light and usable height
Before bringing pots into a greenhouse, check that the space works for people as well as plants. Can you carry a full tray from the door to the bench without turning sideways? Can you reach the back row, open the vents and water without moving the whole collection? Leave headroom above benches for developing shoots and enough height to handle pots comfortably. Consider where daylight reaches and whether nearby walls, fences or established plants cast shade. A convenient staging area should be bright, accessible and easy to ventilate; a nominally large floor area is of little help if the route to the plants is blocked. Include somewhere to set down a tray while you work.
If you are comparing structures, the Limited Edition Aluminium Greenhouses listing gives footprint options from 3.77 to 28.08 m²; those figures do not show the usable headroom, opening arrangement or clear bench area for the configuration you would choose. Check the plan and product details for the individual size, then sketch where pots and a working route would sit. The same exercise is useful if you already own a greenhouse: measure the available area rather than assuming the outside footprint is free for plants. Mark the door, benches, vents and any equipment you will use, so you can see whether the layout remains practical once the pots are in place.
Inspect tuber crowns and label each variety
Take each tuber clump out of storage and inspect the crown, the short central part from which shoots emerge. A firm clump with an identifiable eye or fresh shoot is a better starting point than one that is soft or breaking down. The swollen tuber stores energy, but a loose tuber detached from the crown and without an eye is unlikely to produce a shoot. Remove completely mushy or rotted material rather than putting it in with healthy stock. A dry outer surface by itself does not prove that a clump is dead, so assess its firmness and crown as well as its appearance. Check that the tubers remain attached to sound crown tissue.
If a crowded clump needs dividing, make sure each piece keeps part of the crown with an eye and at least one sound tuber; when the eyes are hard to identify, pot it intact rather than making uncertain cuts. Keep varieties apart and label each pot immediately, with the name if known and the potting date. The Limited-Edition Aluminium Greenhouses with Storage listing identifies built-in storage; if that feature matters to you, check its location and dimensions in the chosen version instead of assuming it will accommodate your hand tools, spare labels or compost. Keep each plant label with its pot during watering and moving. A brief note on a separate list can also help if a label fades or is displaced.

03
Pot tubers shallowly in suitable containers
Choose a sound pot with drainage holes that can hold the tuber without bending or crushing it. Match the container to the clump: a very small pot may dry quickly and be awkward to handle, while an unnecessarily large one uses valuable staging space and holds more wet compost than a dormant tuber needs. You may need more than one pot size if the clumps in your collection vary. Use fresh, free-draining multi-purpose compost, and avoid packing it down hard. A tray beneath the pots can catch drips, but empty standing water rather than leaving the tubers in it. Check that the drainage holes are clear before filling the pot.
Set the tuber with the crown and eyes uppermost and the body supported by compost, then cover the tuber lightly so the crown remains close to the surface. Do not bury the whole clump deeply; shoots need a clear way up, and a buried crown is harder to inspect if growth is slow. Before potting a full batch, arrange several pots in the intended place and check that you can reach each one. The Aluminium Classic Greenhouse range is listed from 3.77 to 28.08 m²; compare the plan for the chosen size with actual pot widths, bench depth and access gaps instead of turning floor area into an assumed pot count.
Manage watering, light and ventilation
After potting, moisten the compost lightly and let excess water drain away. Before shoots appear, the tuber uses little water; repeated heavy watering can leave it sitting in wet compost and encourage decay. Check moisture rather than following a daily schedule, and do not leave pots standing in water in a tray. Once shoots emerge, adjust watering as the compost dries, taking account of warmth, pot size and the amount of foliage. A small pot in a bright, warm spell may need attention sooner than a larger one in cool conditions. Feel the compost before watering, rather than copying another pot’s routine, and direct water onto the compost rather than the foliage.
Give emerging shoots bright light; a dark corner encourages thin, stretched growth. Ventilate the greenhouse when conditions allow, particularly on sunny days, and leave gaps between pots so air can move around the leaves. The Bloomcabin Prestige Greenhouse is listed in sizes from 3.77 to 28.08 m², but the area range does not identify the openings on a particular configuration. Check its actual ventilation details and make sure pots, trays or stored items will not prevent you from using them. The aim is bright, airy shelter without overheating, not a sealed, humid space. Keep an eye on overnight temperatures as well as daytime warmth.
04
Measure staging space before potting a full batch
Estimate capacity using the number of tubers you actually plan to start, not the maximum number you could squeeze into the greenhouse. Set out pots or markers at their intended positions on the bench or floor, then check whether you can water, label and inspect the back row without moving the front one. Leave room for leaves to develop and for a tray or watering can to be handled. A layout that works on potting day may become crowded when shoots expand, so avoid placing pots so tightly that foliage overlaps or air movement is restricted. Check that you can lift out one pot without disturbing the rest.
For a larger footprint comparison, the T-Shaped Orangery Greenhouse is listed in sizes from 16.52 to 30 m². Treat this as total floor area, not usable staging surface: the selected plan, door position, internal arrangement and other plants all affect clear space. Draw a simple plan that marks benches, floor pots, vents, the door and a route through the house; then check it against the actual structure rather than relying on a broad area figure. If your collection is modest, consider whether a separate dedicated structure is needed at all, or whether a clear seasonal zone in an existing greenhouse will do.
Keep batches accessible in a shared greenhouse
Potting every tuber on the same day is not essential. If your collection is large or staging room is limited, work in batches so that all plants do not need the same bench at once. Label before moving pots, group plants by variety or stage, and note the date each batch was potted and when its first shoots appeared. A slow tuber is easier to assess when you know how long it has been planted. Staggering also helps spread watering and inspection rather than creating a mass of pots that is difficult to reach. Keep the newest or most fragile shoots where you can check them easily.
Consider the other plants and tasks that share the greenhouse. Seed trays, established plants, compost bags and watering equipment all use space, and a dahlia row should not block light or access for them. The Pyramid Greenhouse is listed with footprint choices from 5.53 to 18.9 m²; whichever structure you use, sketch benches, trays and clear routes before deciding how many pots fit. The range is a starting point for comparison, not a promise of bench capacity. Plan for the busiest overlap in the season, when the largest number of pots and other plants are present together, rather than measuring an empty greenhouse in winter.

05
Harden off gradually before planting out
Greenhouse-grown shoots have not yet experienced outdoor sun, wind and changing temperatures. Before planting out, set the pots outside in a bright, sheltered spot for part of the day, then extend their time outdoors over about a week if conditions allow. Avoid an abrupt move into harsh midday sun or an exposed, windy position. Watch the compost during this process: pots can dry more quickly outside, particularly in sun or breeze. Bring them back under cover while they adjust, especially if nights are cold. The aim is to acclimatise the foliage gradually, not to make the plant endure a sudden change in conditions.
Pause the process during a cold, wet or very windy spell, and bring pots in if frost is forecast. The Lean-to Greenhouses range is listed from 3.69 to 14.34 m², but the greenhouse type does not replace a suitable outdoor place for hardening off. If choosing a structure, check how the actual site relates to a sheltered spot where pots can stand and be moved easily; a narrow route or awkward access may make daily movement difficult. Continue the transition until plants cope with ordinary outdoor conditions, while still delaying planting if frost risk remains.
Plant out by frost risk, then reset the staging area
Plant out only when local frost risk has eased; new dahlia growth can be damaged even if the tuber started well under cover. Use current forecasts and the conditions at the planting spot, rather than relying on a date from a previous year. Dahlias flower best in a sunny, well-drained position; avoid a bed that stays waterlogged. Space each plant according to the mature size of its variety and prepare support for taller types when planting, so you do not need to disturb established roots later. Water in after planting and continue checking while the plant settles into garden conditions.
Once plants are outside, clear the temporary staging zone, remove dead foliage and compost debris, and check that labels follow the varieties into the bed. The greenhouse can then be used for other work or kept free for another batch, if the season and conditions permit. The Spacious Greenhouse listing gives footprint options from 47 to 70 m²; for any large shared structure, consider the whole year’s uses and routes between work areas, not just the spring dahlia display. Starting a few tubers does not in itself require a large greenhouse, and a clear plan is more valuable than unused floor area.
Frequently asked questions
Will an unheated greenhouse protect dahlia tubers from frost?
It provides shelter, but it is not frost-free by default. Temperatures can fall sharply overnight, so check a thermometer near the pots and move them to a safer protected place if frost threatens, especially once shoots have emerged.
When should I pot dahlia tubers before planting out?
A few weeks before your likely planting-out period is a useful guide, but the calendar depends on local conditions. Early spring, often March or April, is a prompt to check the tubers rather than a fixed date. If you cannot provide bright light and enough room, wait or start a smaller batch.
How deep should a dahlia tuber sit in its pot?
Set the tuber with the crown and eyes uppermost, then cover its body lightly with compost. Keep the crown close to the surface rather than burying the whole clump deeply, and use a pot with drainage holes.
Should I water a tuber that has not sprouted?
Moisten the compost lightly after potting and let excess water drain. Check it from time to time, but do not keep it saturated or leave the pot standing in water. Once shoots appear, adjust watering to how quickly the compost dries.
Can I plant a dahlia outside as soon as it sprouts?
No. A shoot shows that growth has begun, not that the weather is safe. Harden the plant off gradually over several days, bring it under cover if frost is forecast and wait until local frost risk has eased before planting out.
Starting dahlias under cover works best when sound tubers are potted correctly, watered carefully and given bright light as shoots emerge. Allow enough space to care for them until the garden is ready. A greenhouse makes it easier to observe and manage this early growth, but does not remove frost risk. Let local conditions guide hardening off and planting out; a gradual transfer at the right time is more useful than an early batch that outgrows its space.
