
Greenhouse Drainage: Finding the Cause of Water Pooling
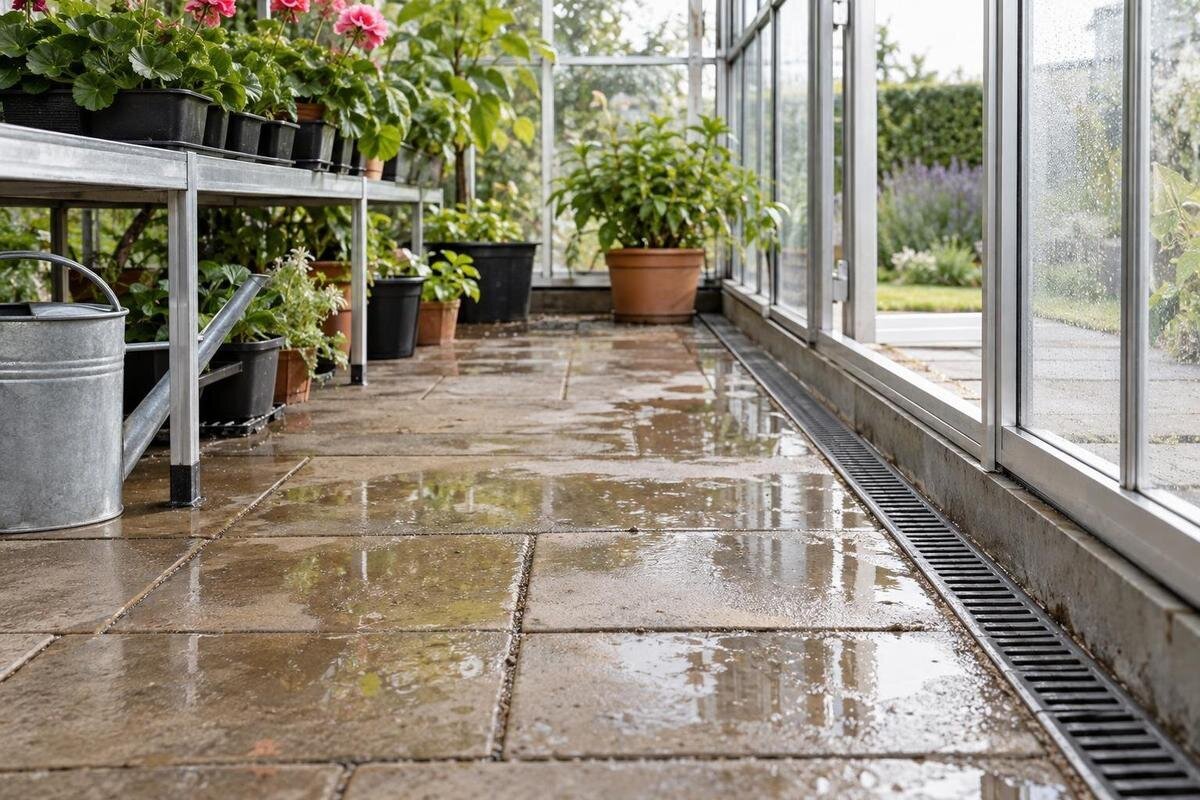
Greenhouse drainage
Water left on a greenhouse floor after watering may come from a spill, plant runoff, water following the floor surface, a slow or blocked outlet, or water arriving from outside. The puddle shows where water has stopped, not necessarily where the problem began. A simple floor plan and a controlled, repeatable test can help separate these causes before you alter paving, add a drain or change the base. The aim is to locate the start of the route, not just mop up its end.

When does the puddle appear?
Treat the first puddle as a clue, not a diagnosis. Note whether it appears while you water, only after the watering can or hose has been put away, following rain, or when the greenhouse has been unused. Timing narrows the possible source: wetness directly beneath a pot may be runoff; a streak at the threshold may be water carried in or arriving from outside; pooling that appears after rain calls for an external check as well as a floor check. Write down the interval between watering and the first visible puddle, and whether another water source was running.
Record how quickly the outline grows, where its edge settles and how long the water remains. Note whether nearby floor or outside paving is wet too, and whether the area was already damp before you watered. If the same low area fills after watering at different points, water may be travelling across the floor; if only one spot gets wet, the source may be local. Neither pattern proves an outlet is blocked. Begin with a dry-floor observation, then compare it with a separate watering event, so old dampness or a previous spill is not counted as part of the new test.
How to map the floor and its drains
Draw a plan view on paper, beginning with the greenhouse outline, door, threshold, walls and each change in floor finish. Add raised beds, benches, pots, taps and visible drains; they can conceal a route or create a local source. The sketch need not be to scale, but choose fixed landmarks, such as a frame corner or doorway, so observations can be compared on different days. Mark each puddle boundary with a date and time. A small legend for dry, wet and tested areas keeps the notes readable; use arrows only for a flow you have actually watched.
Use the exact footprint from the model-specific base drawing, where you have one, rather than estimating from a photograph. When considering a Lean-to Greenhouse, include any adjoining wall or building in the site sketch; water at that junction can follow a route that a floor-only drawing misses. Mark the outside paving, downpipes, hose taps and ground immediately beyond the doorway as well as the interior. If you do not have the drawing, note that the outline is approximate and request the correct document before making changes to the base.
How to repeat the watering test
Choose one small, clear area and let it dry before testing. Use a measuring jug to apply the same modest amount of water in the same way each time: same starting point, pouring rate and watering tool. Do not soak the whole floor. Watch from the moment the water lands and note where it first changes direction, crosses a joint or meets an edge, when a puddle appears, and how far it spreads. A phone timer can make the interval easier to compare. Stop if water approaches electrical equipment or another area where wetting could cause damage.
Repeat the test after the patch has dried, keeping the amount, starting point and method unchanged. If the second result differs, note whether the floor was still damp, rain had entered or another watering source was active. Then change just one factor, such as the test location, to see whether the route moves with the source. For a Limited Edition Aluminium Greenhouse, map the selected model's actual footprint rather than reusing a plan from a different variant. Record each test separately so you can compare the first direction of flow, the puddle boundary and the time taken for water to collect.
Check irrigation, pots and bench runoff
Check one possible source at a time: watering-can spills, a hose spray missing a pot, a leaking connector, an emitter that continues to drip, water from trays or pots, and runoff from a bench. Dry the suspect area, pause other sources if practical, and observe the next normal watering event. If the wet mark begins directly below a container, check its base and tray before interpreting the pattern as a floor-drain issue. A small local source can create a larger puddle if the water then follows a joint or low point.
Give each hose, irrigation outlet, pot group and bench a separate mark on the plan, and note which were active during the test. This helps show whether the puddle follows a fixed low area or follows the watering source when you move it. If you are planning around the Limited-Edition Aluminium Greenhouse with Built-In Storage, add the intended watering points and stored items to your layout. Keep the source of each drip separate from the place where its water collects: runoff from a bench may first become visible at its edge, then travel across the floor before forming a puddle.

Follow water across the floor surface
The first visible puddle may be downstream of the water's source. Look for a narrow trail along paving joints, a crack, the edge of a mat or the base of a raised bed; note where it starts and whether it ends at a hollow or outlet. Different surfaces can hide the same route in different ways: water may spread through exposed soil or gravel, while a hard surface may show a thin stream. Record changes in surface and loose debris before clearing anything, as they can help explain where water travels.
A long straightedge or level can help you compare a suspected low patch with nearby floor, but use it only to describe what you find, not to design a new fall. Note whether water runs across the surface, gathers around a frame edge or disappears through a gap. If you are mapping the floor of a Prestige Greenhouse with Metal Base, distinguish the frame and base edges from joints in the floor finish. Mark the last point where you can see water moving; a gap is not proof of a drainage route. This keeps the visible surface observations separate from assumptions about what lies below.
Check the outlet and where it leads
Check the whole visible route, not just a grate beside the puddle. Establish whether there is a floor drain, channel, gully or no obvious outlet, then note its position and where the pipe or channel appears to lead. From a safe standing position, look for leaves, compost or silt at an accessible inlet and watch during the small test to see whether water enters and clears. Do not lift heavy covers, dismantle pipework or pour chemicals into a drain to diagnose it.
If water reaches an inlet but drains slowly or backs up, there may be a blockage or restriction further along; if it runs past the inlet, the surface route may be the issue. When planning a Spacious Greenhouse, mark every visible drain on the site plan alongside the selected footprint, not just the drain nearest the doorway. For an existing greenhouse, record which inlet receives water during each test and where its onward route becomes hidden. If no outlet is visible, find out how the floor was intended to shed water rather than assuming a drain is missing.
Trace water around the outside
Walk around the greenhouse when the ground is dry and again after rain, if practical. Look for a wet trail approaching the door, water held against the frame, paving that carries runoff towards the greenhouse, hose leakage or a downpipe discharging nearby. Note whether the outside ground is wet before any greenhouse watering begins. Do not assume rainwater on the greenhouse itself is the source; compare a rainy period with a dry-day watering test. A threshold may simply be the point where an outside route becomes visible indoors, so photograph the ground on both sides.
Carry the site sketch beyond the frame, following the visible route as far as the water's source or the point where it disappears. For a proposed T-Shaped Orangery Greenhouse, use its actual base outline and mark water routes along every edge; the product name does not show how the surrounding paving falls. If an outside flow disappears beneath a slab or enters a covered drain, mark that point as unknown rather than drawing an assumed connection. Keep separate notes for rain and watering, as they may expose different entry points.
What repeated water patterns can show
Compare the map and tests for a pattern that repeats. A puddle forming immediately beneath the same pot points first to local runoff; a line following joints suggests a surface route; water collecting in one place after tests at several starting points may indicate a low area or drainage limitation. Water that backs up at an accessible inlet raises a different question from water that never reaches it. These are clues, not diagnoses: wet ground, hidden gaps and several water sources can produce similar marks. Confirm the route with another controlled test before deciding what needs attention.
Do not transfer a water map from one greenhouse or floor to another. If you are comparing your observations with a planned Pyramid Greenhouse, keep the existing floor sketch and proposed layout separate: they record different things. The first shows a route you have watched; the second shows where the greenhouse would sit and which site features need consideration. On both, distinguish visible flow from a suspected connection, particularly where water disappears beneath a surface. For an existing greenhouse, compare repeated tests on its actual floor rather than treating a photograph of another installation as evidence of how yours drains.

Choose a remedy after tracing the route
The least disruptive response depends on what the test shows. A misplaced watering stream or drips from a pot may call for attention to that local source; loose material at an accessible inlet may be removable without altering the floor. If water travels across a surface or returns from an outlet, do not cover its route with a mat, add a drain or redirect it until the discharge point is understood. A quick fix can move the puddle into a harder-to-see part of the base or towards a doorway. Keep observations separate from permanent building work.
Before specifying new paving, cutting a channel, drilling through a base or changing finished levels, compare the diagram with the actual manufacturer's base drawing for the exact model and selected configuration. The Aluminium Classic Greenhouse listing can identify the product being discussed; it is not a substitute for the drawing or a site review. Ask a qualified groundworks or drainage professional to confirm the intended outlet route and whether a proposed change affects the greenhouse base. Avoid relying on generic foundation dimensions or slopes, which cannot account for the particular floor and discharge point.
When to call a drainage or groundworks professional
A qualified drainage or groundworks professional should inspect the site if water persists without recent watering or rain, seeps back after you clear it, appears in several places or remains around an outlet whose route is unknown. Get site-specific advice before disturbing a base, cutting a hard surface or changing a drain route. If water reaches electrical fittings or other vulnerable equipment, stop the test and arrange a suitable qualified assessment rather than continuing to pour water. These signs do not identify the cause by themselves; they mean the route or its consequences need a closer look.
Share the plan, dated photographs, rainfall and watering notes, test amount and sequence, and a description of what was dry or wet beforehand. Point out which outlet you watched, whether water entered it, and where its discharge path becomes unknown. Have the correct manufacturer's base drawing for the selected greenhouse available, but do not assume it resolves the site's drainage design. A site review can focus on the route you observed rather than a general suspicion that the whole floor is at fault. Update the map after any work to create a useful baseline for future checks.
Frequently asked questions
Why does water pool only after I water the greenhouse?
Water may be spilling, draining from pots or travelling across the floor to a low area. Repeat a small test in one place while other water sources are paused, then note where the water first moves and where it collects. The timing alone cannot confirm that an outlet has failed.
How can I tell whether an outlet is blocked?
Watch whether water reaches an accessible inlet and appears to clear. Slow drainage or water backing up can point to a blockage or a problem further along the route; water that bypasses the inlet may have a different cause. These are clues, not a diagnosis, so avoid dismantling pipework.
How much water should I use for a repeatable test?
Use a small, measured amount that lets you observe the route without flooding the floor. Repeat with the same amount, starting point and pouring rate after the test area has dried. Test one area at a time, and stop if water could reach electrical equipment or cause damage.
Does one puddle prove that the floor is uneven?
No. A spill, pot runoff, a route along a joint, an outside source or a slow outlet can all leave water in the same place. Compare more than one controlled test and record the route you see before concluding that a low spot is responsible.
Can I drill through the floor or add a drain?
Do not cut, drill or add an outlet based only on where a puddle forms. First establish the route and where any outlet would discharge, then have the proposed change checked against the correct greenhouse base drawing and site conditions by a qualified drainage or groundworks professional.
Once you can show where a measured amount of water first moves, where it stops and whether the outlet clears, you have a clearer basis for identifying the cause of pooling. Keep the map and repeat-test notes with the greenhouse's actual base information; the cause may be as simple as a local spill or may need site-specific drainage review. Decisions can then be based on the route you observed, not only on the final wet patch.
